

a1. Welcome to JavaScript Introduction
a2. Course forums
a3. Course tools
a4. Why Accessibility is Important
a5. Why Internationalization is Important
a6. About W3C and the Web
1.1.1 Intro - Module 1: Intro to JavaScript
1.1.2 Module 1 outline
1.2.1 HTML is for structure
1.2.2 CSS is for style
1.2.3 JavaScript is the 'interactive glue'
1.2.4 JavaScript history
1.2.5 Discussion and project
1.3.1 The best way to learn JavaScript
1.3.2 What can be done with JavaScript?
1.3.3 Where to put JavaScript code?
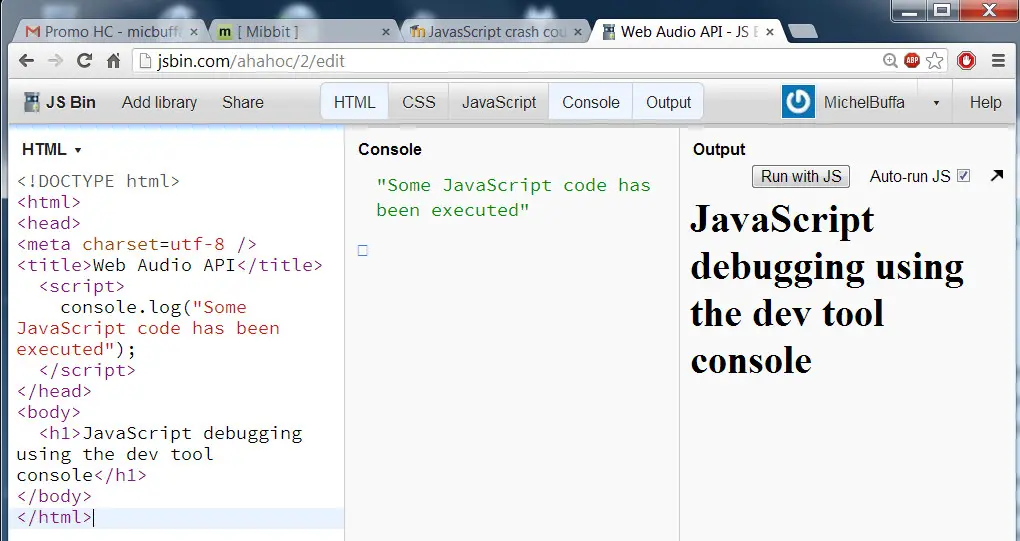
1.3.4 How to debug JavaScript
1.3.5 Discussion and projects
1.4.1 Creating an HTML/CSS/JS project
1.4.2 Using CodePen
1.4.3 Using Sublime Text
1.5.1 JS variables and values
1.5.2 Scope of JS variables
1.5.3 JS data types
1.5.4 Numbers
1.5.5 JS operators and expressions
1.5.6 Number Operators
1.5.7 Strings, part 1
1.5.8 String operators, part 2
1.5.9 Objects, part 1
1.5.10 Arrays, part 1
1.5.11 Functions, part 1
1.6.1 Intro: Simple JS examples to play with
1.6.2 The devtool console
1.6.3 Modifying an HTML document
1.6.4 Modifying CSS styles on the fly
1.6.5 Adding interactivity with events
1.6.6 Using built-in HTML5 APIs
1.6.7 Using third-party JS APIs/libraries
1.6.8 Working with remote data
2.1.1 Intro: Adding Interactivity to HTML documents
2.1.2 Module 2 outline
2.2.1 Boolean values and logical operators
2.2.2 Conditional statements
2.2.3 Loop statements
2.2.4 Discussion and projects
2.3.1 Functions and callbacks
2.4.1 Intro: Adding Interactivity to a Web App
2.4.2 Adding and removing event listeners to a document
2.4.3 The event object
2.4.4 Page lifecycle events
2.4.5 Key events
2.4.6 Dealing with different keyboard layouts
2.4.7 Key and code properties
2.4.8 Mouse events
2.4.9 Form and input field events
2.4.10 Reference tables
2.4.11 Discussion and projects
2.5.1 Introducing the DOM
2.5.2 A warning about the DOM API
2.5.3 Accessing HTML elements
2.5.4 Changing the style of selected HTML elements
2.5.5 Modifying selected HTML elements
2.5.6 Adding new elements to the DOM
2.5.7 Moving HTML elements in the DOM
2.5.8 Removing elements from the DOM
2.6.1 Drawing
2.6.2 Animating
2.6.3 Animating multiple objects
2.6.4 Mouse interactions
2.6.5 Moving a player with the mouse
2.6.6 Adding collision detection
2.6.7 Adding input fields
2.6.8 Discussion and projects
3.1.1 Intro: Standard HTML5 APIs
3.1.2 Module 3 outline
3.2.1 Arrays
3.2.2 Strings are arrays of characters
3.2.3 Iterating on array elements
3.2.4 Discussion and projects
3.3.1 Playing audio and video streams
3.3.2 Audio and video player JavaScript API
3.3.3 Examples using the JavaScript API
3.3.4 Using the webcam
3.3.5 Extended examples
3.3.6 Discussion and projects
3.4.1 The Geolocation API
3.4.2 Geolocation and maps
3.4.3 Reverse gecoding
3.4.4 Discussion and projects
3.5.1 Background music (streamed)
3.5.2 Sound effects using howler.js
3.5.3 Adding music and sound effects
3.5.4 [Advanced] a multiple image, sound and music loader
3.5.5 Discussion and projects
4.1.1 Intro: Module 4: Structuring Data
4.1.2 Module 4 outline
4.2.1 Intro: Structuring Data
4.2.2 From objects to arrays
4.2.3 Property declaration syntax
4.2.4 An object can contain another object
4.2.5 Elements, properties and methods
4.2.6 "this": accessing properties
4.2.7 Adding/deleting properties and methods
4.2.8 "this": some final thoughts
4.3.1 Classes: definition
4.3.2 The "new" keyword
4.3.3 Creating objects using modern JavaScript classes
4.3.4 Declaring a class before using it
4.3.5 Creating objects with functions (factories)
4.3.6 Static properties and methods
4.3.7 Advanced Modern JavaScript getters and setters
4.3.8 Discussion and projects
4.4.1 Class and constructor
4.4.2 Adding methods classes
5.1.1 Intro: Working with Forms
5.1.2 Module 5 outline
5.2.1 References and objects
5.2.2 Comparing two objects
5.2.3 The "global" window object
5.2.4 Built-in JS class: Object
5.2.5 Built-in JS class: Array
5.2.6 The most useful methods of the class Array
5.2.7 Built-in JS class: Number
5.2.8 Built-in JS class: String
5.2.9 The most useful methods of the class String
5.2.10 Built-in JavaScript class: Math
5.2.11 Built in JS class: Date
5.3.1 The HTML table basics
5.3.2 The HTML table JavaScript API
5.3.3 HTML forms: best practices
5.3.4 HTML forms and JavaScript
5.3.5 Discussion and projects
5.4.1 What is JSON?
5.4.2 Consuming JSON remote data
5.4.3 The LocalStorage API
5.4.4 Discussion and projects
5.5.1 A contact manager (part 1)
5.5.2 Persistence (part 2)
5.5.3 Display contacts in an HTML5 table (part 3)
5.5.4 Use a form to enter new contacts (part 4)
5.5.5 Discussion and projects
HTML5, CSS and JavaScript are the "classic three" for Web developers and designers. JavaScript lets you add interactive features to your Web sites, including dynamically updated content, controlled multimedia, animated images, and much more.
This course is designed for anyone who is comfortable with programming concepts. No prerequisites are required though we encourage you to follow these two other W3Cx courses: HTML5 and CSS Fundamentals and CSS Basics.
You will make good use of your JavaScript skills in the other 2 W3Cx courses included in the "Front-End Web Developer" W3Cx Professional Certificate program: HTML5 Coding Essentials and Best Practices and HTML5 Apps and Games.
In the meantime, have fun in this course!
Professional Certificate programs are series of courses designed by industry leaders and/or top universities to build and enhance critical professional skills needed to succeed in today's most in-demand fields.

W3C has designed a "Front-End Web Developer" (FEWD) Professional Certificate where you will learn all of the necessary skills needed to build interactive and responsive user experiences on the Web. This program will deepen your knowledge of the 3 foundational languages that power the Web: HTML5, CSS and JavaScript.
To get a W3C FEWD professional certificate, you must successfully pass and receive a Verified Certificate in the five courses above.
“When I work locally, with files located on my computer hard drive, I use the Sublime Text source code editor, Visual Studio Code, WebStorm, NetBeans, depending on the size of the project I'm working on.
- For testing simple examples, I mainly use the JSBin.com online code editor.
- For embedding online examples in this course, I use the CodePen.io online code editor.
- For choosing a CSS color, shadow, text-shadow, gradients, etc. I use the LiveWeave online code editor.”
You can use any source code editor that has good support for HTML, CSS and JavaScript files. For this course, you are free to use whichever you prefer. However, there are some in particular that we recommend.

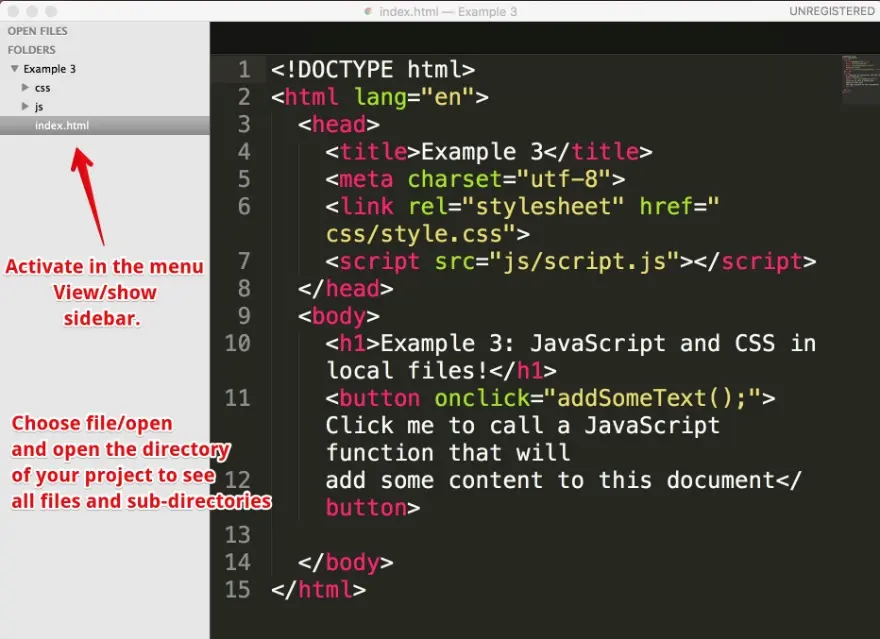
Sublime Text is a very powerful, multi-platform source code editor, it's semi-free (you can use it without paying, it will pop up a dialog asking you to buy it once in a while, but not very often). Sublime text supports hundreds of plugins to enhance its features.

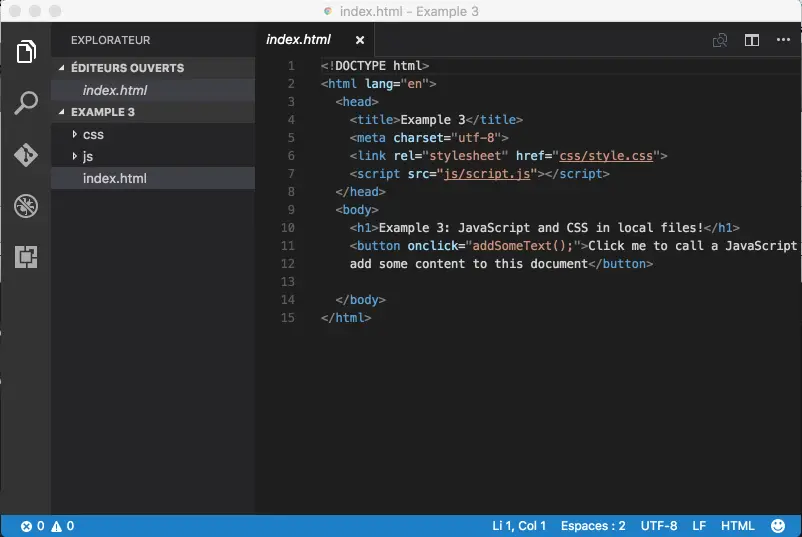
Visual Studio Code is a free, open source, multi-platform editor by Microsoft.
To help you practice for the duration of the course, you will use the following tools:

Tutorials can be found on the Web (such as these ones) or on YouTube. The tool is really simple: just open the link to the provided examples, look at the code, look at the result, etc. And you can modify the examples as you like, you can also modify / clone / save / share them. Keep in mind that it's always better to be logged in (it's free) if you do not want to lose your work.
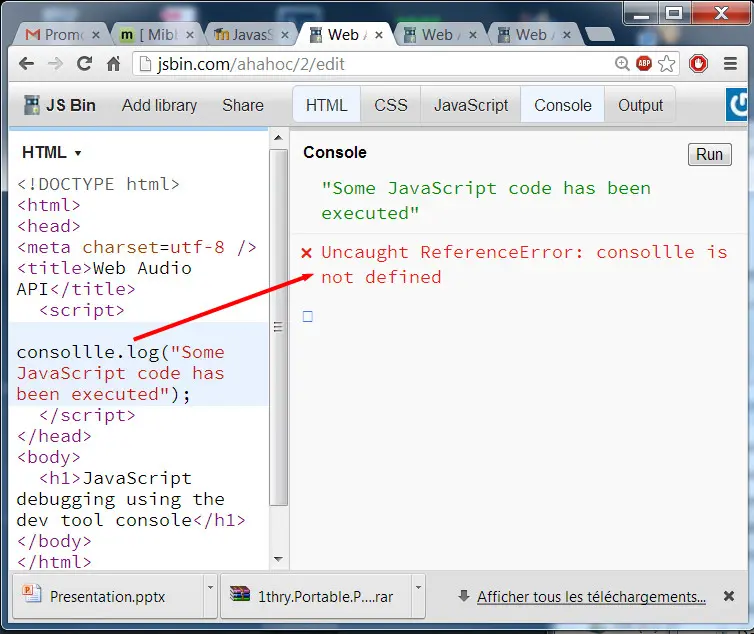
In our opinion, JSBin is the best online IDE for "live coding": typing and seeing what you are doing in real time, monitoring error messages in the console tab, and debugging your code. We will mainly use this tool for the live coding videos.

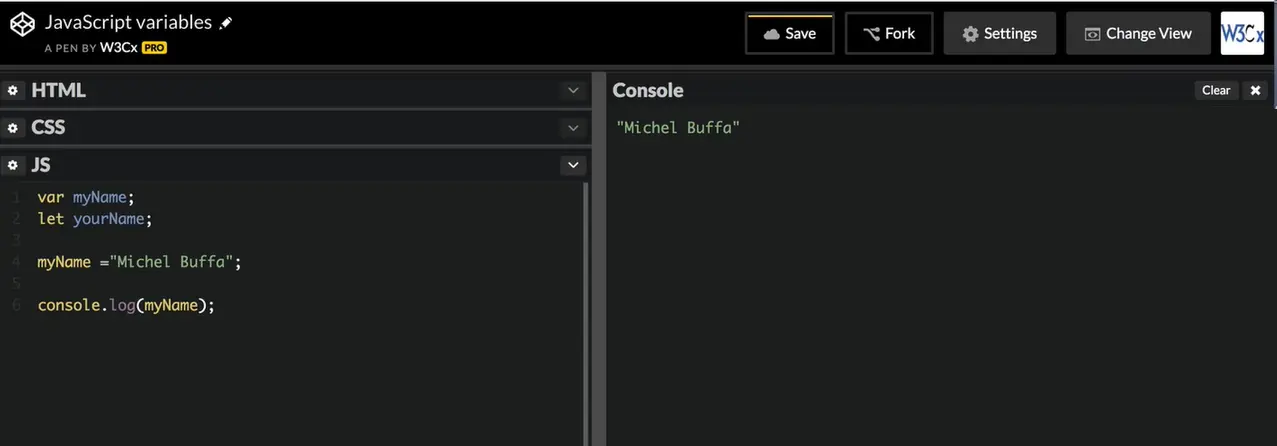
This is a great service to get you started quickly as it doesn't require you to download anything and you can access it, along with your saved projects from any Web browser. Here's an article which will be of-interest if you use CodePen: Things you can do with CodePen [Brent Miller, February 6, 2019].

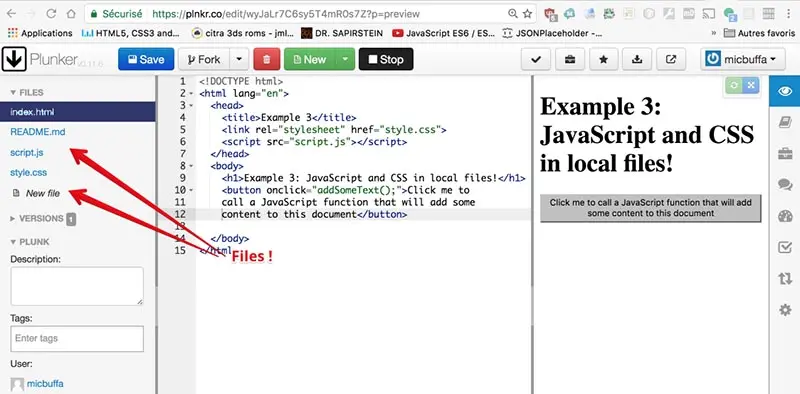
Plunker allows us to work online with separate files. So, when we have no choice but to use separate files, we might use this tool.

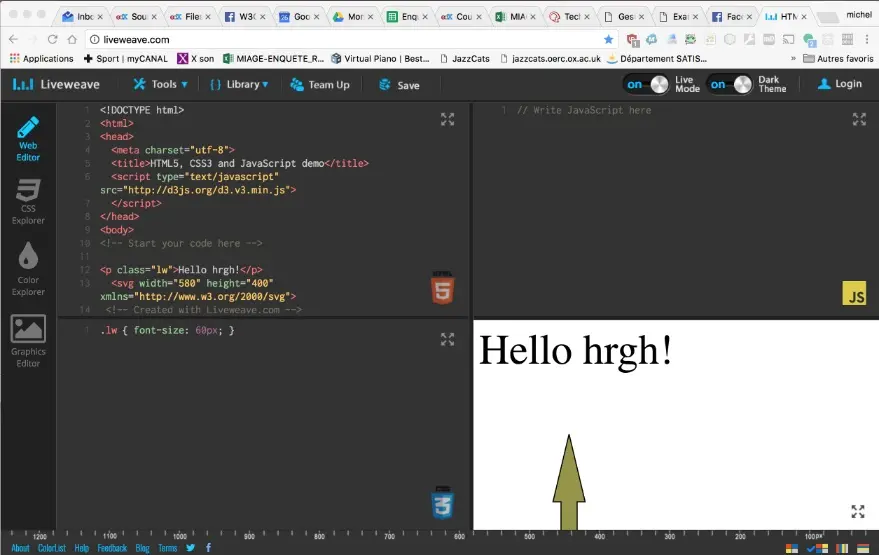
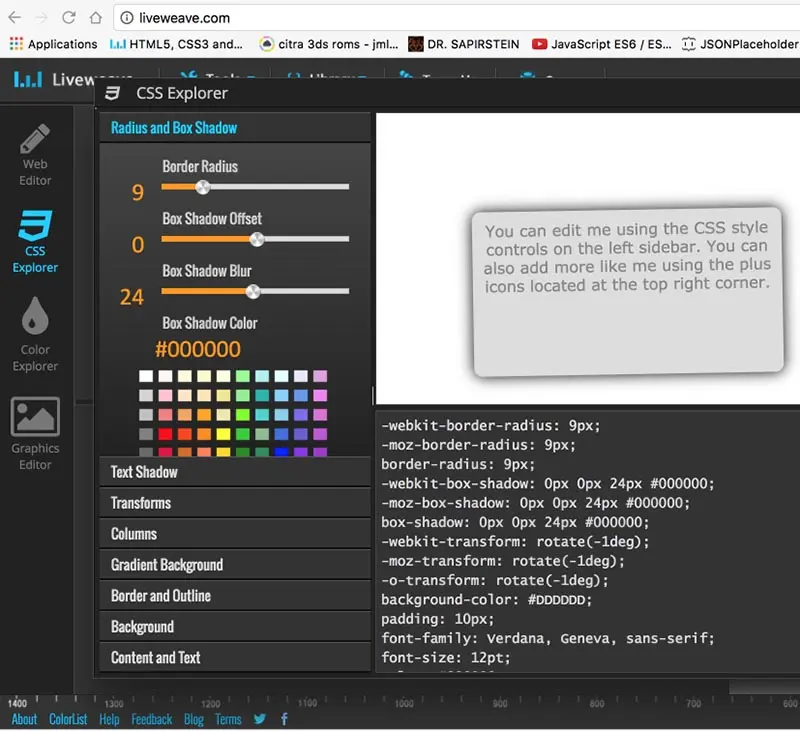
LiveWeave is great for writing CSS code or for embedding SVG Graphics in an HTML document, as it includes online wizards and interactive editors. We use it when we have problems with CSS shadows, CSS colors or gradients, or when we want to include an SVG arrow in a document.

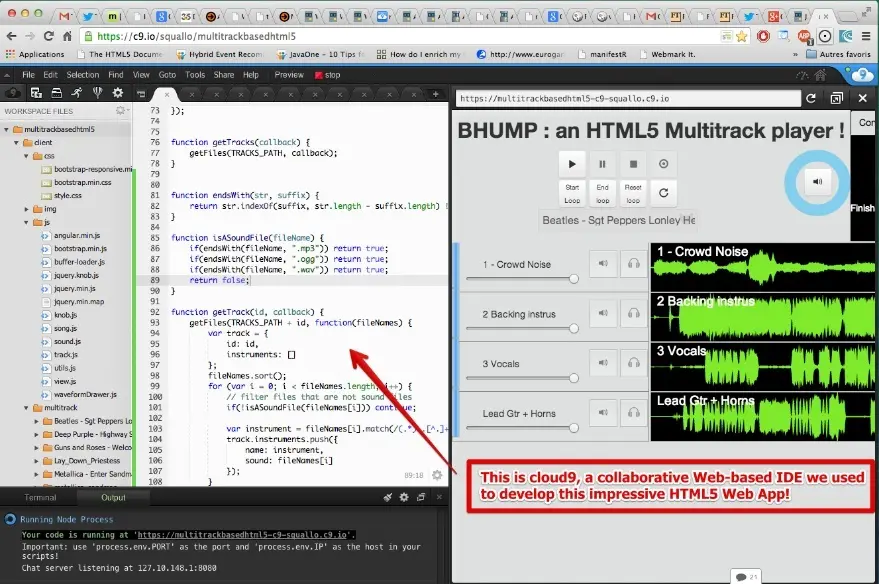
There are many other online IDEs and new ones appear each year. If you want a real, heavyweight online IDE that has nearly all the features offered by "big IDEs" such as Eclipse, NetBeans and WebStorm, take a look at the Cloud9 IDE. It's free and will enable you to develop huge projects, that can include many files, it supports uploaded assets such as images, videos and sound files. Furthermore, like Google Docs, it will support multiple users working at the same time on the same project, even on the same file. It's a real collaborative environment.
Michel Buffa, author of this course, developed a whole multitrack audio player this way. This application is available online. (See also screenshots below:)
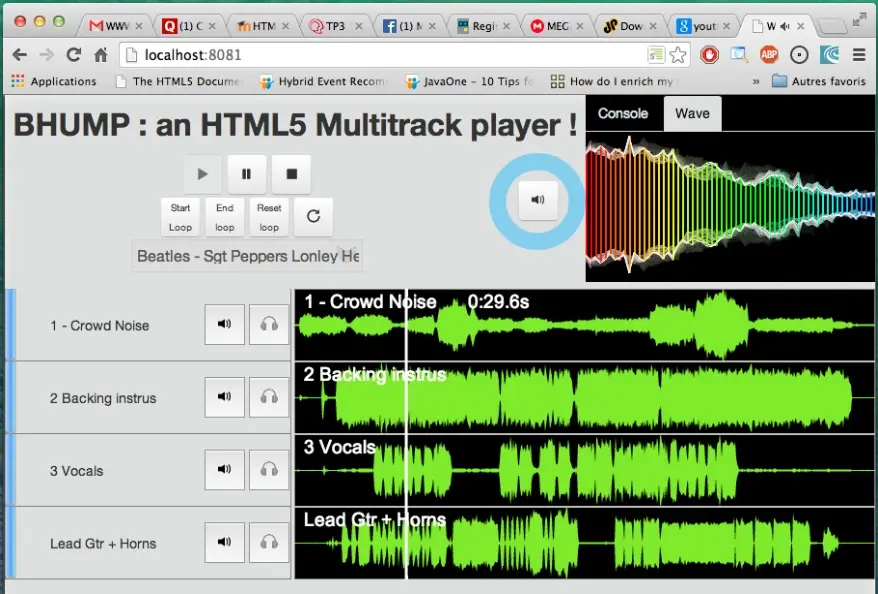
100% of the development was done in a Web browser, by Michel Buffa and two friends, using the c9.io (Cloud 9) IDE (to see if online IDEs were a valuable approach):
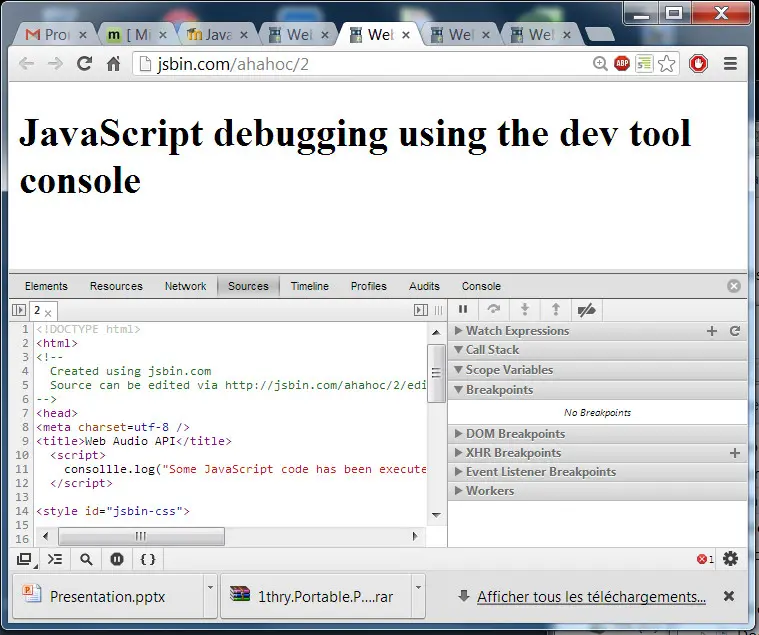
Here is a selection of tools to help debug JavaScript code. The instructor will indicate other tools in module 1 of the course.
The term browser compatibility refers to the ability of a given Web site to appear fully functional on the browsers available in the market.
The most powerful aspect of the Web is what makes it so challenging to build for: its universality. When you create a Web site, you're writing code that needs to be understood by many different browsers on different devices and operating systems!
To make the Web evolve in a sane and sustainable way for both users and developers, browser vendors work together to standardize new features, whether it's a new HTML element, CSS property, or JavaScript API. But different vendors have different priorities, resources, and release cycles --- so it's very unlikely that a new feature will land on all the major browsers at once. As a Web developer, this is something you must consider if you're relying on a feature to build your site.
We are then providing references to the browser support of HTML5 features presented in this course using 2 resources: Can I Use and Mozilla Developer Network (MDN) Web Docs.
Can I Use provides up-to-date tables for support of front-end Web technologies on desktop and mobile Web browsers. Below is a snapshot of what information is given by CanIUse when searching for "CSS3 colors".
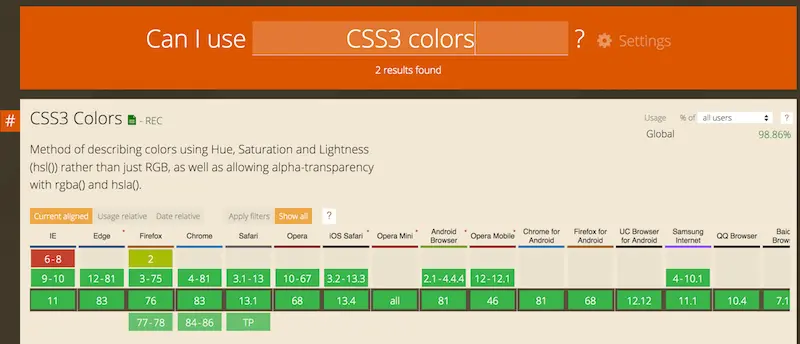


To help developers make these decisions consciously rather than accidentally, MDN Web Docs provides browser compatibility tables in its documentation pages, so that when looking up a feature you're considering for your project, you know exactly which browsers will support it.

For over 20 years, the W3C has been developing and hosting and open source tools used every day by millions of Web developers and Web designers. All the tools listed below are Web-based, and are available as downloadable sources or as free services on the W3C Developers tools site.
The W3C validator checks the markup validity of various Web document formats, such as HTML.
The CSS validator checks Cascading Style Sheets (CSS) and (X)HTML documents that use CSS stylesheets.

Unicorn is W3C's unified validator, which helps people improve the quality of their Web pages by performing a variety of checks. Unicorn gathers the results of the popular HTML and CSS validators, as well as other useful services, such as RSS/Atom feeds and http headers.
The W3C Link Checker looks for issues in links, anchors and referenced objects in a Web page, CSS style sheet, or recursively on a whole Web site. For best results, it is recommended to first ensure that the documents checked use valid HTML Markup and CSS.
The W3C Internationalization Checker provides information about various internationalization-related aspects of your page, including the HTTP headers that affect it. It also reports a number of issues and offers advice about how to resolve them.
The W3C cheatsheet provides quick access to useful information from a variety of specifications published by W3C. It aims at giving in a very compact and mobile-friendly format a compilation of useful knowledge extracted from W3C specifications, completed by summaries of guidelines developed at W3C, in particular Web accessibility guidelines, the Mobile Web Best Practices, and a number of internationalization tips.
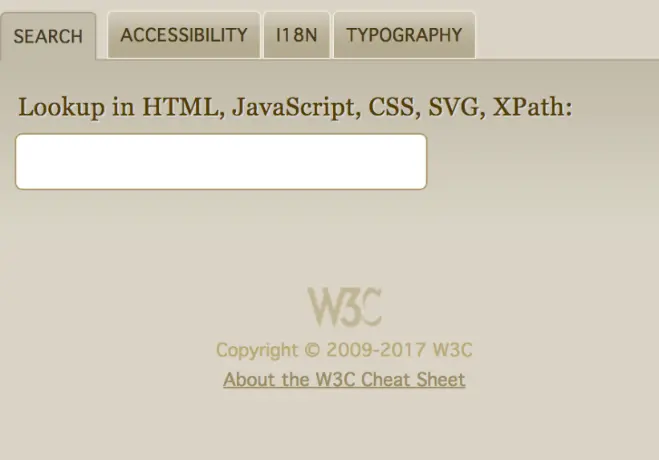
Its main feature is a lookup search box, where one can start typing a keyword and get a list of matching properties/elements/attributes/functions in the above-mentioned specifications, and further details on those when selecting the one of interest.
The W3C cheatsheet is only available as a pure Web application.
Most of the technologies you use when developing Web applications and Web sites are designed and standardized in W3C in a completely open and transparent process.
In fact, all W3C specifications are developed in public GitHub repositories, so if you are familiar with GitHub, you already know how to contribute to W3C specifications! This is all about raising issues (with feedback and suggestions) and/or bringing pull requests to fix identified issues.
Contributing to this standardization process might be a bit scary or hard to approach at first, but understanding at a deeper level how these technologies are built is a great way to build your expertise.

If you're looking for an easy way to dive into this standardization process, check out which issues in the W3C GitHub repositories have been marked as "good first issue" and see if you find anything where you think you would be ready to help.
As steward of global Web standards, W3C's mission is to safeguard the openness, accessibility, and freedom of the World Wide Web from a technical perspective.
W3C's primary activity is to develop protocols and guidelines that ensure long-term growth for the Web. The widely adopted Web standards define key parts of what actually makes the World Wide Web work.

Another approach is to go and bring feedback on ideas for future technologies: the W3C Web Platform Community Incubator Group was built as an easy place to get started to provide feedback on new proposals or bring brand-new proposals for consideration.
Happy Web building!
As steward of global Web standards, W3C's mission is to safeguard the openness, accessibility, and freedom of the World Wide Web from a technical perspective.
W3C's primary activity is to develop protocols and guidelines that ensure long-term growth for the Web. The widely adopted Web standards define key parts of what actually makes the World Wide Web work.

Tim Berners-Lee wrote a proposal in 1989 for a system called the World Wide Web. He then created the first Web browser, server, and Web page. He wrote the first specifications for URLs, HTTP, and HTML.
In October 1994, Tim Berners-Lee founded the World Wide Web Consortium (W3C) at the Massachusetts Institute of Technology, Laboratory for Computer Science [MIT/LCS] in collaboration with CERN, where the Web originated (see information on the original CERN Server), with support from DARPA and the European Commission.
In April 1995, Inria became the first European W3C host, followed by Keio University of Japan(Shonan Fujisawa Campus) in Asia in 1996. In 2003, ERCIM took over the role of European W3C Host from Inria. In 2013, W3C announced Beihang University as the fourth Host.
As of January 2023, W3C is a public-interest non-profit organization incorporated in the United States of America, led by a Board of Directors and employing a global staff across the globe.
As of July 2023, W3C:
Committed to core values of an open Web that promotes innovation, neutrality, and interoperability, W3C and its community are setting the vision and standards for the Web, ensuring the building blocks of the Web are open, accessible, secure, international and have been developed via the collaboration of global technical experts.
People often use the words "Internet" and "Web" interchangeably, but this usage is technically incorrect.
The Web is an application of the Internet. The Web is the most popular way of accessing the Internet, but other applications of the Internet are e-mail and ftp for example. One analogy equates the Internet to a road network where the Web is a car, the email is a bicycle, etc. Read this article for more details about the difference between Internet and the Web.

First photo: Tim Berners-Lee is on the left wearing a black shirt that says "I didn't invent the Internet" and Vint Cerf on the right wearing a black shirt that says "I did not invent shit. DARPA did.". Second photo: Both facing backwards, Tim Berners-Lee is on the left wearing a black shirt that says "I invented the Web" and Vint Cerf on the right incorrectly wearing a black shirt that says "I invented the Internet". He didn't.
The W3C community is passionate about creating free and open Web standards. The next video, created in partnership with Microsoft, explains why standards are important to maintain a royalty-free, Open Web Platform, as well as to help shape the Web of the future.
The power of the Web is in its universality. Access by everyone regardless of disability is an essential aspect. Tim Berners-Lee, W3C Director and inventor of the World Wide Web.
When websites and web tools are properly designed and coded, people with disabilities can use them. However, currently many sites and tools are developed with accessibility barriers that make them difficult or impossible for some people to use.
Accessibility is essential for developers and organizations that want to create high-quality websites and web tools, and not exclude people from using their products and services.
Making the web accessible benefits people with and without disabilities, businesses, and society. Accessibility is an important aspect of diversity, equity, and inclusion (DEI).
Video Introduction to Web Accessibility and W3C Standards is a 4-minute video with descriptive transcript and subtitles in over 20 languages.
Web accessibility addresses all disabilities, including hearing, learning and cognitive, neurological, physical, speech, and visual disabilities. Some examples of Web accessibility features include:
Web accessibility features also benefit many more users, such as:
The Web is an increasingly important resource in many aspects of life: education, employment, government, commerce, health care, recreation, and more. When Web pages, Web technologies, Web tools, or Web applications are badly designed, they can create barriers that exclude people from using the Web. More information is available in the W3C Accessibility overview.
There are many simple Web accessibility improvements that you can implement and check right away, even when you are new to this topic. Two example excerpts are provided below on this page but you can find more tips and information from W3C/WAI:
Good page titles are particularly important for orientation --- to help people know where they are and move between pages open in their browser. The first thing screen readers say when the user goes to a different Web page is the page title. In the Web page markup, they are the <title> within the <head>.
Check #1: There is a title that adequately and briefly describes the content of a page, and that it distinguishes the page from other Web pages.
<head>
  ...
  <title>Web Accessibility Initiative (WAI) - home page</title>
  ...
</head>
Example 2: image text alternatives ("alt text")
Text alternatives ("alt text") are a primary way of making visual information accessible, because they can be rendered through any sensory modality (for example, visual, auditory or tactile) to match the needs of the user. Providing text alternatives allows the information to be rendered in a variety of ways by a variety of user agents. For example, a person who cannot see a picture can have the text alternative read aloud using synthesized speech.
Check #2: Every image has alt with appropriate alternative text.
Example: See the W3C logo below. It contains a link that points to the W3C Web site. The text alternative is going to be a brief description of the link target.
<a href="https://w3.org">
  <img src="https://w3.org/Icons/w3c_home.png" width="72" height="48" alt="W3C Web site">
</a>
Access to the Web for all has been a fundamental concern and goal of the W3C since the beginning. It is easy to overlook the needs of people from cultures different to your own, or who use different languages or writing systems, but you have to ensure that any content or application that you design or develop is ready to support the international features that they will need.
'Internationalization' is sometimes abbreviated to 'i18n' in English, because there are 18 characters between the 'i' and the 'n'.

The W3C Internationalization Activity works with W3C working groups and liaises with other organizations to make it possible to use Web technologies with different languages, scripts, and cultures.
During this course you will learn about some basic internationalization features, such as character encoding and language declarations. If you don't use those features you will create barriers for people from different cultures who are trying to access your content. This is important even if you think you are only designing for a specific community -- communities are made up of diverse individuals, and the Web stretches worldwide.

Text in a computer or on the Web is composed of characters. Characters represent letters of the alphabet, punctuation, or other symbols.
Unicode is a universal character set, ie. a standard that defines, in one place, all the characters needed for writing languages in use on computers. It is a superset of all other character sets that have been encoded.
As a content author or developer, It is important to clearly distinguish between the concepts of a character set versus a character encoding. You should nowadays always choose the UTF-8 character encoding for your content or data. This Unicode encoding is a good choice because you can use a single encoding to handle any character you are likely to meet. This greatly simplifies things.
You find below three examples (and checks!) to help you to ensure that your Web page works for people around the world, and to make it work differently for different cultures, where needed. Let's meet the words 'charset' and 'lang', soon to become your favorite markup ;)
A character encoding declaration is vital to ensure that the text in your page is recognized by browsers around the world, and not garbled. You will learn more about what this is, and how to use it as you work through the course. For now, just ensure that it's always there.
<head>
  <meta charset="utf-8"/>
  ...
</head>
For a wide variety of reasons, it's important for a browser to know what language your page is written in, including font selection, text-to-speech conversion, spell-checking, hyphenation and automated line breaking, text transforms, automated translation, and more. You should always indicate the primary language of your page in the <html> tag. Again you will learn how to do this during the course. You will also learn how to change the language, where necessary, for parts of your document that are in a different language.
<!doctype html>
<html lang="fr">
  <head>
  ...
People around the world don't always understand cultural references that you are familiar with, for example the concept of a 'home run' in baseball, or a particular type of food. You should be careful when using examples to illustrate ideas.
Also, people in other cultures don't necessarily identify with pictures that you would recognize, for example, hand gestures can have quite unexpected meanings in other parts of the world, and photos of people in a group may not be representative of populations elsewhere. When creating forms for capturing personal details, you will quickly find that your assumptions about how personal names and addresses work are very different from those of people from other cultures.
Check #3: If your content will be seen by people from diverse cultures, check that your cultural references will be recognized and that there is no inappropriate cultural bias.
The following 7 quick tips summarize some important concepts of international Web design. They will become more meaningful as you work through the course, so come back and review this page at the end.
You will find more quick tips on the Internationalization quick tips page. Remember that these tips do not constitute complete guidelines.
When you start creating Web pages, you can also run them through the W3C's Internationalization Checker. If there are internationalization problems with your page, this checker explains what they are and what to do about it.
Hello everyone, welcome to the wonderful world of JavaScript!
In this module, after giving a brief history of JavaScript and Web browsers, we will explain how HTML, CSS and JavaScript are related to one another. We will see JavaScript in action through numerous interactive examples. We have made sure that all examples can be run directly in the course's Web pages.
Hey, we're teaching Web technologies, after all! We will do that throughout the course, as you will be asked to change some code, tweak this or that example, even if the code details are not fully explained at first. Because, this is how we recommend beginners to learn JavaScript: first look at examples, then tweak some code and see the results of the changes. You will certainly encounter error messages, but no worries, as I will teach you how to debug JavaScript code using your browser's devtool console.
In this first module, you will also learn about JavaScript variables, operators and expressions, and have a first lesson about functions, objects, arrays and strings.
These are the basic concepts of JavaScript and are shared by many other programming languages. We'll then develop together, and step by step, an interactive graphic tool that will use many different features from JavaScript, HTML and CSS. Let's start having fun with JavaScript, now :-)
If you thought that a Web browser could only display HTML documents, you were mistaken! ;)
Behind the scenes, an HTML document is nearly always associated with two other standard languages of the Web: CSS and JavaScript. Before looking at the guts of JavaScript, we introduce the basics and play with many examples. We will also have a first look at the browser devtools, and discover how JavaScript is useful.
A word of caution: you will not learn JavaScript in full detail in this course! This is an introductory course designed to help you understand the basic concepts of the language.
A fundamental key to the World Wide Web is the concept of "hypertext". Hypertext is built on the idea of linking information together, not unlike using footnotes, but far easier and more flexible. The idea is to "mark up" your document with links and define how to break it down into different segments (chapters, sections, paragraphs, tables, figures, etc.)
That's why, in 1989, Tim Berners-Lee began to create a definition of HTML: Hypertext Markup Language, to provide a simple, uniform way to incorporate hyperlinks into a text document.
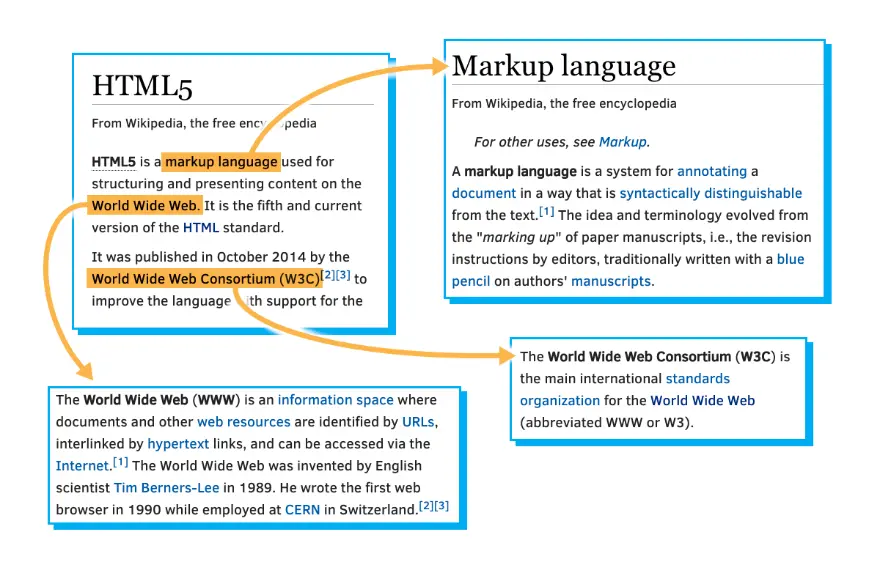
He envisioned a technology that would facilitate thoroughly interconnected documents. He wanted authors to be able to connect an idea in one document to the source of the idea in another, or connect a statement with the data that backs up that statement. Traditionally this kind of thing was done with footnotes and bibliographies, which can be cumbersome. This information should be easily transferable from one place to another, so that in reading one document, it is easy to access everything related (linked) to it. Tim Berners-Lee imagined a "Web" of interconnected documents.
He used the metaphor of a Web to emphasize the importance of connections between documents. It was not just a long list of details, but rather a sea of information stretching out in all directions. This sea of information was navigated by a new tool called a "browser".
The "M" in HTML stands for "Markup", but what does Markup really mean? Essentially it means to annotate a document with extra information: things like where different sections and paragraphs begin and end, which part is the title, which things should be emphasized and so on.
There are many ways to markup a document, but HTML borrows a technique from an ancestor language, SGML (Standard Generalized Markup Language), which uses angle brackets ("<" and ">") to separate the annotations from the regular text. In HTML these annotations are called "tags".
For example, consider the following chunk of HTML code (note: you can edit the source code and see the resulting Web page updating in real time):

<body>
  <h1>A Tale of Two Cities</h1>
  <p>
  It was the best of times, it was the worst of times, . . . .
  </p>
  . . .
  <p>
  . . . it is a far, far better rest
  that I go to than I have ever known.
  </p>
</body>
If you eliminated everything in between the angle brackets from the text, for most purposes it would still read the same:
A Tale of Two Cities It was the best of times, it was the worst of times . . . . . . . . . . it is a far, far better rest that I go to than I have ever known.
Once you know that everything in angle brackets is "meta-information", it gives you a lot of flexibility. You can put a lot of different things in between those brackets without any of it showing up (directly) in your finished document. And though you don't usually see directly what's in those angle brackets, they can often have a big effect on how your Web page looks, as well as how it responds and interacts with you.
Here is another, more generic example:
It's time to write your first HTML code :-)
You can use a source code editor like Sublime Text, Atom,brackets or any lightweight text editor. You can also use more "professional" tools such as Visual Studio Code, NetBeans, Eclipse WebStorm, jetbrains, etc.
To try out the simple examples from this course, I'd suggest using an online IDE such as JSBin, CodePen, Plunker, etc.
During the course, we will show you how to test out simple code snippets in online IDEs, but we will also teach you how to organize your code with folders and files.
The next lesson shows how you can use JSBin, CodePen, and SublimeText in order to test the HTML code provided earlier in this section.
In this lesson, I will show you how to try and tweak the HTML example from the Web page, the one from the course.
I propose first to show you two online tools that are very practical for editing some HTML, CSS and JavaScript code, and seeing in real time the result of your modifications.
In the second time, I will show you how to use the regular source code editor for editing HTML5 files directly on your hard disk.

In order to use the JSBin.com tool, that is the first one I recommend, you will open a new tab with your browser and you go to JSBin.
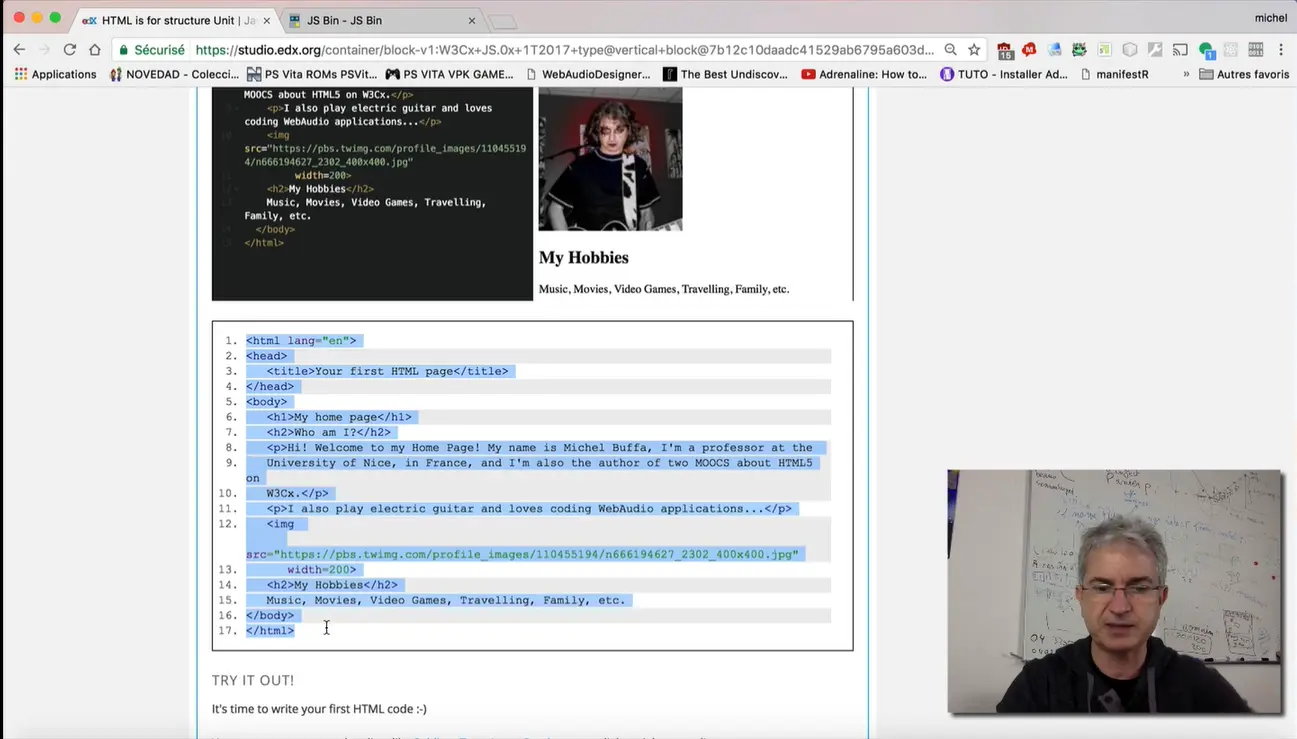
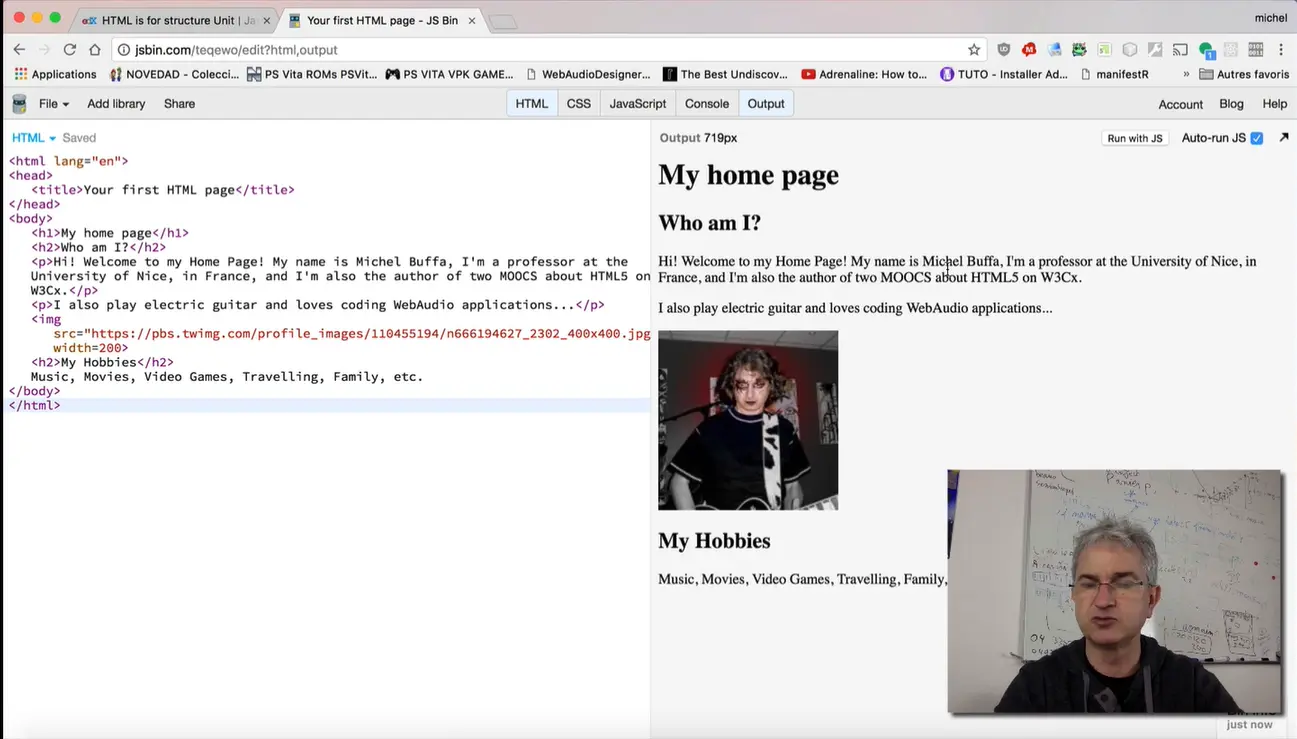
For the moment, we are going to use only HTML code. If you want to try the example from the course, just copy and paste the code in the HTML part on JSBin, and you see the result instantly. This is very practical because then you can modify the content, you can change the different values, the different elements... You can type your own text or your own HTML elements and attributes, and so on.
You can also save your work using the "Save snapshot" menu, and if you created an account, it's completely free. And you will be able to find your work the next time. You can share the URL; you can share the Web addresses of your work with friends. They won't to be able to break what you've done because it will be create a new version or clone your own work so that your friends can work on what you've done.
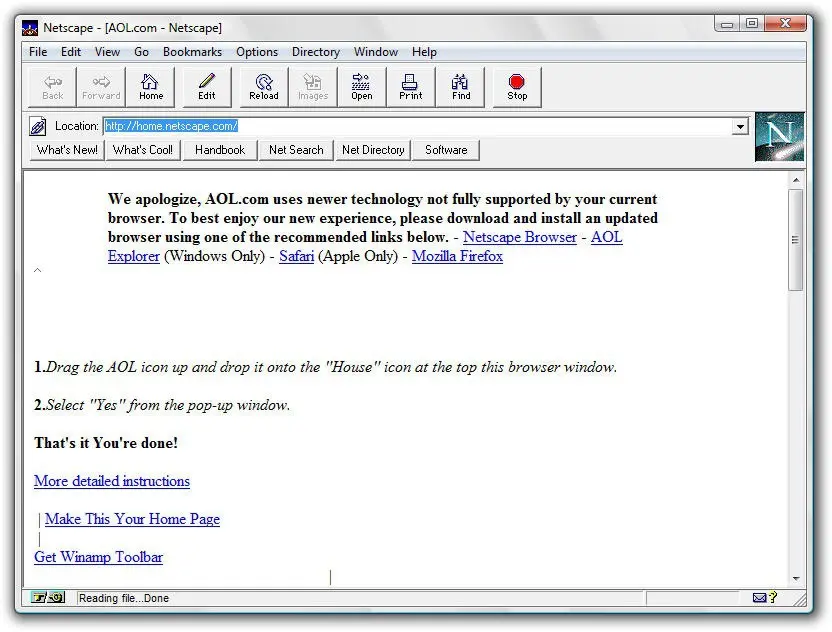
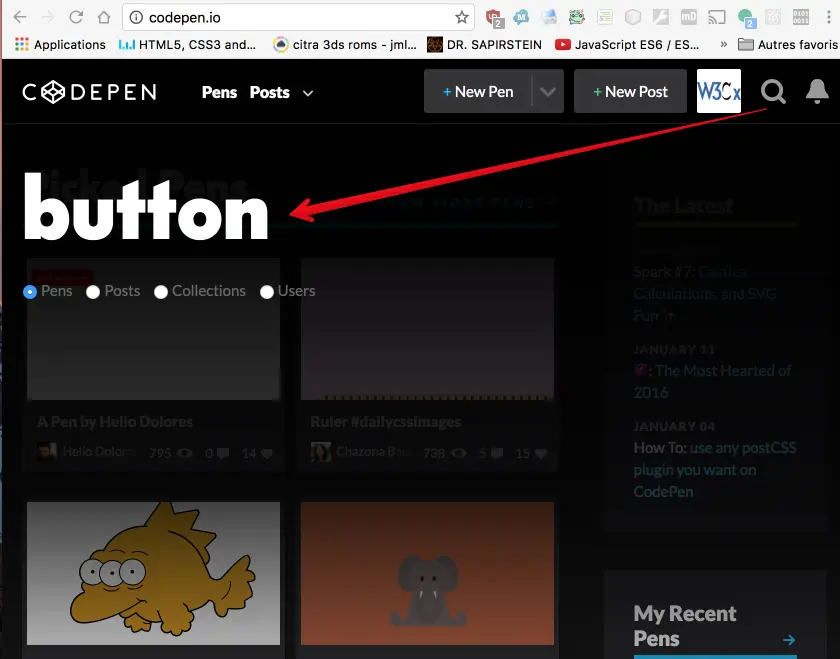
The other online tool, that is very practical, is codepen.io. This one is maybe nicer but I think that JSBin is more practical for typing code. This one is interesting because it's got a search engine, and you can look for existing examples made by others.
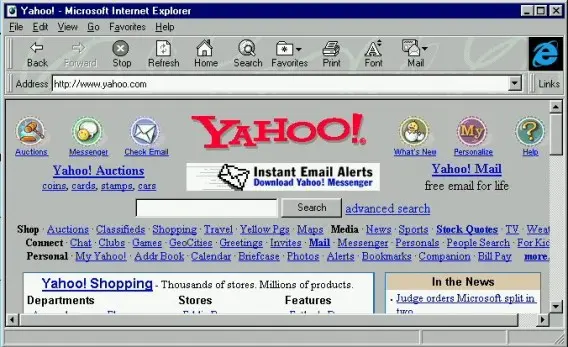
I just typed "button", and here I can see an example that create buttons. I can see the HTML code; CSS code and I can learn by looking at these examples.

In our case, if you want to create a new example, you just open codepen.io, you click on the "New Pen" button and you copy the HTML code in the HTML part on the editor, and you see the result. Don't forget to save to create an account also. And here, you can download the result for editing that offline if you would like using the "export" option (bottom right of screen in 'edit CodePen' mode).
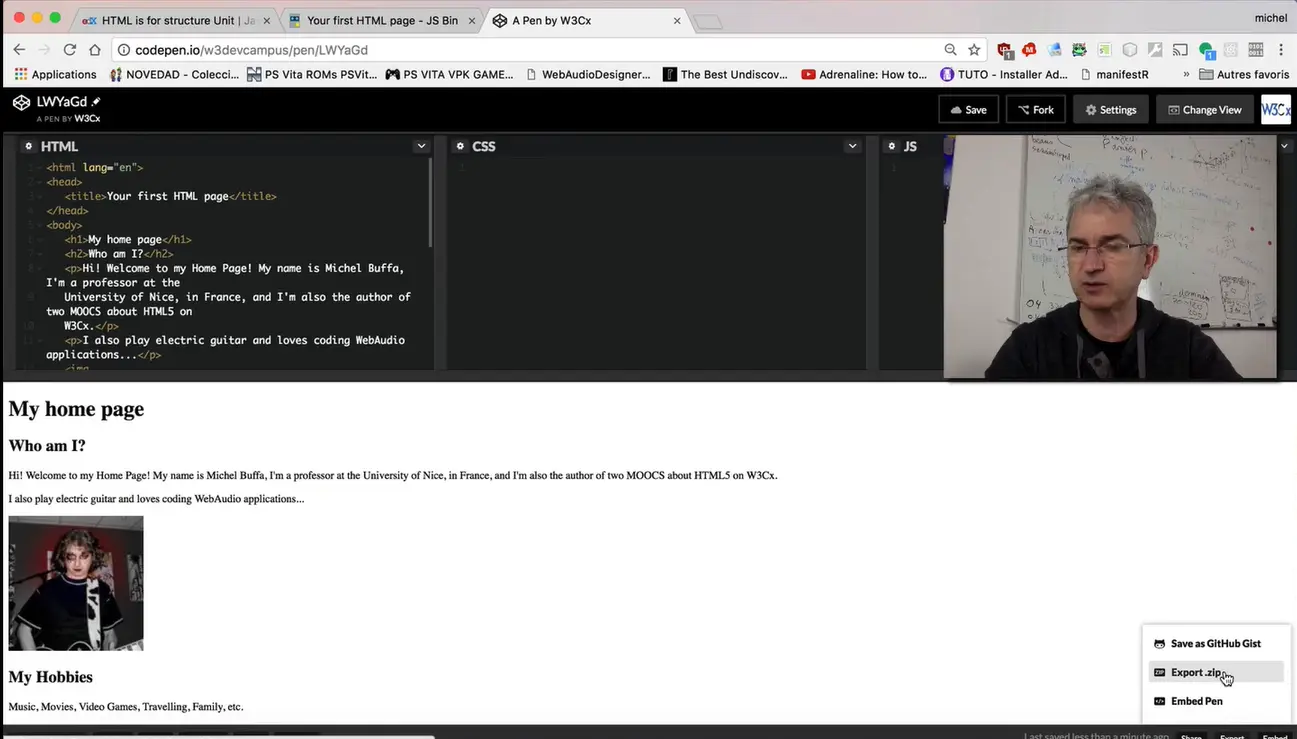
"Export.zip". With CodePen, I've got a zip file and in the zip file, I've got index.html here. And if I look at the source, it's exactly the source from the example.
With JSBin, you can also download your result: "Download". And in that case, the name of HTML file will be built using the name of your example in the address bar of your browser. But if you click on it, you've got the same result. You've got an HTML file that is local in your hard disk that you can edit later on. You can see that the source code is nearly the same. The only difference is some comments that have been inserted at the top of the file. And if you want to create this example locally on your hard disk, I recommend to install some source code editor. In the course, we propose different ones.
The one I use is "Sublime Text". You go to SublimeText.com Web site. You download, it's free. You can also buy an enhanced version but the free version is ok. You download it. And once it's installed, you can work with it locally. I'm going to show you how to do that. What I recommend is that you create a directory somewhere.
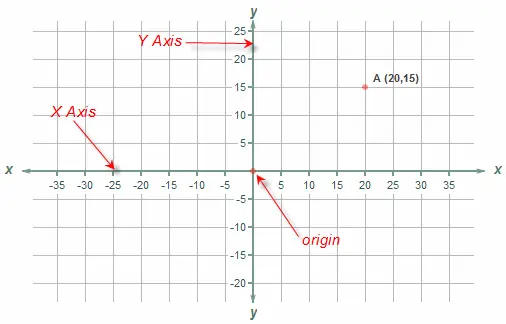
Here, I'm creating a directory on my desktop... so, a new directory: "Example 1". And inside that directory, I will create the HTML file. I use the "New file" option from Sublime Text. I copy and paste the code. I use "Save as" and i will save the page as index.html file... you can name it as you like. "index" is very common for the main page of Web site. I then go to the desktop to the « Example 1" directory and I save the file.
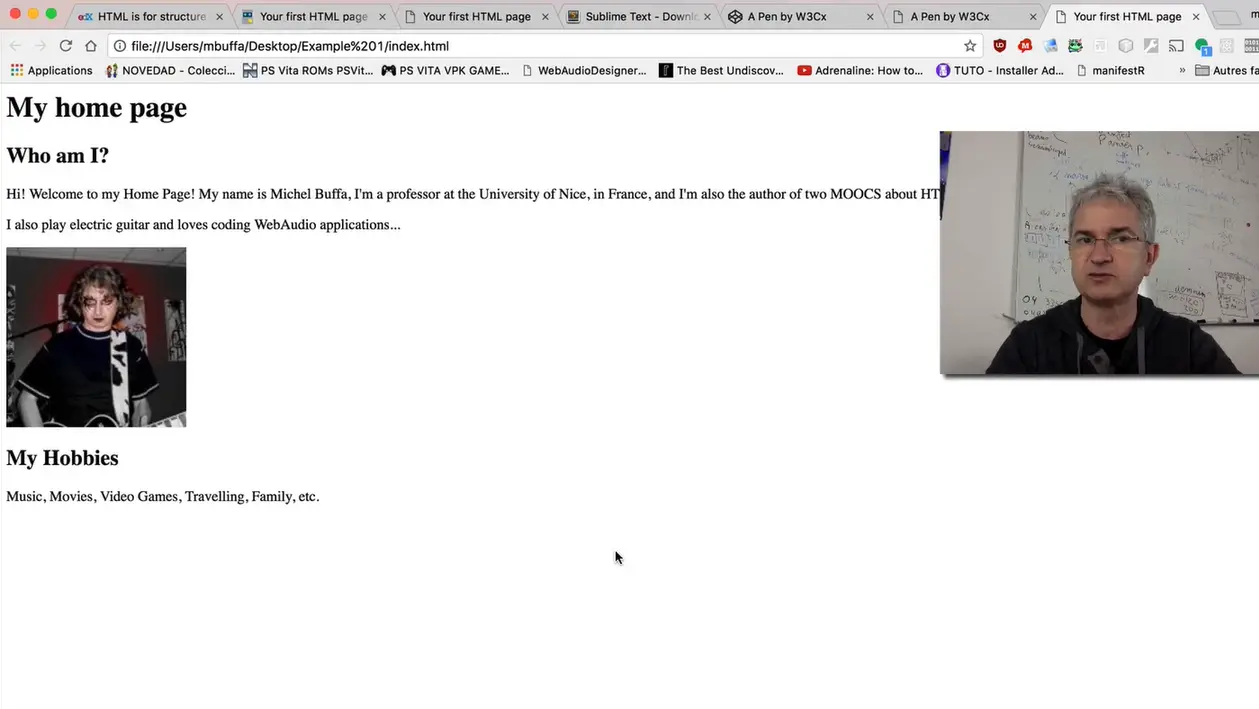
And from Sublime Text, you can use the right click "Open in browser" and you can see the result. If I change the code here, my home page "Hello W3Cx students" and I want to see the result, I just save 'CTRL s' or command s on my Mac. I do "Open in the browser" or I can just reload the page, and I can see that I changed the content of the HTML file.
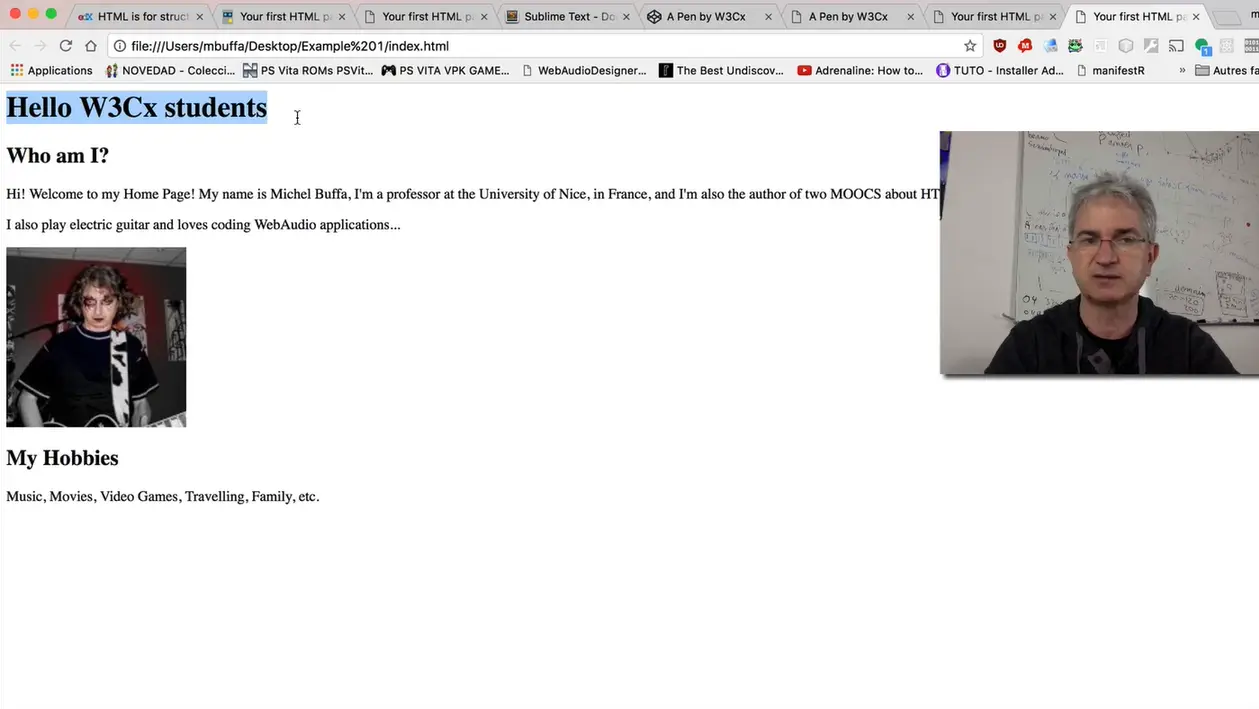
This is how you can work. Or you can also directly open an example you downloaded from JSBin or from CodePen. My download directory, I can find back the file that I downloaded when I was working with CodePen.io. And here, I have got HTML file. This is the code I prototyped, I tested first using an online environment.
If you are sitting at a coffee shop next to a table of Web developers, you will probably often hear these three words: "Elements", "Tags" and "Attributes".
"Elements" are the pieces themselves, i.e. a paragraph is an element, a header is an element, even the body is an element. Most elements can contain other elements, as the body element would contain header elements, paragraph elements, in fact pretty much all of the visible elements of the Document Object Model (that developers refer to as the "DOM").
As an example, let's look at a simplified version of the last HTML code we presented earlier:
<!DOCTYPE html>
<html lang="en">
  <head>
    <title>Your first HTML page</title>
    <meta charset="utf-8"/>
  </head>
  <body>
    <h1>My home page</h1>
    <p>Hi! Welcome to my Home Page! My name is Michel Buffa, I'm a
      professor at the University of Côte d'Azur, in France, and I'm also
      the author of three W3Cx MOOCS.</p>
  </body>
</html>
Click the red circle next to HTML to unfold this HTML document structure (we can also say "see its DOM structure"):
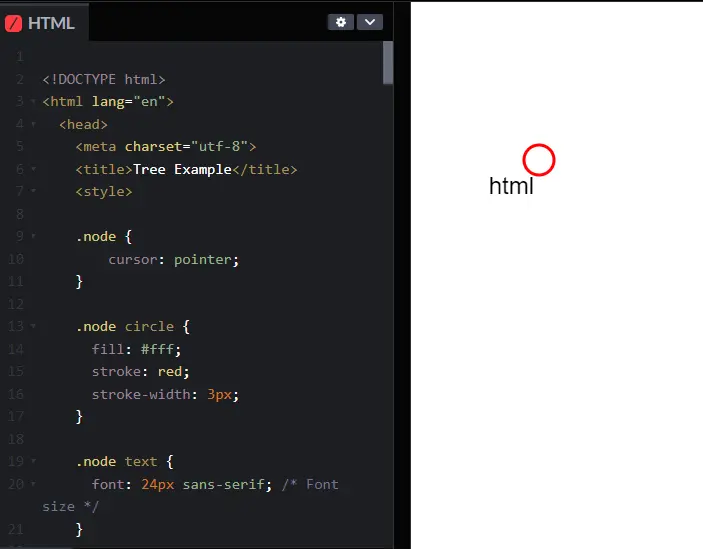
Consider the figure above. It contains a single html element. It turns out this includes within it the entire content of your html file. If you click on the "html" red node, you'll find that it contains two components, a head and a body.

Clicking on each of those will reveal their respective contents. This structure is what we computer scientists call a "tree". Any given element (except for the outermost "html" element) is wholly contained inside another element, referred to as the "parent" element. Not surprisingly, the elements contained within a given element are its "child" elements. And, yes, children of a common parent are often referred to as "siblings".
Thus, in the example above, the top element is the html element, which contains just two elements, the head and body. The head element contains a title element and the body contains an h1 element and a p element. In a more typical example, the body would contain many more children, but for our purpose this is enough. p is for "paragraph" (the text between <p> and </p> will be separated by some space before the next element is displayed in the final HTML page rendering), h1 means "heading level 1", and will be rendered by default in bold with a bigger char size than any other text element, etc.
That may be a great picture, but how do we represent such a structure in a text file? Well, that's where "tags" come in.

"Tags" are what we use to organize a text file (which is just a long string of characters) such that it represents a tree of elements that make up the html document. Tags are not the elements themselves, rather they're the bits of text you use to tell the computer where an element begins and ends. When you "mark up" a document, you generally don't want those extra notes that are not really part of the text to be presented to the reader.
HTML borrows a technique from another language, SGML, to provide an easy way for a computer to determine which parts are "MarkUp" and which parts are the content. By using "<" and ">" as a kind of parentheses, HTML can indicate the beginning and end of a tag, i.e. the presence of "<" tells the browser "this next bit is markup, pay attention".
Whatever that tag (or "open tag") does, it applies to the content following the tag. Unless you want that to be the entire rest of the document, you need to indicate when to stop using that tag and do something else, so "<" and ">" are used again. Since elements are typically nested within other elements, the browser needs to be able to distinguish between the end of the current tag and the beginning of a new tag (representing a nested element). This is done by adding a "/" right after the "<" to indicated that it's a "close tag". To indicate the beginning and end of a paragraph (indicated by the single letter "p") you end up with something like this:
<p>This is my first paragraph!</p>
The browser sees the letters "<p>" and decides "A new paragraph is starting; I'd better start a new line and maybe indent it". Then when it sees "</p>" it knows that the paragraph it was working on is finished, so it should break the line there before going on to whatever is next.
For example, the "<em>" tag is used for element that needs Emphasis. The "<" and ">" indicate that this is a tag, and the "little bits of text" in between tell us what kind of tag it is. To completely describe the element, it needs an open and close tag, and everything in between the tags is the contents of the element:

Most tags have open and close versions, but there are a few strange ones. For more info, we strongly recommend that you follow the W3Cx HTML5&CSS Fundamentals course, but we generally refer to the strange ones as "self closing" tags. Usually these tags represent an element that is completely described by its attributes, and thus there is no need for other content. So if you see something like this:
<img src="https://goo.gl/pVxY0e" alt="Floating Flower"/>
… then you should know that the slash at the end of the open tag is sort of a shorthand for a close tag, so you won't see any other indication that this element is now complete. There are also a few tags that don't even use the "/" at the end, they just don't have any close tag at all. This works because all of the information this tag needs is declared in an "attribute".
The <img> tag is one of them, the "/" at the end is optional and can be removed entirely, this will still be valid HTML5.
<img src="https://goo.gl/pVxY0e" alt="Floating Flower">
These elements, without a "/" at the end, are called "void elements". They are: area, base, br, col, embed, hr, img, input, link, menuitem, meta, param, source, track, wbr.
Most of what you can learn about HTML attributes is presented in the three W3Cx MOOCs about HTML5 (fundamentals, coding essentials, and advanced techniques), but we can introduce the idea briefly in this JavaScript course. Basically, a given element on your Web page can be distinguished by any number of unique or common attributes. For example, we've already seen how an image can be inserted in your Web page, and in that example we used the width attribute of the <img> tag in order to constrain the width of the image:
<img src="https://pbs.twimg.com/profile_images/110455194/n666194627_2302_400x400.jpg">
  width=200 alt="Michel Buffa plays rock&roll">
As you might guess, the <img> tag also has a height attribute, as well as others. Different HTML tags share some common attributes that we'll meet in the next section, which are particularly useful when coupled with CSS (id and class) for applying graphic styles (color, shadow, etc.), but can also have specific attributes (for example: the src attribute can be found in the <video>, <audio>, <img> tags but not on a <p> or on an <h1> tag!)
Try changing the value of the width attribute in the example below, or add a height attribute, and see the result:

<img
  src="https://pbs.twimg.com/profile_images/110455194/n666194627_2302_400x400.jpg"
  width=200
  alt="Michel Buffa plays rock and roll">
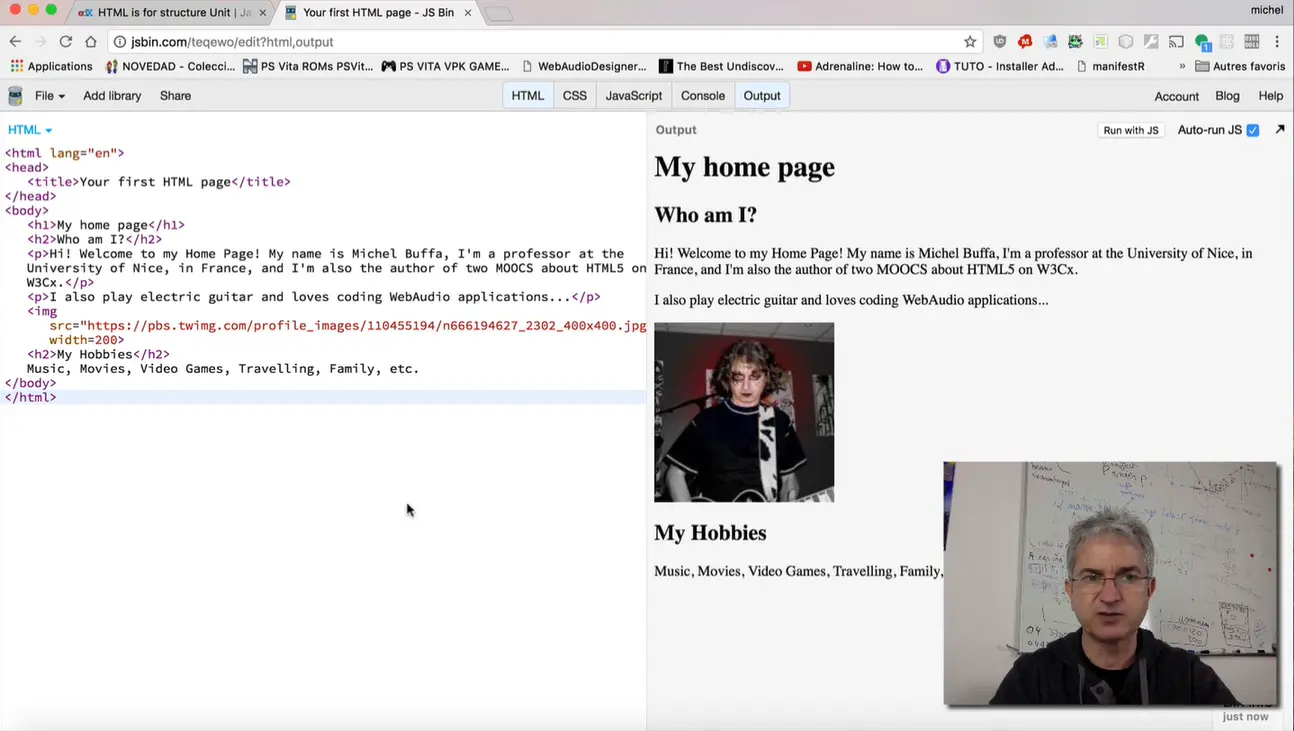
In this lesson, I will show you how to create from scratch an HTML page using some of the most common HTML tags. I will use an online tool for doing that. Like that, you will see some live preview of what I'm doing. I'm using "jsbin.com", and I will work on the HTML part of the editor, and you will see in the output part the results of what I'm doing. JSBin created for me a first template. Most common HTML5 starts with <!DOCTYPE html>, that tells the browser that the file is going to render will be an HTML5 file.

Then, you've got a first element that is called <html> and you've got the closing corresponding element that is </html>. It's a common way with markup languages to have opening and closing tags. And as you saw earlier in the course, when you've got such elements, they will have children. In the HTML tag, we will have a head element and a body element.

We've got a head element, and an empty body element, here.
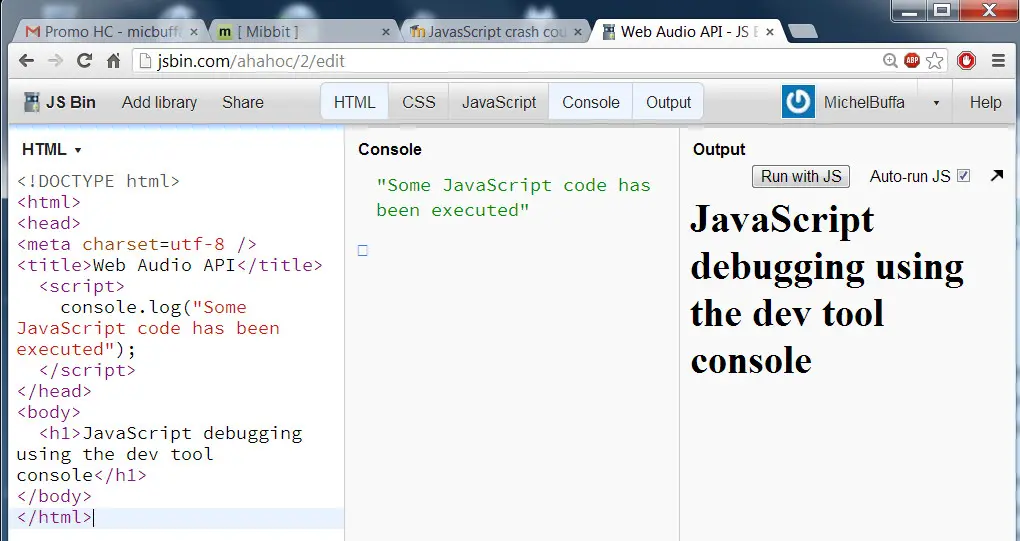
In the <head>, usually, we specify the title: "First HTML page". And this title is what will be displayed when you put the cursor on a tab in your browser. Then, it is a good practice to indicate the language: "lang=en" (English). Like that, you will be better indexed by search engines. And then in the body of the document, we will add some really visible content. I start with the very common element, a very common tag.
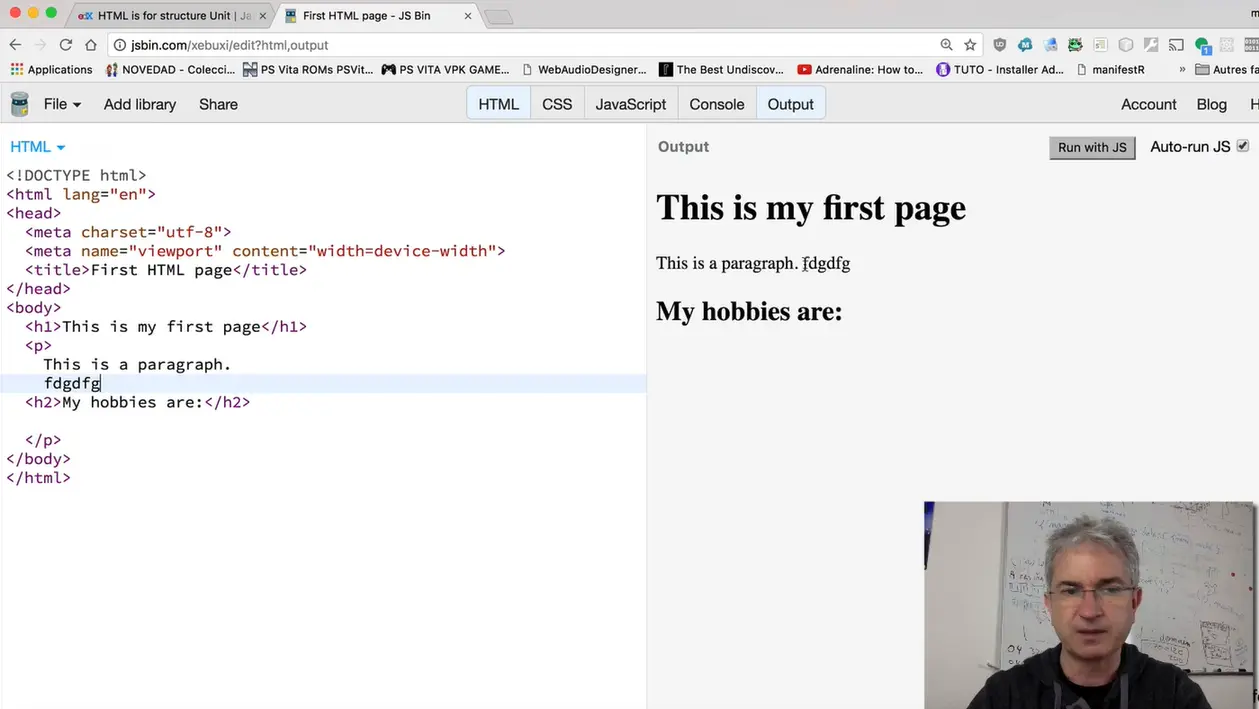
The tag is the notation between < and > signs and the element is the conceptual thing - like, I'm writing a heading. "This is my first page". This is a heading 1, and you've got 6 levels for typing titles. And also very common, is a paragraph: <p>, </p>, I typed the opening and closing tags. And I enter "this is a paragraph". I write a subheading h2: "My hobbies are:". Ok, you see that the size of headings is different here. And if, in the paragraph, if I go to the next line, this doesn't have an effect here.
The only return to the next line I can do is, either write another paragraph inside the paragraph, or I can use another tag that is useful just for going to the next line without letting some space between paragraphs, it's called <br>. And <br> in that case, I can go to the next line.
If I want to enumerate my hobbies, a very common practice is to use lists. In HTML, you've got an unnumbered list that are composed of list items. For example: "I play guitar", "I code video games". These are my hobbies. "I like movies", etc. If I want, instead of an unnumbered list, a numbered list, I can use an order list.

With <ol> instead of <ul>. In that case, you can see numbers. Another very common element is the "img" tag that is useful for inserting an image in your Web page. The tag "img /" is a self-closing element, so you don't have an opening tag and a closing tag. And you will use different attributes for specifying the size of the image. For example, I want an image of 100 pixels width. You can indicate a description of an image, and this is a good practice. I'm going to insert a picture of Leonardo Di Caprio in this example.
And you've got other different attributes that will not be detailed this time but I recommend you to follow the HTML5 intro. Course and the other course about HTML5 provided by the W3Cx. In order to indicate which image, I want in this page, I need to use the "src" attribute that will take as a value the URL of the image.
For this example, I'm using the images.google.com for finding an image of Leonardo. I pick an image of Leonardo. I display the image and I've got the URL, here, in the address bar. I just copy and paste it and I've got Leonardo Di Caprio in my document.
In this short video, I will show you quickly the principle of CSS. I recommend you follow the CSS Basics course from W3Cx if you want to learn this technology more deeply.
HTML is for structure. CSS is another language, by W3C, that it's useful for specifying the look and feel of these elements. How do they fit together...How many spaces between them...What color to use, and so on ...
I'm just going to copy and paste some examples here, and you saw that the look and feel of the document changed. And it's, now, using shadows, borders, background colors, different character fonts and so on.
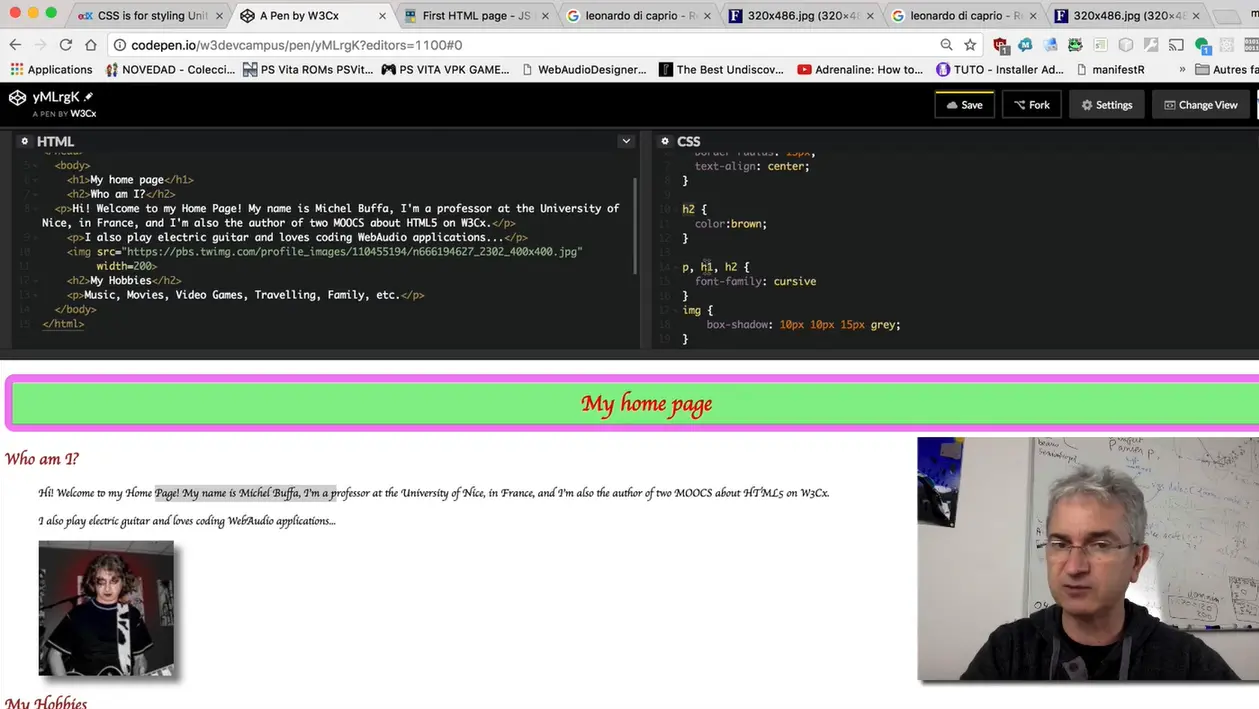
The CSS file, here, is just using what we call "rules". A rule is a selector, so this means for all "h1" elements in the page, I want to apply these properties.
And each property has a name 'color', and a value 'red'. So, you indicate, for each different elements you selected (the "h1", the "h2", the "p" the paragraph, for the image). You then indicate what you want to change. For example, for the image in the document, you indicate a box-shadow.

CSS, or Cascading Style Sheets, is a style sheet language used to describe the way an HTML or XML document should look to a user. CSS is where you specify the color, size, spacing, font and other visual aspects of the content that you create in your markup language document.
Usually, you see CSS used alongside HTML to describe the way a Web page looks and feels. You can have a Web page without CSS, but it would be very difficult to make it look the way you want with just HTML. This is why almost every Web page is a combination of HTML and CSS.
Stands for "Cascading Style Sheets". A style sheet language for describing how to display an HTML document.
Let's take the (ridiculous) Michel Buffa home page again: Notice the use of some HTML tags: h1, img, p, body etc.
Now, we can add some "CSS rules" to the HTML, and see that the appearance of the resulting HTML page rendering is rather different (click on the HMTL/CSS buttons to see alternatively the HTML or the CSS code, remember you can always make changes to the code: change the color in the CSS part, etc.):
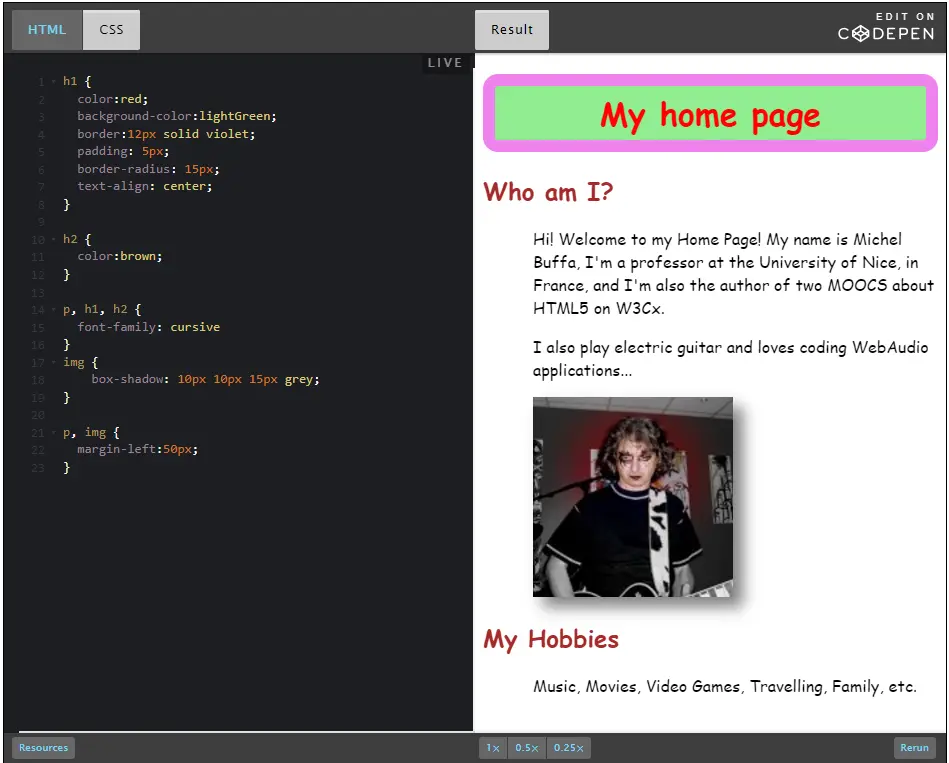
If you click on the CSS button on the top left of the previous codepen example, you see the CSS rules that have been applied to the HTML document. Let's look at the first one:
h1 {
  color:red;
  background-color:lightGreen;
  border:12px solid violet;
  padding: 5px;
  border-radius: 15px;
  text-align: center;
}
This rule turns all the h1s in the document into red text, centered horizontally, on a light green background, with a violet border of 12 pixels (a solid border, not a dashed one), and this border has rounded corners made of arcs of a circle whose radius is 15 pixels.
The part before the opening brace (line 1) is the "CSS selector", it indicates the elements that have their properties changed according to what is inside the braces.
The part inside the braces is a set of properties and values that are useful for setting the look and feel of the selected elements.
Line 2 for example, says that all h1s are colored in red.
After the previous rule is applied, then the second rule is taken into account, then the next, etc. In this way, you can see that all h2s is in brown (second rule).
The third rule uses what is called "a multiple selector":
p, h1, h2 {
  font-family: cursive
}
This one says that all p, h1 and h2 uses a cursive font character. The "," means "and also".
This is also how we indicate in the last rule that images and paragraphs should be moved to the right 50 pixels (property margin-left: 50px).
Basically, any given element on your Web page can be identified uniquely with an 'id' attribute, or grouped with a class of other elements by setting the 'class' attribute.
<p id="paragraph-1" class="regular-paragraphs">
  Call me Ishmael . . .
</p>
The paragraph above has a unique identifier: the id attribute whose value is "paragraph-1" and is part of a class of "regular-paragraphs". The letters inside the quotes have no meaning to the computer, they just need to be consistent. They are actually strings.
Again, the fact that the computer does not care what we put in those strings (except for some restrictions) means we can use them to convey meaning to a human developer. I could just as easily have said id='x' and class='y', but anyone looking at that would have no hint what the significance of x and y are. Best practice is to name these things to increase clarity, consistency and brevity.
Let's look at a modified version of Michel Buffa's home page example:
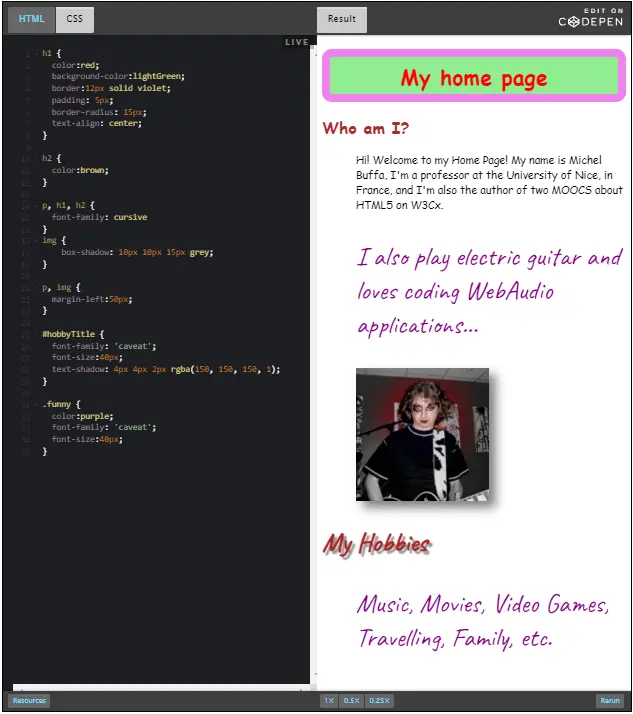
The last two rules first target the element whose id is 'hobbyTitle', in our case it's the second h2 element:
<h2 id="hobbyTitle">My Hobbies</h2>
#hobbyTitle {
  font-family: 'caveat';
  font-size:40px;
  text-shadow: 4px 4px 2px rgba(150, 150, 150, 1);
}
Line 1 uses the "#" character in the selector, meaning that we're going to select an element by its id attribute. In this case, the selector equal to #hobbyTitle, selects the element that has an attribute id="hobbyTitle".
In that case, we use a funny char font called 'caveat' we took from the Google font service (see fonts.google.com), and in order to be able to use it in a font-family CSS property, we included its definition using a <link> tag in the HTML part of the document:
<head>
  <title>Your first HTML page</title>
  <meta charset="utf-8"/>
  <link href="https://fonts.googleapis.com/css?family=Caveat"
  rel="stylesheet">
</head>
The last rule targets all elements that have an attribute class="funny". Notice they can be different elements, we can have a p and an h3 element that have the class="funny" attribute:
.funny {
  color:purple;
  font-family: 'caveat';
  font-size:40px;
}
This rule changes the color, font family and size of two out of three paragraphs in the HTML element:
...
<p class="funny">I also play electric guitar and love
  coding WebAudio applications...</p>
  ...
<p class="funny">Music, Movies, Video Games, Traveling, Family, etc.</p>
There are many, many, many different CSS properties in existence, and many different ways to select elements. We recommend that you follow the W3Cx CSS Basics and HTML5&CSS Fundamentals courses to learn more about CSS and about HTML5 basics.
You can do both!
You can embed the CSS rules between a <style>…</style> tag, located inside the <head>…</head> of the HTML documents, like in this example:

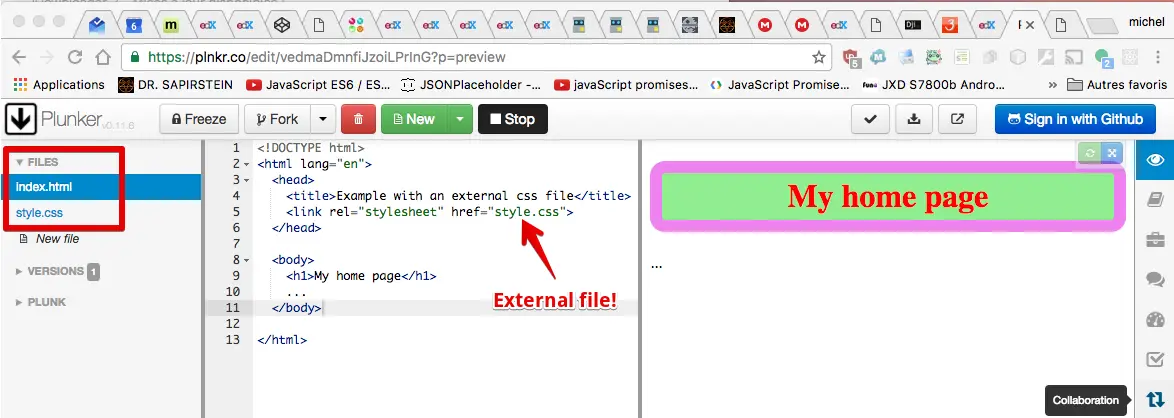
This is OK if you do not have too many CSS rules. In general it's better to put the CSS rules in one or more separate .css files, like this ( open this example in Plunker)
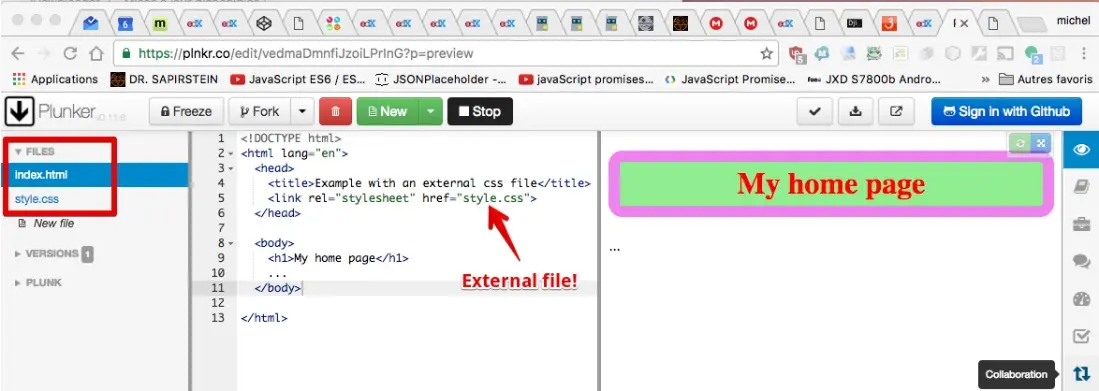
Note that when you use an online IDE, you usually type/paste the CSS rules in a "CSS tab" in the online editor, and it hides all the "plumbing" for you (except the more complete ones such as Plunker or AWS Cloud9 that enable you to manage files in the cloud).
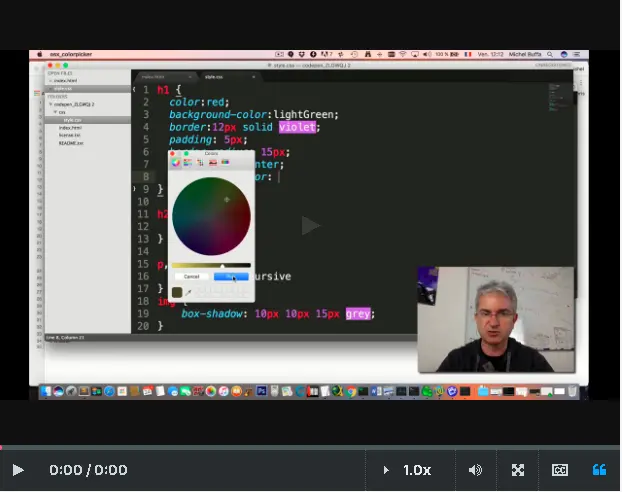
In this lesson, I will show you how you can include CSS in your HTML file, because we used online tools that hide, in a way, the location of the different languages.
If you take this example we described in the previous video, and if I export it using CodePen...and if I look at the zip file that has been downloaded, you can see CSS file are located in the subdirectory and in a .css file. This is a common way for organizing source code when you make a project with HTML and CSS.

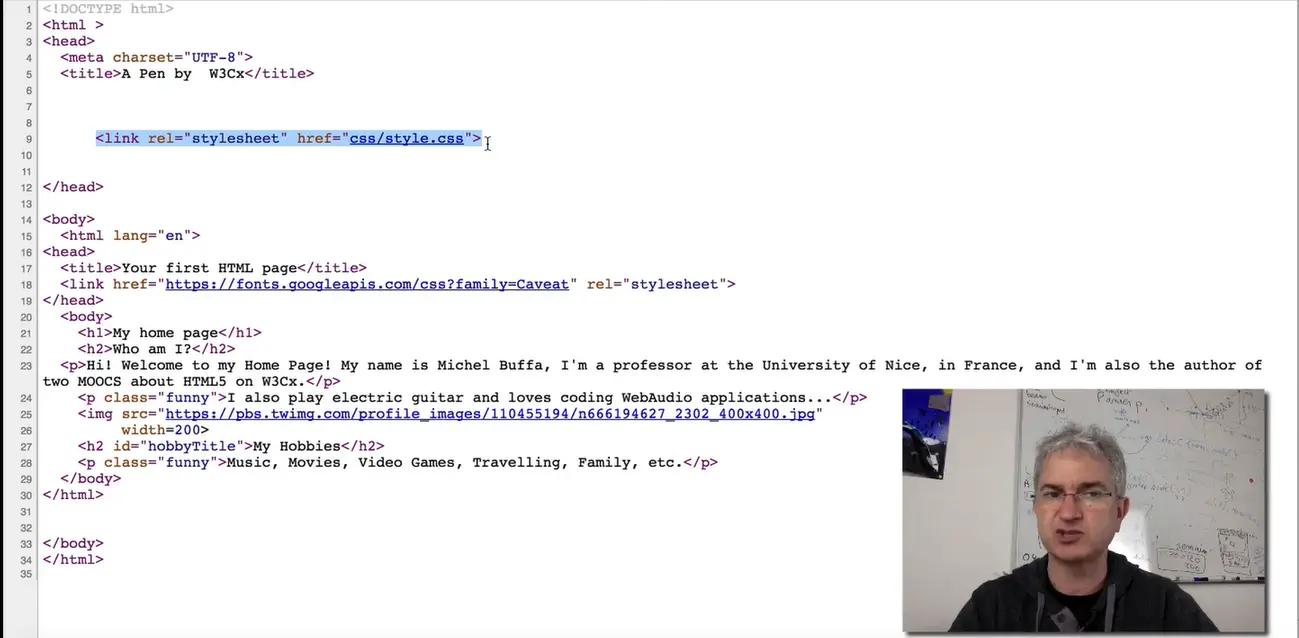
And if we open the "index.html" file, you can see that, what is really going on if we look at the source code. Actually, in order to include CSS file in an HTML file, we use the "link" tag with the attribute "rel = "stylesheet" and "href" = the name of the file.
Here, it means the "style.css" file located in the "css" subdirectory. If I open this project with Sublime Text ... I go to the directory I've just downloaded, and if I open the directory, I can see my hierarchy, here. The "index.html" file that includes the .css file.
And if I open the "style.css". I can see the CSS content here. And it's interesting to use a real source code editor because you've got auto-completion on the name of the properties: "background-color". You can use also some wizard for indicating or choosing the colors. If I take this color, it will give me directly the value and so on. You can edit your CSS, edit your HTML and when you save the result, you can open directly in your browser the file and see the result.
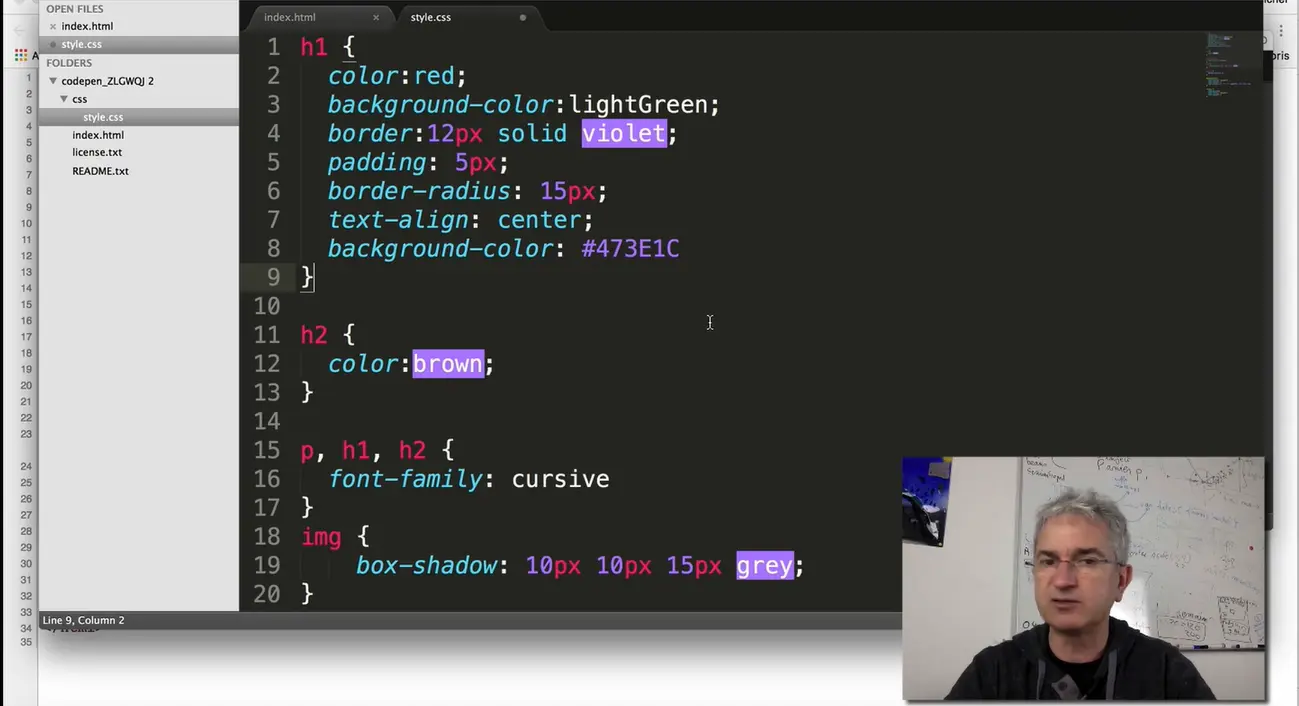
Here, I change the background-color of the heading 1. You can also use directly in your HTML, the CSS rules. In that case, instead of using the "link" element, you use the "style" element. <style>, </style>, and like that you can directly include, in the HTML file, the style. I've got "h1" CSS rule, that will indicate how the "h1" will be rendered and I'm no more including an external file.
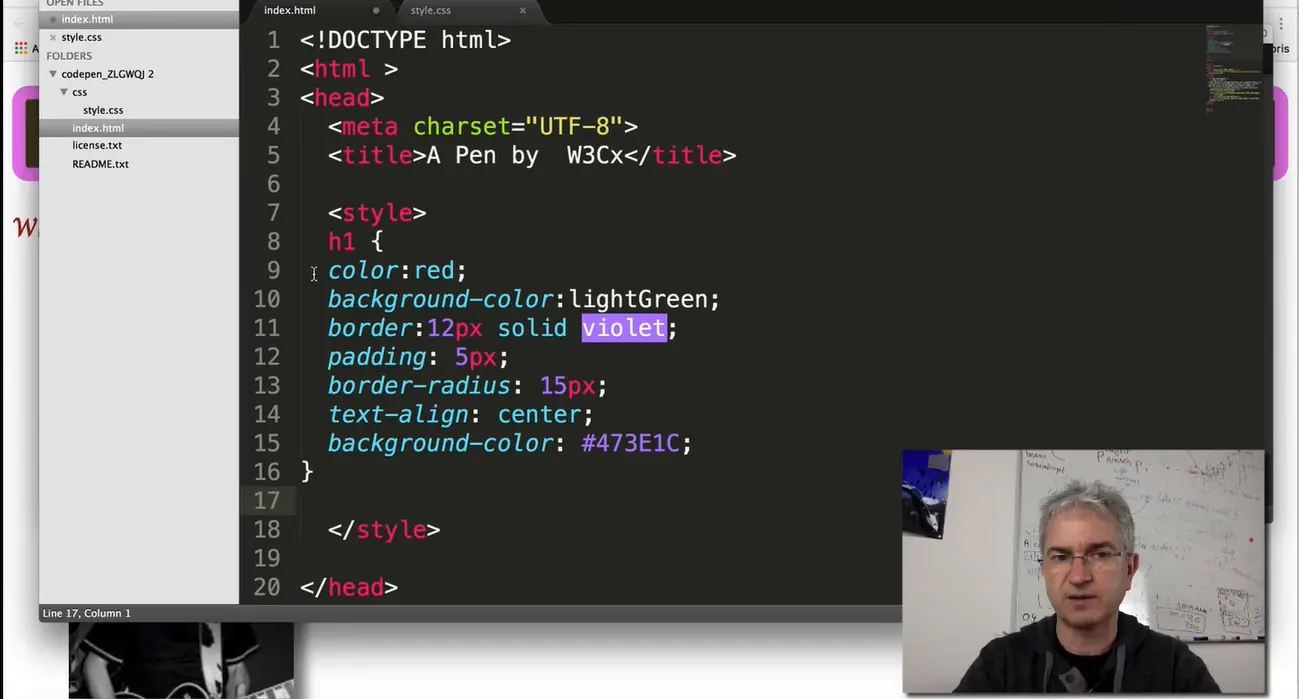
If I save this and "Open in the Browser", I've got the same result here for the "h1". And if I look at the source code, I will see directly in the HTML, the CSS rule.
To sum up, you can have your CSS in external file or inside the HTML file using the "style" element.
Hello, your Web browser can only understand three different languages when you ask for a Web page to be rendered in the browser.
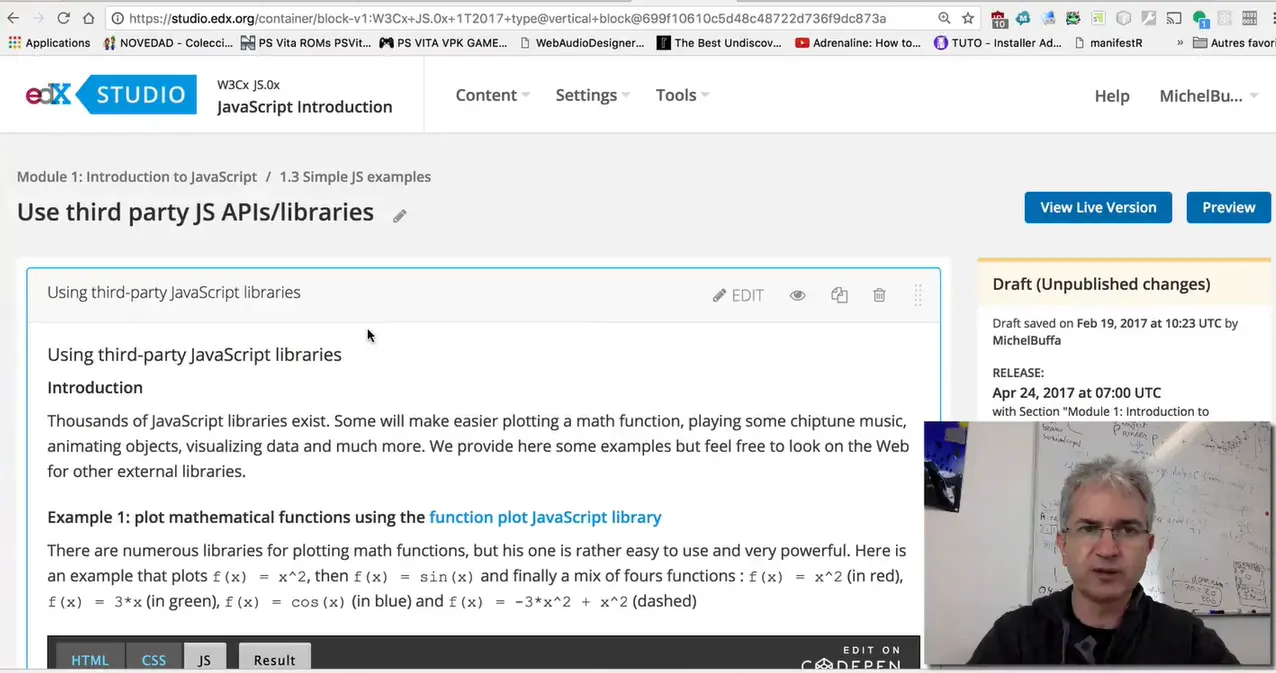
Let's take this document for example. We type the URL here, and the document arrives from a remote machine. And this document is a HTML source code that has been interpreted and rendered to give you a nice-looking document.
In this HTML, you can have CSS rules for specifying the look and feel of the document as we saw in the previous example. But you can also have Javascript code and Javascript when its run inside the browser can act as a glue between HTML and CSS. We will use Javascript to provide interactivity to the documents.
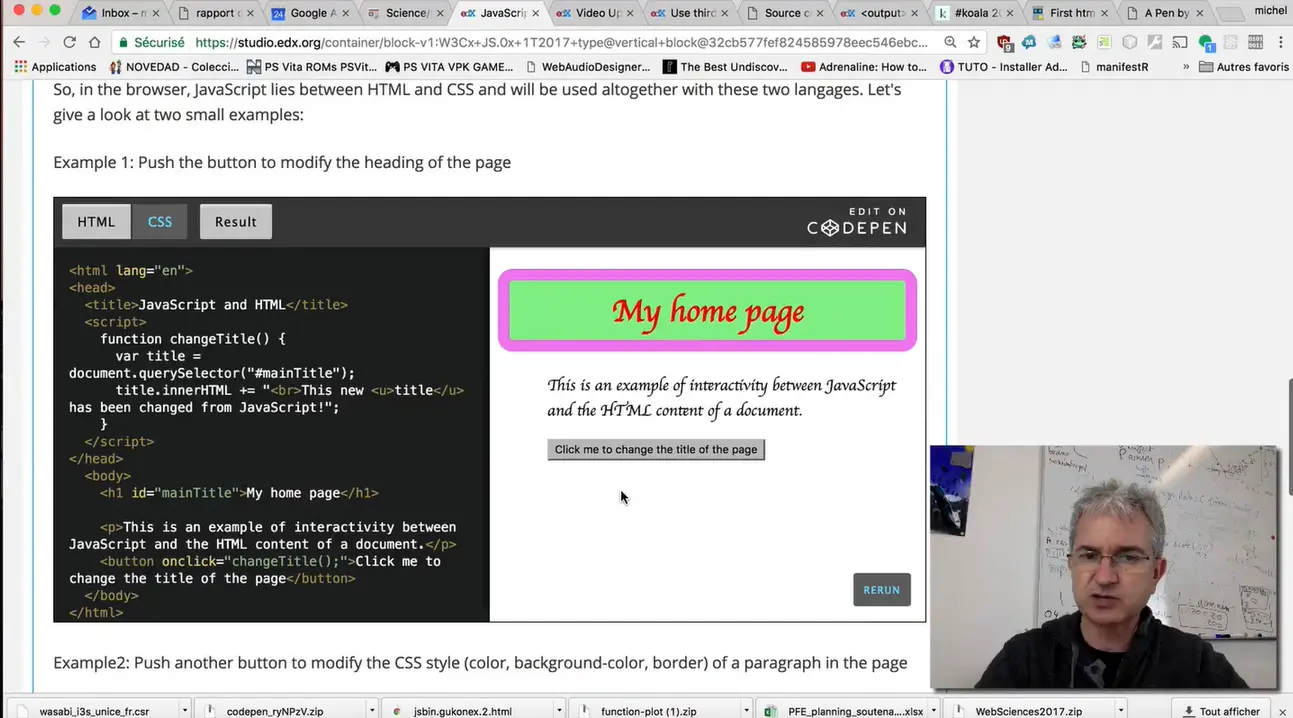

In this example, the first one on this page, I can click to change the content of the document. We modify what we call the document object model. It's exactly the set of elements that compose the page. When I click, I change the content of the heading. That was previously equal to 'My home page', and then when I clicked on the button, (this is an HTML button), this is how in Javascript we can indicate that we are going to do something when you click on it. In that case, it means call the function named "changeTitle" and the function is here defined between <script> and </script> elements.
In this example, the Javascript lies inside the HTML file and the function is a piece of code that can be run on different conditions. A click on the button executes these two lines of code here. 1st use: interact with the document object model, interact with the HTML elements of the page, add new ones, modify some existing ones, remove some elements.

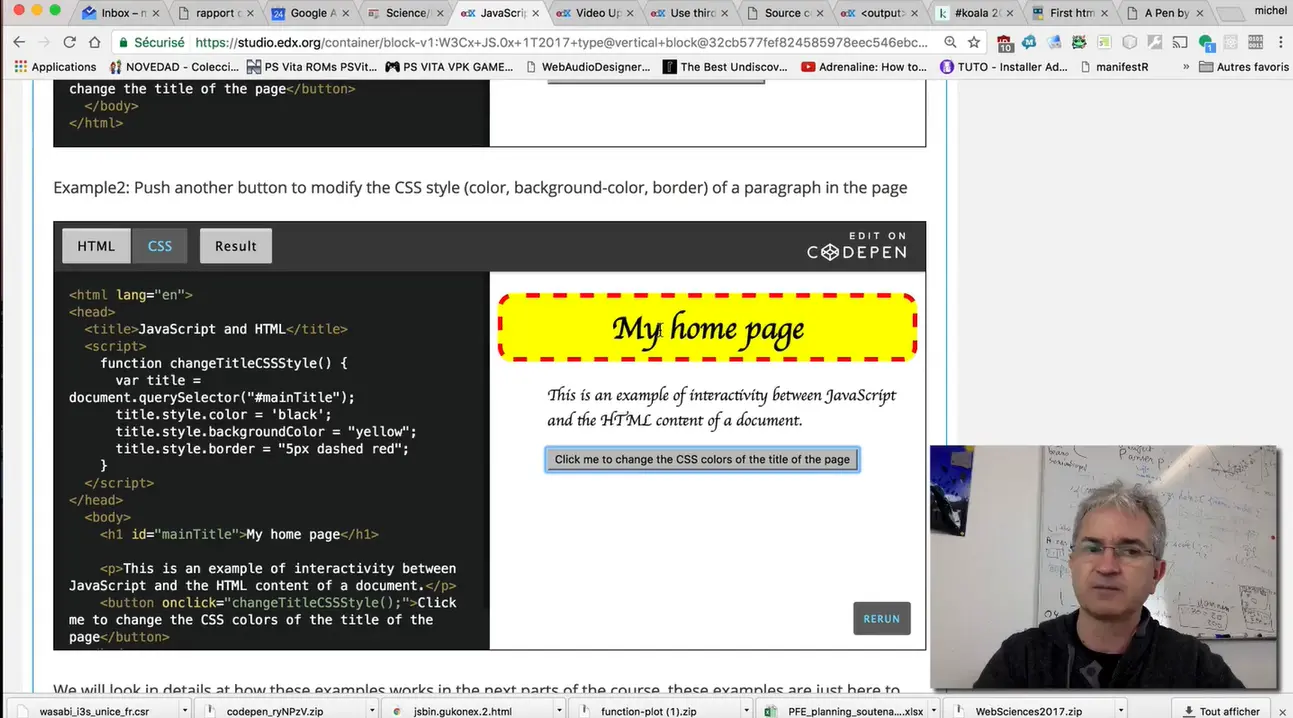
It can be also use for interactive for the CSS styles of the page. In this example, I click on the button. And instead of modifying the content of the page, I just change the look and feel. I change the CSS style of the heading. If we look at the code quickly without going into details: when I click on the button "button onclick", I call the "changeTitleCSSStyle" function.
In this function will use the "style" attribute of some elements that correspond to the heading 1 and it will indicate that we want the text to be black, the background color to be yellow and the border to be 5 px wide, dashed and colored in red. This was just an example. What we can do with Javascript goes much further than this simple example. We can work with remote data, upload and download data from a remote server. We can use it for making multimedia players, for writing video games, for making music, for building tables on the fly to display some dynamic data that you came after, for example, we enter some text in the search form, etc.
During week 1, we will see other examples with different sort of applications of JavaScript. And, we will first give some explanations about variables, functions, some basics events handling: how to detect a click? how to debug the code? What tools we're going to uses for writing Javascript code, and so on. JavaScript is the third of the "magic trio": HTML5/CSS/JavaScript. It is the only programming language a browser can run (without installing any plugins or extensions), and it's a real standard of the Web (even if not standardized by the W3C).

Actually, this description does not do justice to JavaScript, which can do far more than just act as glue. JavaScript can be run outside of the browser (on a nodeJS interpreter on a remote server, or in scripts run by the operating system), but for this intro course, we focus on "JavaScript" in the browser.
In the browser, JavaScript lies between HTML and CSS and will be used together with these two languages. Let's take a look at two small examples:
Example #1: push the button to modify the heading of the page.
Example #2: push another button to modify the CSS style (color, background-color, border) of a paragraph in the page.
We have a closer look at how these examples work in the subsequent parts of the course. These examples are just here to show you how JavaScript can interact with the HTML content and the CSS styles of a Web document. Finally, note that, in these examples, the JavaScript code is located in the HTML of the document.
JavaScript remains the most commonly used programming language with 67.7% of developers employing it in 2020 (see this survey's results).
Created out of necessity, it is used to build 97.4% of websites, including some of the world's largest, like Facebook and YouTube. Without it, we would not have popular and useful web apps such as Google Maps and eBay.
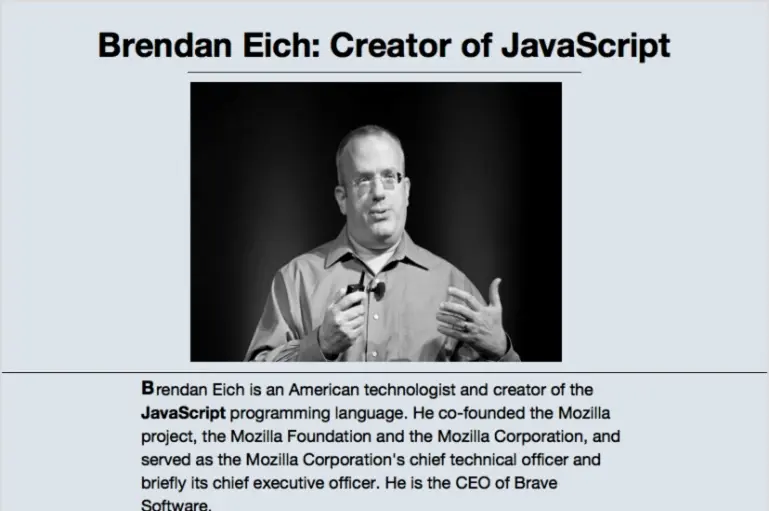


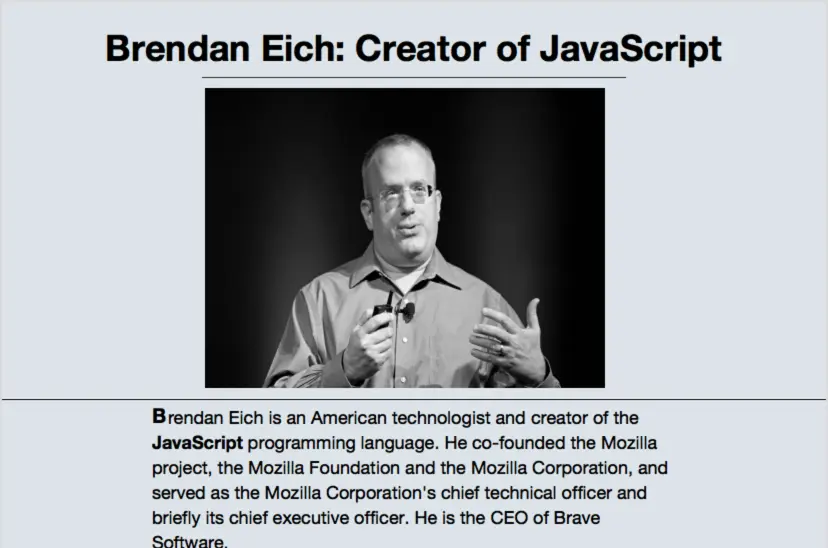
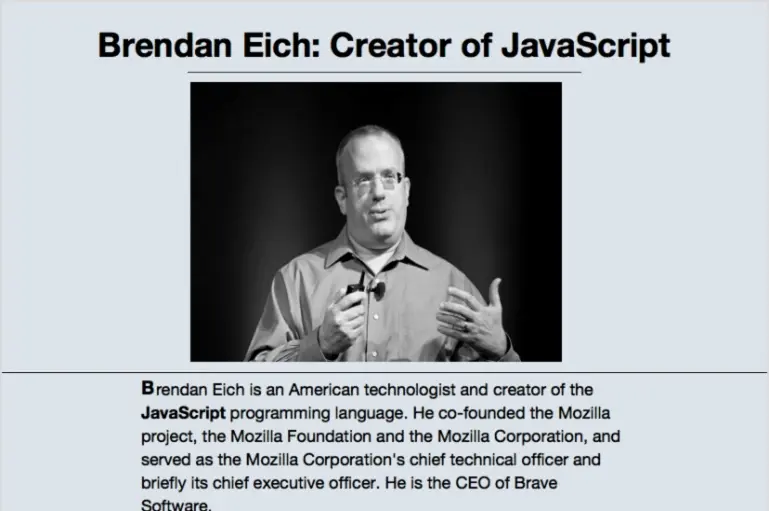
JavaScript was born in 1995 as part of the work of Brendan Eich's team at Netscape (the ancestor of Mozilla). At that time, Netscape (a hero), in association with Sun MicroSystems (another hero), provided popular server and client-oriented solutions (Netscape Navigator, ancestor of Firefox) which depended on Java. (Sun Microsystems, the company that created the Java programming language, no longer exists, having been bought by Oracle Corporation in 2009.)
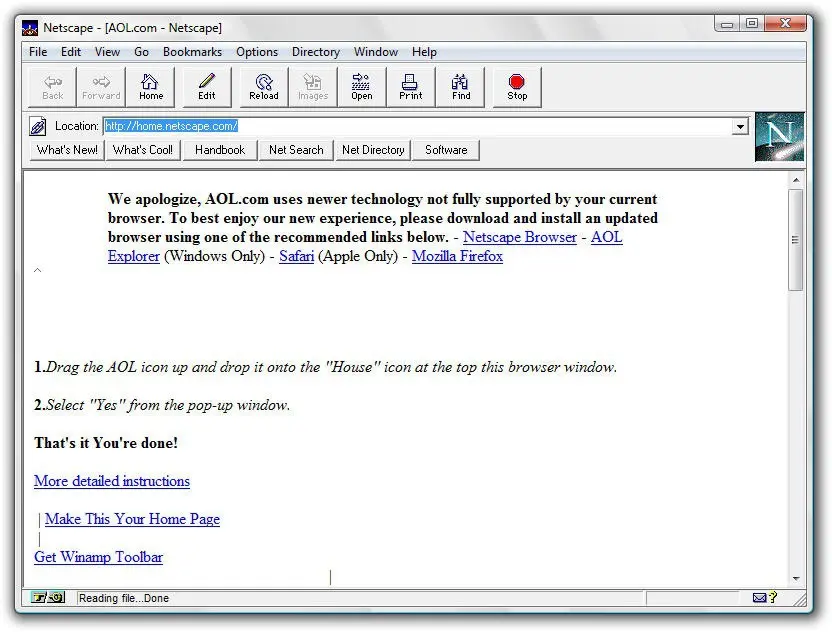
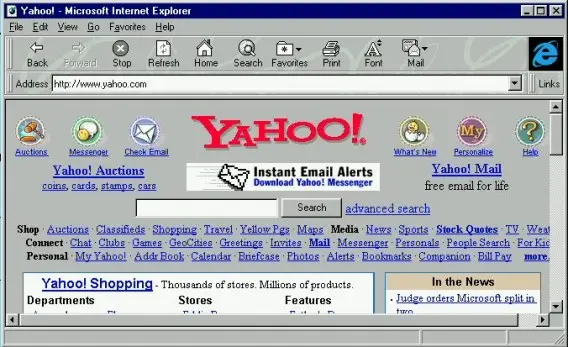
But Netscape realized that Java wasn't a suitable language for in-browser use. Netscape thought of JavaScript at the beginning, as a lightweight Java.
JavaScript was initially inspired by Java, but in fact only some naming conventions remained the same. We highly recommend not even trying to look for similarities - this is actually a bad way to start learning JavaScript! We'd rather just say that the only real commonality between these two languages is their names. If you are coming to this course from Java, leave the Java thinking behind!
JavaScript quickly became a success following its first appearance in Netscape Navigator 2 in March 1996, and it was quickly integrated into other popular browsers. Microsoft also created its own version named JScript (and shipped it with Internet Explorer 3 in 1996 -- It was a dud).

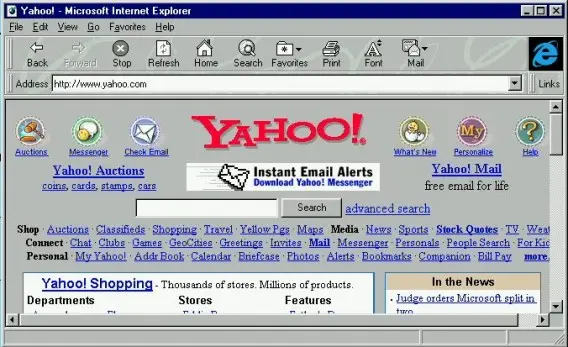

Towards the end of 1996, JavaScript was standardized by ECMA as the EcmaScript standard. So no matter whether you see it called JavaScript or EcmaScript, don't worry, it's the same thing. EcmaScript has continued to be released right up to the present day. MS still didn't play ball.
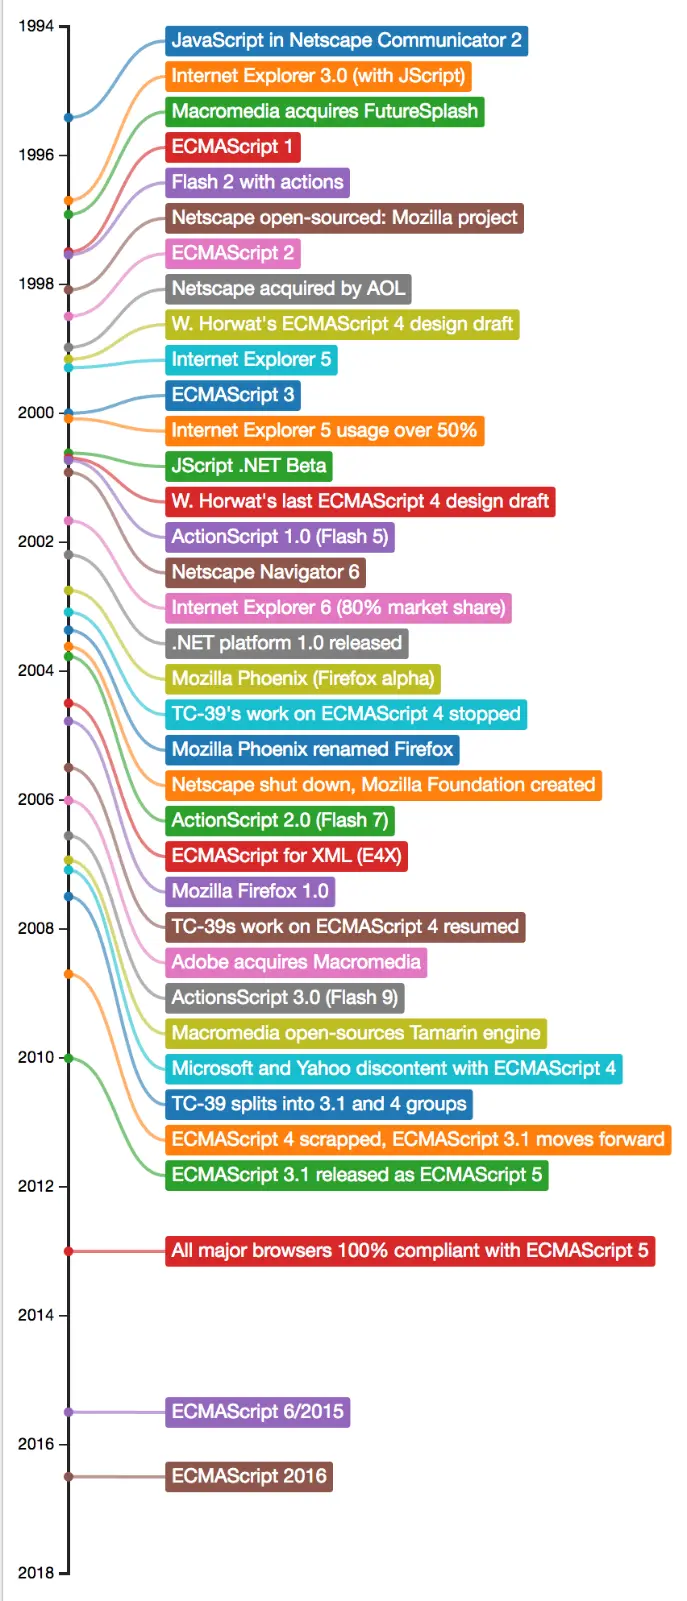
The present: what is the current version?
What about ES6/ES2015/ES2016/ES2017/ ES2018/ES2019/ES2020/ES2021/ES2022?
Are these the new names of JavaScript?
Since 1996, multiple versions of JavaScript have appeared. For a long
time, the stable version supported by all major browsers deployed on
computers and smartphones was EcmaScript version 5 from 2010, but in
2015, a new version known first as EcmaScript 6 or ES 2015 came out with
lots of new features (classes, etc.). Since then, every year a new
version is published, with some adjustments/novelties. The latest
official version is ES2021.
Back in 2015, ES2015 was a pseudonym for the 6th version of the
JavaScript programming language to be approved by ECMA International,
the standards group responsible for vetting and approving different
versions of the language. In June 2015, ECMA International approved the
6th edition of the language. The name, ES2015, was used because the
latest version of JavaScript is identified as the 2015 version of
ECMAScript (the alternative name for JavaScript).
Read this blog post about all these naming incongruities!
At the beginning, ES2015 was referred to as ES6 and before that,
Harmony. Moving forward, ES suffixed with the year of the latest
approved standard is the naming convention. The next version was
called… ES2016, etc.!
Browser vendors do not wait that ECMA standardizes a version as they start implementing it during the standardization process, which can take months or years (they also contribute to the standardization process all along its life cycle).
The new open development process adopted by the ECMA TC39 committee decided that every year, a new version will occur. This annual publication rate has been effective since 2015.
The current edition of the ECMA-262 standard is the 13th edition, published in June 2022 and is known as ES2022.
Beware: even on recent Web browsers the whole supported feature sets of the latest versions are generally not completely implemented, as it takes time for browser vendors to follow the standards!
There is no easy-to-read table of current browser global support, but caniuse.com can be used to check feature by feature which browsers support them. For example, this link shows the support for the new "javascript private class fields" feature.
Up to date browsers usually support more than 90% of the features from the version corresponding to the previous year. For example, in 2020, there is good support for ES2019, while certain features from ES2020 won't be implemented before some months.
First of all, this is an introductory course! Not all features of JavaScript need to be covered, in particular the ones that you cannot run in your browser without using advanced tools (there are tools, such as Babel, that can turn ESxxxx source code into ES5 code that can be run in nearly any browser, but they are tricky to use and not for beginners).
We will cover all the important features of the last version that are relevant for an intro course.
JavaScript is the only programming language you can run in your browser. Without JavaScript there would be no games, no fancy dynamic HTML forms, no interactive maps, no Gmail, no YouTube, no Twitch TV, no Netflix….
JavaScript is integrated into nearly every popular Web browser and is probably the most frequently used language in the world. More than 90% of Web documents now use JavaScript too.
Every computer, smartphone, and tablet uses JavaScript many times a day within the browser and even as native code! Indeed, some applications are compiled from their JavaScript/HTML/CSS version into "classic" applications that can be run without a browser. This compilation step can give an extra performance boost, the NetFlix application, or Office 365 are such applications.
In the beginning, JavaScript was invented to work not only on the client side (in Web browsers) but also on the server side (on the Netscape HTTP Web server back in 1995).
In recent years this trend has returned, thanks to the appearance of the Node.js server/JavaScript interpreter. It's common to see JavaScript applications running on a remote Web server. Mastering JavaScript basics is highly recommended before trying to learn JavaScript server-side programming.
JavaScript is an interpreted (or just-in-time compiled) language, which means that the code is converted into a machine language at, or just before, runtime. The most popular JavaScript engines are:
Here is the discussion forum for this part of the course. Please either post your comments/observations/questions or share your creations.
What it the best method for learning Web Development?
Take a look at one of my websites; 'Web Programming with JavaScript and Python'.
Now, what it the best method for learning JavaScript?
When you are a complete beginner, I will recommend to look at examples, tweak them, change small things, try to understand what the syntax looks like. Even without deep explanations, without reading a book, or studying in details the different concepts of language, you can learn a lot.
To learn everything, a great start is W3Cx. Google it.
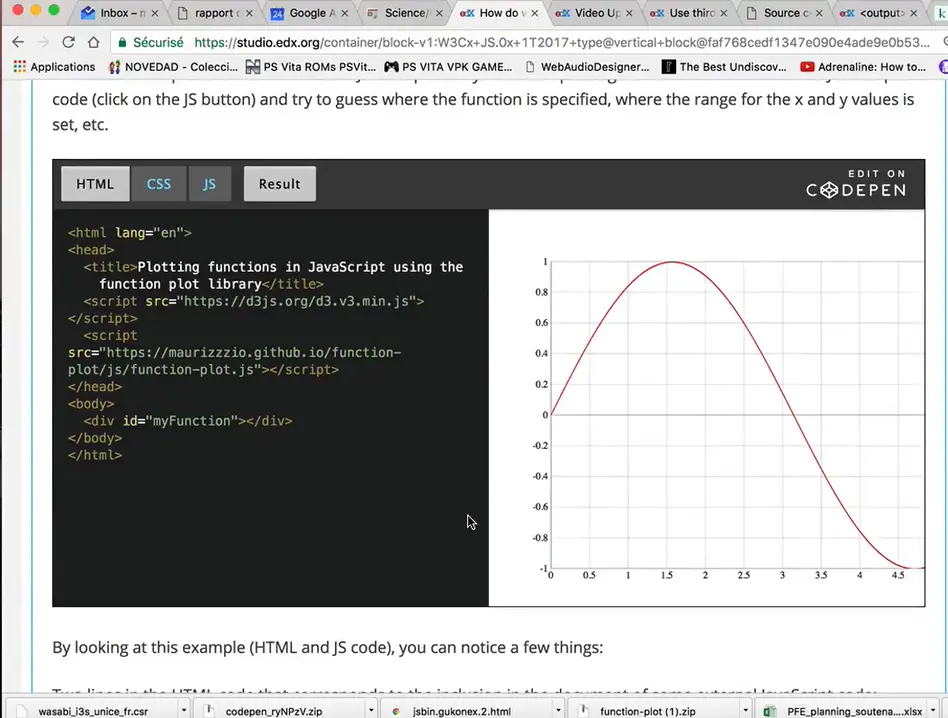
In this section, I propose that you look at a small example without understanding the details, and try to tweak it.
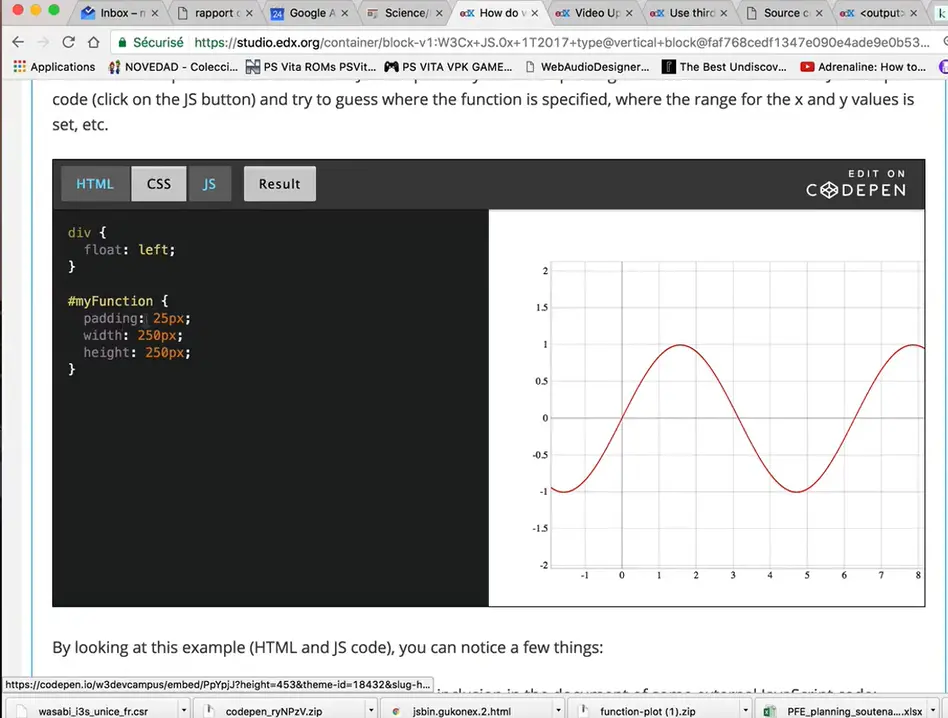
Here is the example we provide. It's just an example that draws, that plots, a mathematical function. You can use the mouse wheel to zoom in, zoom out, and you can look at the HTML code.

There is only very few CSS and very few lines of JavaScript. How can we do the such a complex result? Complex thing drawing the grid with axes, with labels, with a curve, and interact with the mouse.
With only 10 lines of code: it's because we are using what we call an external JavaScript library. Actually, we are using 2 of them here. Because, this one: the "function-plot" JavaScript library, is using internally another one you must include also in the document.
What I propose is that we will start looking at this example. The best way is to click on "Edit on CodePen" label here, it will open the code in the CodePen.io online editor. And… just look at the HTML part here.

Okay, we can just look at the HTML part and zoom in a little bit. What do we see? We can see that it uses 2 libraries here between <script> and </script> elements. This is how we can insert in the document an external JavaScript file. In that case, it's a remote JavaScript file because we are downloading it using http. It uses this "d3js" JavaScript library that is located at "d3js.org".

You can open this in another tab and you will see the documentation and the Web site, the homepage of the Web site, for the "d3js" library. By the way "d3js"is one of the most popular JavaScript libraries for visualizing data.
Let's go back to our example, so you can just tweak the different elements.
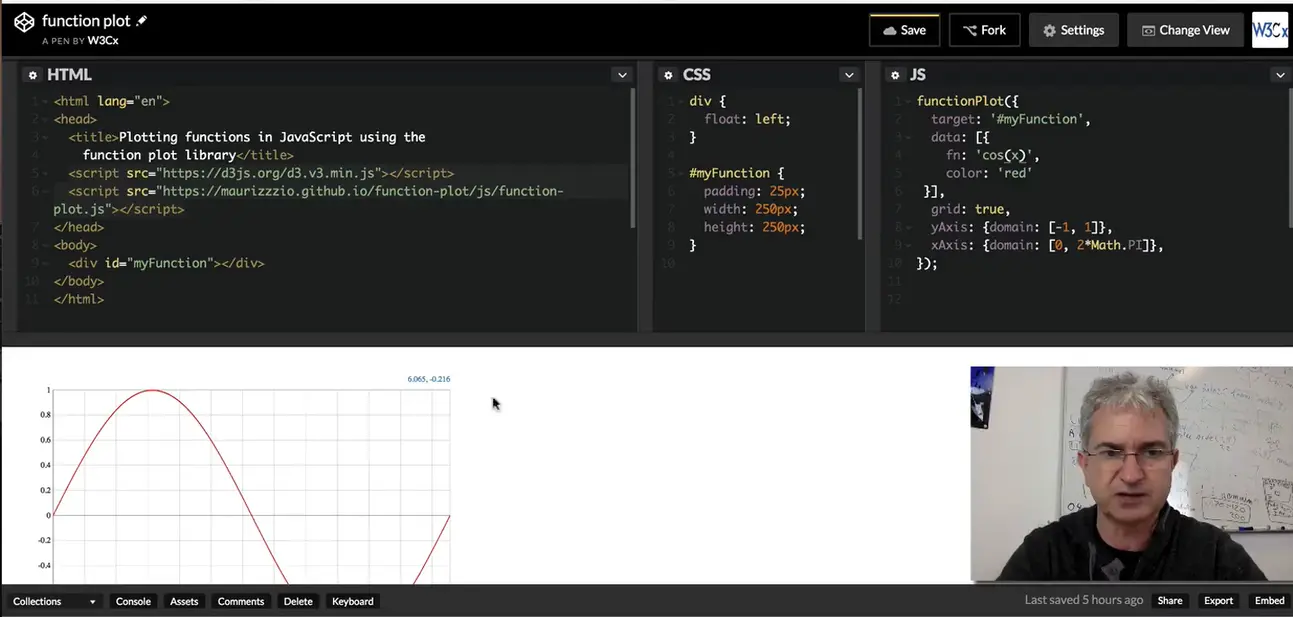
If I want to plot a cosine instead of a sine, I don't need to understand the whole syntax here, but I guess that by just typing "cos" here, it will do something.
And indeed, I have just drawn a cosine. If I change this from red to "green", it changes the color. If I change the grid, that is by default "true", if I say "false", I don't have a grid anymore. Okay let's put it back. And I've got some "xAxis" domain: "-1, +1". If I change that for "-10, +10", I can see the result. It's more interesting, if you change this for the x values… instead of going from PI to 2 PI.
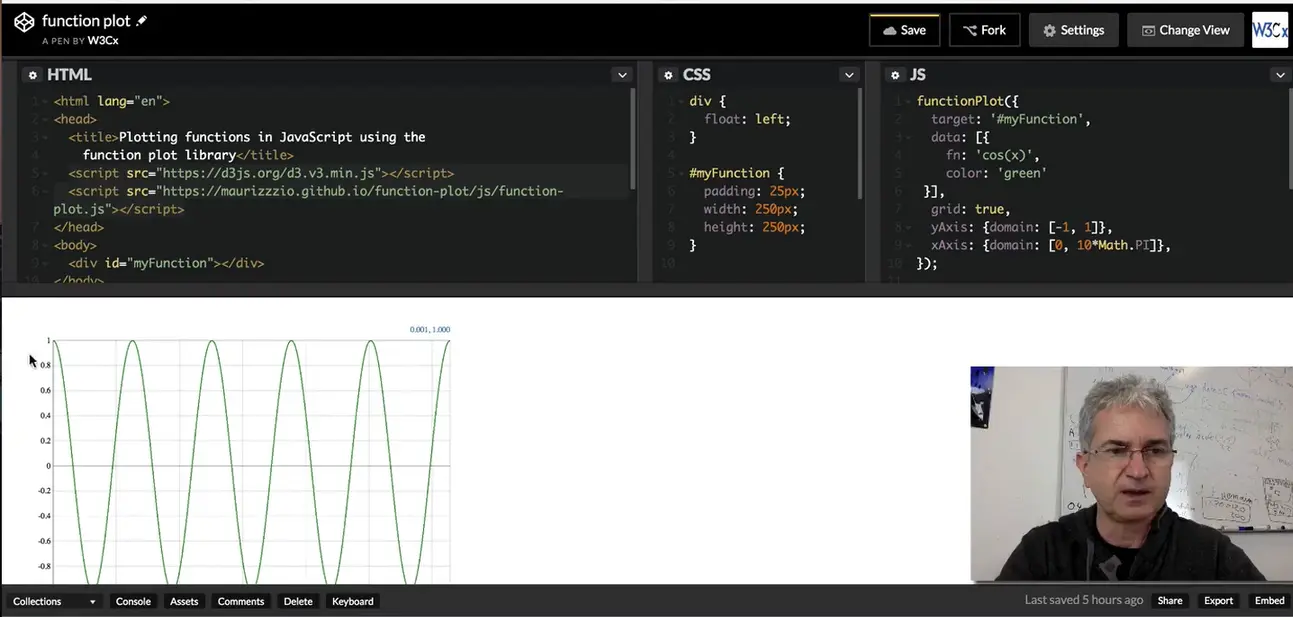
I went from 0 to 10 PI. I can see the result here, and so on… Now that you tweak the example, you can try to understand what is going on. Okay, this thing is a name followed by a parenthesis. An open parenthesis with a closing parenthesis. It's a function call. When you've got something like that, in JavaScript, function parenthesis with something in the middle, it's called a "function call".
We're going to call a function, that, in this case, we haven't written, so it's coming from one of the external libraries. In that case, it's the "function-plot" library. What is inside? There are the parameters.

And I can use an external name. I can declare that, here, it's equivalent. You see that it works the same here, but I've just separated the two things. If I put directly this thing inside here, like it was before, it still works. Okay, so what is this syntax? In JavaScript, when you've got braces like that, opening braces and closing braces, it's called an object.
And inside an object, you've got properties and values. The properties have names: target, data, function, color, grid. And the values are after a column characters. The target is my function. The data is this thing. The grid is true, and so on…
You separate the different properties of the object using a comma and sometimes, you can have some properties that in turn, have a value that is an object. The xAxis property is equal to an object that has a property domain, that has for values: "-1, 1".
And when you've got brackets, opening and closing brackets, it's like that… That will define arrays of things in JavaScript. And an array of things is a list of enumerable elements. In that case, the domain has two elements: the minimum value and the maximum value.
And here you can see that the data that is plotted, the cosine function, is also an array. If I use the comma and I introduce a second element here. For example, the sine function, and if I change the color, let's make it pink…
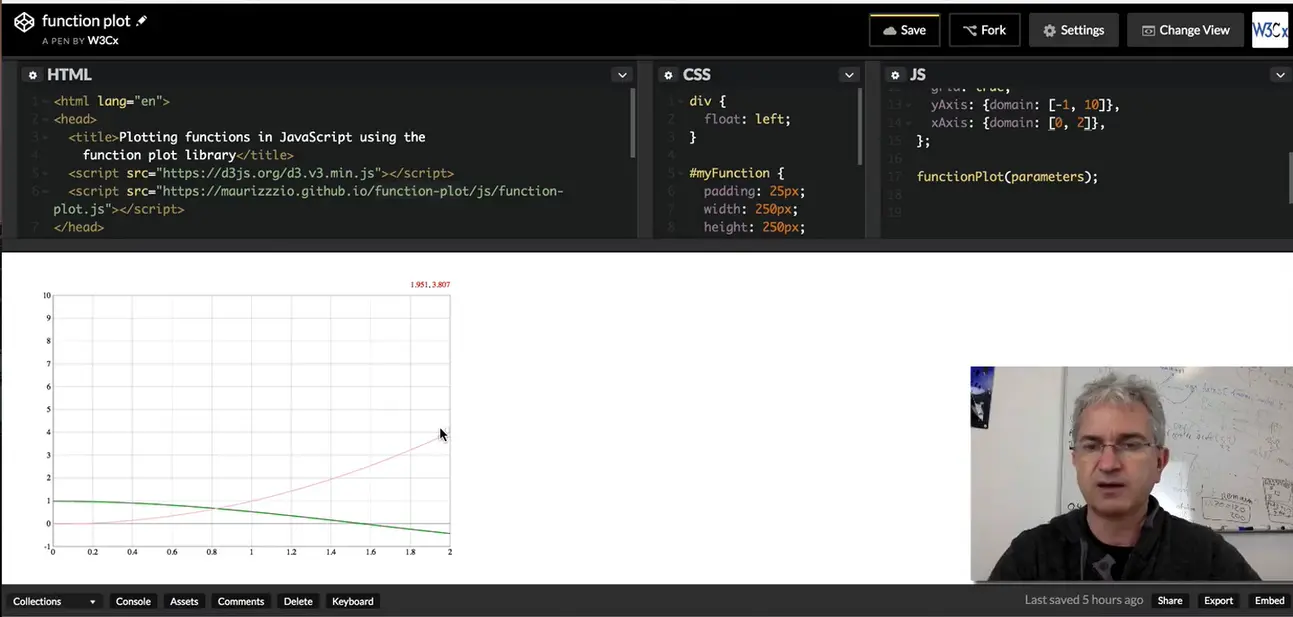
Look at the result: I've got 2 different functions that have been plotted in my graph. I can, instead of using this, I can maybe plot x2 (x square 2), like this, okay. It should work. Ok, we can see a little bit of it here.
Maybe we will change the domain, so instead of stopping at 1, we go to 10. And if we look at the values, we see the x square function that is a bit better, and if we just plot it for x=0 to x=2… …In that case, I've got another scale for looking at the functions.
In this first example, you saw how to use an external library, what is the syntax to call a function, and how we can define objects in JavaScript by using a set of properties and values, separated by a comma. And we also had a first encounter with what we call arrays, that are elements separated by commas inside brackets.
Well, there is no definitive answer to this question, but I'd recommend firstly looking at small examples, tweaking them and trying to guess what they do. You will rapidly discover that you can learn a lot just by modifying a few lines of JavaScript code, even if you do not understand the whole thing.
During module 1, we give you some basics:
During the course, we provide extra "reference pages" that detail some important parts of the language. For example, in a later section, we explain the concepts of "variables", "values", "operators", "output", etc.
Here is an example that uses an external JavaScript library useful for plotting math functions. Look at the JavaScript code (click on the JS button) and try to guess where the function is specified, where the range for the x and y values is set, etc. Notice that you can use your mouse wheel to zoom in/out the function plot.
By looking at this example (HTML and JS code), you note a few things:
Two lines in the HTML code that correspond to the inclusion in the document of some external JavaScript code:
<script src="https://d3js.org/d3.v3.min.js"></script>
<script src="https://mauriciopoppe.github.io/function-plot/js/function-plot.js"></script>
We will examine this soon in a later section of the course, but, in brief, it means that we will use the d3js plotting library and another from github (a famous repository for open source contributions), and located in the github account of a person named "mauriciopoppe", the repository is named "functionPlot" ( "functionPlot JavaScript library").
Then, looking at the JavaScript code of the example (click the JS button on the CodePen example), we see:
functionPlot({
  target: '#myFunction',
  data: [{<
    fn: 'sin(x)',
    color: 'red'
  }],
  grid: true,
    yAxis:{domain: [-1, 1]},
    xAxis:{domain: [0, 2*Math.PI]}
});
Ok, the syntax looks strange if you are not used to JavaScript, but I bet that you guessed that the function plotted is "sin(x)", that the color of the curve is "red", that the range of the x values is [0, 2*PI], and the range of the y values is [-1, 1].
You can think of this code in this way:
functionPlot(…);
Where the "…" corresponds to some sort of parameter. When you see a name followed by two parentheses (maybe with something in between) followed by a ";", this is "a function call".
A function is a piece of code defined somewhere else, that can accept parameters (the "thing" between the parentheses), and that will do something. In our case the function's name is "functionPlot" and we can assume (or we read the documentation of the library) that the goal of this function is to plot a mathematical function, as its name tells us.
The "thing" between parentheses is what we call "the parameters of the function": the data we pass to the function so that it can plot different math functions, with different colors, with different ranges for the x and y values, with or without a grid, etc.
Let's have a look at the parameters we used in our example (the ones you tweaked). They are in bold in the source code we saw earlier:
{
  target: '#myFunction',
  data: [{
    fn: 'sin(x)',
    color: 'red'
  }],
  grid: true,
  yAxis: {
    domain: [-1, 1]
  },
  xAxis: {
    domain: [0, 2*Math.PI]
  }
}
In JavaScript you can have simple values like: 2, 5, "hello", "3.14", and you may also encounter more "structured" values that we call "objects". In Module 3 we will address JavaScript objects, but for the moment we will just present them through examples, without too much detail.
A JavaScript object can be defined by two braces with a set of properties/values inside, separated by a comma. Here is a simple object:
{
  givenName: "Michel",
  familyName: "Buffa"
}
We use the ":" separator between the property name and its value. We use a comma between two properties, and we omit the comma after the last property (or before the ending brace).
In our examples, the properties of the object that is passed as a parameter to the functionPlot(…) call are in bold.
Notice that after each property (color, grid, etc.) there is a ",". Notice that between the name of the properties and the value there is a ":", etc…
If we look at the values of the xAxis and yAxis properties, they are also objects.
xAxis: {
  domain: [0, 2*Math.PI]
}
The data object is even more complicated:
data: [{
  fn: 'sin(x)',
  color: 'red'
}],
Instead of containing another object like xAxis or yAxis, it contains another sort of object, but inside brackets! In JavaScript, brackets are used to create arrays of "things" (multiple, enumerable things). In this example, the array contains one single object that has two properties:
In arrays, the different elements are separated by commas. Let's try to plot an additional function in our example. We will add f(x) = cos(x) to our example, with a different color:
data: [
  {
    fn: 'sin(x)',  // First function
    color: 'red'
  },
  {
    fn: 'cos(x)',  // Second function
    color: 'blue'
  }
]
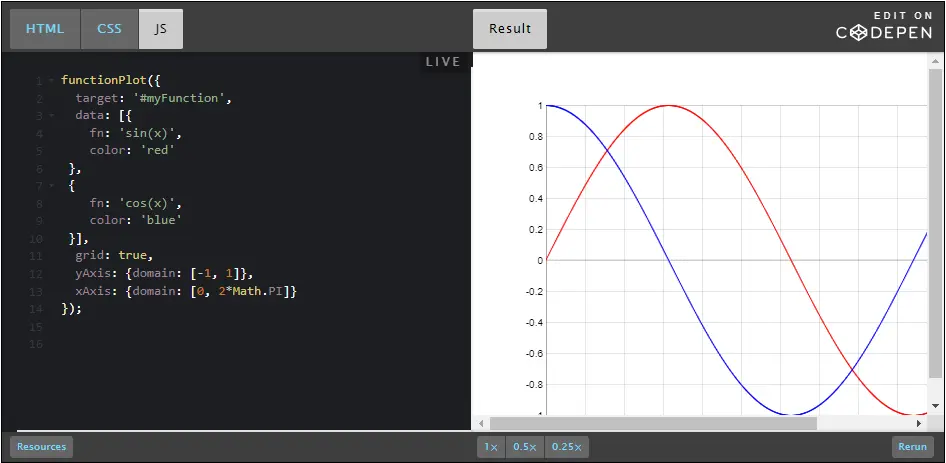
Just by looking at one example, and without going into the boring details, you saw:
Live coding transcript what can be done with JavaScript.
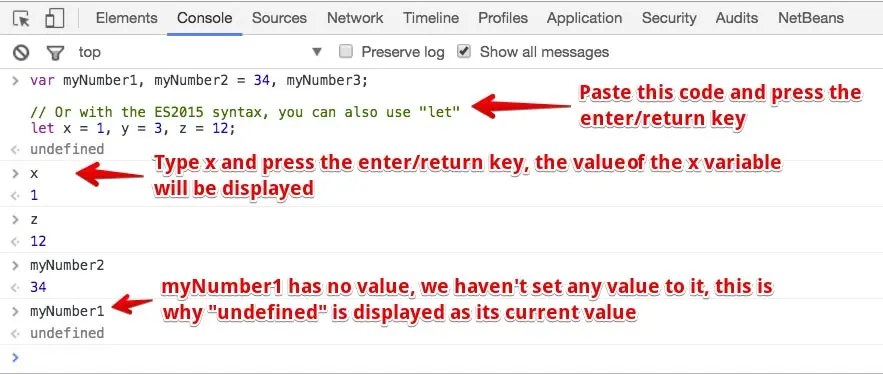
Hello! What can be done with JavaScript? Let me show you some examples that are the most common ones.
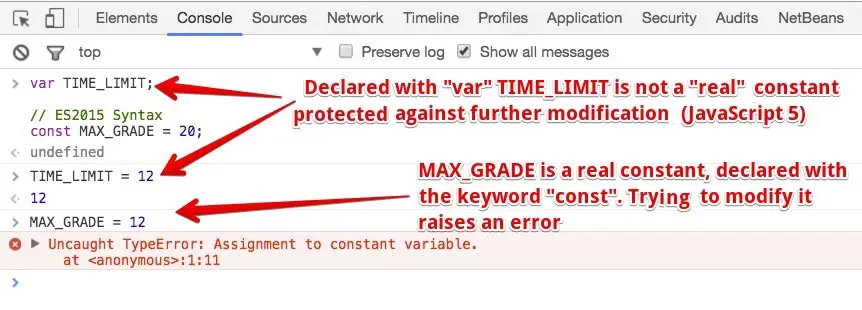
First, you can change dynamically the content of a Web page.

Here I've got a Web page, I click on the button and I change the content of the page.
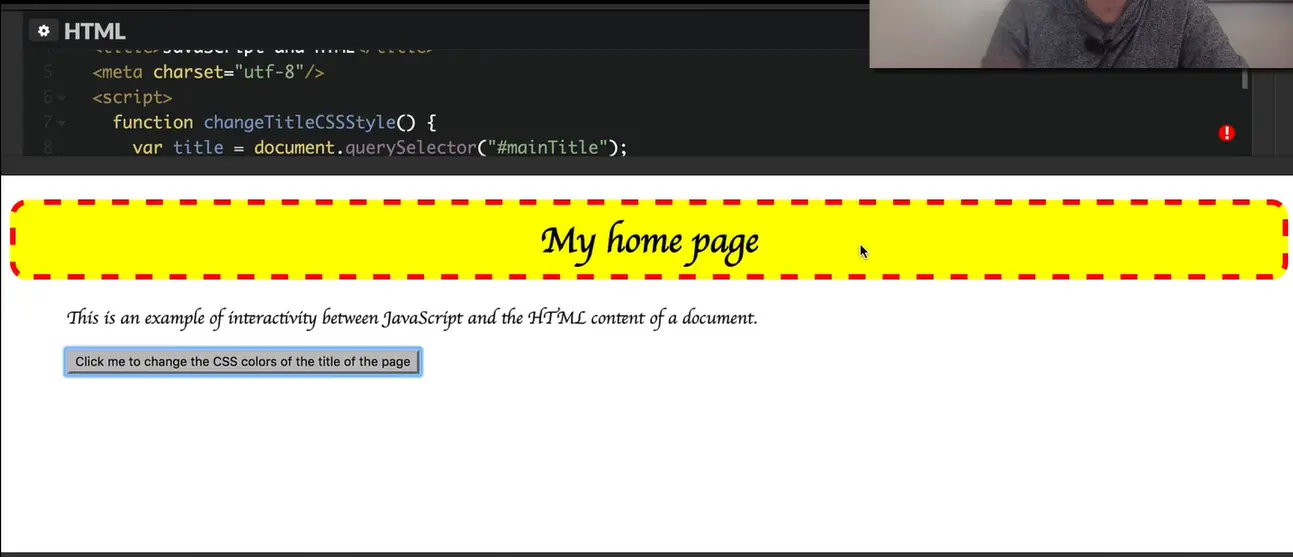
Another thing we can do is to change dynamically the CSS style of some part of the document. I click on the button and I change the style of the title.
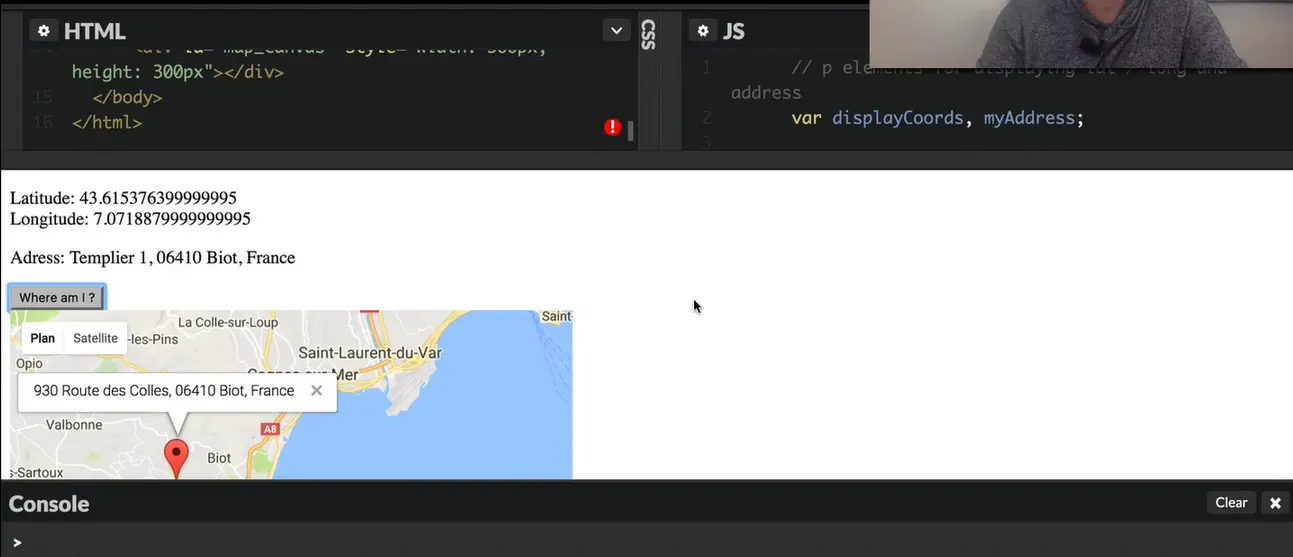
You can also use, from your JavaScript code, different objects, methods and functions that are defined in your browser, in what we called standard HTML or standard JavaScript APIs. HTML5 comes with many of these APIs for the geolocation, for animation, for making music, and so on. In this example, we use the standard W3C geolocation API that comes with HTML5. You can get from your browser, your current latitude and longitude.
And here, we also use the Google Map APIs; we pass it the longitude and latitude and it displays the map centered on the current position and also displays the surface address. Here we go. I'm located near Antibes in the south of France.
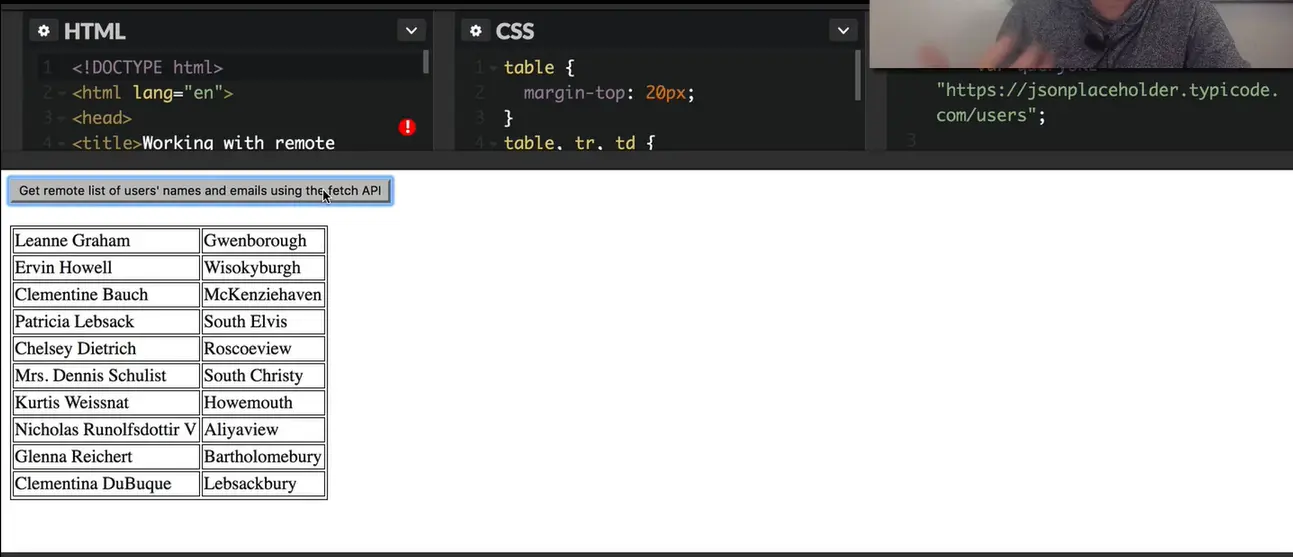
You can also work with remote data. So in this code, I'm just sending what we call an Ajax request to a remote server to get a list of users... and once I get this list of users, I just use the HTML table JavaScript API for building dynamically tables. And I use this API to display the data that just came from a remote server.
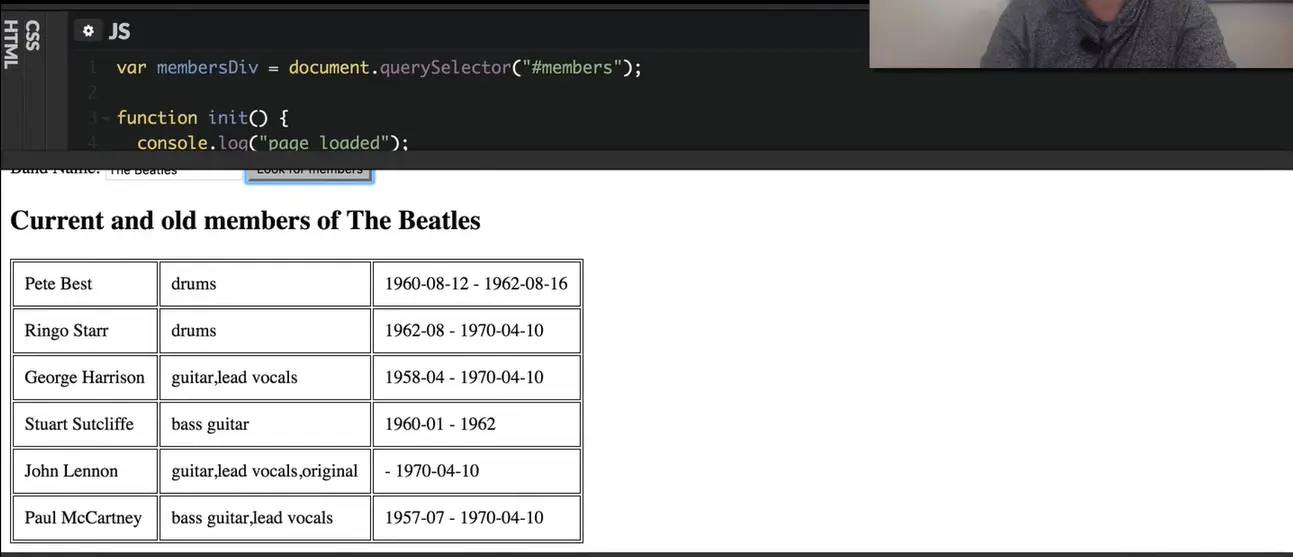
There is another example, that uses another database, another online database, for getting the members of a rock band. So, I type "The Beatles". I got from the remote server the list of the members of The Beatles. So, these were the most typical uses of JavaScript Web sites.
We have already seen three examples in previous parts of this week's course material.

This first example used the selector API for selecting a particular element in the document (the main title) and the DOM API for modifying its content.
An API is an application programming interface. In the case of JavaScript, the DOM API is implemented natively by the browser, and you can call several functions/methods or access properties of the DOM: an object that represents the document (the Web page).
It uses the selector API to target a particular part of the DOM (in our case, the main title of the page), the HTML element with an id attribute equal to "mainTitle". The selector API uses the same syntax as CSS to select elements in the document. In our case, "#mainTitle" is a selector value that means "the element whose id is equal to mainTitle".
var title = document.querySelector("#mainTitle");
It uses the DOM API to change the HTML content of the selected element:
title.innerHTML = "This new title has been changed from JavaScript!";
It listens to click events in order to call the changeTitle() function when we click on the button:
<button onclick="changeTitle();">Click me to change the
    title of the page</button>
And it executes the whole action (changing the title text) in a function (a block of code that is executed only when we call it by adding a parenthesis after its name, followed by a semi colon):
function changeTitle() {
  var title = document.querySelector("#mainTitle");
  title.innerHTML = "This new title has been changed from JavaScript!";
}

The second example is nearly the same except that we changed the name of the function, and instead of using the DOM API to update the text content of the main title, we use its style property to change its look and feel. Using the style property is a way of altering the CSS property values of this HTML element.
function changeTitleCSSStyle() {
  var title = document.querySelector("#mainTitle");
  title.style.color = 'black';
  title.style.backgroundColor = "yellow";
  title.style.border = "5px dashed red";
}
title is in reality what we call "an object" and style is a property of the title object. The style is an object as well and has attributes that correspond to the different CSS properties we set. For example, style.color returns the color that element has set on it. By calling title.style.color = "yellow"; you can apply the style change dynamically.
Some of you may be wondering what happens when the CSS property being set has a hyphen. The syntax has to be different here, because, for example, if you write title.style.background-color, JavaScript will try to subtract color from the title.style.background notation, which is not what you want to happen. To stop this problem from occurring, all the CSS properties are written out in CamelCase: the CSS name background-color becomes backgroundColor, text-size becomes textSize, border-color becomes borderColor etc.
Don't worry, we will return to this later in this course, these first examples are just here as an introduction.
The third example (outlined in the previous section), which showed how to plot math functions, illustrated that with a few lines of code you can reuse code from others (a third party JavaScript library).
Your browser comes with a lot of different "libraries" that are called "standards APIs" for "application programming interfaces". Such APIs are "W3C standards" and are present in all Web browsers that follow the Web Standards. You will have APIs for manipulating multimedia (audio and video), geolocation (getting the longitude and latitude), orientation (on mobile devices), accessing the webcam or the microphone, etc. In a later section we will provide a set of examples that use some of the most useful APIs provided by your Web browser.
Example of an HTML page that embeds an interactive OpenStreet Map (you need to click the CodePen logo on top right to run this example. For security reasons it cannot be run inside this course page).

You can also download or upload data from your browser to a remote Web server. When this is done from JavaScript the popular term to describe such operations is "AjaX" (Asynchronous JAvascript and Xml), even though XML is not used in any examples you'll see in this course (XML is a language for describing structured data that was very popular a few years ago).
Here is an example that will display the current and past members of famous rock bands:
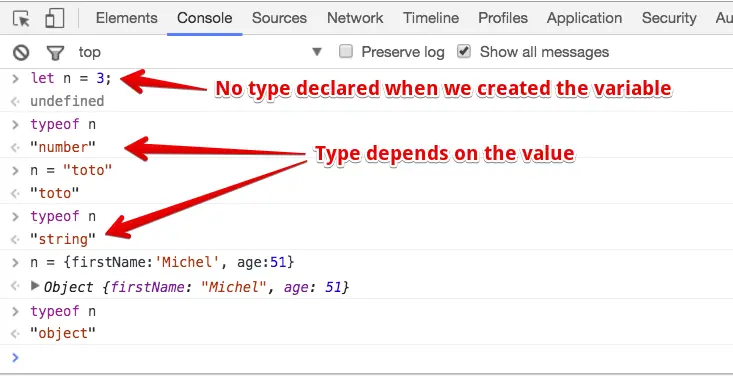
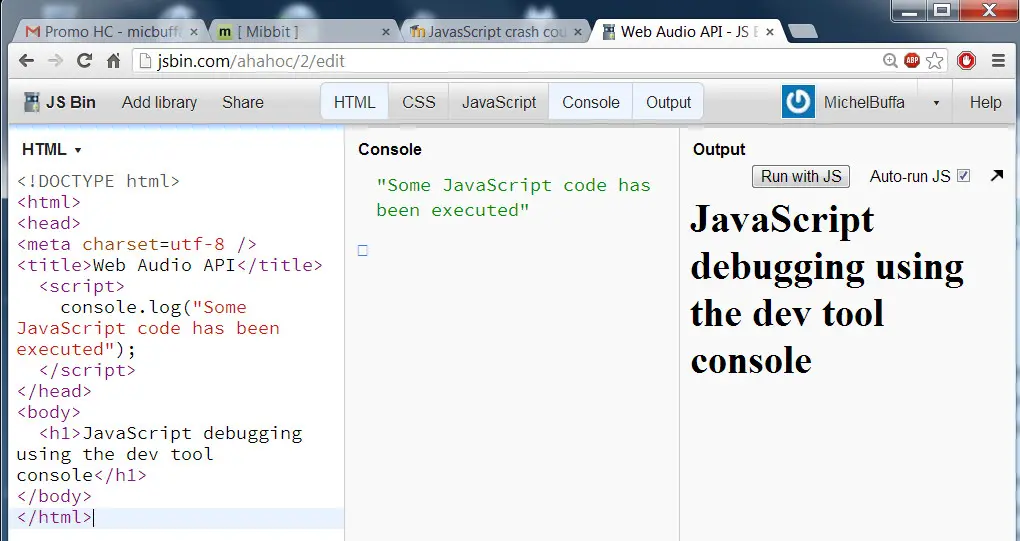
Welcome!
In this lesson, we will just look at the different locations where we can put
JavaScript code. The first place where you can put JavaScript code is inside an
HTML document, using the <script> and </script> tags.
We've prepared an example, it's called the "Example 1" in the page, that shows how we can display the value of a variable. A variable is a location in the memory of the computer where we are going to store some values. And the variable has a name and it's declared using the "var" keyword. There are others possibilities we will see later.
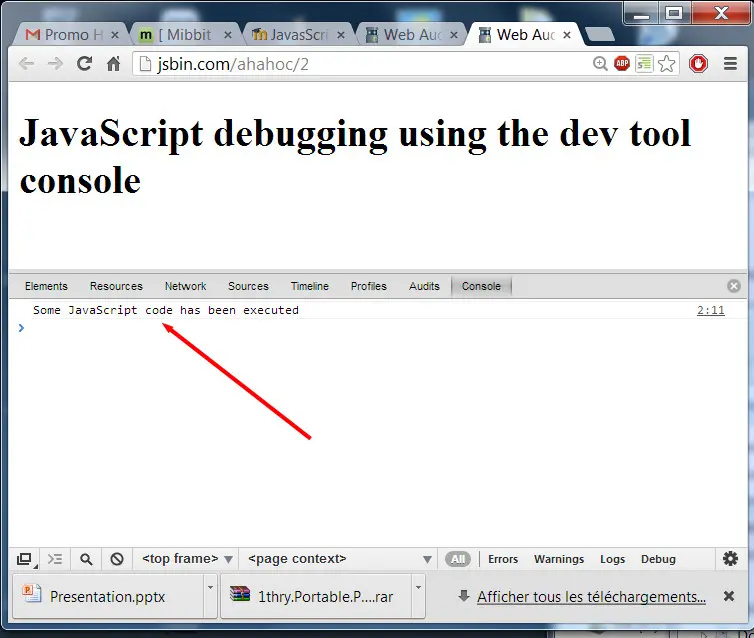
Here we've got the variable called "x" that has the value of 2. And, we use some strange instruction "document.body.innerHTML" for adding to the body of the document some HTML code. "document.body" corresponds in JavaScript to the body element of the document, and the "innerHTML" property corresponds to its HTML content. By doing this, we are adding a bold element JavaScript code executing the value of the variable x=2 and we display the value of the x variable in bold.

This is the result of the execution of this code. And this code is not in a function, so it's executed as soon as the page is rendered. When the browser receives this document, it will first display the "h1" then display this paragraph, then executes this code. It will define the variable x, assign the value "2" to it, and then add this string, with the value of "x" inside, to the body of the document.
And finally, we display in the dev tool console: "console.log("JavaScript code executed")". We can open it by clicking on the console button in CodePen, or we can also open the devtools using the "F12" key or "ctrl+alt+i" or "cmd+alt+i" on a Mac. And you see that the "console.log" message has been displayed in the devtool console of your browser.
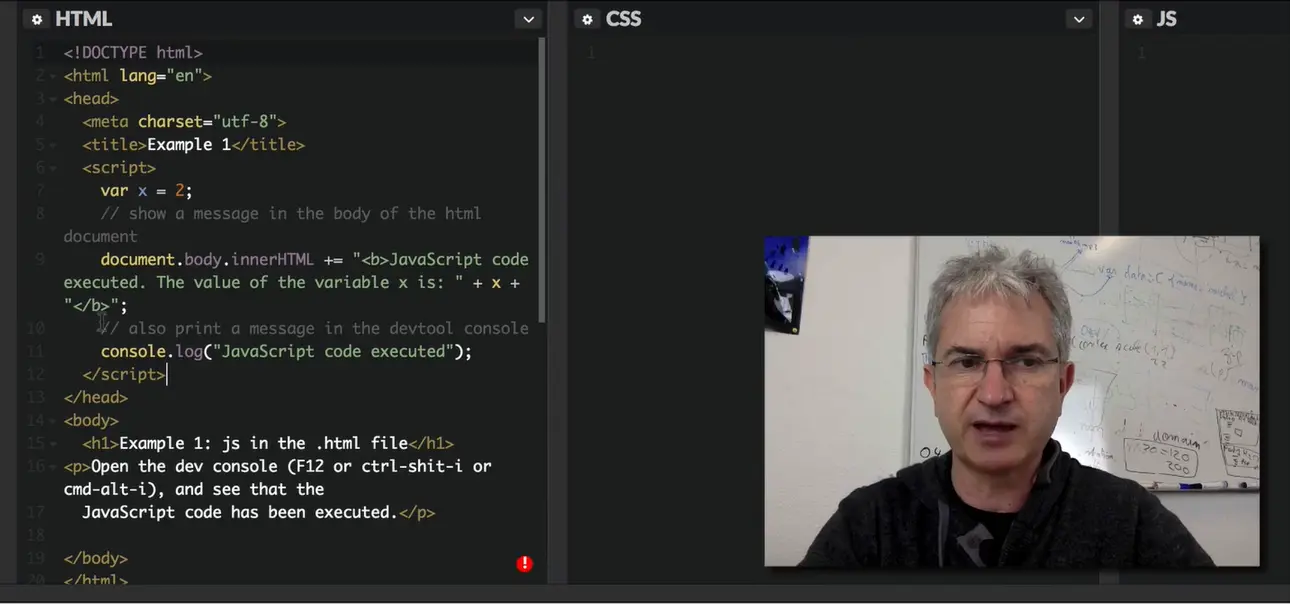
Here, notice that we use the "script" element directly into the body of the document. Another possibility is to a put this code in the head of the document. It's also common practice because it separates clearly the JavaScript code from the HTML body of the document. In that case, the result is the same, except that the JavaScript code is displayed before the rest of the page.
Here we defined the variable x, we added it to the body of the document, and later on we display the body, where the browser renders the body of the document. Okay, what is better? It depends on your application. For the moment, just stay with knowing that you can put scripts in the body or in the head of a document.
Another possibility is to use an external JavaScript file. In that case, the same way we showed you how to use an external file for storing the CSS code, we can use the "script" tag with the "src" attribute to include in the HTML document an external JavaScript file.
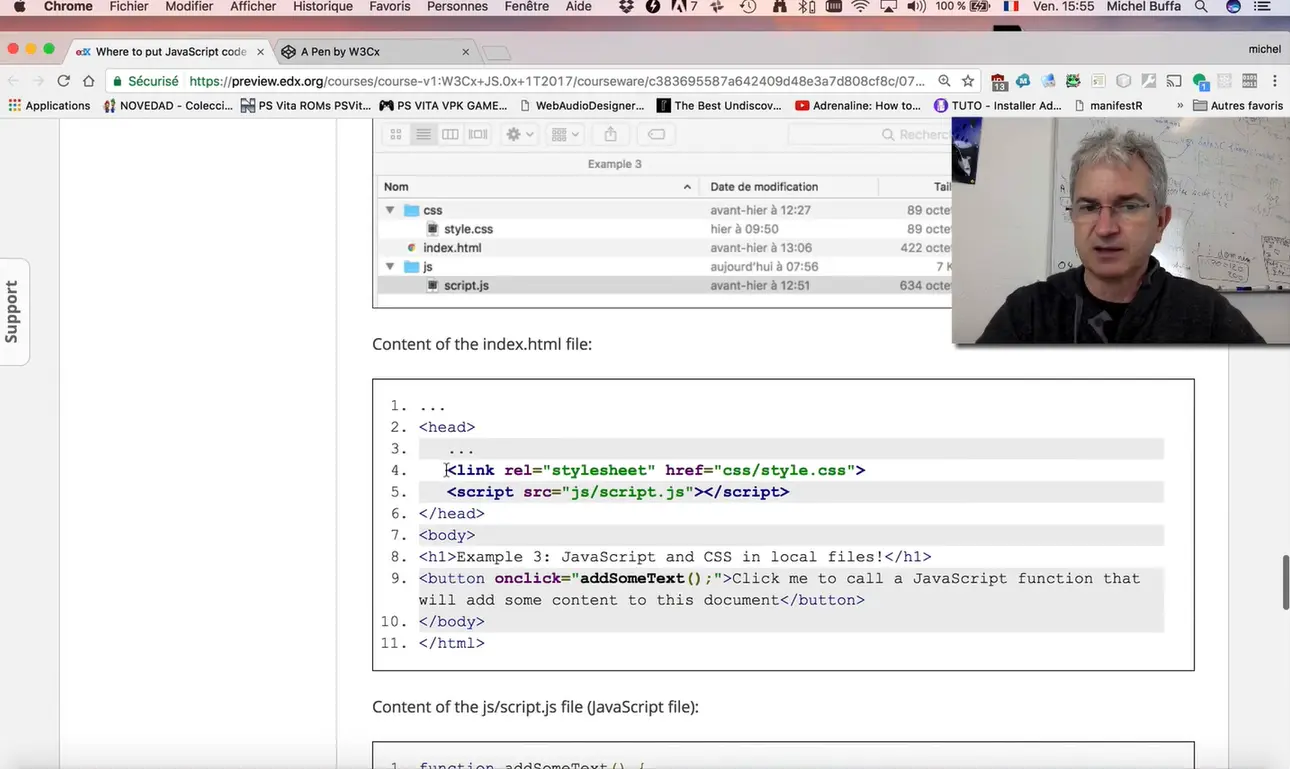
Notice than we can include more than one JavaScript file if we like, like this. In that example, we are including 3 different JavaScript files sequentially.
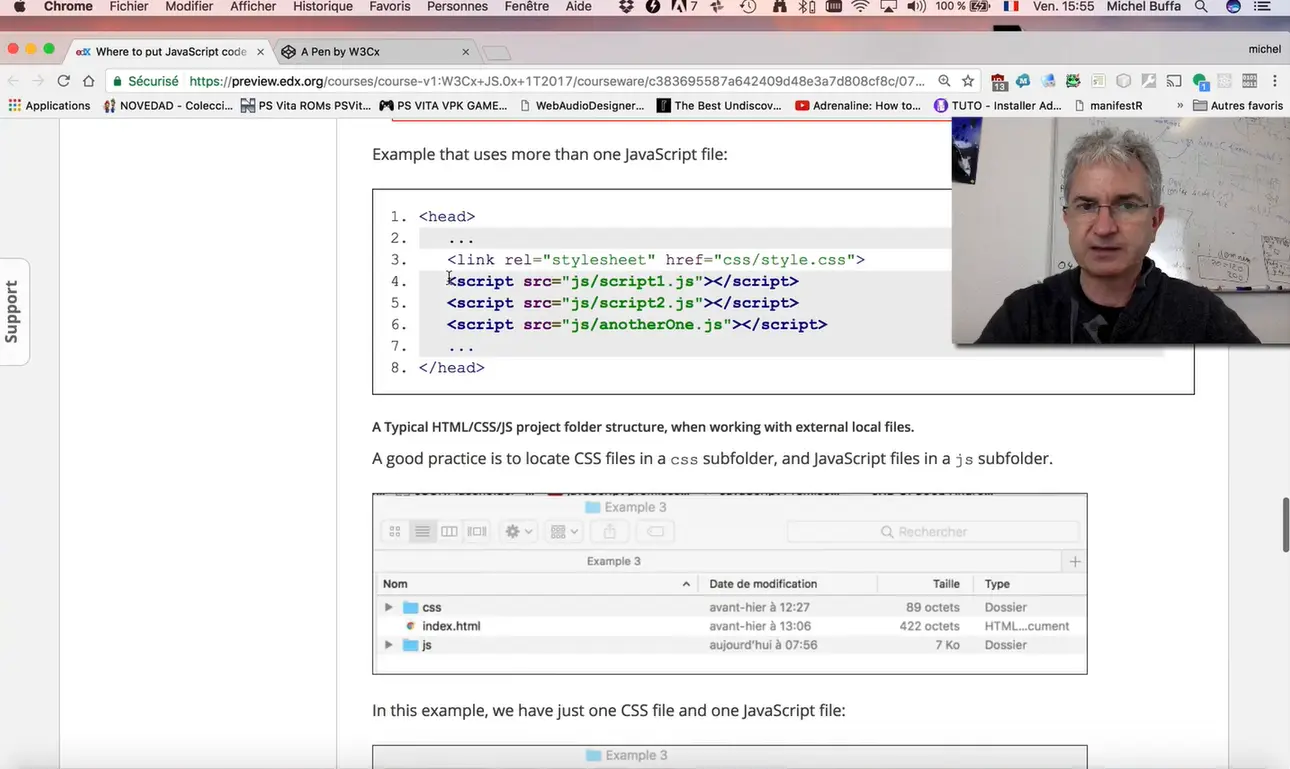
I prepared for you an example you can download - it's called "Example_3.zip". I click on it, download it, unpack it, and inside this element, I've got an HTML file. And I open it with my Sublime Text editor.
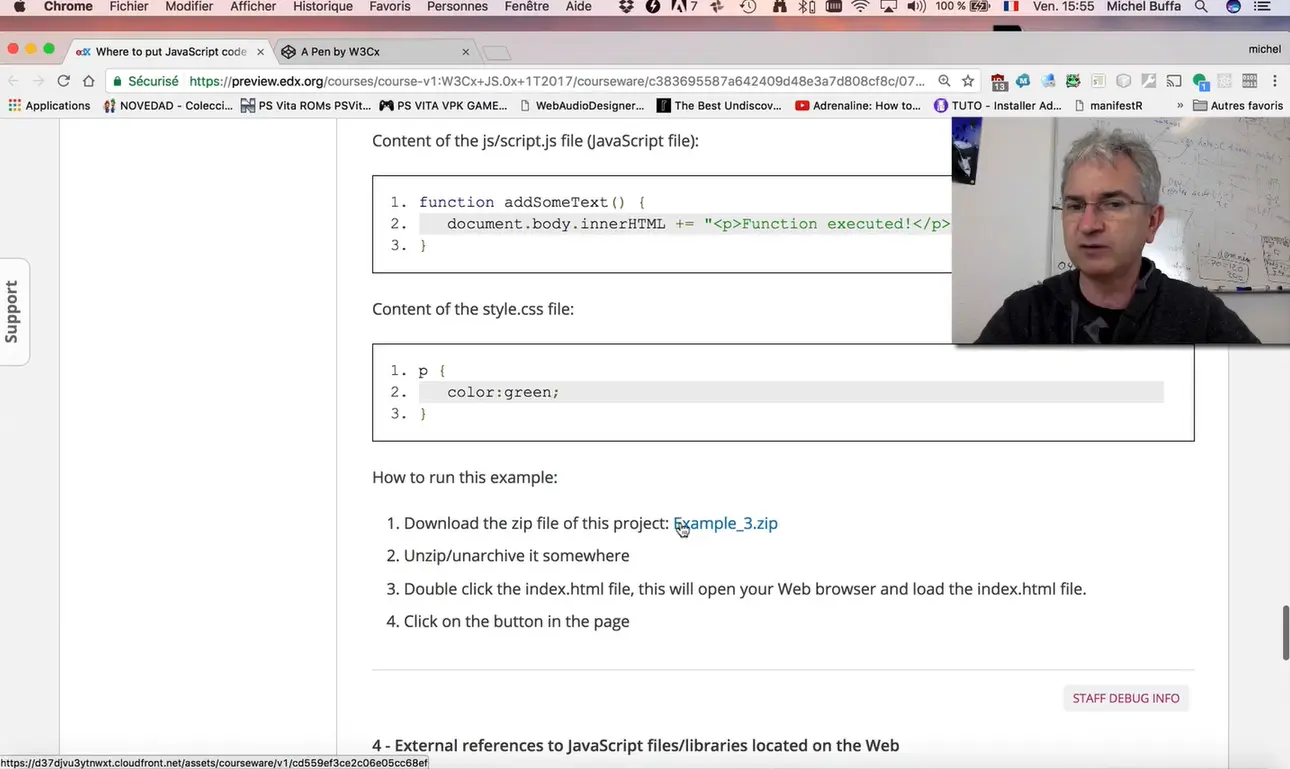
And what I've got here, is that you can see in the HTML header in that case but you can also put this in the body if you like, we included a "script.js" file located under the "js" directory.
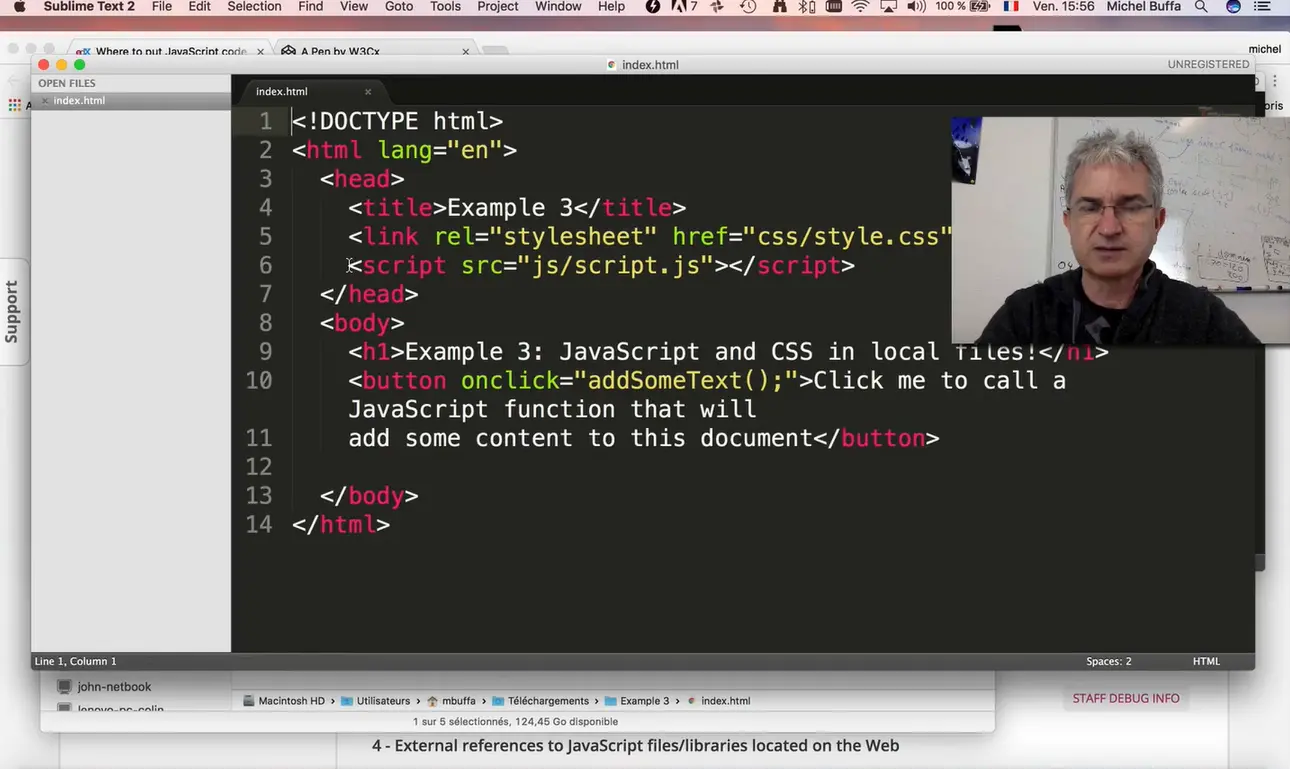
I can also open this file. I can see that I display the message called "Function executed" and a function "addSomeText" directly in the script. When is this executed? It's executed when we click on a button. Let's have the button "onclick" call the function "addSomeText".
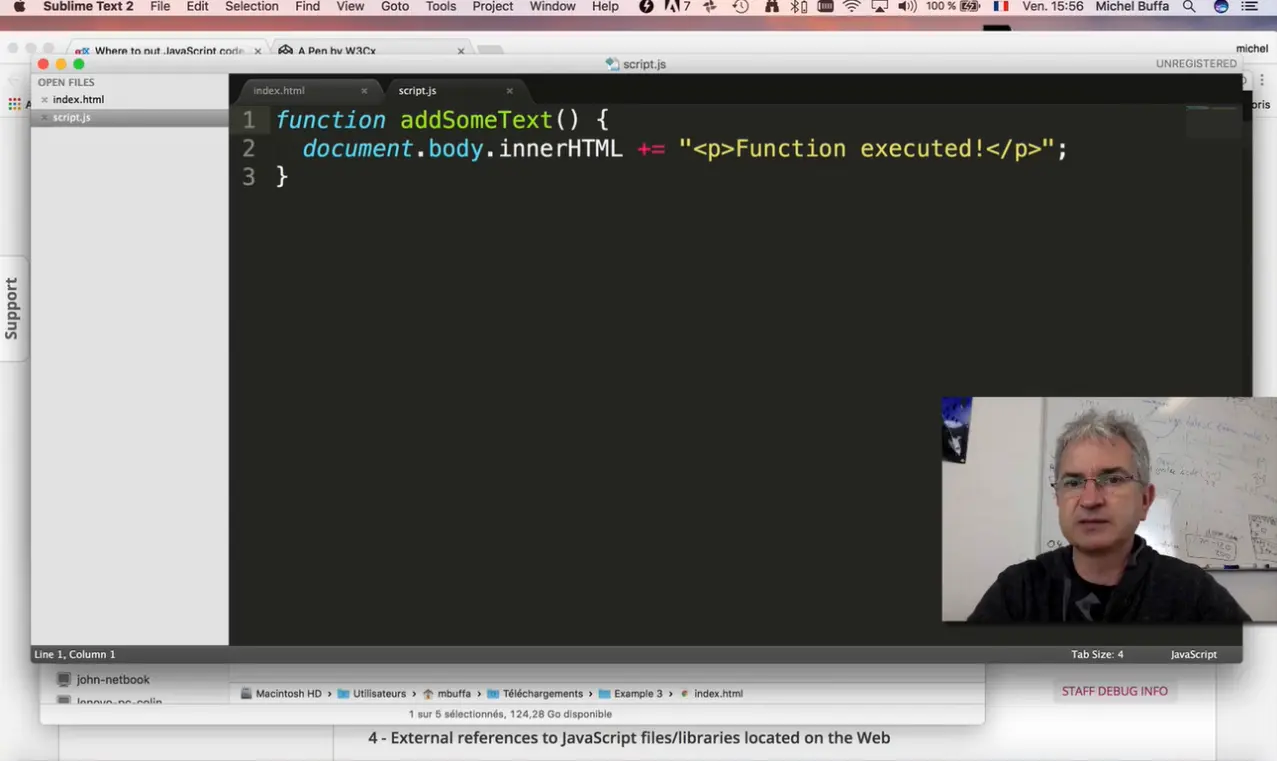
Let's execute this, here is the result: "Click me to call a JavaScript function that will add some content to this document". I click and you see that the function have been executed. And finally, the last thing you can do, is to include an external JavaScript source code.
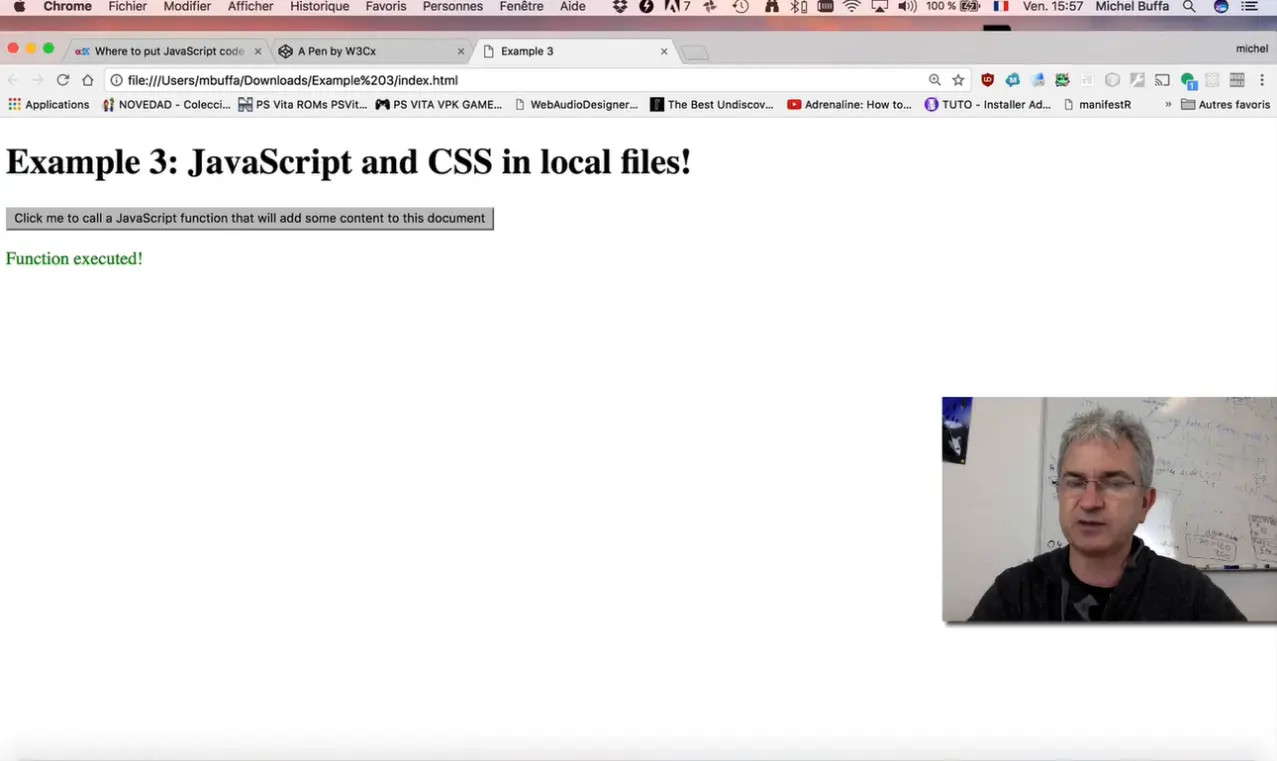
You've got an example here, where we use the "paper.js" library and the "paper.js" library, if I open the "paper.js" Web site, is a library for making graphic animations in JavaScript, so you can have plenty of funny things you can do. Things like that, or things like this... Just to be able to use what this library proposes, you need to include the library. If you read the documentation, they will tell that you what you need to include...
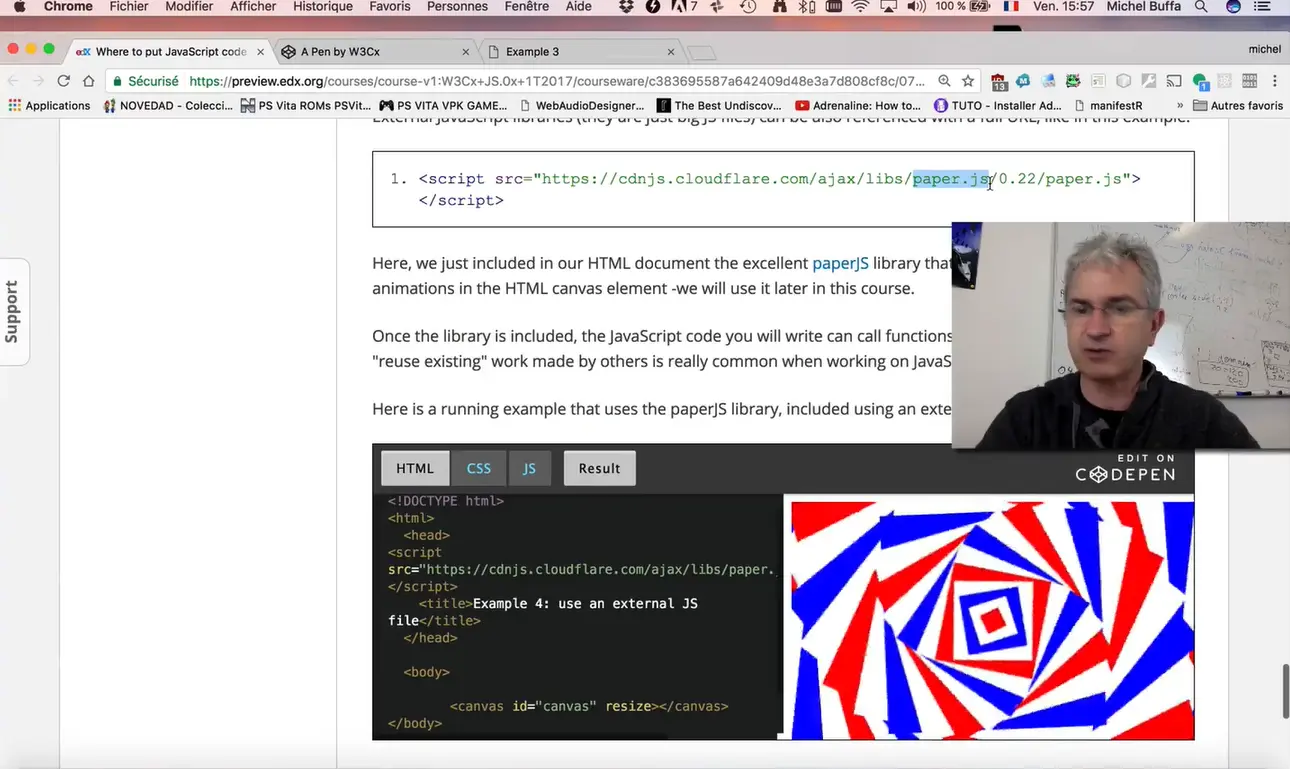
Okay -let's open it in CodePen- ...you need to include this JavaScript file. And once you included this JavaScript file... a bit the same way we used the external library for plotting functions... then you can use some functionalities that come from the "paper.js" library. You need to read the documentation to learn how to use it, but here is an example: a set of squares, animated squares, that follow the mouse.
<body>
  ...
  <script>
    var x = 2;
    // show a message in the body of the html document
    document.body.innerHTML += "JavaScript code executed. The value of the variable x is:
      "+ x + "";
    // also print a message in the devtool console
    console.log("JavaScript code executed");
  </script>
  ...
</body>

Old JavaScript examples may use a type attribute: <script type="text/javascript">. The type attribute is now obsolete and should be ignored.
In this example, the <script>…</script> element is placed in the <head>..</head> section of an HTML page.
This time, we placed a JavaScript function that is invoked (called) when a button is clicked:
<head>
  <script>
    function addSomeText() {
      // append a message in the body of the html document
      document.body.innerHTML += "
Function executed!";
    }
  </script>
</head>
<body>
  <button onclick="addSomeText();"Click me to call a JavaScript function that will add
    some content to this document
  </button>
</body>
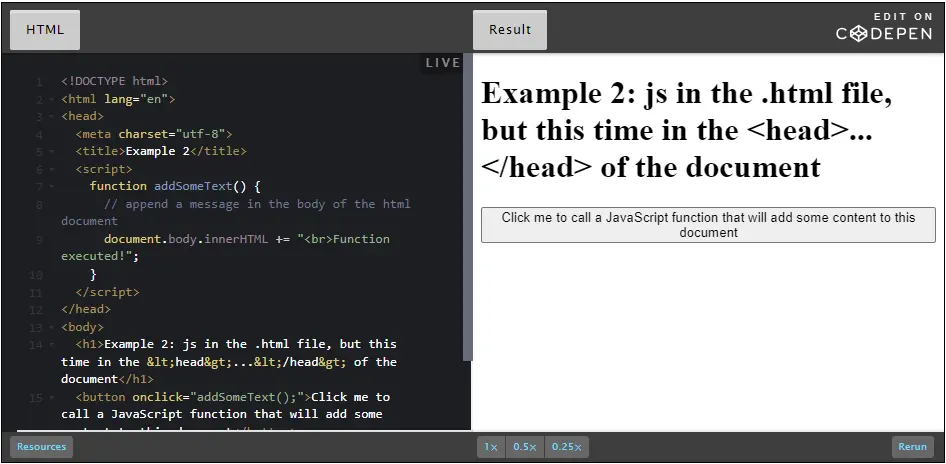
Putting JavaScript code in external scripts files is easy, and offers many advantages:
A typical example:
<head>
  ...
  <link rel="stylesheet" href="css/style.css">
  <script src="js/script.js"></script>
</head>
To use an external JavaScript file:
<head>
  ...
  <link rel="stylesheet" href="css/style.css">
  <script src="js/script1.js"></script>
  <script src="js/script2.js"></script>
  <script src="js/anotherOne.js"></script>
  ...
</head>
It is good practice to locate CSS files in a css subfolder, and JavaScript files in a js subfolder.

In this example, we have just one CSS file and one JavaScript file:

...
<head>
  ...
  <link rel="stylesheet" href="css/style.css">
  <script src="js/script.js"></script>
</head>
<body>
  <h1>Example 3: JavaScript and CSS in local files!</h1>
  <button onclick="addSomeText()">Click me to call a
    JavaScript function that will add some content to this
    document</button>
</body>
</html>
function addSomeText() {
  document.body.innerHTML += "<p>Function executed!</p>";
}
p {
  color:green;
}
External JavaScript libraries (they are just big JS files) can be also referenced with a full URL, like in this example:
<script src="https://cdnjs.cloudflare.com/ajax/libs/paper.js/0.22/paper.js"></script>
Here, we just included in our HTML document the excellent paperJS library that can be used to make fancy animations in the HTML canvas element - we will use it later in the course.
Once the library is included, the JavaScript code you will write can call functions located in this library. This "reuse existing" work made by others is really common when working on JavaScript projects.
Here is a running example that uses the paperJS library, included using an external URL:
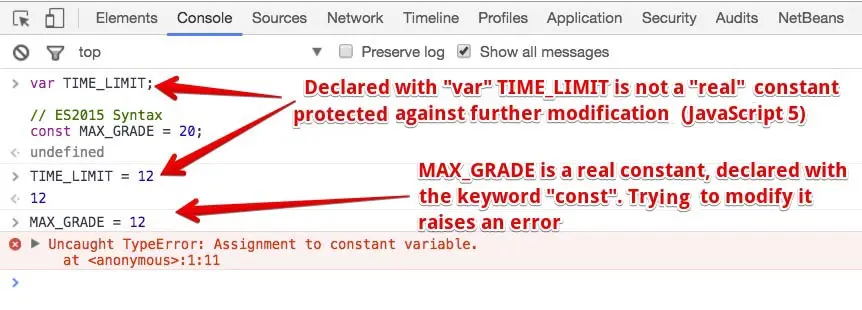

Hi, every programmer will make errors. It is very important that you learn how to debug your JavaScript programs, how to see your errors, how to write messages for debugging, tracing what is going on, etc.
Every browser comes with a very powerful set of tools called the devtools.
With my Mac, I can use command "alt + I". So the thing we will going to use the most is the console. A console loads problems or errors. So, if I can clear the messages from here and this is the place where I will see the different error messages I've got in my code.

Here is an example in JsBin. So, you can click here to see the console or it’s the same thing you can get here.
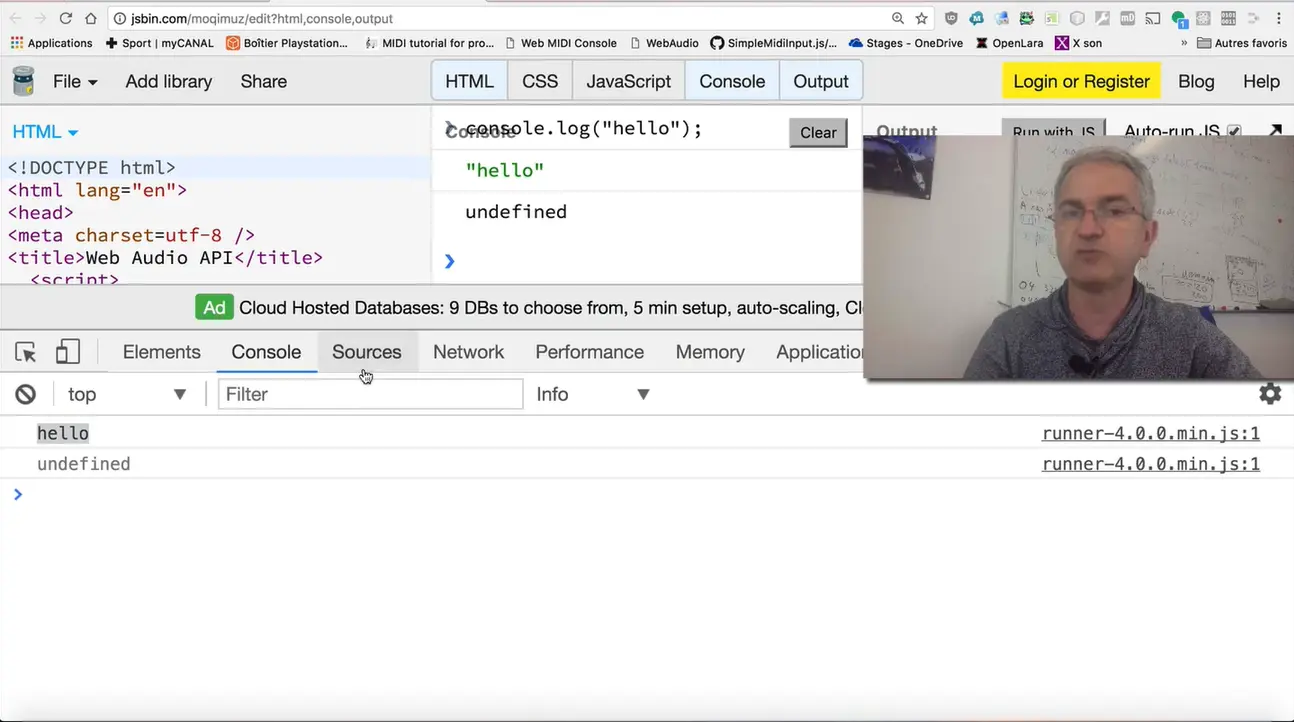
If I type something here: console.log("hello"). So this is the instruction you will use the most for printing error messages in the dev toolconsole. If I execute it, it prints "hello", and I can see also in the browser built in console: "hello".
This just a comfortable way to display error messages. If I make some errors, here I've got a script that will display, as soon the page is loaded, "Some JavaScript code has been executed".
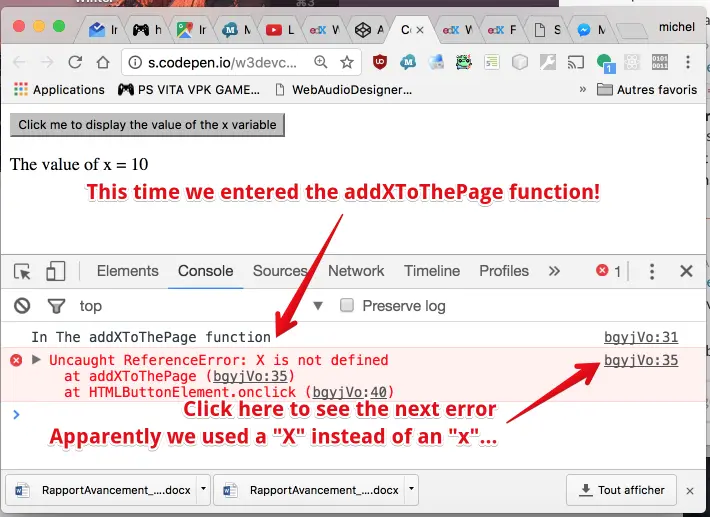
If I run the code, here, it displays "Some JavaScript code has been executed".

If there is a mistake, if I make an error here, for example, I write console with two "l". I can see, in red, some messages: "consolle is not defined", bla, bla, bla...
When you use some online tools like JsBin or CodePen, and so on, it's a bit difficult to debug your code because you are debugging at the same time the code of the tool itself that is written in JavaScript too. Each these tools comes with a way to run your code in what we decode ‘standalone mode’ or ‘debug mode’.
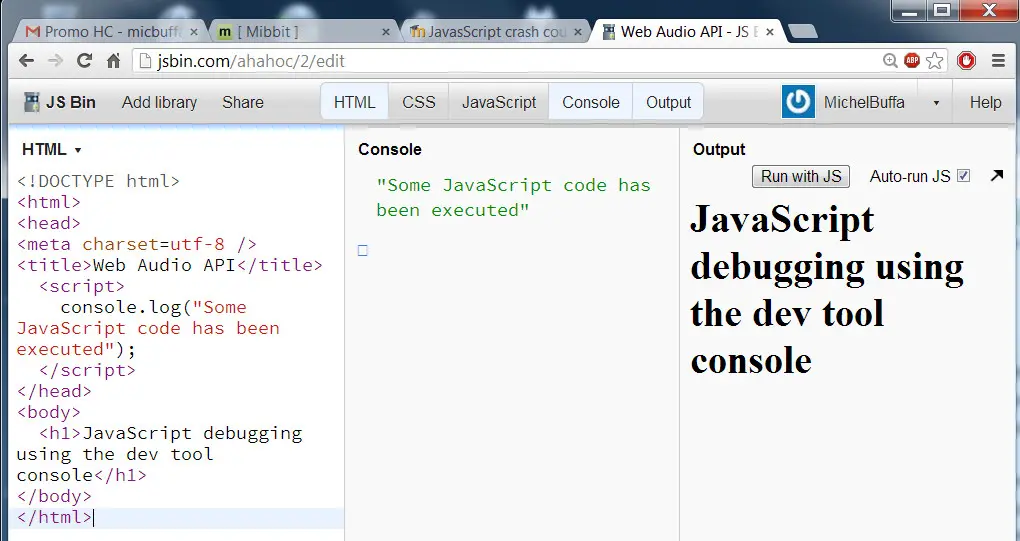
With JsBin, I click on the small black arrow, here. And if I open the built-in browser console, I can see the error message.
And here, if I click on the link on the right, it will just show the line where my program made a mistake display, as an error. Here, I can see that console needs only one "l", I can fix that.
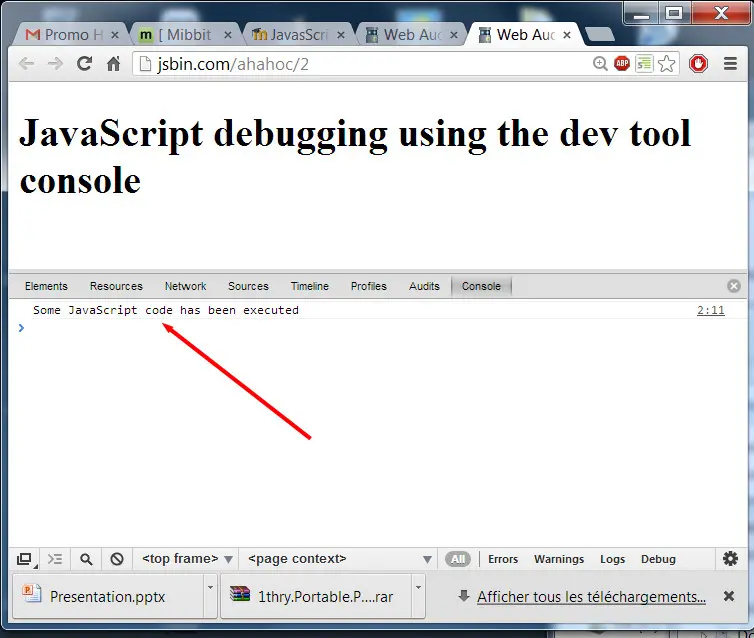
Another interested thing is that when you use "console.log", you can use it to display some variable values. If I declare a variable named x with a value of 10, I can use «console.log" to display the value of x, using the "+" operator. In that case, if I run my code it will help me by displaying the value of different variables when “console.log” is executed.
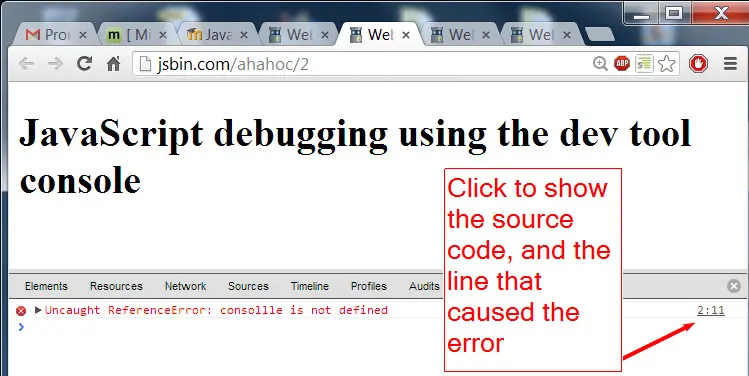
With CodePen, another tool we use a lot in the course, you've got the debug mode. Just save your work and click on "change view mode" we’ve got "debug mode" here. And you can also open the console. If you click on the console button here, you can have a console here, and see what is going on. CodePen does not display the error messages, so is better for debugging to click on the "debug mode", here.
You've got the page in standalone mode, and you can open the dev tool console. With local files, I’ve got another example here with HTML code that uses it some JavaScript code from a "script.js" file. If I make an error here, an error in the name console, I save. I can run the result: "Open in browser". I click, it does nothing. I open the dev tool console and I see where the problem is and I can click on the link on the right and it shows the line with the error.
Let's introduce what is debugging.
When you are developing a Web Application that contains JavaScript code, you will make errors.
There will be error messages, and you will need to print messages for debugging your code. We will see more advanced debugging techniques at different points in this course, but for the moment, let's see the basics of JavaScript debugging: seeing error messages in the devtool console, or in the "console tab" of your source code editor.
We will not look at the JavaScript syntax here, but more at "JavaScript in the browser", how it works, how to start writing code, etc.
First of all, you need to find a way to debug your code and see errors. If your work does not produce any results, you need to know why!
For this you will use the dev. tools of your browser. Press F12 (or ctrl-shift-i) in Windows or cmd-option-i in MacOS to open the dev. tools, then go to the console tab: this is where errors will be displayed, or messages of your own (use the console.log(string) JavaScript function in the JavaScript code embedded in your html page). In the console, you will be able to type any JavaScript command.
Let's look at this example below (or online as a JS Bin):
<!DOCTYPE html>
<html lang="en>
<head>
  <meta charset=utf-8 />
  <title>Web Audio API</title>
  <script>
    console.log("Some JavaScript code has been executed");
  </script>
</head>
<body>
  <h1>JavaScript debugging using the dev tool console</h1>
</body>
</html>
The simplest way to add JavaScript code in an HTML page is to use the <script>…</script> element.
The code in this example is executed sequentially when the page is loaded: the JavaScript code is executed before the browser could see the rest of the page (as the <script></script> is located before the <body>).
The H1 element, for example, does not exist in the Document Object Model, and has not yet been displayed when the JavaScript code is executed. If we move the <script></script> at the end of the document, then the H1 would have been built before the JavaScript code is executed.
The only line of code we have is console.log("Some JavaScript code has been executed");
This means "display in the JavaScript console the message…". If we open the console tab provided by jsbin.com in a dedicated tab (that redirects all console.log() messages), and re-execute the page (just type a space at the end of a line to re-render the page and display the message in the console), we see the message in the console tab, as well as in the dev. tools console. This is illustrated by the image below (or online):
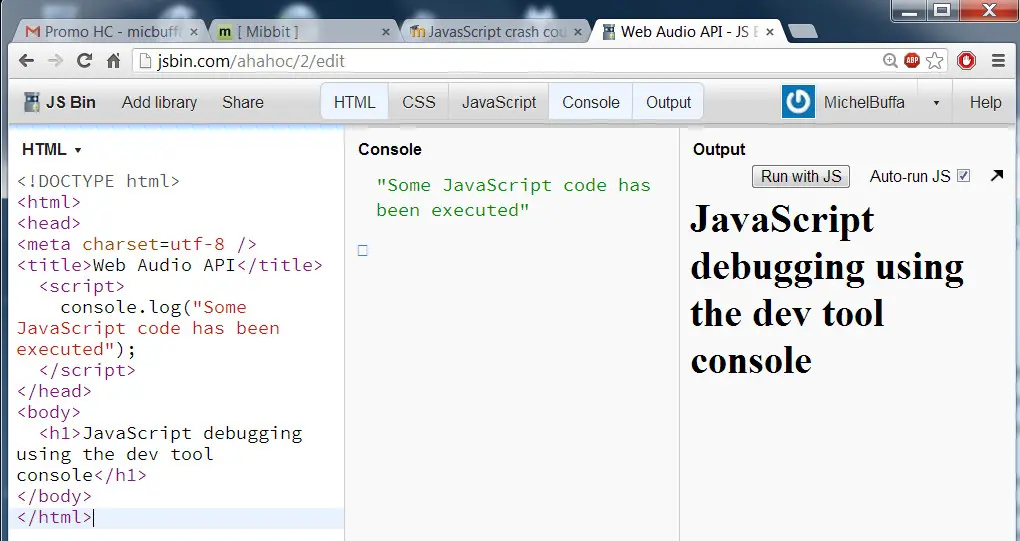
It is also possible to use the "real dev. tool console", and for this, I recommend running the application in a single window, not in the Js Bin editor. Press the black arrow on the top right of the output window - this will render the page as a standalone Web page, then press F12. You should see:
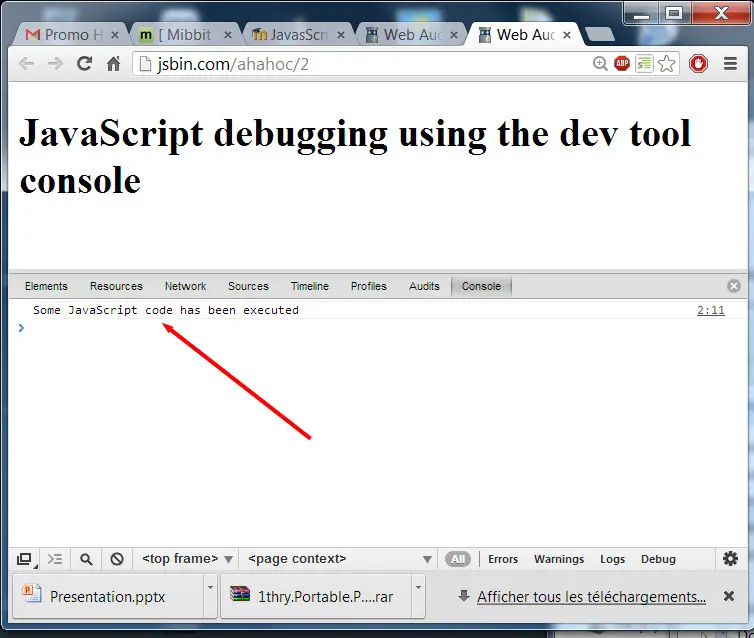
Ok, now, let's make an error: change console.log() into consollle.log(). Let's see what happens:

And if we run it standalone and use the dev. tool console:
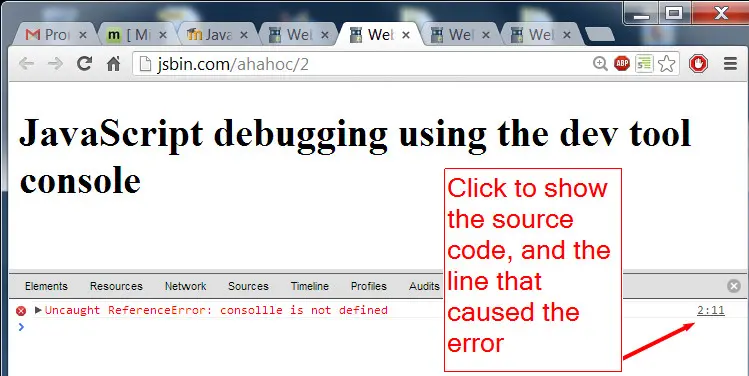
And if we click on the line number to the right, the dev. tool shows the source code centered on the line that caused the error:
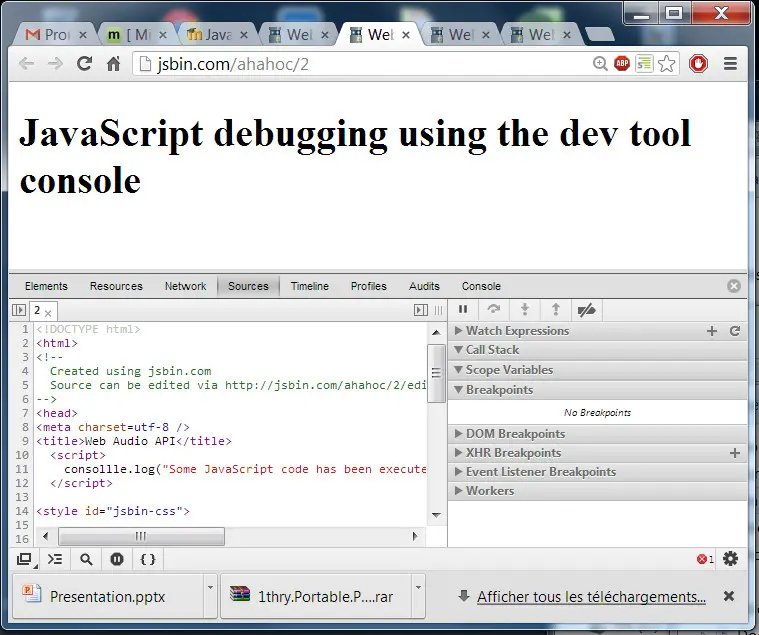
Without such tools, debugging JavaScript code is impossible. You need to look at some basic tutorials on how to use the dev. tools of your browsers, since they differ from one another in the way they work - although the principles remain the same.
Here is the discussion forum for this part of the course. Please either post your comments/observations/questions or share your creations.
Let's create a small HTML/CSS/JS project together.
It's time for you (and me) to create a small HTML/CSS/JS project, step by step, following some best practices. We will do this using different tools: source code editors + files but also two online IDEs (JsBin.com and CodePen.io). We will see how to write/debug the code and also how to migrate a project prototyped with online tools to a project you can run and edit on your hard drive using regular source code editors.
Many things we use in this example may be new to you. Don't worry. We will cover them either later on this week or over the following weeks. It's time to throw you in the deep end of the JavaScript world, getting you to write code, and look at examples etc. And from time to time, we will take a break and have a "real", "academic", look at the concepts of the language you have been using. We think this is the best way for you to learn!
We will write a small, interactive HTML page that will use some HTML input fields for indicating the name of a math function we'd like to plot, the ranges for the x and y values, the color of the curve etc.
We will first write this application online, using the JsBin.com editor, then we will do the same thing using the CodePen online editor, then, using a regular source code editor and .html, .css and .js files.

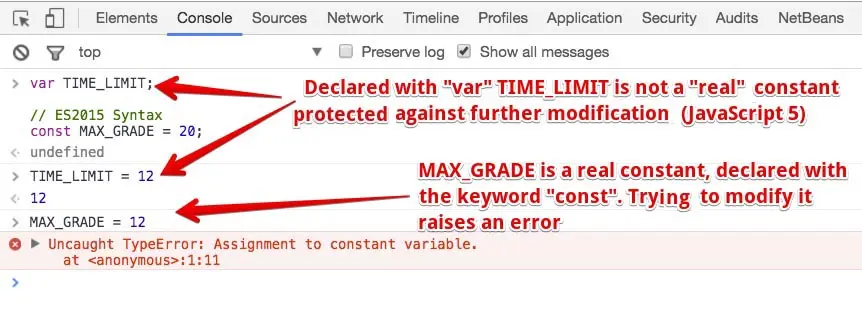
We're going to work from an example we already saw in the course: the math function plotter. In this version, you can see that we added some input fields for changing the color of the curve, for changing the range of the x values, changing interactively the functions we are going to plot, and so on.
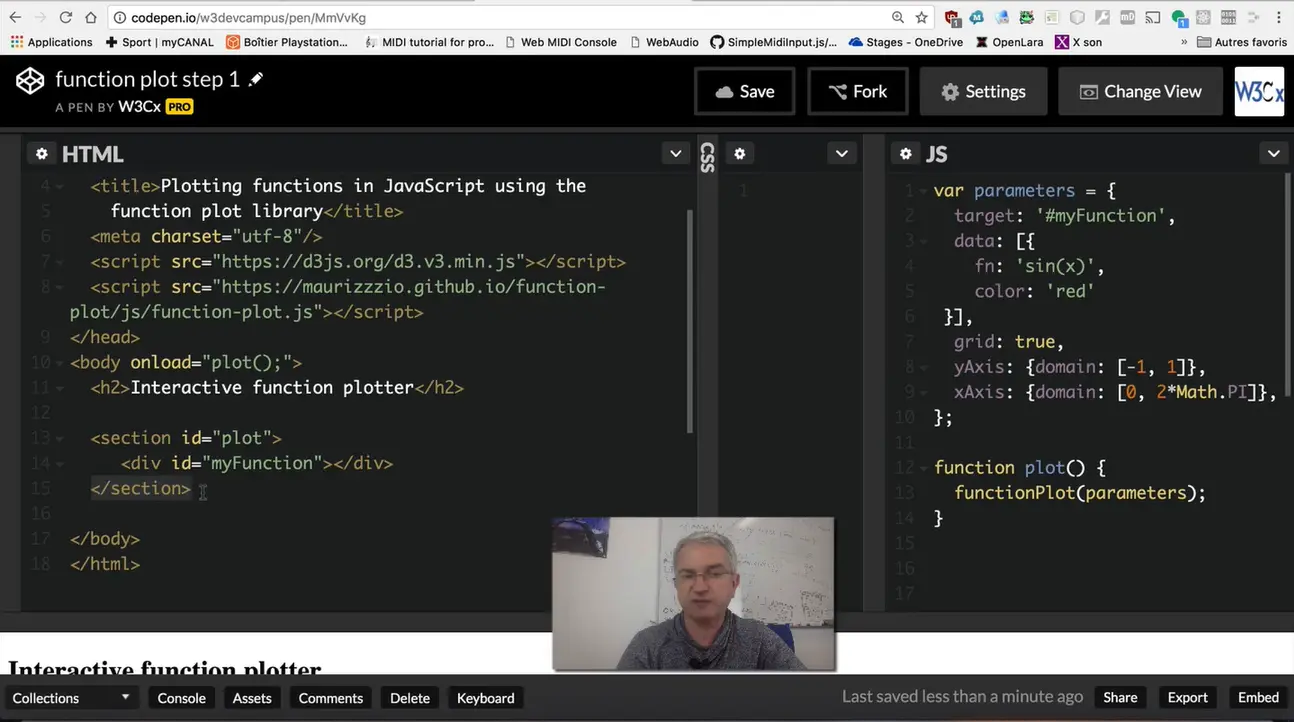
Let's start from the very basic example we saw earlier on the course. We saw that, the function is located in a "div". And we just added a "section" tag from HTML5, just to identify the part of the document where the function is plotted.
Later on, we'll add another "section" about the input fields and the different controls. You've also got a <body onload='plot();>', that means that when the page is loaded, we execute a JavaScript function named "plot()", that is located here. And it uses the "functionPlot()" function from the external library we use. And it takes a set of parameters that are located at the beginning of the JavaScript part. That will indicate, within the target property, the "id" of the div where we are going to plot the function. In the data property is the function itself: "sin(x)" and its color: red. What can we do to improve this?
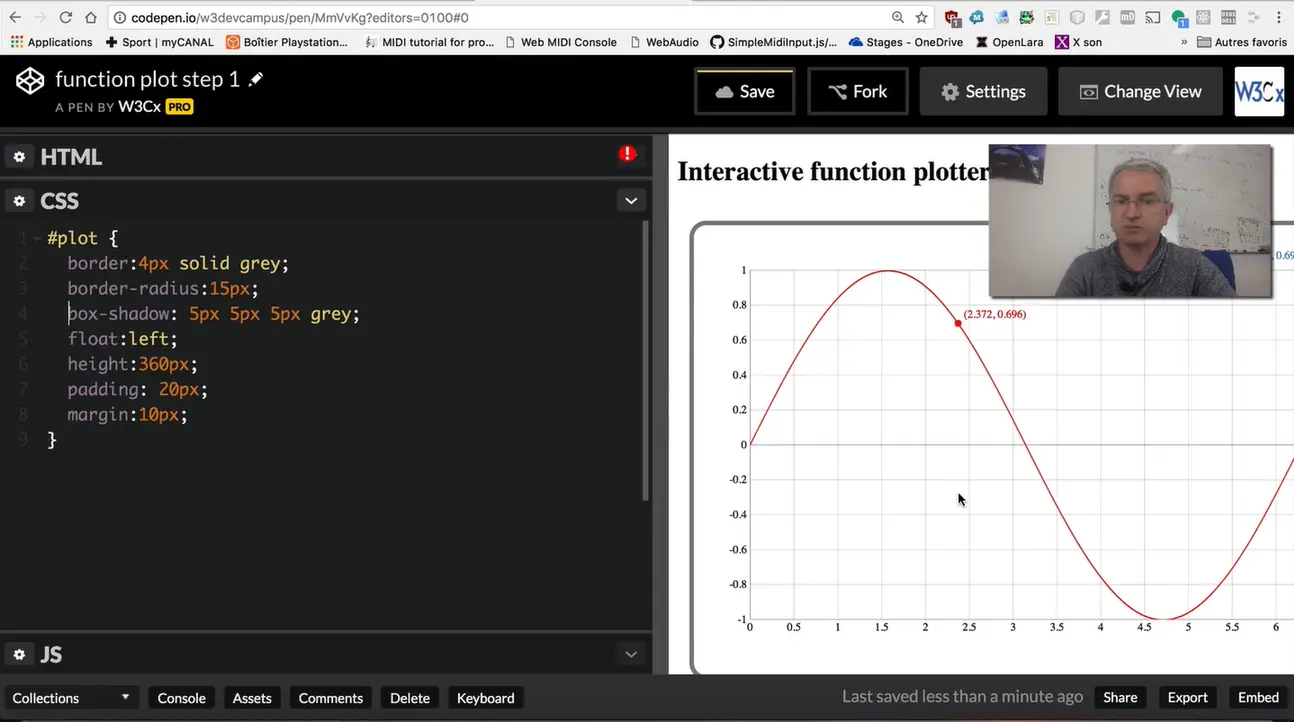

At first, we can add some CSS code to make this nicer. I'm going to change the view with CodePen. Let's resize that, and let's work on the CSS part: "Maximize CSS Editor". What I can do, is that I can indicate that the div that contains this function wil have a rounded border, some shadows and so on. Now it's rounded, you can have add some shadows, height, margin and so on. Let's copy and paste some code I’ve prepared. Here we are. Now, what I've got, is a nicer presentation of the function itself.

Now, I'm going to add a section that will contain the different controllers that are input fields from HTML5. I add a section called "plotSettings" that will contain all these controllers. Let's start for example with a controller for the color. What we added here is a label color value and the color input field from HTML5. If I click here, it asks for a color. And we can also add an event listener: "onchange='plot();'". That means: "when the color has been selected, call the plot() function". And you remember that this function is the one that plots the mathematical function, here. The plot function is here.

What we are going to do in this change color function? It changes the property of the parameters here. Let's add some code for that... How can we get the value of the color from JavaScript before plotting the function? We are going to use the selector API: "document.querySelector(...)" for the input field whose id is "color".
What we do is that we are going to use the color for changing this, here. So "parameters.data"... it's an array. 0 is the first index, the first element that corresponds to the part that I highlight now. .color=color
If I change the color, this line is executed and the color changes. We can use the same principles with other input fields. Let me copy and paste some code I prepared, that will add all these different controllers.
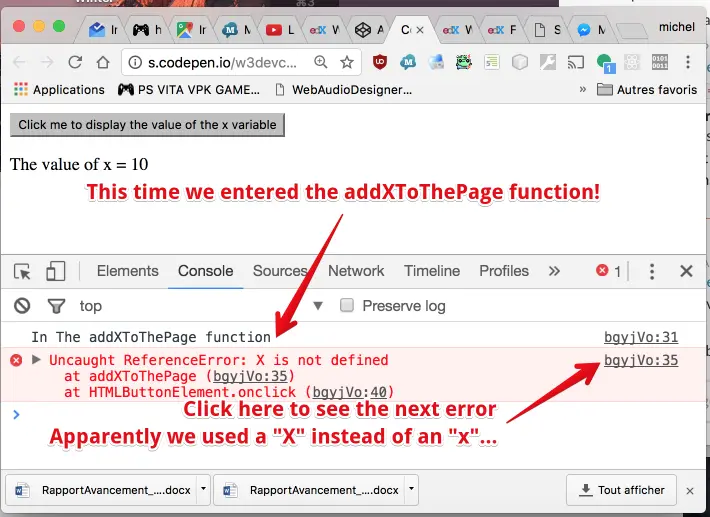
Now I've got all the different controllers, and if you look at them, they all have an "onchange" or "oninput" event listener. Now, we’ve got 2 sections, 2 HTML sections: one with an "id='plotSettings'" that corresponds to the different input fields.
And one with an "id='plot'" that corresponds to the function itself (the drawing here). If I want to have a nice look and feel, what I can do is share the same borders and shadow properties from CSS, put the first section with the different input fields on the left and the plot on the right.

Let me just cut and paste some CSS rules here, that will factorize the common properties for both sections in a section selector. OK, what I've got now, is that I've got a nice balanced view of the whole application.
If you want to code while watching the video, please open this CodePen. It contains the source code of the example we started coding from.
And here is the same version with the polyfill for the <input type="color"> input field, not yet supported by Safari.
In case you have a hard time following the video, here is the full example (this link points to the example from the previous course page).
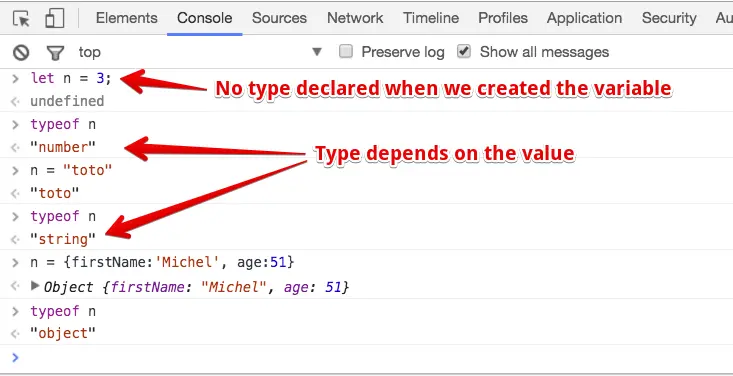
Now, I'm going to show you how we can do the same application using files and a regular source code editor, and working on your local hard disk. I'm going first to create a directory for storing the files on my desktop. "Math plotter app" and I will work inside.
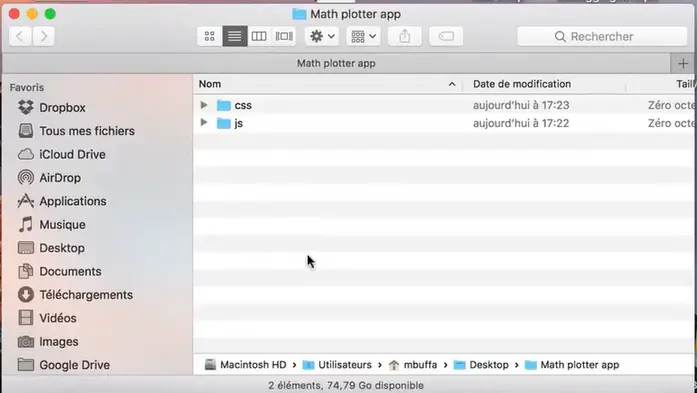
In this folder, I will create a subfolder named "js" for the js files and a subfolder named "css" for the CSS files, and the HTML file will lie in the current directory.

With Sublime Text, I can open this folder, the one I just created. And I can start saving the current file as "index.html". I will copy the HTML, CSS and JavaScript source code from the previous example. I just took the previous application.
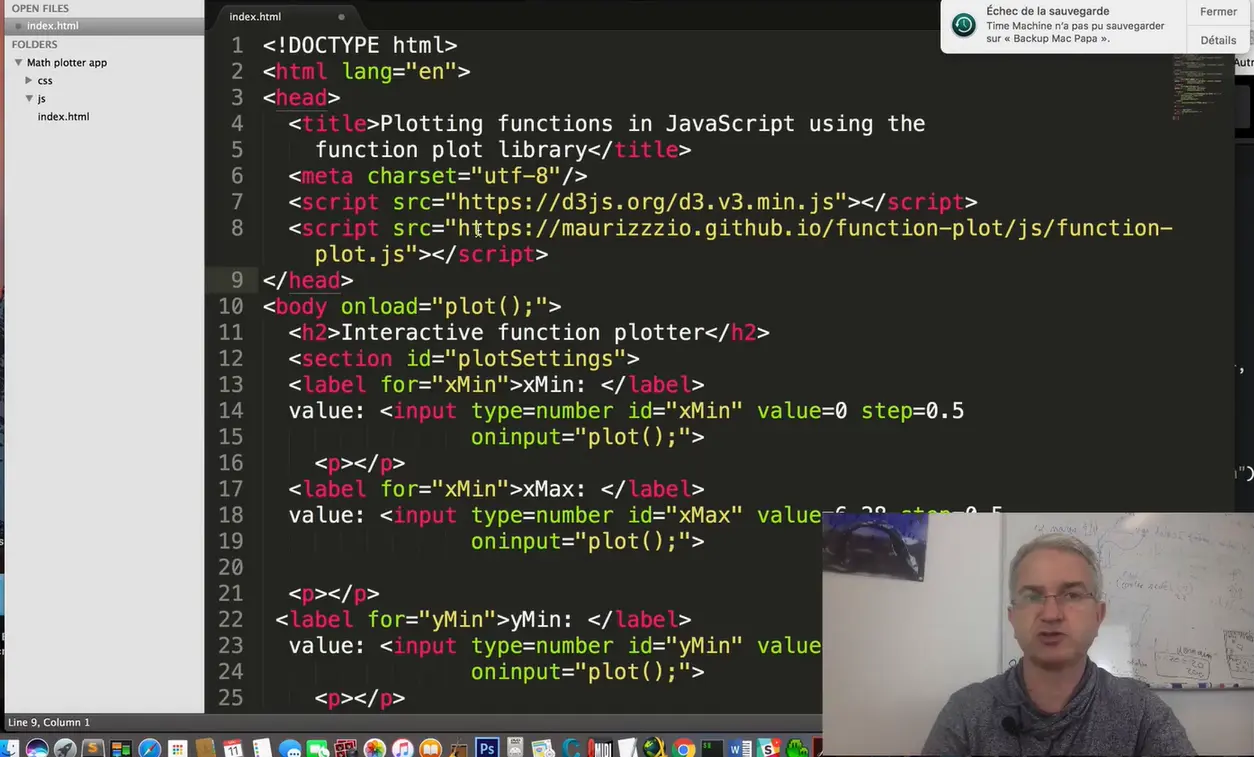
And I will copy it in the index.html file. I create a "style.css" and a "script.js" file for holding the JavasCript and CSS files. I copy the source code from the js part of the previous example. I create a new file with the CSS code.
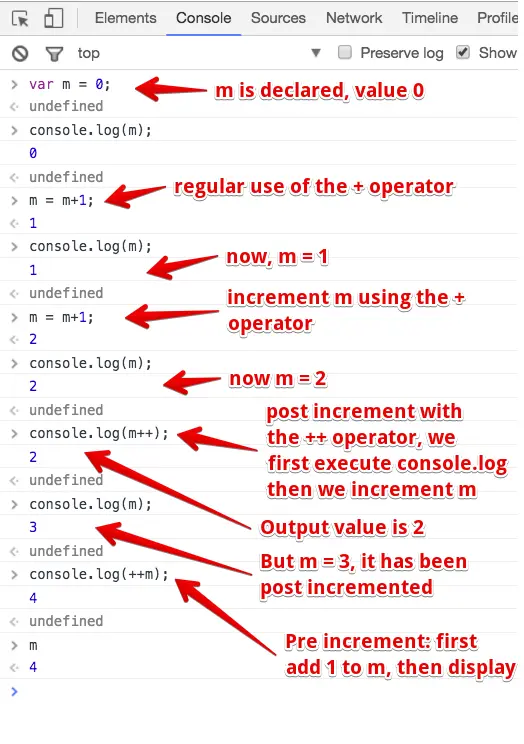
"Save as" ... I include the JavaScript code :<script src="js/script.js">
Remember that the script tag has always a closing tag at this end.
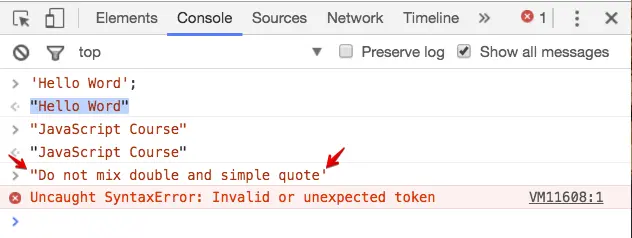
It is not an auto-closing tag. And I use a "link" tag for importing the CSS file.
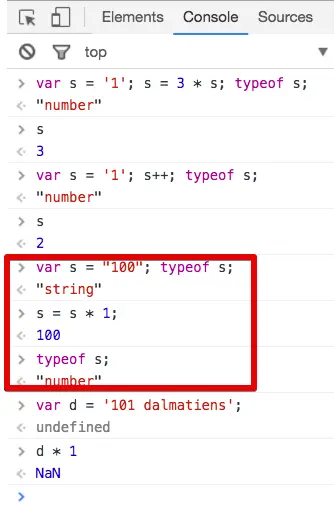
I can check that my files are located at the right place and now I can "Open in Browser". Another way to do what we've done manually would have been to use the "Export" button from CodePen.
It will download a zip file, that will contain the whole architecture, the whole folder and subfolder I've already prepared for you. And it will also make the HTML file for you, that will include the JavaScript, but in the end, instead of at the beginning of the source file, like what I did manually.
Using generated code can be useful, but most of the time for a big project or a serious project, you will use a source code editor like Sublime Text.
Live coding lesson: JavaScript variables.
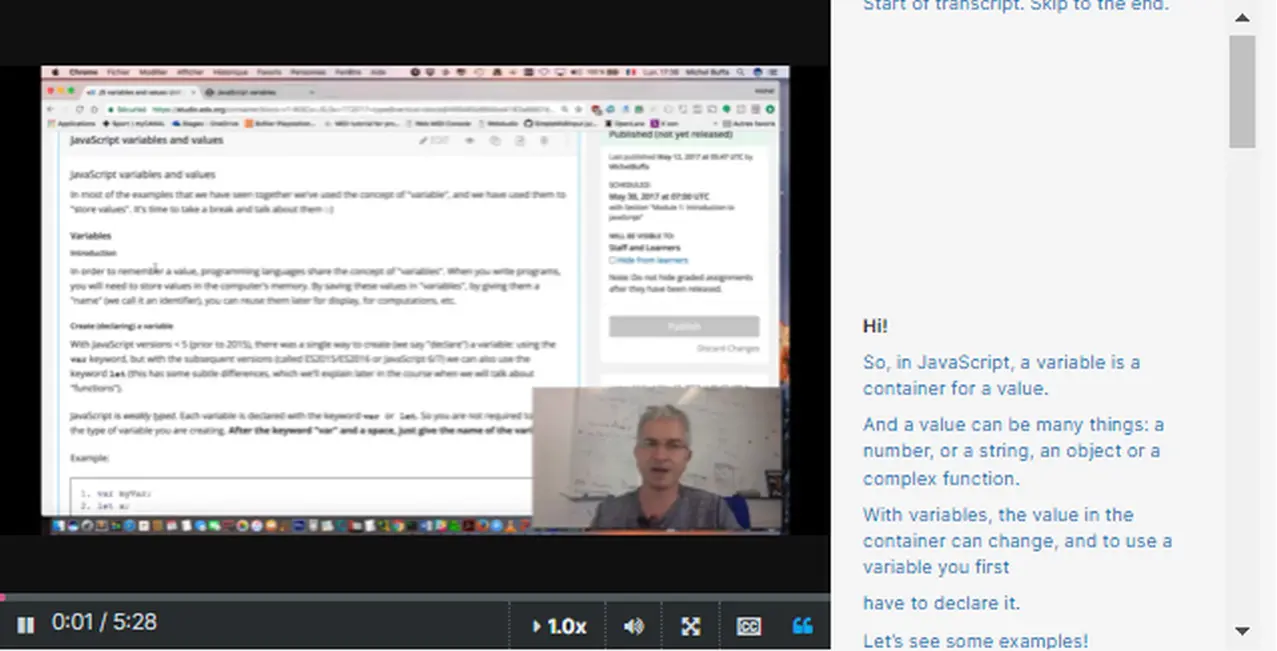
In JavaScript, a variable is a container for a value. And a value can be many things: a number, or a string, an object or a complex function.
With variables, the value in the container can change, and to use a variable you first have to declare it. Let's see some examples! You can declare a variable using the keyword "var", and followed by the name of the variable, or you can also use the keyword "let", that came with ES6, with JavaScript version 6.
Before ES6, you could only use "var". There are small differences that
I will explain later, but for the moment you can use "var" or you can
use "let". Once a variable is declared, you must initialize the variable,
this is where you give it a value. And this is done by using the equal sign.

As you can see, the console.log will display in the console the value of the variable "myName". You can also initialize and declare a variable at the same time.
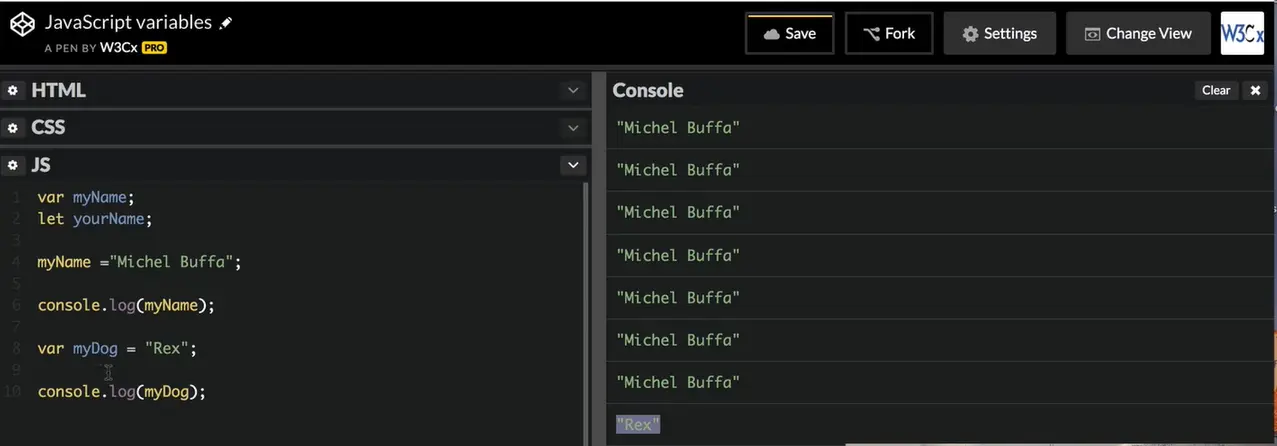
You see, I declare a variable called myDog and I gave it a name: Rex. Also, you can use these variables in instructions, in expressions like: "the name of my dog is".
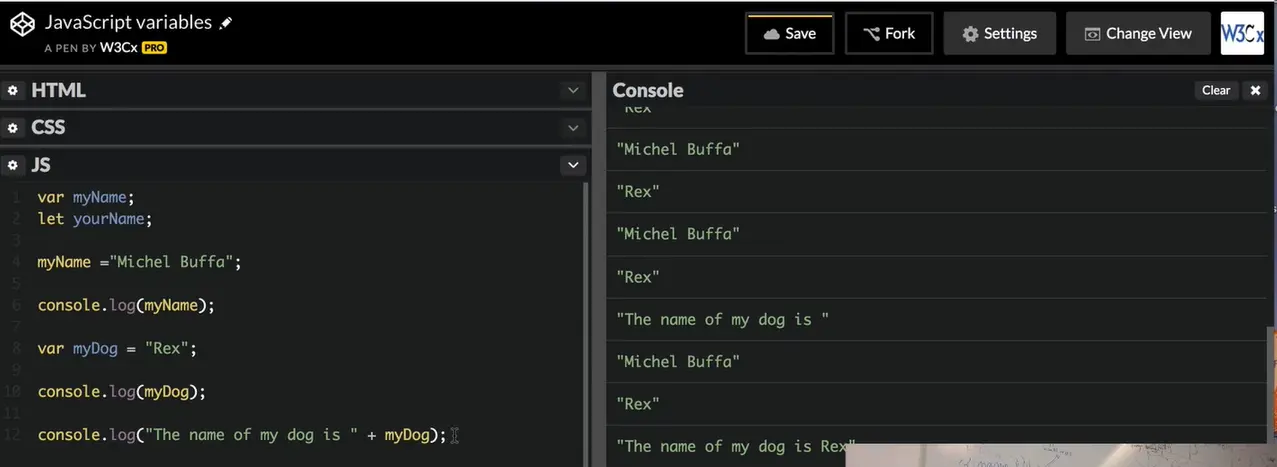
You can use the "+" operator for concatenating strings, because "myDog" is a string, and in that case you will see: "the name of my dog is" ...followed by the value of the "myDog" variable.
There are also naming rules and conventions for variables. You can give to variables names like "x", "y", "z". If they are just single, one-word names, you use lowercase. But the convention, when you start using composed words, is to use the "lower camel case" syntax.
If your variable name is made of two or more words, write the first one in lowercase, and capitalize every other words. Example: "myFastCar", "my" is lowercase, "Fast" and "Car" are capitalized.
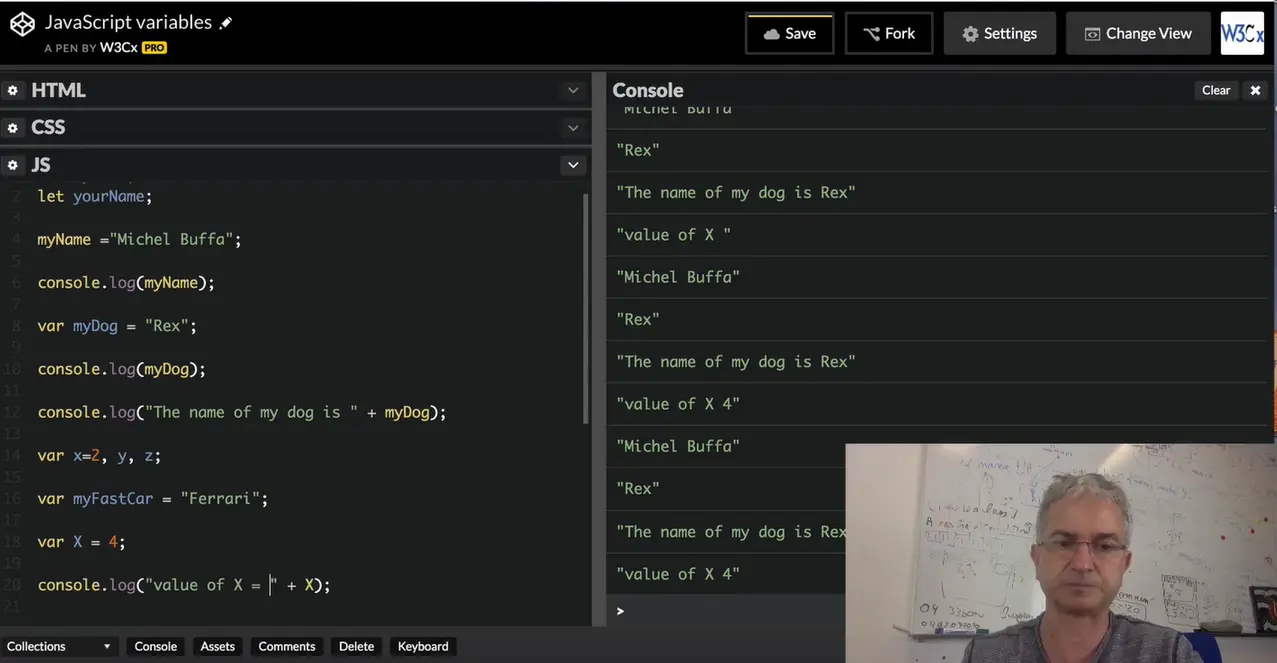
Also, variables are case sensitive: do not mix a variable name in lower case and in uppercase. For example, if I give to the small "x" a value of "2", and to big "X" a value of "4", and if I display the value of big "X", then the JavaScript interpreter will know that big "X" is different than small "x".
If you need to use different names like if I've got two fast cars, just, my recommendation: use "myFastCar1", "myFastCar2", etc. Also, you should not use JavaScript reserved words such as "var", "let", "if", "for", "function", etc.
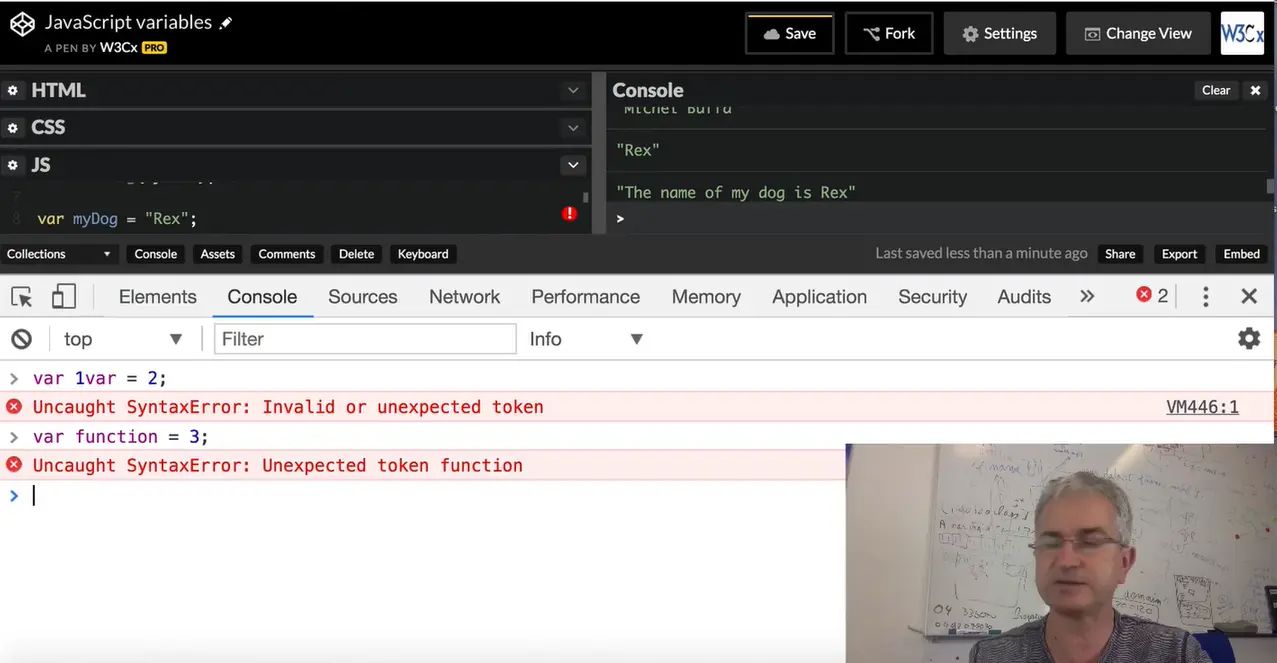
So, var function = 3; will raise an error, I can show that to you in the devtool console, this raises an error. function is reserved.
We will next talk about variable values and variable scopes, and you will see that there is a small difference between "var" and "let" when you declare variables.
In most of the examples seen earlier, we've used the concept of "variable", and we have used them to "store values". It's time to take a break and talk about them :-)
In order to remember a value, programming languages share the concept of "variables". When you write programs, you will need to store values in the computer's memory. By saving these values in "variables", by giving them a "name" (we call it an identifier), you can reuse them later for display, for computations, etc.
With JavaScript versions < 5 (prior to 2015), there was a single way to create (we say "declare") a variable: using the var keyword. But with the subsequent versions (called ES2015/ES2016 or JavaScript 6/7), we can also use the keyword let (this has some subtle differences, which we'll explain later in the course when we will talk about "functions").
JavaScript is weakly typed. Each variable is declared with the keyword var or let. You are not required to specify the type of variable you are creating. After the keyword "var" and a space, just give the name of the variable.
var myVar;
let x;
The first letter of a variable can only be "$", "_", "a" to "z", or "A" to "Z". The other characters in a name must be any of these, or numeric digits. The name is case sensitive. Variables "myVar" and "MyVar" are different variables.
There are some reserved names that you can't use as a variable name: boolean, if, delete, var, function, etc. as they are reserved words of the JavaScript language.
A value can be assigned to a declared variable, or even directly in the variable declaration. For this, we use the equal character, also called "the assignment operator".
(notice at line 4 one way to introduce comments in your code: start a line with "//"!)
var myValue;
myValue = 78;
// With the ES2015 syntax. BTW, lines staring with
// are comments!
let myNumber = 1.34;
At line 2, we are not saying that "myValue" and "78" are the same, we're saying "hey, I want to store the value 78, and I'm putting it in a variable whose name is "myValue". It's like giving an id to a location somewhere in the memory of the computer.
Using the id "myValue", we store 78 into a memory location identified by the name "myValue": a variable, or if you prefer, a value that can vary over time if we assign a new value to the variable "myValue" (for example by executing myValue = 5;).
You can also declare many variables at once by separating them with a comma. Always end each instruction line with a semi colon.
var myNumber1, myNumber2 = 34, myNumber3;
// Or with the ES2015 syntax, you can also use "let"
let x = 1, y = 3, z = 12;
Reminder: you can always open the devtool console using F12 on windows, or ctrl-shift i, or cmd-alt-i on other computers.
If we copy and paste the variable declarations from the previous example, and type myNumber2 in the devtool console, it will display 34 (while myNumber1 will have an undefined value):
var myNumber1, myNumber2 = 34, myNumber3;
undefined
// Or with the ES6 syntax you can also use "let"
undefined
let x=1, y=3, z=12;
undefined
x;
1
z
12
myNumber2;
34
myNumber1;
undefined
Below is an image that explains how you can try JavaScript code in the devtools console:
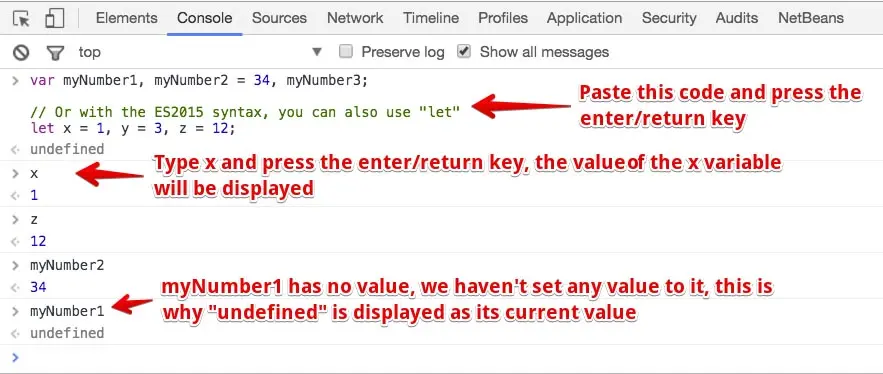
If you try to use a variable that has never been declared, you get an error message:

The JavaScript community has some conventions about naming variables:
var myModel;
// ES2015 syntax
let michelBuffaAge = 51;
Most JavaScript examples you will find are written in the camelCase format. For harmony in the code source, it is a good idea to keep this convention. Sometimes, you will see the snake_case naming convention, which separates each word of a variable with an underscore.
Here's an interesting article: CamelCase vs underscores: Scientific showdown.
Constants are variables that cannot be modified after a value has been set.
The naming convention is to use uppercase letters with underscores.
Example: var TIME_LIMIT = 50;
With JavaScript 5, constants were declared as normal variables, using the var keyword, and there were no verifications by the JavaScript interpreter forbidding you to modify them after you assigned a value to them.
With ES2015/2016 it is recommended that you use the keyword const instead of var to declare them. This means that an error will be raised if you try to change their value in the future.
var TIME_LIMIT;
// ES2015 Syntax
const MAX_GRADE = 20;
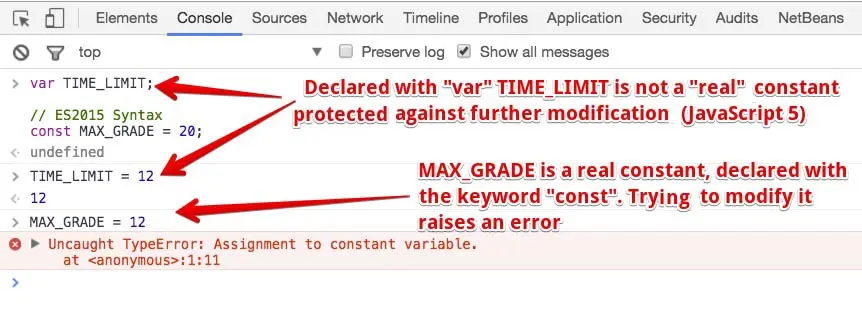
Here are a set of examples (using the let keyword, but they would also work with var):
let a;
let thisIsAVariable;
let and_this_too; // but does not respect the usual naming convention
let mix12three;
// invalid!
let 2three4five; // can't start with a digit!
let a = 1
let v1, v2, v3 = 'hello', v4 = 4, v5;
// Beware with lowercase / uppercase
let case_matters = 'lower';
let CASE_MATTERS = 'upper';

Let's talk about "variable scopes". The scope of a variable corresponds to the locations in your code where you can use this variable.
When you define… when you declare a variable outside of any functions, it's usable anywhere in your code. It's considered as a "global variable": it belongs to the "global scope". The x variable here, can be used inside a function.
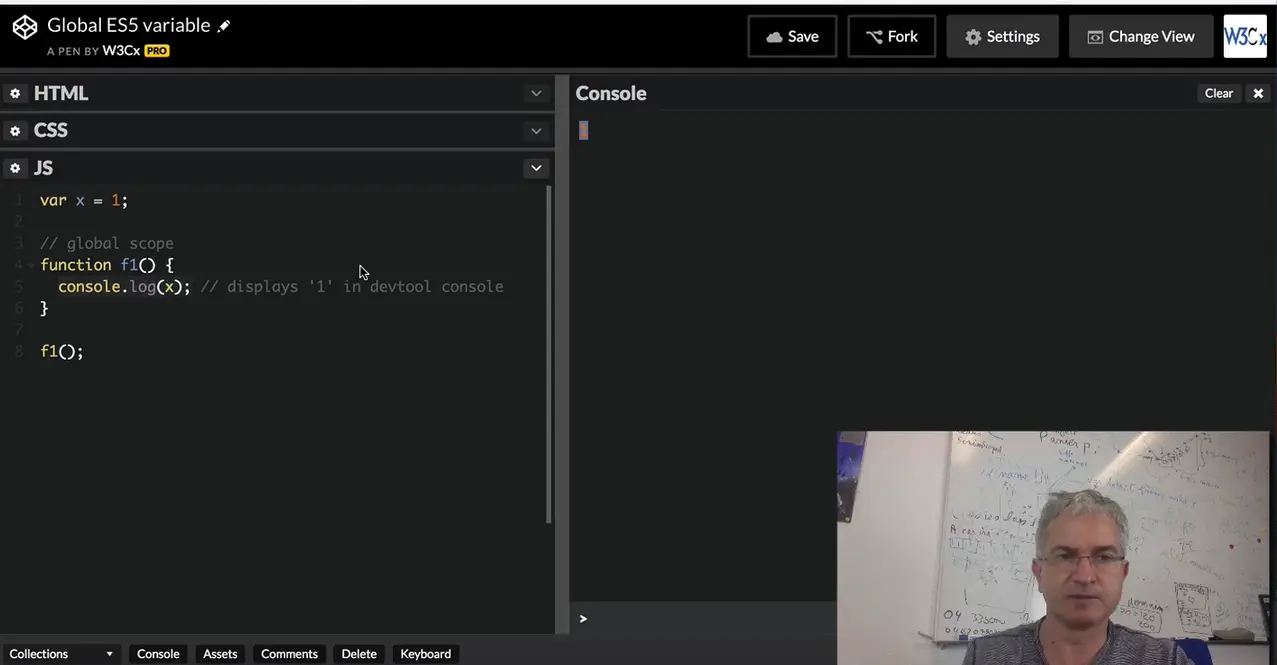
The console.log inside f1... if I execute f1... will display the value
"1" because the variable here is "global".
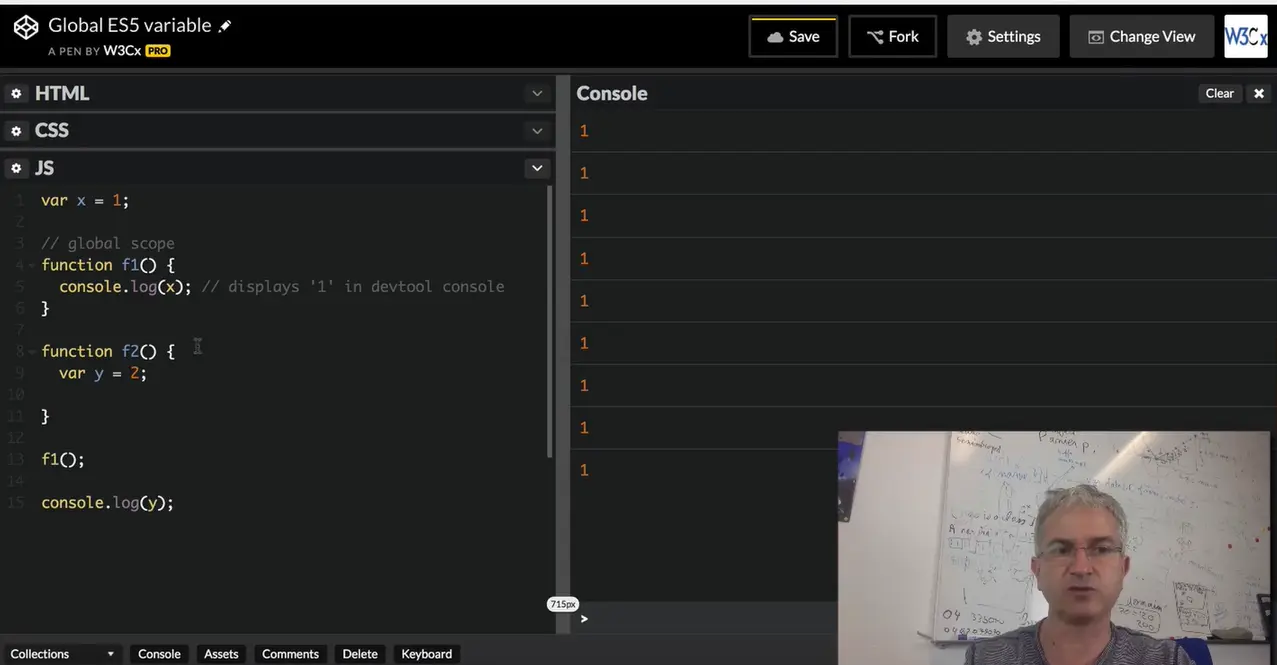
If I've got another function... f2, that declares another variable y, and if I try to display this value from outside of the function, then it does not work...I've got an error: y is not defined. So, you've got "local variables", and "global variables". In the case of local variables, when a variable has the same name as a global variable, then the most local one wins.
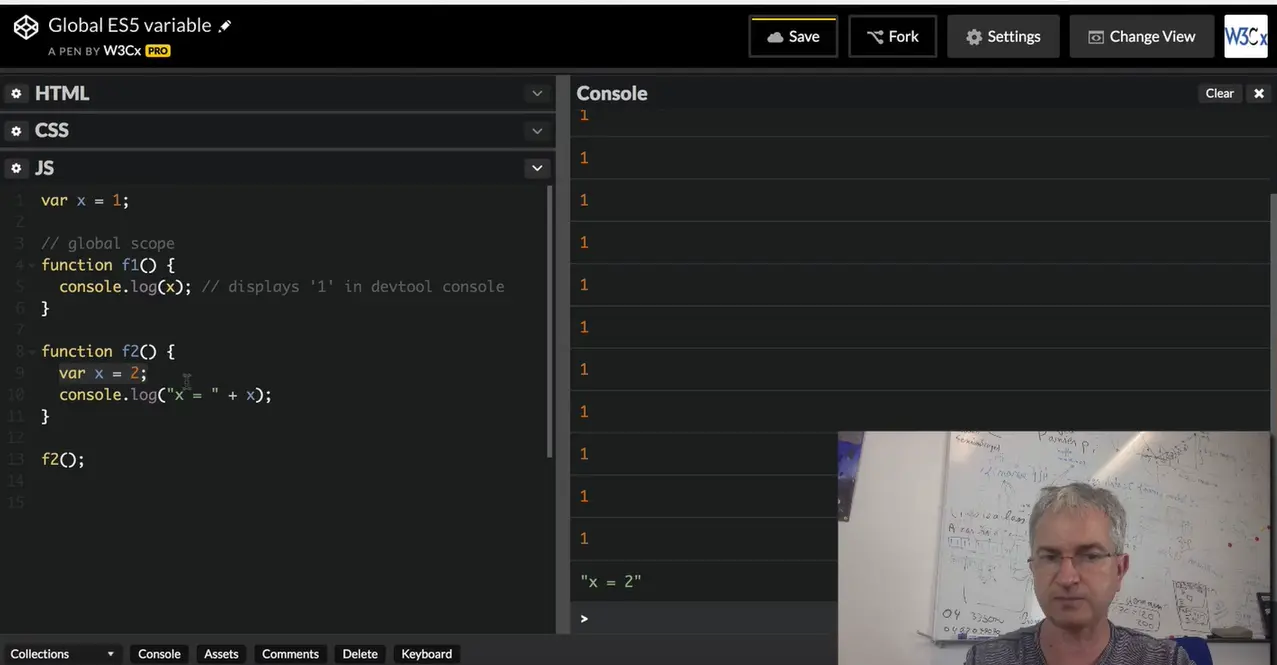
If I try to display inside F2 the value of x, it will be the closest variable -the local one- that will be displayed. If I execute f2, then it will display "x = 2", it's the value of the local one that is taken into account, not the value of the global one. We call this "masking". The same… if I pass a parameter to a function, and if this parameter has the same name as a global variable, then it acts as a local variable, and it's the value of the local parameter that is taken into account.
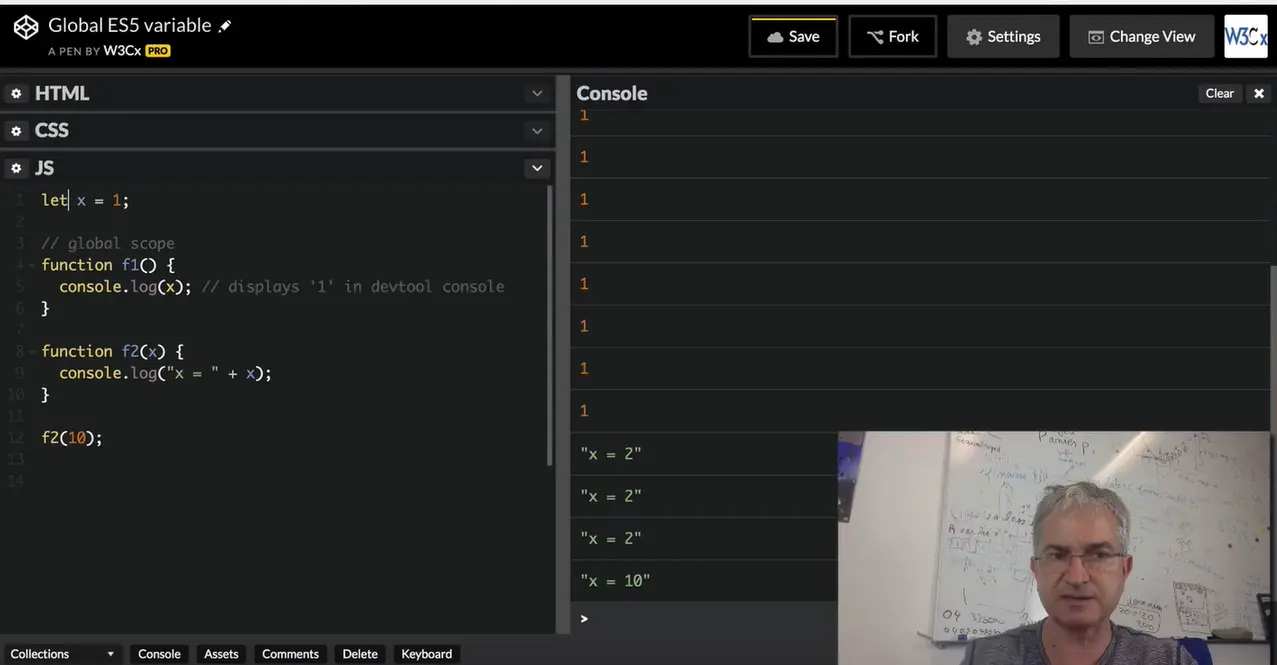
This x here, is not the global one: it's the one I passed as a parameter that has the value 10. Now, there are some little variations when I use "let" instead of "var". Let's see some examples.
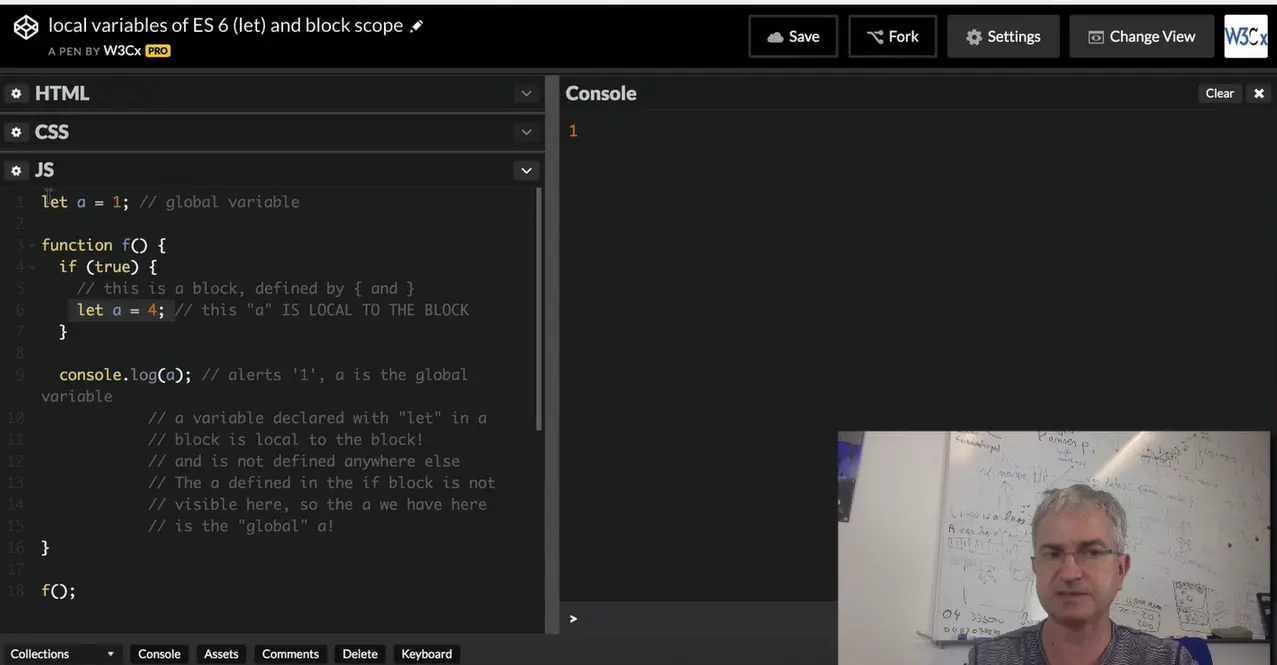
With JavaScript 6, I can use "let" instead of "var". The global scope does not change. If I declare a global variable, it can be used anywhere. But, if I declare a local variable, it's no more local to the whole function in which it is defined, but it's local to the block of instructions that is defined by an opening brace and a closing brace.
If I try to use this variable here, that is defined in the block, outside of the block but inside of the function, the "a"..., the value of the variable "a" here, will not be the value of the local variable here, because this one does not exist, it's not usable here. It will be the global variable "a" that will be used.
This is why the printed value here, when I execute "f" is "1" and not "4".
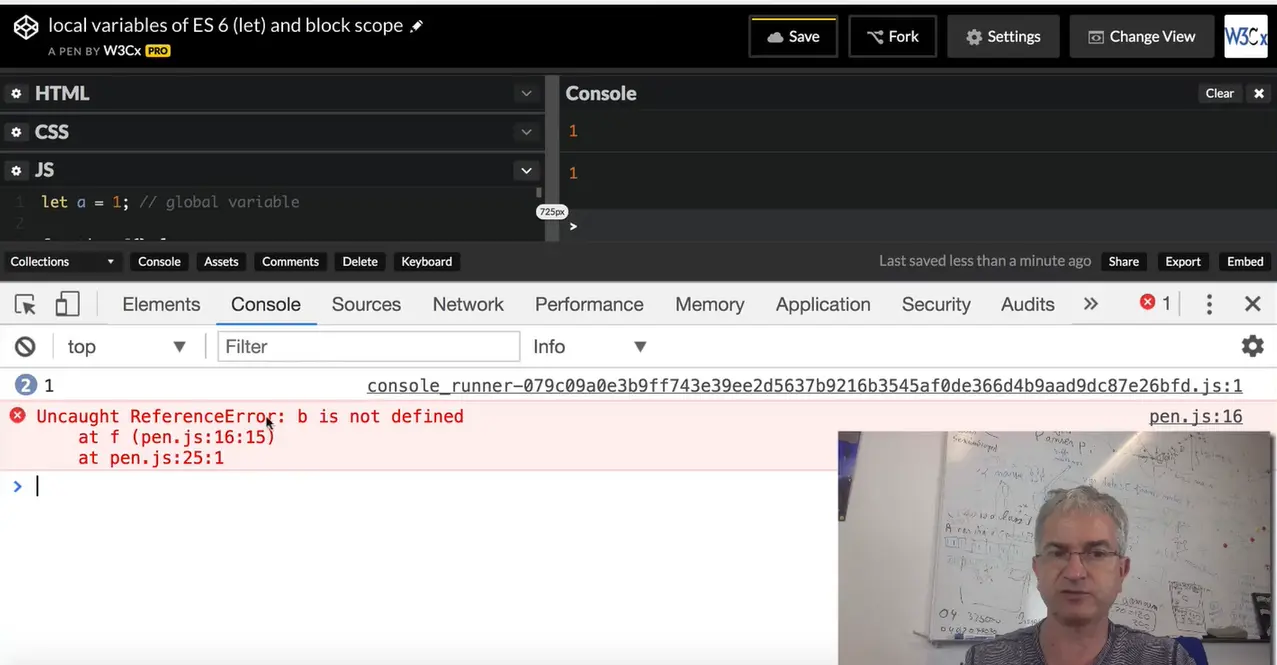
If the variable was named "b" and if I tried to display it, then... I've got an error: "b is not defined".
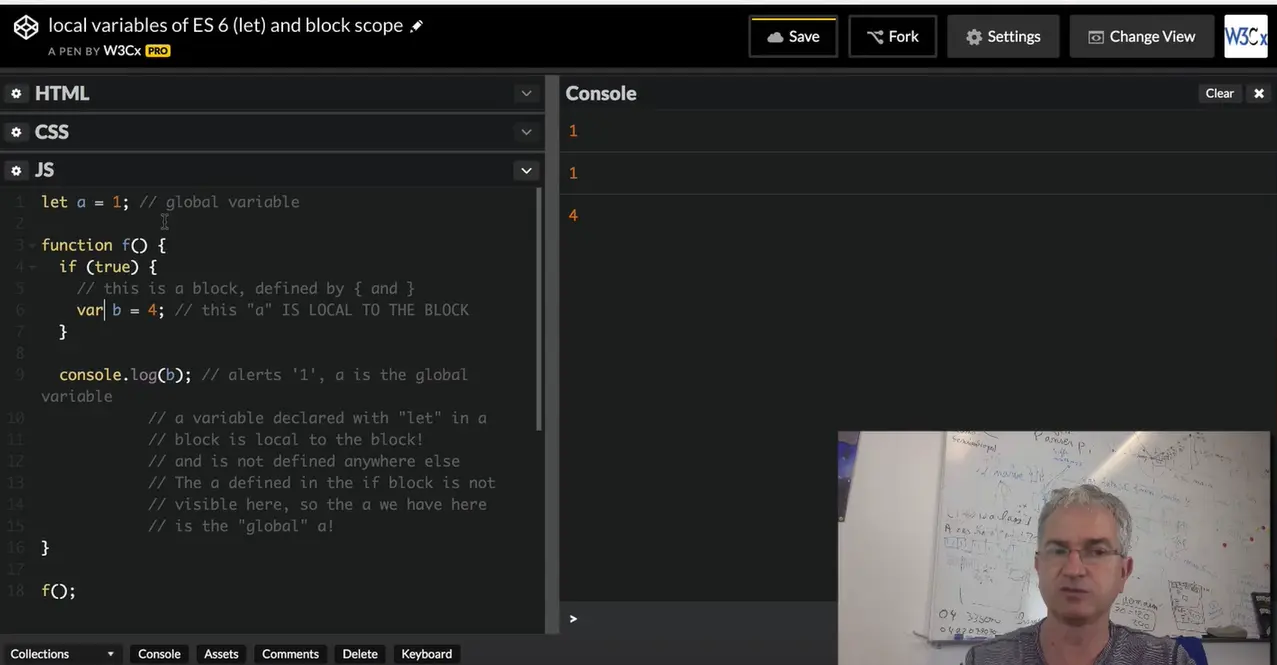
Remember that if I used "var" in that case it works, because "var" will define a variable local to the whole function, not just to the block of instructions.
JavaScript 5 / ES5 has two scopes: 1) a global scope for declaring global variables, and 2) a function scope for declaring variables that are local to a function.
Furthermore, like in most programming languages, inside a function, a local variable masks a global variable that has the same name.
See examples below.
Global variables are variables declared outside of functions. They can be used anywhere in the code.

Variables declared with the keyword var in a function, are said to be "local to the function". They "mask" any global variable that may have the same name.
When a variable is declared in a function, we also call it simply "a local variable", as opposed to "a global variable". In JavaScript 5 (and this is not common in programming languages), local variables are local to the function. They can be used anywhere inside the function.
Most programming languages have local variables that are limited to the block of instructions between '{' and '}' that contains the variable declaration. We call these variables "block variables". This is the case with variables declared with the let keyword introduced by JavaScript 6 / ES6. See examples at the end of this section.
Example of a local variable declared in a function, that is NOT local to the block, but to the whole function:
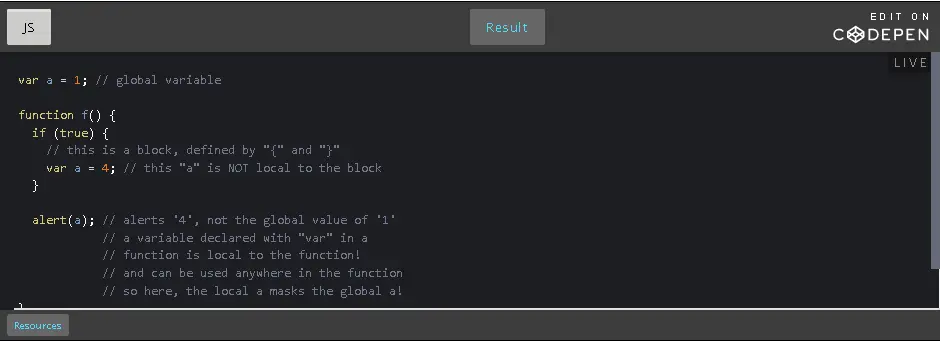
Here is another example that shows the differences between global and local variables, and highlights the "masking" of global variables by local variables when they share the same name.
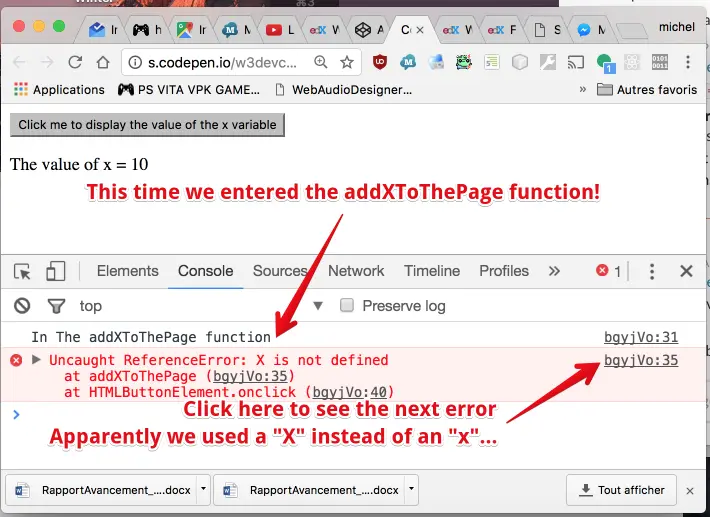
JavaScript is sometimes an overly permissive language. We can make stupid errors that turn out to be very hard to detect. One such error occurs when we forgot to use the var keyword while declaring a local variable.
In JavaScript 5 / ES5, a variable declared in a function without the var keyword, makes it a global variable.
BEST PRACTICE: in JavaScript 5 / ES5, always use the keyword var when declaring a global or a local variable.
Better: use the keyword let if you target browsers that support JavaScript 6 or above.
Here is an example that shows what happens when you forget to use var or let while declaring a local variable:
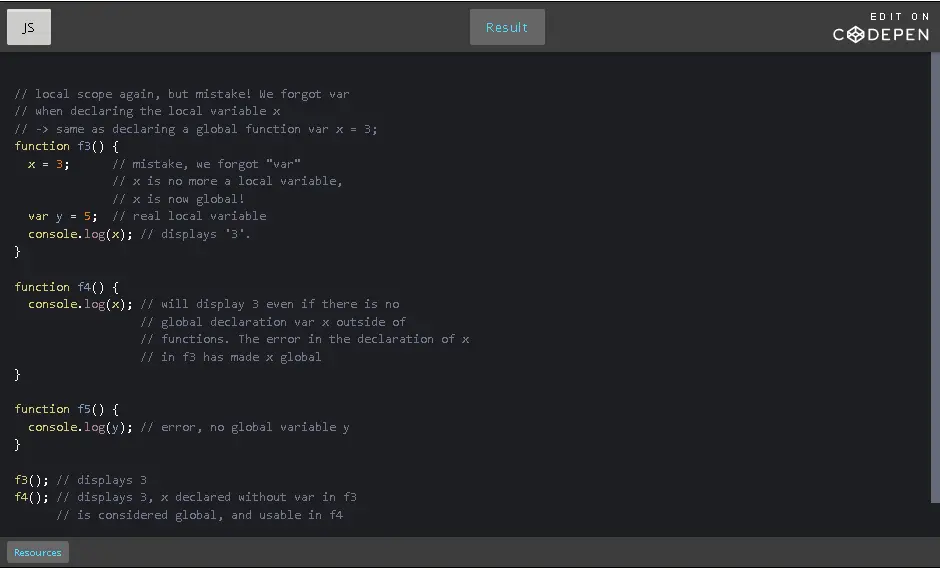

Modern JavaScript has the let keyword for declaring variables, and the const keyword for declaring constants.
Modern JavaScript has two scopes: 1) a global scope for declaring global variables, and 2) a block scope for declaring variables between { and }. This is similar to what we find in many other programming languages such as Java, C# etc.
Furthermore, like in most programming languages, inside a block, a local variable masks other variables located in higher scopes (global or in another block that contains the current block).
Example of a local variable declared with the let keyword. Its scope is the block:
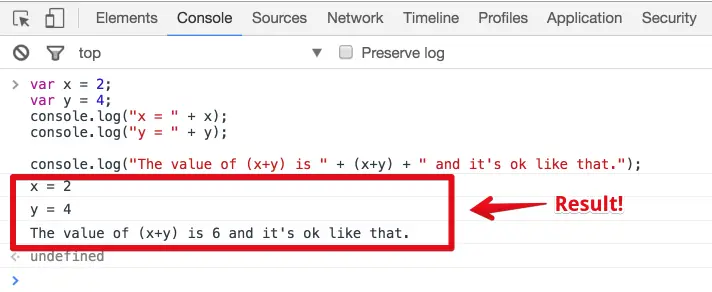
Well, all modern browsers support the let and const keywords, however, you might find lots of examples that still use the var keyword…
Anyway, we highly recommend to use let and const instead of var, for declaring variables and constants!
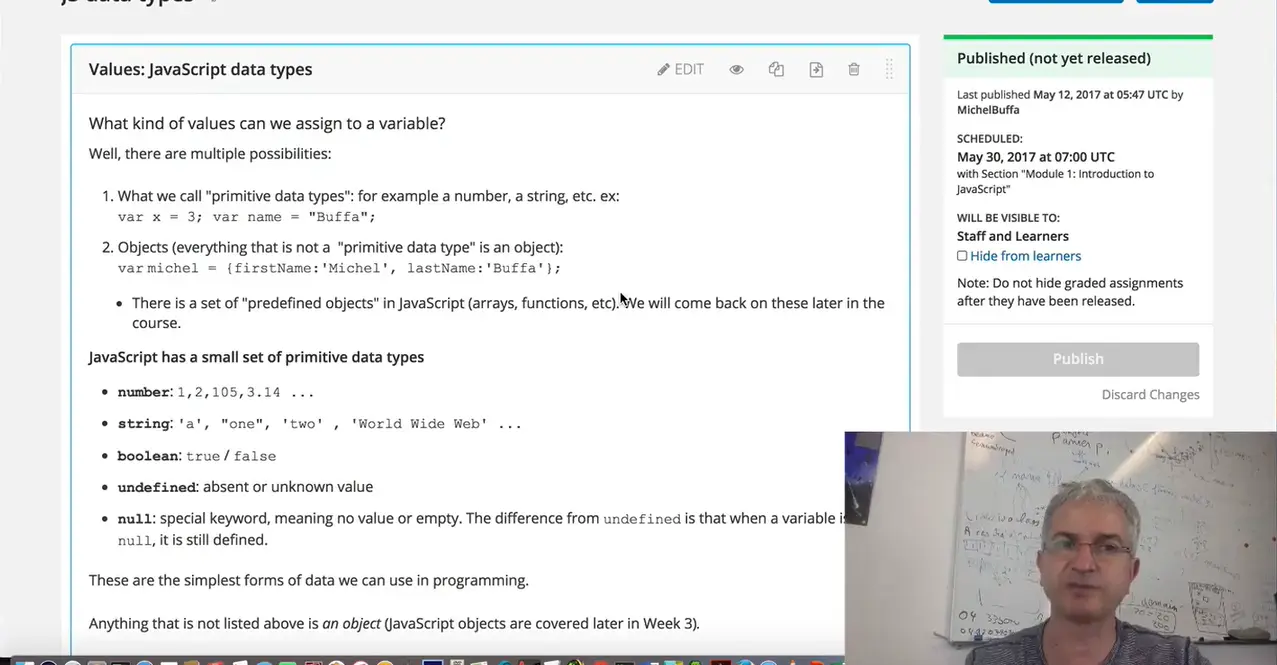
Let's talk about JavaScript data types. The data type of variable is the kind of value you can give to this variable. With JavaScript, there are many possibilities: even if when you declare a variable, you don't type if data type: "var x=10", the value you give to this variable will help JavaScript figure out the data type of this variable.
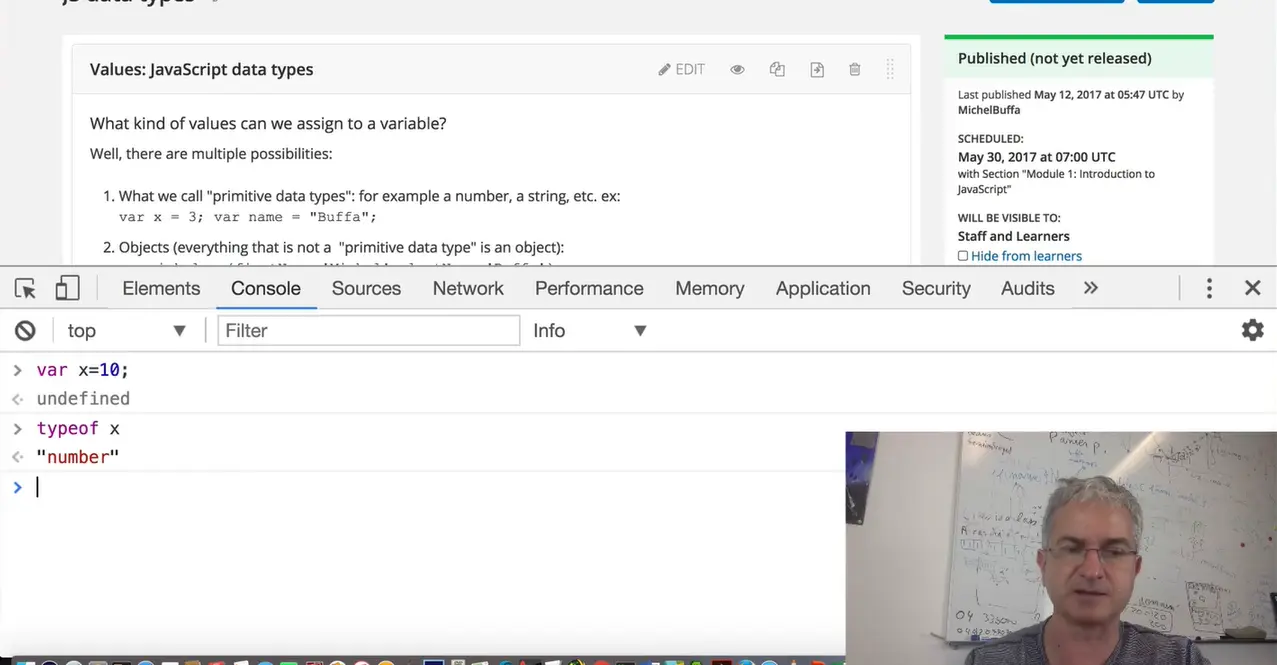
And there is an operator named "typeof" that you can use for visualizing the internal data table of variable. So "var x=10", this corresponds to a number.
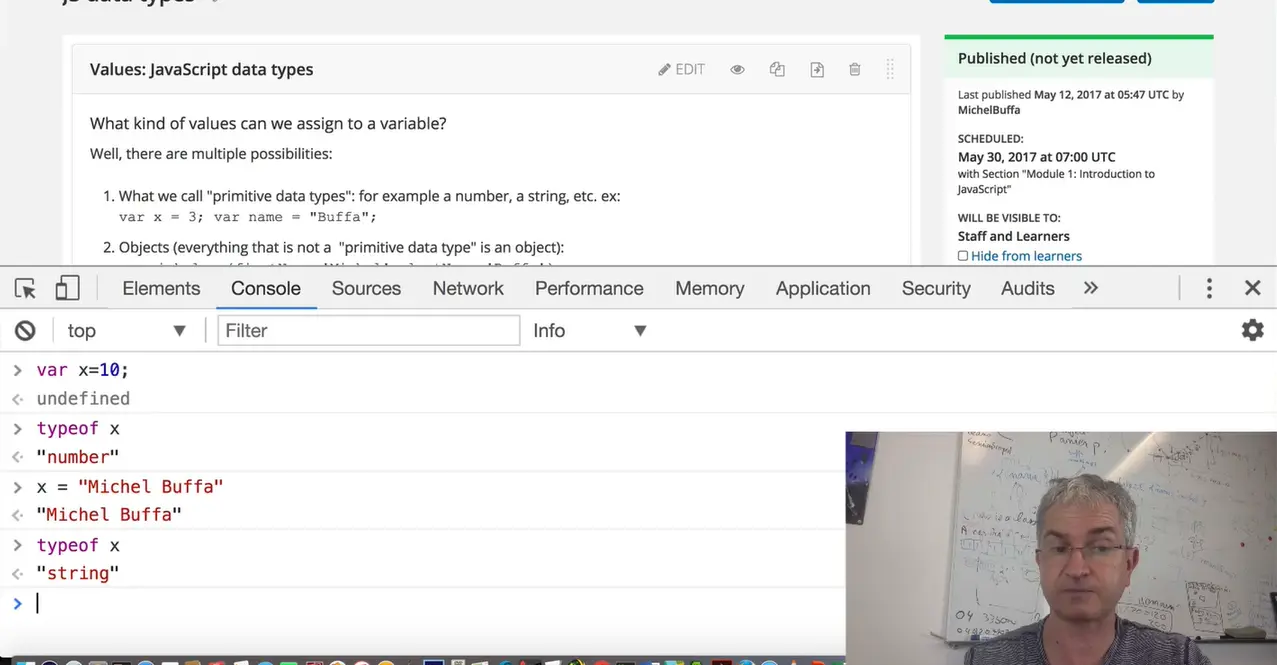
If I give to "x" a string value like my name, then the type of "x" will be "string". It changed its internal type on the fly, we call this "dynamic typing".
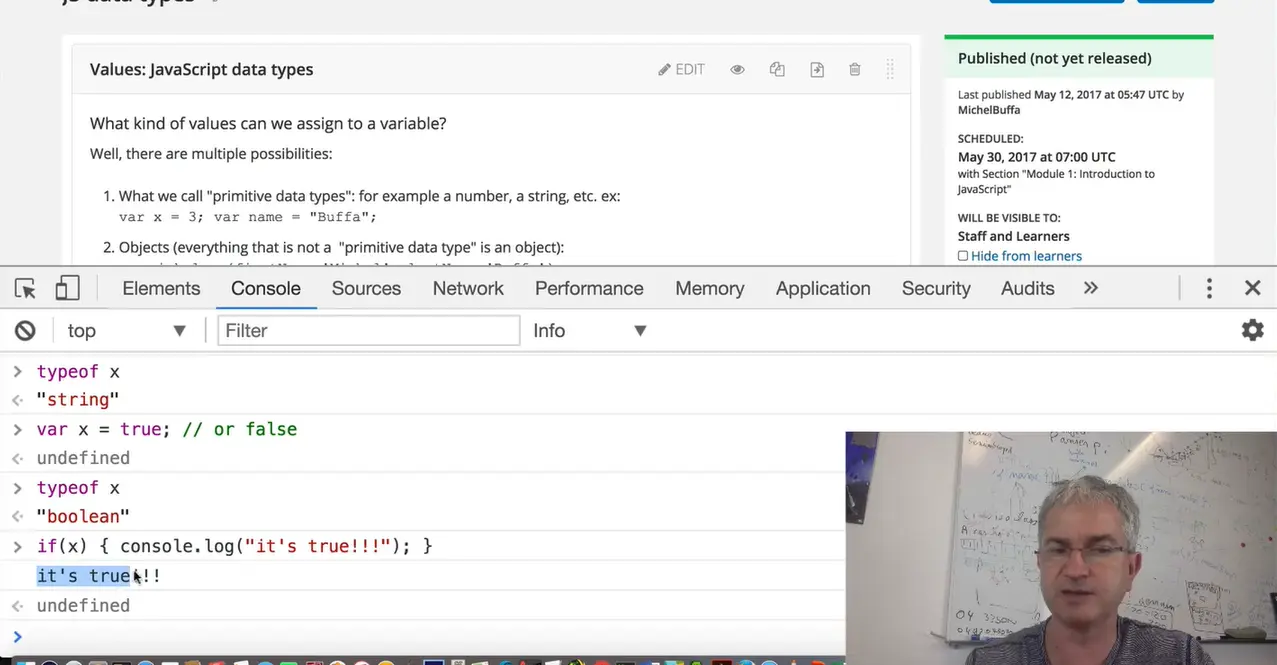
What kind of data types can we get? String, number, we've got also boolean value: "var x = true" or "x = false" corresponds to a boolean value: "typeof x"... boolean.
And I can say "if (x)" then... do something... "console.log("it's true!!!")" and the boolean data types is useful for "if" statements or some other statements that will test boolean value.
In that case, it printed "it's true!!!" because "x" was "true". If I give to "x" the value "false", then if I execute this code, it will do nothing because "x" is false.
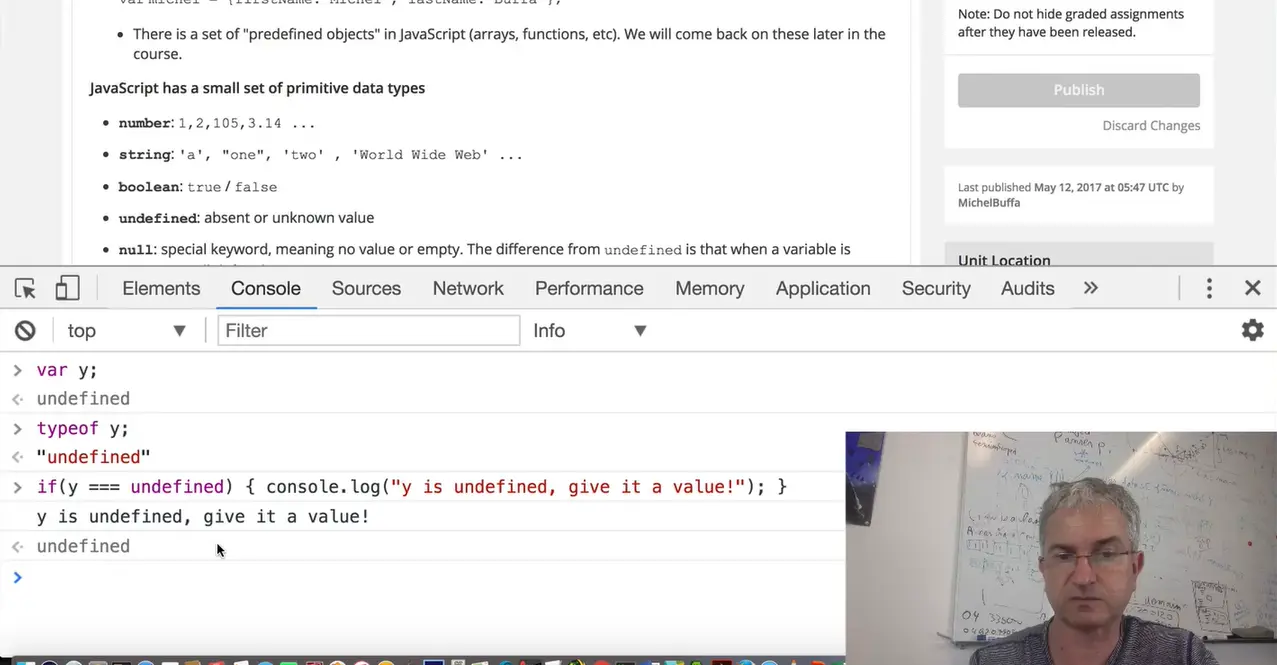
We've got also some special values… but "typeof y": undefined. I can test if y is undefined then ....And in that case, you can test if a variable is defined or not.
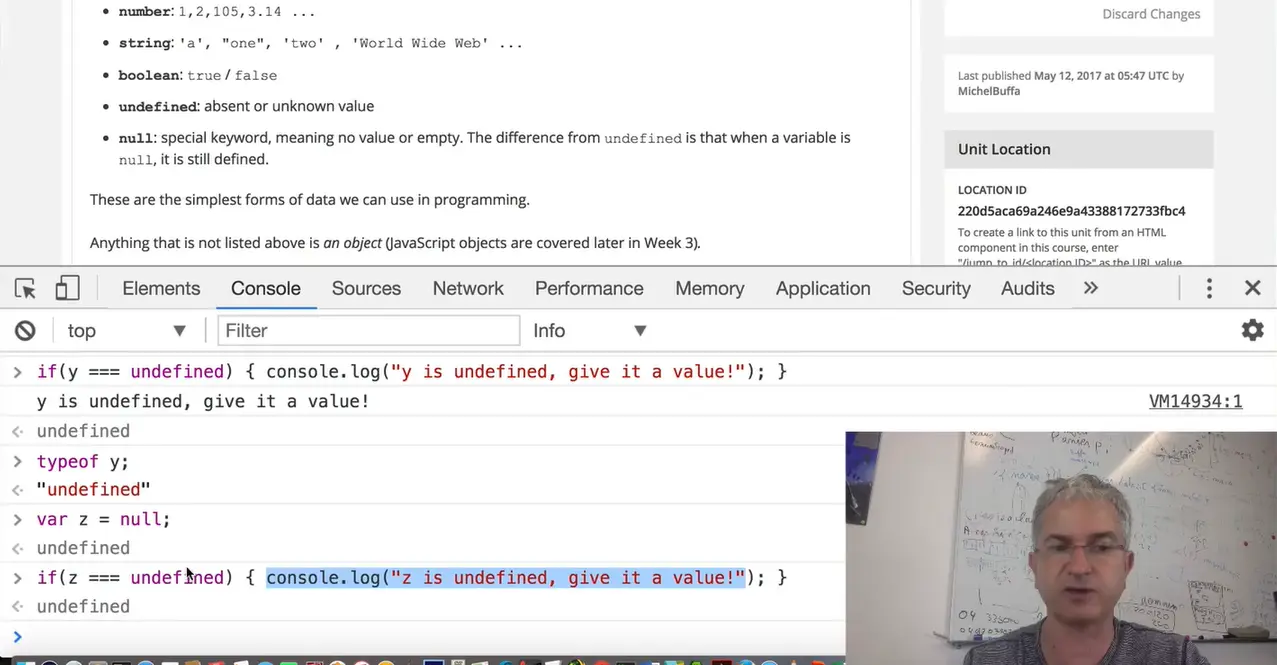
There is a special data type called "null" that corresponds to "no value". The difference with the null defined variable is that the variable that has the value of null is still defined. Like "y" is not defined here... but if I say "z = null" then "z" is defined.
Ok, this has not been printed because "z" was not undefined. OK, another common value we give to variable is object. An object is something like this: property, value. And if I look at the type of "person", it will say: object. And object is a structured variable, I can use the "." operator to check the value of some property.
So, "person.familyName" will print the value "Buffa" .... "person.name" will print my given name. There is a particular case for arrays. Arrays are defined using "brackets". If I define an array with two names of days in a week: Monday and Tuesday, then, its type is also "object". There is no type that is called "array". Arrays are objects in JavaScript. To sum up, we've got: number, string, Boolean, undefined, and null and object.
Nothing else. And the "typeof" operator can be used to display the type of an object.
Well, there are multiple possibilities: What we call "primitive data types": for example a number, a string, etc. ex: var x = 3; var name = "Buffa";
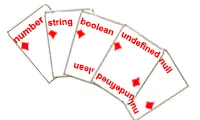
var x = 3; var name = "Buffa";
<a href="" target="_blank" rel="noopener noreferrer">a set of playing cards</a>
Objects (everything that is not a "primitive data type" is an object):
var michel = {firstName:'Michel', lastName:'Buffa'};
There is a set of "predefined objects" in JavaScript (arrays, functions, etc). We will come back on these later in the course.
These are the simplest forms of data we can use in programming.
Anything that is not listed above is an object (JavaScript objects are covered later in Module 3).
You said JavaScript does not have types for variables?No! I said that JavaScript is weakly typed; you do not declare the type of variable. In some other languages (Java language syntax, for instance) instead of var x=2; or let name="Buffa"; you would write int x=2; or String name = "Buffa";, with the datatype explicit in the variable declaration.
The next section of the course talks about "operators" but there is one that is better introduced in this section: the typeof operator, that is useful for knowing the type of a variable depending in its value (possible values: number, string, boolean, undefined, object, or function)
We will use it in lots of examples in the next three sections.
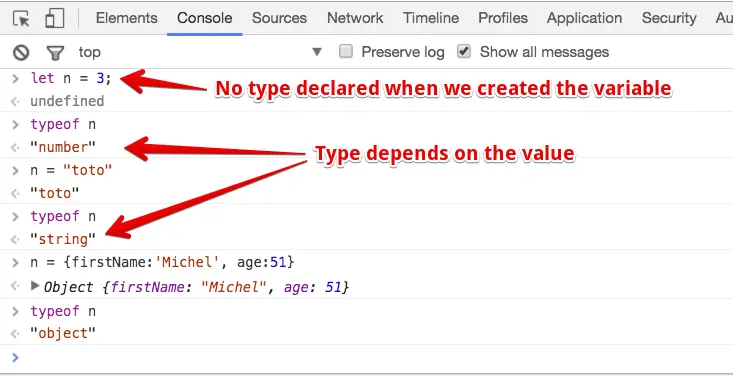
This operator is not often use in JavaScript programs, but it's useful for us, for explaining the data types.
Type 343 in the devtool console, and after you press the Enter key, the corresponding value (343) will be displayed.
var n=1;
undefined
> typeof n;
"number"
> n=1234;
1234
> typeof n;
"number"
> n=1.23;
1.23
> typeof n;
"number"
> typeof 123;
"number"
3.46e4 equals 3.46 x 10^4 equals 34600
> 1e1;
10
> 1e+1;
10
> 2e+3;
2000
> typeof 2e+3;
"number"
> 2e-3;
0.002
> 123.456E-3;
0.123456
> typeof 2e-3;
"number"
Be careful with this, don't start an integer with 0 (zero), JavaScript will understand it as an octal value.
010 equals 8 which means 1 * 8^1 + 0 * 8^0
The number 0456 means 4 * 8^2 + 5 * 8^1 + 6 * 8^0
Question 1: What's the result, as an integer, of the operation: 24 - 024?
Explanation 1: 24 is an integer which equals 24 but 024 is an octal value which equals 20.
Question 2: Which value will be displayed in the devtool console if you type 098 followed by the Enter key?
Explanation 2: 9 and 8 don't exist in base 8 (only 0 to 7), the typed number will be considered as an integer.
0xFF equals 255, 0xF3 means 15 * 16^1 + 3 * 16^0 and the resulting
value is 243
> var n3 = 0377;
undefined
> typeof n3;
"number"
> n3;
255
> var n4 = 0x00;
undefined
> typeof n4;
"number"
> n4;
0
> var n5 = 0xFF;
undefined
> typeof n5;
"number"
> n5;
255
The value Infinity (or +Infinity) represents all number values greater than 1.79769313486231570e+308 and -Infinity represents values smaller than -1.79769313486231570e+308.
Finally, Nan represents not-a-number values, for example if you try to divide 0 by 0 (type 0/0 in the devtool console).
> 0 / 0;
NaN
> 3 / 0;
Infinity
> Infinity;
Infinity
> typeof Infinity;
"number"
> 1e309;
Infinity
> 1e308;
1e+308
> var a = 6 / 0;
undefined
> a;
Infinity
> var i = -Infinity;
undefined
> i;
-Infinity
> typeof i;
"number"
> Infinity - Infinity;
NaN
> -Infinity + Infinity;
NaN
> Infinity - 20;
Infinity
> -Infinity * 3;
-Infinity
> Infinity / 2;
Infinity
> Infinity - 9999999999999;
Infinity
NaN is a special value and its type is "Number"!
> typeof NaN;
"number"
> var a = NaN;
undefined
> a;
NaN
0. > var a = 10 * "f";
undefined
> a;
NaN
> 1 + 2 + a;
NaN
In JavaScript, numbers are represented with a double-precision 64-bit format (IEEE 754). These 64 bits are used with this table:
| Total bits | Sign | Exponent | Significant |
| 64 | 1 | 11 | 52 |
First, each number is represented as a float. For example, 1 equals 1.0. But there are approximation errors that are well-known in float calculations. One common example of errors due to the approximation of floating point numbers is that 0.1 + 0.2 does not equal 0.3.
> 0.1 + 0.2;
0.30000000000000004

Second, an integer has 2^52 relevant bits, the biggest integer is 2^53. There is one bit that determines the sign of the number, so the smallest signed integer is -2^53.
Note: Some arithmetic functions use only numbers with a 32-bit format. Larger numbers will be converted…
For more information about floating point numbers, follow this link at Wikipedia.
For example, the expression 3 + 5 produces the value 8, and the value 11 alone is also an expression. Within an expression, we can find values, variables, operators, and expressions. The first two have been already described above, all that's left are operators.
In JavaScript, an operator can be unary or binary (plus one ternary operator). A unary operator is applied to one expression. It can be prefixed or suffixed.
typeof 'world';
A binary operator is applied to two different expressions, and is both prefixed and suffixed.
var x = 45 / 32;
Within an expression, we can also use parentheses to force the execution of the expression inside. Parentheses can be used to indicate precedence.
For example, this is an expression: (3 + 2). And the expression (3 + 2) * 4, which equals 20, depends on the expression within the parentheses.
In JavaScript, expressions can evaluate to four types, which are: numbers, strings, booleans, and objects. For example, an expression with the operator - will evaluate to a number. But an expression with the operator + can evaluate to a number or a string (for addition or concatenation).
Live coding video: number operators
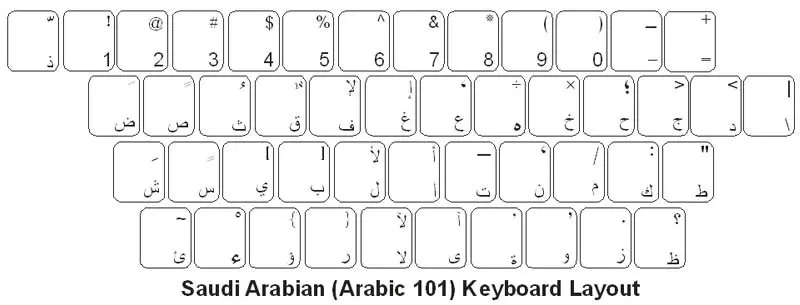
Welcome to a short video about JavaScript number operators. The different
operators you can use in numerical mathematical expressions are:
" + ", " - ", " / ", " * " and modulo, the percent sign (" % ").
You can use these operators in what we call mathematical expressions. An expression is something where you use "12 * 20". And you got a result. You can assign this to a variable: "var x =12 * 20" You can see that you can group different values or ….like this. And then, you can start building some more complex expressions. You've got the "*“ operator for multiplying, "/" for dividing, "+" and "–" for addition and subtraction.
There’s also an operator called modulo for example: "22 % 20". We display the rest of the division "22 % 20". "42 % 20" will display the same value. You can also regroup expressions within parentheses like: "var z = (12*20)/(x+10)".
This will work. It will first compute what is within the parentheses, then use the result for the final computation.
Nothing special to say here, but there are strange operators that are we called the prefix and suffix increment operators. So, if I declare variable "x" that has the value of "10". And if I display it, but I use “–- “ at this end, this will display the value of “x” and after that, it will decrement the value of "x" It will remove 1 from "x ". This is equivalent to writing: "var x= 10" … "console.log(x)"… and "x = x –1".
As you saw, it's longer to type all these instructions, but if I do just "console.log(x--)", it will do the same thing. It will display the current value of “x", but its final value is one less that. You can also post increment or post decrement values: " console.log(++x)". You remember that "x" was equal to "8". In that case, it will display "9" because "x" will be first incremented by one then displayed. If I display the value of "x" it’s "9"... Z= ++x ... "z" will be "9 + 1"… "10".
And "x" will be 10 because it's been incremented. This is equivalent to "x= x+1 ... Z= x". That's all we can say about number operators, nothing special. It's the same syntax you can find in the Java programming language or in c#, Python, or Ruby.
The following arithmetic operators are binary:
+, - , /, *, % (modulo)
Example: 7 % 5 equals 2, which is the remainder of the integer division of 7 by 5
Note: (7 / 5 = 5 * 1 + 2 ).
++, --, - (the opposite of a number)
++ and -- operators increment or decrement the value of a variable. They can be both prefixed or suffixed, which have different effects:
Examples typed in the devtool console of a browser
> 1 + 2;
3
> var a = 1;
undefined
> var b = 2;
undefined
> a + 1;
2
> b + 2;
4
> a + b;
3
> var c = a + b;
undefined
> c;
3
> 1 + 2;
3
> 99.99 - 11;
88.99
> 2 * 3;
6
> 6 / 4;
1.5
> var m = 0;
Undefined
> m;
0
> // regular use of the + operator
m = m + 1;
1
> m;
1
> m = m + 1;
2
> m;
2
> // post increment
m++;
2
> m;
3
> console.log(m++); // will display 3 but after that m is incremented
3
> m;
4
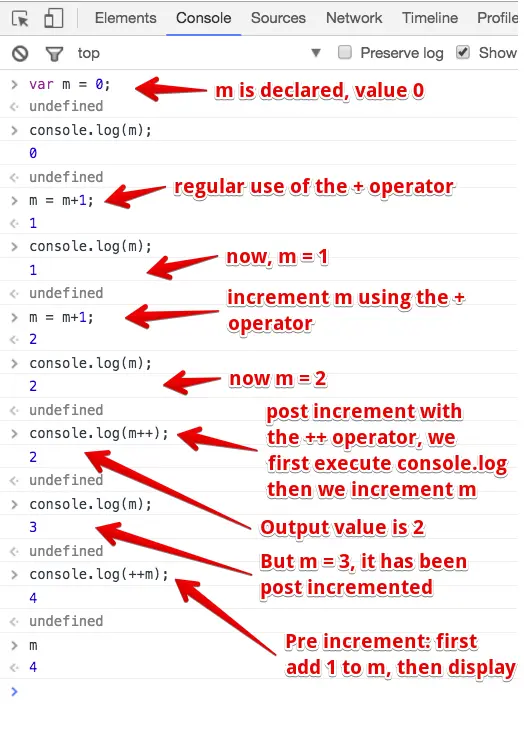
> var a = 123; var b = a++;
Undefined
> b;
123
> a;
124
> var a = 123; var b = ++a;
Undefined
> b;
124
> a;
124
> var a = 123; var b = a--;
undefined
> b;
123
> a;
122
Binary operators can be used with a shorter syntax when we want to assign the resulting
value to a variable at the same time.
Code below (try it in the devtool console of your browser):
> var a = 10;
> a *= 5; // equivalent to a = a * 5;
> console.log(a);
> 50
There are good chances you will encounter such code:
> var a = 5;
Undefined
> a += 3 // equivalent to a = a + 3;
8
> a -= 2; // equivalent to a = a - 2;
6
> a *= 10; // equivalent to a = a * 10;
60
> a /= 5; // equivalent to a = a / 5;
12
> a %= 2; // equivalent to a = a % 2;
0
> // this is normal, as it is even
To declare or manipulate strings you must write them with single quotes ' or double quotes " around them. Single quotes or double quotes are both accepted, and there is no difference between them in JavaScript. However, the community prefers to use single quote for string - this is not a convention, but a recommendation.
And finally, you cannot start a string with a single and end with a double quotes, or the opposite.
> "Hello World";
"Hello World"
> "JavaScript Course";
"JavaScript Course"
> 'With single quotes';
"With single quotes"
> "Do not mix double and single quotes'; // here we opened the string
  with double and closed with single quotes
VM24763:1 Uncaught SyntaxError: Invalid or unexpected token
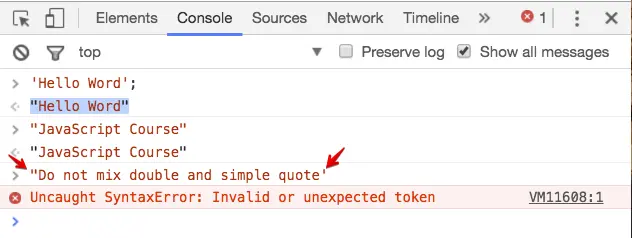
Live coding video: string and string operators
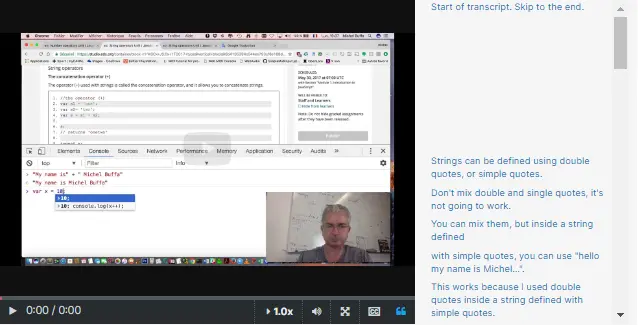
Strings can be defined using double quotes, or single quotes. Don't mix double and single quotes, it's not going to work. You can mix them, but inside a string defined with single quotes, you can use "hello my name is Michel...". This works because I used double quotes inside a string defined with single quotes. I can do the reverse: use single quotes inside a string defined with double quotes.
But if I wanted to use the single quote like for "I'm your teacher", you see that the color changes because this is not correct. In that case you must use the antislash (\)... Like this… you escape the single quote that confuses the JavaScript interpreter, and you can, in that case, display single quotes inside a string that has been defined using single quotes.
The \ character is also useful for printing special characters.
For "s1 = My\n" ... it means "go to the next line"…
if I print "s1 = My\\nName\\Is\\Michel". You saw the carriage return
here, I came to the next line. Ok, let me fix it by adding \\n
In that case each word is on a different line. You can use also \\t for
inserting a tab, and \\\\ for displaying the \\ character itself.
In that case, you can display the \\ character itself using double
antislash.
Let's talk about string operators. The "+" operator is the most common one, it's useful for concatenating values to any string. Let's look at one example.
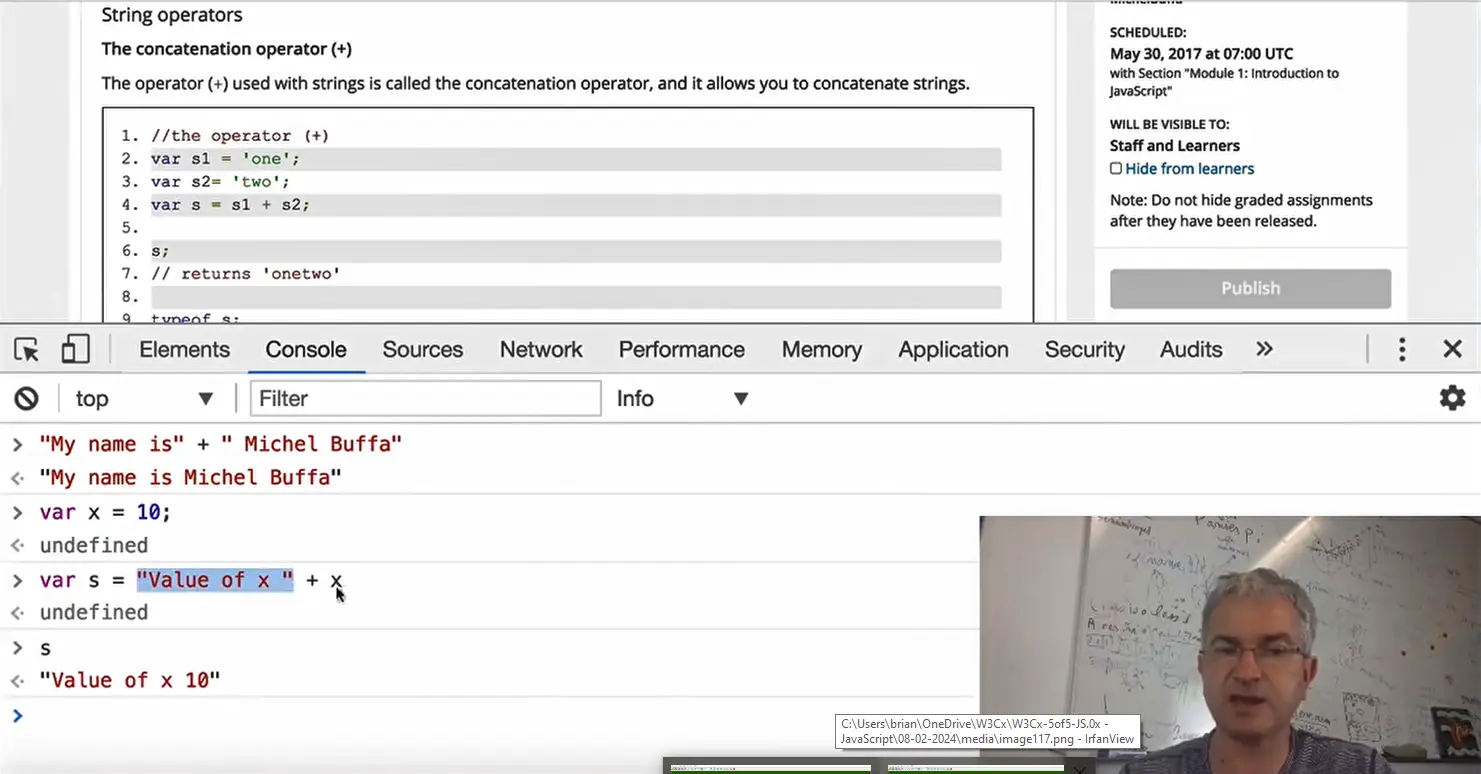
If I say 'my name is' + 'Michel Buffa', then you see that the result here is the concatenation of the string 'my name is' and the string 'Michel Buffa'. You can also use variables of different types, that will be converted to strings, if some parts of the + operator, some sides of the operator, are strings.
You see that the value of s is the concatenation of the string "value of x " and the number value of x (that was 10), has been converted and concatenated to it.
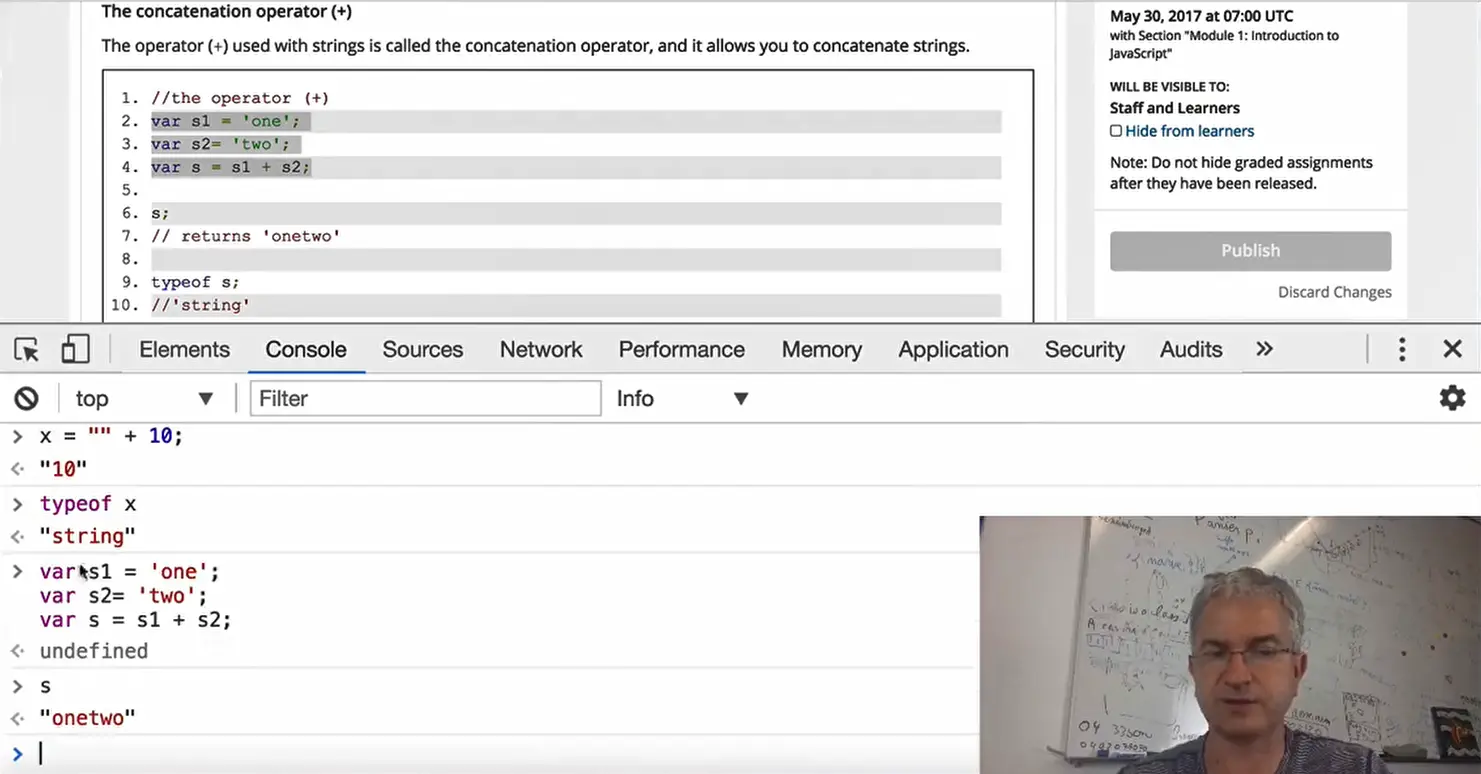
There are also some ways to convert variables to strings. x here, is a number, but x = "" + 10; in that case, x is a string. You can also concatenate string values... s1 = "one", s2 = "two", if I concatenate these values here, s is equal to the concatenation of s1 and s2.
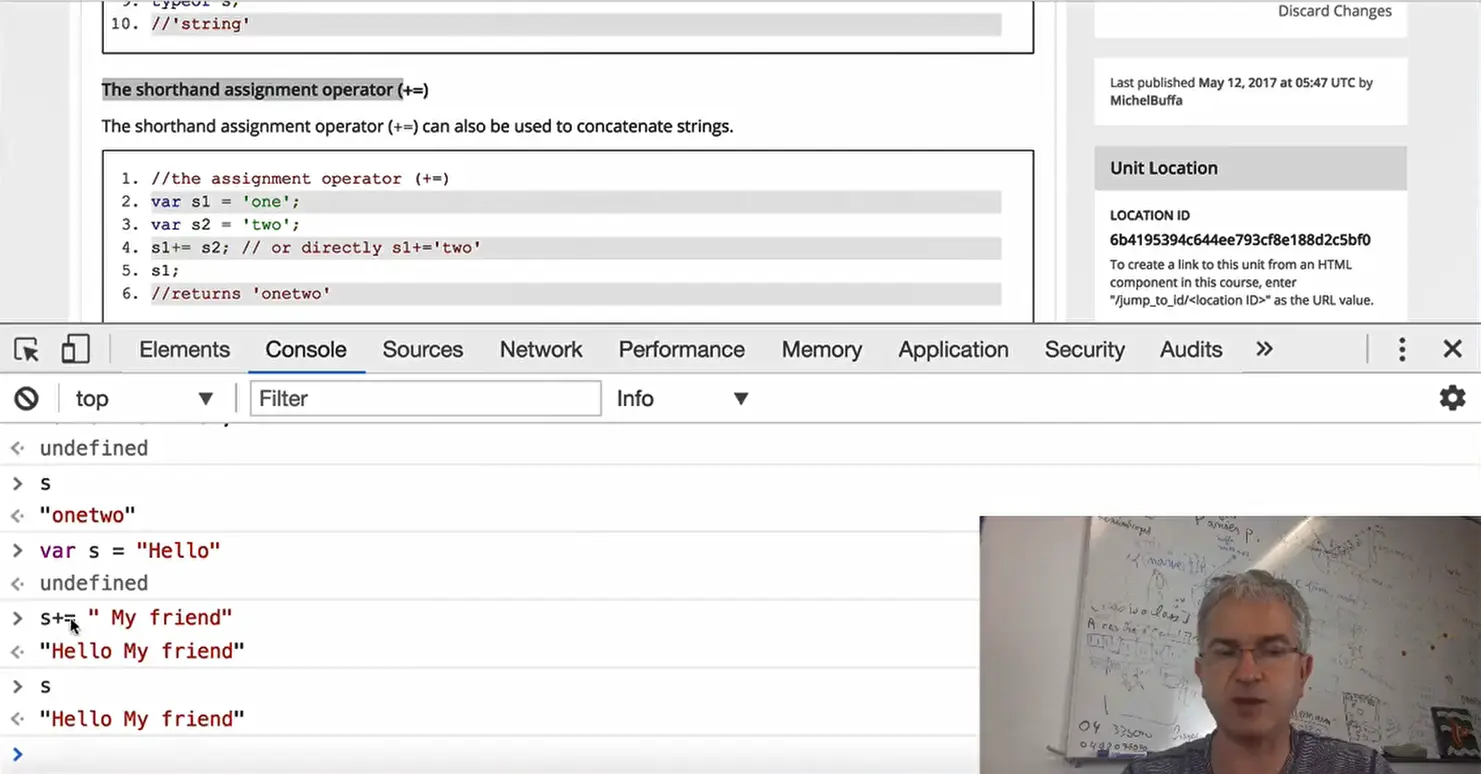
There is also an assignment operator called += that can be very useful
when concatenating values to a string. Like var s=Hello; s+="My
friend", you give a value of s="Hello my Friend".
The += means s = s+something, it adds to the end of s. I can also use
strings in mathematical operations, and they can be converted
automatically.
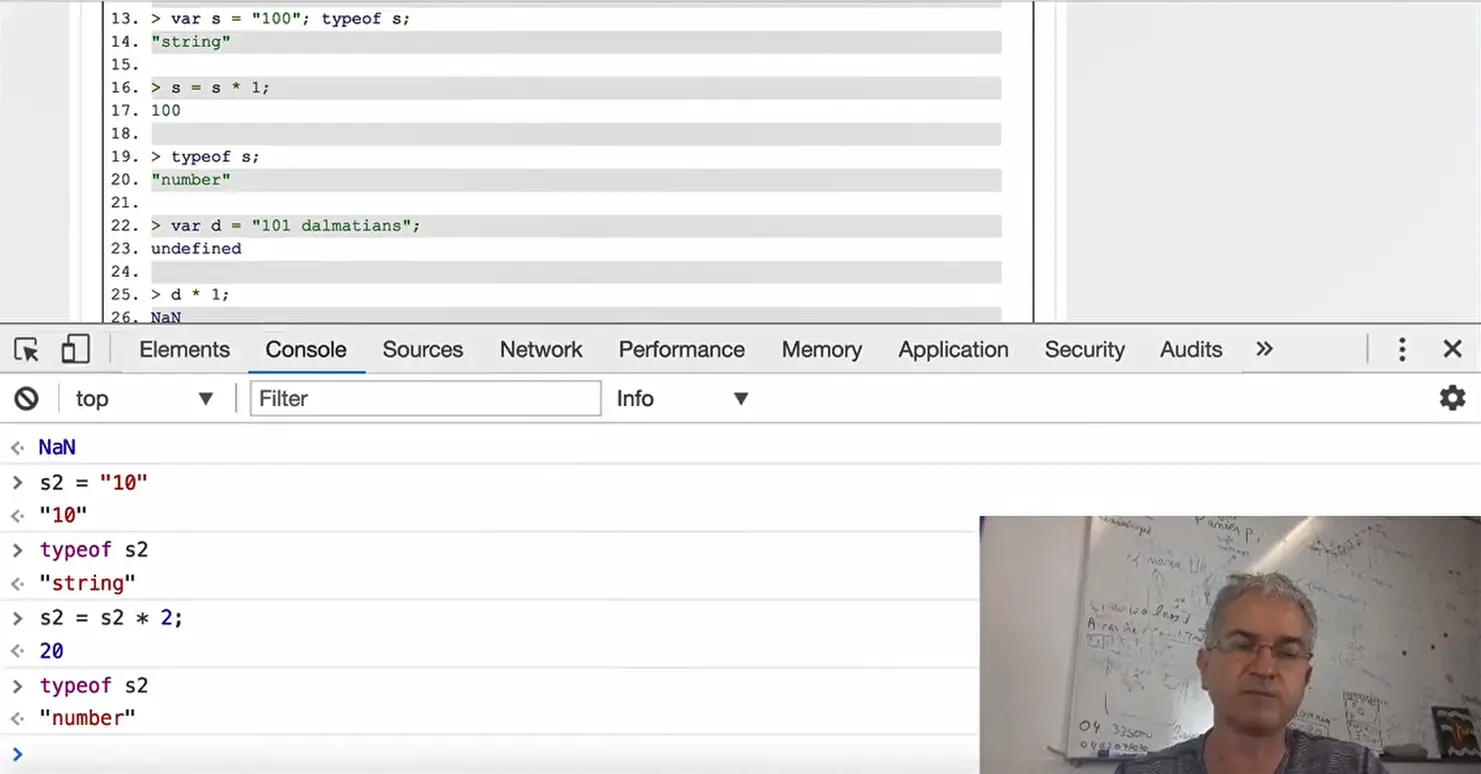
I've got s2 that is 10. s2 is a string, and if I do s2=s2 * 2; in that case, s2 has been converted automatically. The value "10" as a string became 10 as a number. And s2 now is a number that is worth twice its previous value.
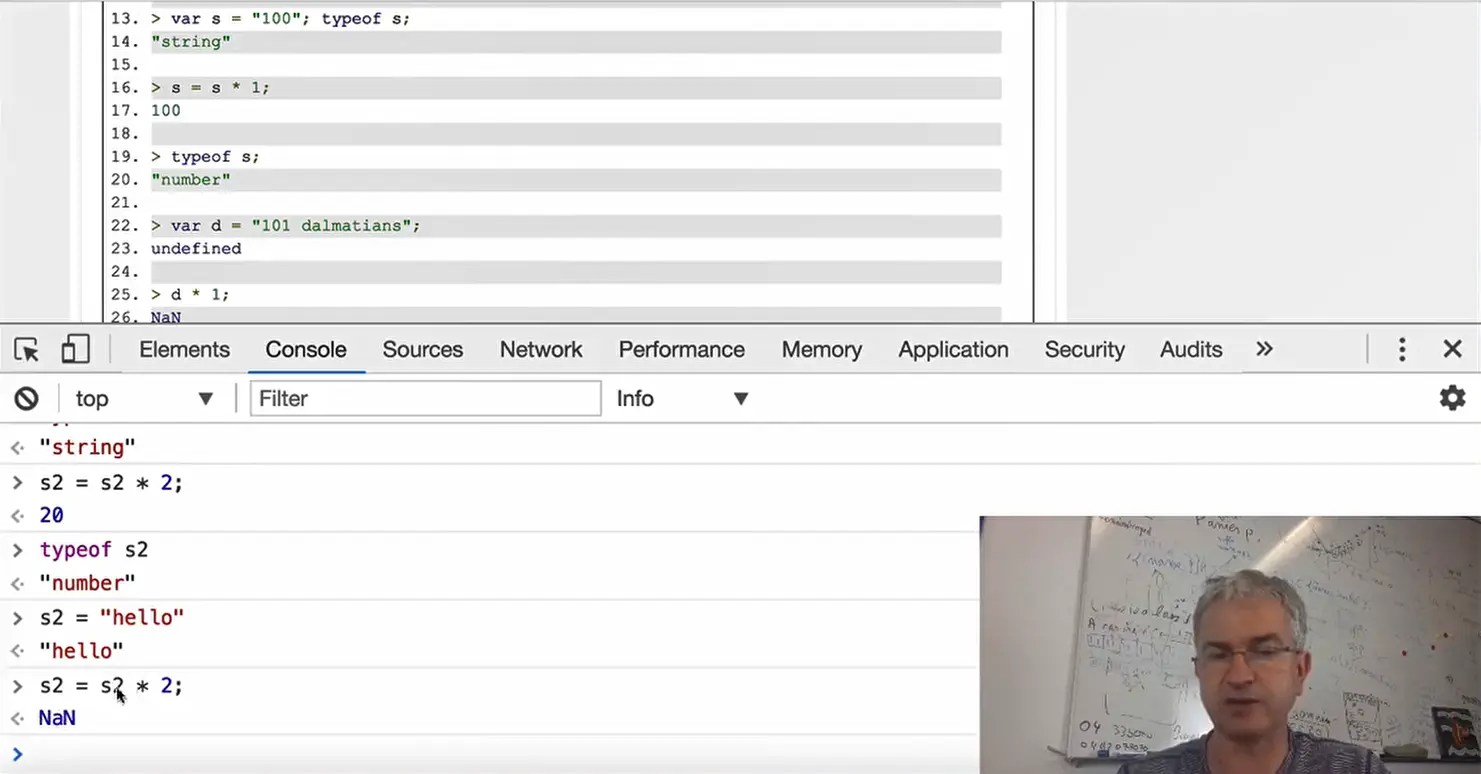
If I try to use a string that is not a number, not a value that can be converted to a number, like "hello"… in that case - if do the same operation - the result is NaN that means "Not a Number", you cannot convert "hello" to a number that can be used in a mathematical expression or multiplied by two.
The operator (+) used with strings is called the concatenation operator, and it allows you to concatenate strings.
// the operator (+)
var s1 = 'one';
var s2= 'two';
var s = s1 + s2;
s;
// returns 'onetwo'
typeof s;
// 'string'
The shorthand assignment operator (+=) can also be used to concatenate strings.
// the assignment operator (+=)
var s1 = 'one';
var s2 = 'two';
s1+= s2; // or directly s1+='two'
s1;
// returns 'onetwo'
Another way to concatenate strings is the method concat():
// the 'concat' method
var s1 = 'one';
var s2 ='two';
var s = s1.concat(s2);
s;
// returns 'onetwo'
All the methods shown above can be used with a variable number of arguments:
var s1 = 'Hello';
s1 = s1 + ' World' + ' JavaScript';
var s2 = 'Hello';
s2+= ' World ' + ' JavaScript';
var s3 = 'Hello';
s3.concat(' World' , ' JavaScript' );
// s1,s2 and s3 return 'Hello World JavaScript'
A String number in an arithmetic expression is converted to Number, unless the formula is a pure addition.
> var s = '1'; s = 3 * s; typeof s;
"number"
> s;
3
> var s = '1'; s++; typeof s;
"number"
> s;
2
> var s = "100"; typeof s;
"string"
> s = s * 1;
100
> typeof s;
"number"
> var d = "101 dalmatians";
Undefined
> d * 1;
NaN
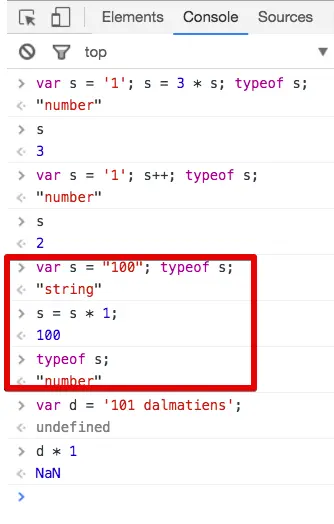
There is trick for converting a Number into a String: we concatenate with an empty string, at the beginning of expression (type this in the devtools):
var n = 1;
typeof n;
// returns "number"
n = "" + n;
// returns "1"
typeof n;
// returns "string"
The \\ is useful for "escaping" special characters. Here are a few examples:
var s = 'I don't know';
var s = "I don't know"; // here the \ is useless
var s = "I don't know";  // same result as previous line
var s = '"Hello", he said.'; // ok, double quotes inside single one will be displayed
var s = "\"Hello\", he said."; // double quotes inside double quotes need to be escaped
var s = "1\\2"; s;
// returns "1\2"
var s = '\n1\n2\n3\n';
s
// returns "
1
2
3
"
var s = '1\r2';
var s = '1\n\r2';
var s = '1\r\n2';
// the three previous lines give:
"1
2"
var s = "1\t2"
// s is equal to
"1 2"
We have already encountered objects in different examples. You can easily recognize these objects:
They are declared using "{" and "}", such as in var p = , givenName and familyName are called "properties" and Michel and Buffa are their respective values.
We are using the "." operator to access their properties or methods. Example : daysOfTheWeek.length (arrays are objects too - special ones, but objects), or document.body or window.innerWidth (try typing that in the devtool console). There are plenty of predefined objects in JavaScript (window, document, navigator, etc.). We have also used console.log(…), and indeed console is a predefined JavaScript object. With the object var p = {givenName:'Michel', familyName: 'Buffa'}, we can access the properties the same way, with: p.givenName and p.familyName.
Open your devtool console (F12 or ctrl-alt-i or cmd-alt-i on Mac), go to the console tab and type "window" followed by a ".", normally you should see an auto-completion menu. Start typing "inne" and you should see some possible completions.
Try looking at the values of the size of the current browser window (type window.innerWidth followed by the "enter/return" key, type window.innerHeight, etc.).
Try looking at the vendor of your browser: type "navigator.vendor", try looking at the current URL displayed in your window: type window.location, etc.
We will study these objects later, but for the moment, just play with objects :-)
> window.innerHeight
217
> window.innerWidth
1704
> navigator.vendor
"Google Inc."
There are many ways to create your own JavaScript objects. For the moment, let's stick to the simplest one, "singleton objects", and for now all you need to know is that they can have properties that hold values. We will return to objects in Week 4 and cover them in further detail.
var student1 = {
  fullName:'John Doe',
  age: 23,
  city: 'New York',
  ssn: "11-22-33-44" // no comma at the end of the last property
}                    // declaration
Accessing an object's properties: we use the operator "."
> student1.ssn
"11-22-33-44"
> student1.age
23
> student1
[object Object] {
  age: 23,
  city: "New York",
  fullName: "John Doe",
  ssn: "11-22-33-44"
}
Arrays are a special datatype. You declare arrays using brackets, like this:
var daysOfWeek = [];
You can fill them at declaration time:
var daysOfWeek = ['Monday', 'Tuesday', 'Wednesday', 'Thursday', 'Friday', 'Saturday', 'Sunday'];
var gradesInMaths = [12, 7, 14, 18, 9, 11];
Each element in an array has an index. The first element's index is 0, the second element's index is 1 etc.
To access an element, you use the array variable and "[" followed by the index value followed by "]", as shown in these examples:
var daysOfWeek = ['Monday', 'Tuesday', 'Wednesday', 'Thursday', 'Friday', 'Saturday', 'Sunday'];
undefined
daysOfWeek[0]
"Monday"
daysOfWeek[1]
"Tuesday"
daysOfWeek[2]
"Wednesday"
daysOfWeek.length
7
var daysOfWeek = ['Monday', 'Tuesday', 'Wednesday', 'Thursday','Friday', 'Saturday', 'Sunday'];
undefined
daysOfWeek.length
7
Indeed, there are seven days in a week and the daysOfWeek array has seven elements, indexed from 0 to daysOfWeek.length -1
This way of enumerating all elements (from 0 to the length of the array -1) is very, very common, and will prove to be very useful when you learn how to iterate on an array's elements (Week 2).
If you want to add a new element at the end of an array, use the index equal to the length of the array.
var daysOfWeek = ['Monday', 'Tuesday', 'Wednesday',
    'Thursday', 'Friday';, 'Saturday'];
undefined
daysOfWeek.length
6
daysOfWeek[6]
undefined
// NO ELEMENT AT INDEX 6 in an array of 6 elements, first index is 0
// last 6-1 = 5
> daysOfWeek[6] = 'Sunday'
"Sunday"
daysOfWeek.length
7
// Sunday, the 7th day of week is at index 6 !
Well, this is not so important for the moment, but look:
> var a [];
> typeof a;
"object"
> var a = [1,2,3];
> a
[1, 2, 3]
> a[0]
1
> a[1]
2
And indeed, when you write daysOfWeek.length, you are using the array as an object, and you are using the length property of array objects.
Since arrays are objects, we can do much more with them - in particular, they have more properties and more methods than the push method. You will learn more about this in a later lesson (Arrays part 2), but for the moment, let's focus on the most useful features…
> var daysOfWeek = ['Monday', 'Tuesday', 'Wednesday', 'Thursday', 'Friday', 'Saturday'];
undefined
> daysOfWeek.length
6
daysOfWeek.push('Sunday');
7
> daysOfWeek
["Monday", "Tuesday", "Wednesday", "Thursday", "Friday", "Saturday", "Sunday"]
> daysOfWeek.length
7
Strings are arrays of characters!
> var s = 'one';
> s[0]
"o"
> s[1];
"n"
> s[2];
"e"
> s.length;
3
A function allows you to group code, give it a name and be able to execute it by calling it by name.
Functions always return a value:
function sum(a, b) {
  var c = a + b;
  return c;
}
var result = sum(1, 2);
// result is equal to 3
console.log(result)
> 3
If parameters are omitted during the call, JavaScript gives them the value undefined:
> sum(1)
NaN
An array named "arguments" is created automatically in each function, it contains all the call parameters of the function:
function f() {
  return arguments;
}
…
f();
// returns []
…
if( 1, 2, 3, 4, true, ';Michel Buffa';);
// returns [1, 2, 3, 4, true, "Michel Buffa"]
function newSum() {
  var i, res = 0;
  var numberOfParameters = arguments.length;
  for (i = 0; i < numberOfParameters; i++) {
    res += arguments[i];
  }
  return res;
}
…
>>> newSum(1, 1, 1);
3
>>> newSum(1, 2, 3, 4);
10
This section does not detail the examples presented. Some of them are studied later in the course, some won't.
The examples are just here to bring some fun whilst making you play with some various uses of JavaScript. You are invited to look at their source code, and to tweak the examples. Do not worry if you don't understand how they work. We are just giving you "a taste" of JavaScript. There will be no graded exercises about them.
Using the console.log(…) instruction, you can write messages to the devtool console of your browser. This is a common way to debug your code!
For example, let's say you added a button to your Web page, but nothing happens when you click on it. It can be very difficult to spot your error without using the devtool console and console.log(…)!
Let's check that some parts of the code you wrote are executed correctly.

Normally, when the button is clicked, we should call the addXToThePage() function, which in turn should display the value of the variable x inside an HTML paragraph.
Let's check if the function is really executed. We need to add a console.log("In the addXToThePage function"); as the first instruction of the function:
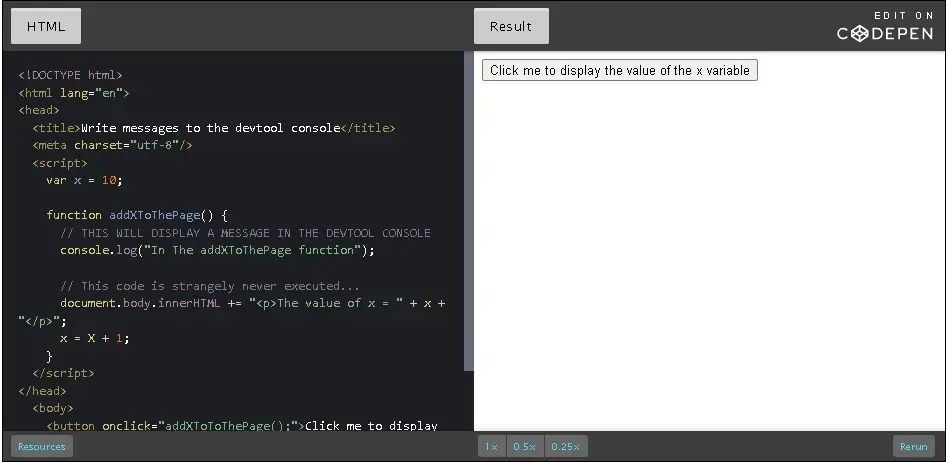
And let's execute this with the devtool console open (use F12 on Windows, or Cmd-Alt-i on a Mac, or control-shift-i). First, as the provided example is located on CodePen, an online IDE, it's better to execute it in "debug mode". The online IDE will just display a page (see snapshot below) with the code running:
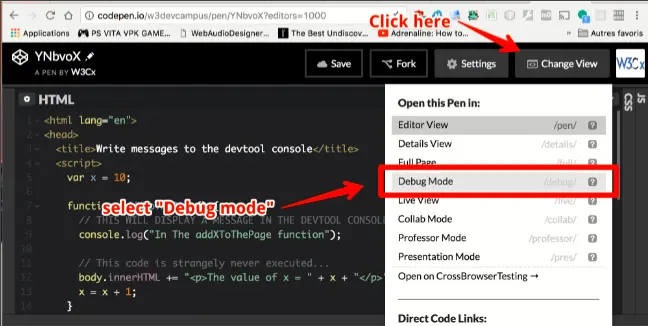
This action opens a new tab with only your code running in it (not the whole codepen IDE + your code!). Open the devtool console (F12 or control-shift-i or cmd-alt-i on Mac), and you should see this:
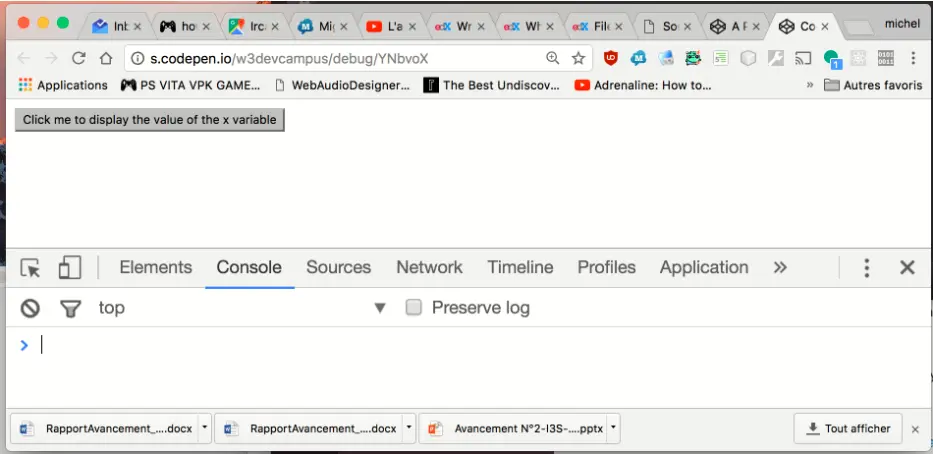
Now, press the button! An error message appears:

Apparently the function name is wrong, addXToToThePage does not exist. We can check the source code by clicking on the YNbvoX:40 link on the right:

Our first error was that we typed the wrong name in the onclick="…", the name we used : AddXToToThePage has "ToTo" instead of "To". Let's fix that now and try again:
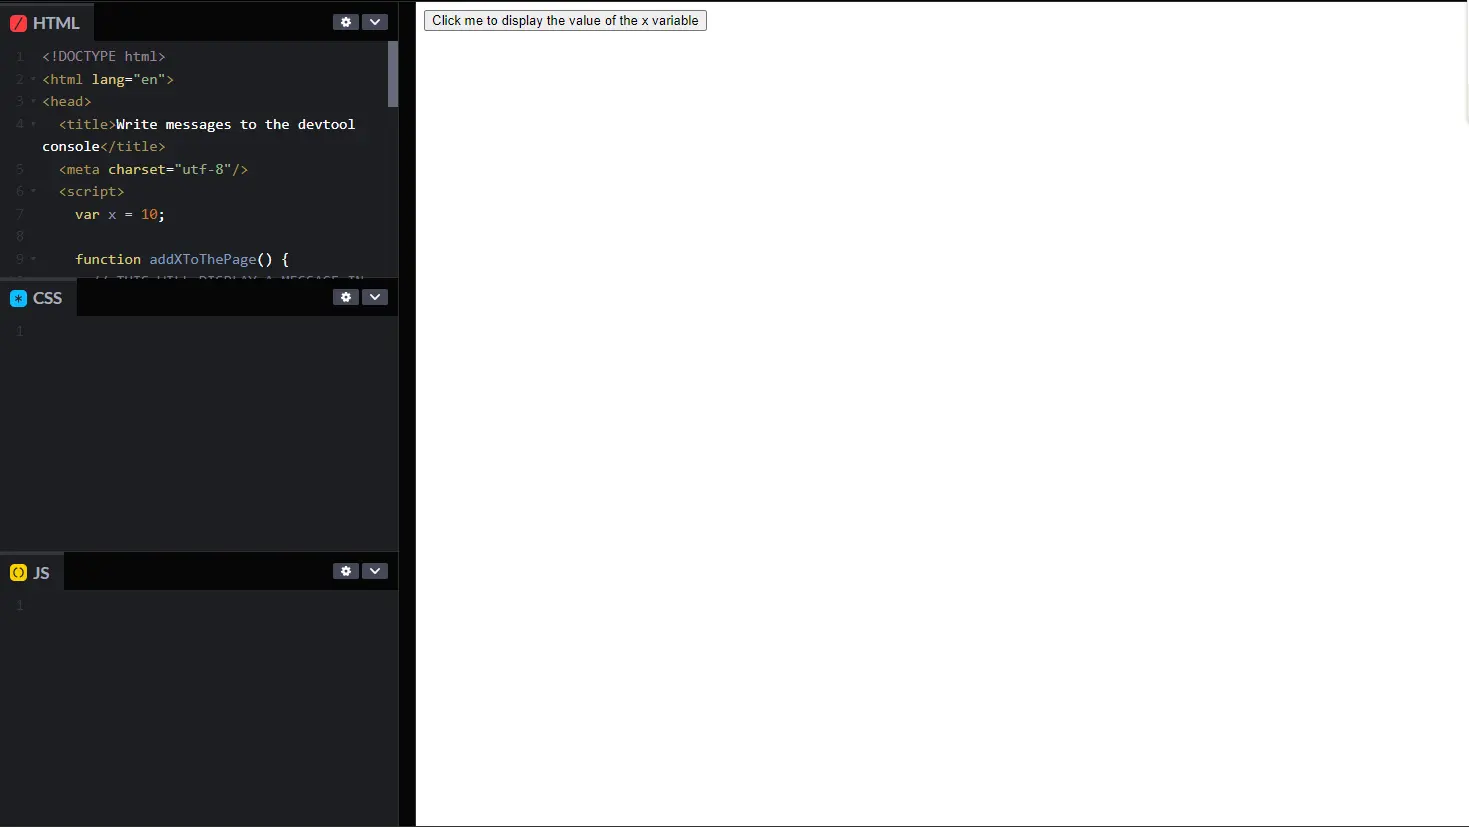
After we've changed the name of the function to the correct one, let's go in debug mode, open the devtool console and click the button. Here is what we get:
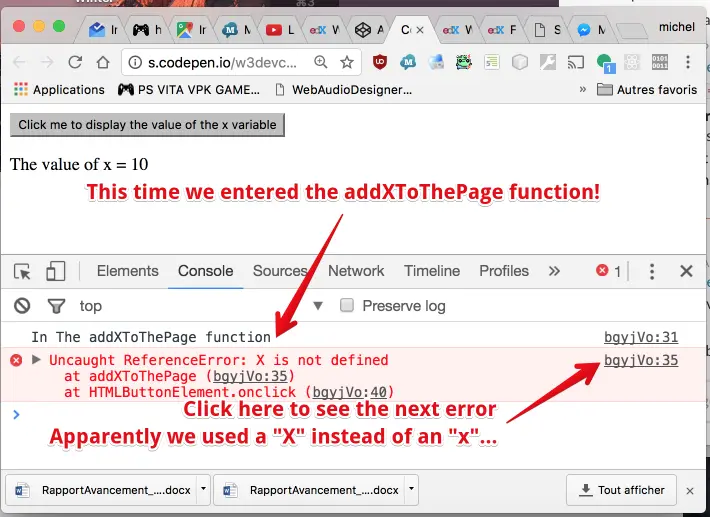
Ok, you understand the principle… by using console.log(…) with a string message as parameter, you can make the message appear in the devtool console, confirming that you have executed your code without error at least to this point…
Let's fix this "X"! We'll replace it with an "x" and everything should be ok now:

You can click on the button now….
Instead of just displaying pure string messages, you can also use the "+" operator to concatenate variable values to the pure character strings.
var x = 2;
console.log("The value of x is " + x + " and it';s ok like
that.");
We typed this code in the devtool console to check what it does:

You can use as many "+" as you like, the part right after the "+" will be turned into a string if the part in front is a string…
You can also use parentheses in order to display results of simple calculations:
var x = 2;
var y = 4;
console.log("x = " + x);
console.log("y = " + y);
console.log("The value of (x+y) is " + (x+y) + " and it';s ok like that.");
Result:
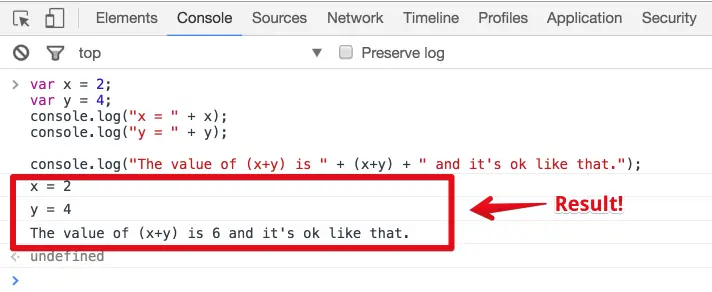
You can use any operator (+, -, /, *, etc.), you are not limited to using the "+" operator. And of course, you can use such code in your programs, not only in the devtool console :-)
Don't worry if we do not explain all the details of this example. In the first module, we're giving you "a taste" of what we can do with JavaScript. Over the following modules, we'll delve deeper into the details…
We've already seen some examples that modify the content of the document dynamically. We changed a title by clicking on a button, we displayed the value of a variable named x in the previous section, etc.
The browser comes with some very powerful APIs (Application Programming Interfaces - a set of predefined objects/functions/variables you can use):
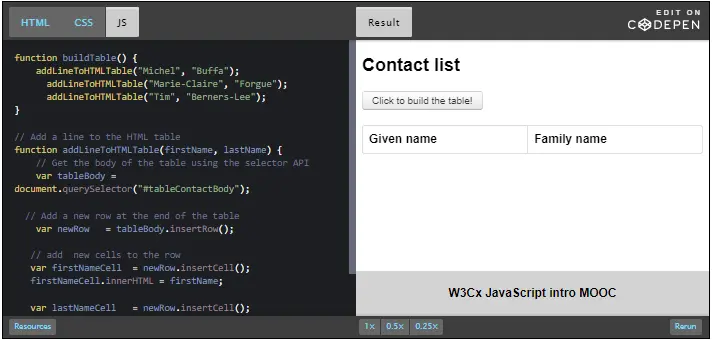
Just click the button to build the HTML table dynamically. You should see this:
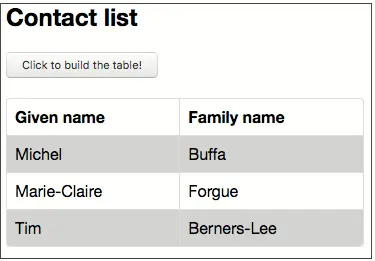
We've already seen some examples in which we modify the style of some parts of a document using JavaScript. Here we show another example of what can be done.
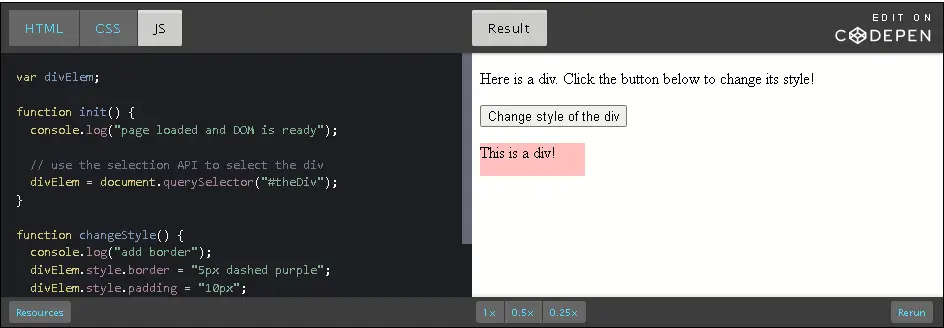


Notice how the CSS properties change when we use them from JavaScript:
And the positions, widths and heights are always string values. In our example we used pixel units and a percentage, so we need to add the "px" and "%" character(s) when we manipulate these properties from JavaScript.
With JavaScript, you can react to user interactions (keyboard, mouse, gamepad), to changes in the lifecycle of your document (page has just loaded or resized, screen has been rotated on a mobile device), or to be notified when a long process has been completed (loading a large image or sound from the network).
We've already seen how we can make a <button> react to a mouse click with <button onclick="…">Click me</button>
Below, we outline some extra examples. In the next course module, we will go into detail about events, and in the following modules, we will study some of the most useful events in even greater depth.

The HTML5 canvas is useful for drawing and animating at 60 frames/second. Very detailed tutorials are provided in the W3C HTML5 Coding Essentials and Best Practices course, while the W3Cx HTML5 Apps and Games MOOC addresses how to write video games using the canvas 2D API.
In this JS introductory course, we use HTML5 canvas to draw curves, to make a small game, etc. Small and diverse examples for illustrating some JavaScript data structures such as Arrays or Objects are going to be presented.
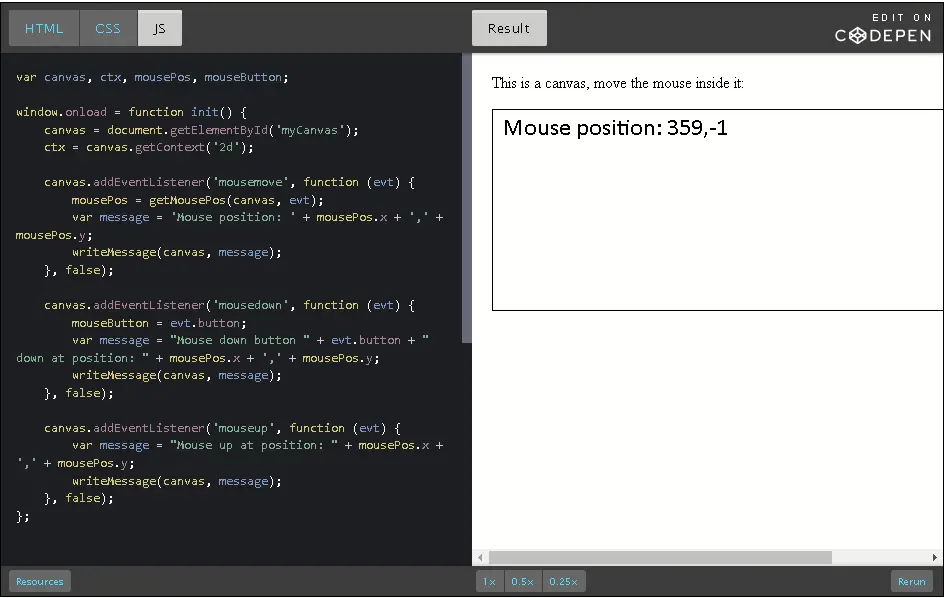
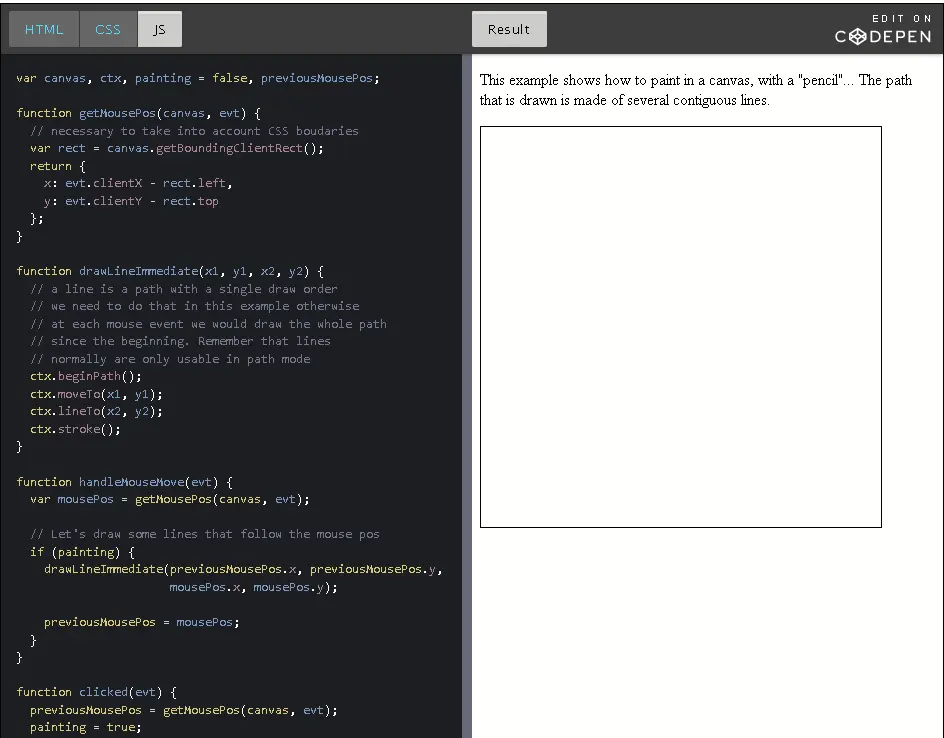
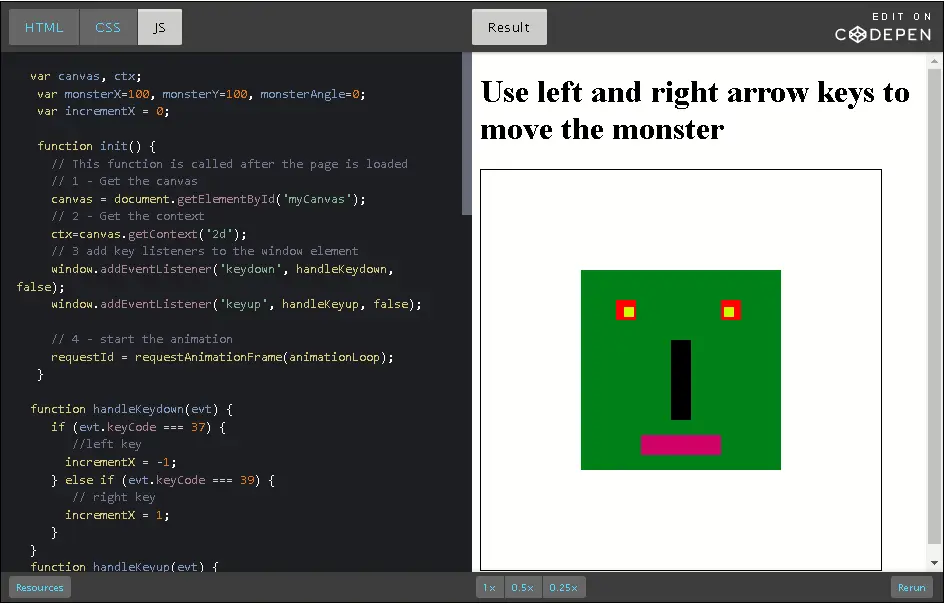
Your browser comes with a lot of standard W3C APIs. By standard, we mean "parts of HTML5" or real Web standards that will still work in 10 years. In contrast to "industry standards", W3C standards are meant to be supported by browsers for years to come. These standards are a joint effort by the industry, the community, and W3C to develop stable, reliable standards.
The following example uses some of these APIs, simply to "show the possibilities". Others will be discussed later on in the course, or in other W3Cx courses.
CLICK ON THE TOP RIGHT OF THE BELOW WINDOW (on the "Codepen" logo) to see this example running. Due to security restrictions, the webcam image cannot be seen in this embedded example anymore.
Look at the JavaScript tab! The W3Cx HTML5 Coding Essentials and Best Practices course provides many other examples that use the webcam.
If you want to spend some time having fun with the WebCam, don't forget to try the WebCam Toy demo!
Click on the piano keyboard. Use the different buttons, sliders, etc. This example uses the WebAudio API in order to synthesize sounds.
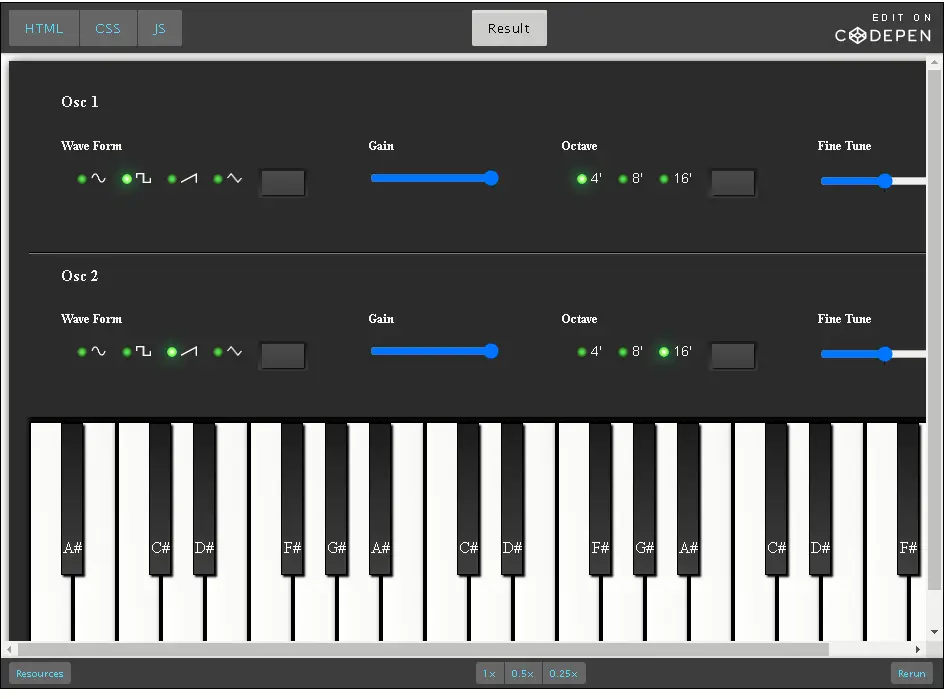
I Hope you enjoy this pen, it was a lot of fun to make. Both mouse and keyboard is supported. However, make sure you click onto the preview window before using keyboard.
Thousands of JavaScript libraries exist. Their purposes range from making it easier to plot a math function, playing chiptune music, animating objects, through to visualizing data and much more.
We provide some examples below, but feel free to look on the Web for other external libraries.
There are numerous libraries for plotting math functions, but this one is pretty easy to use and very powerful. Here is an example that plots f(x) = x^2, then f(x) = sin(x) and finally a mix of fours functions : f(x) = x^2 (in red), f(x) = 3*x (in green), f(x) = cos(x) (in blue) and f(x) = -3*x^2 + x^2 (dashed)
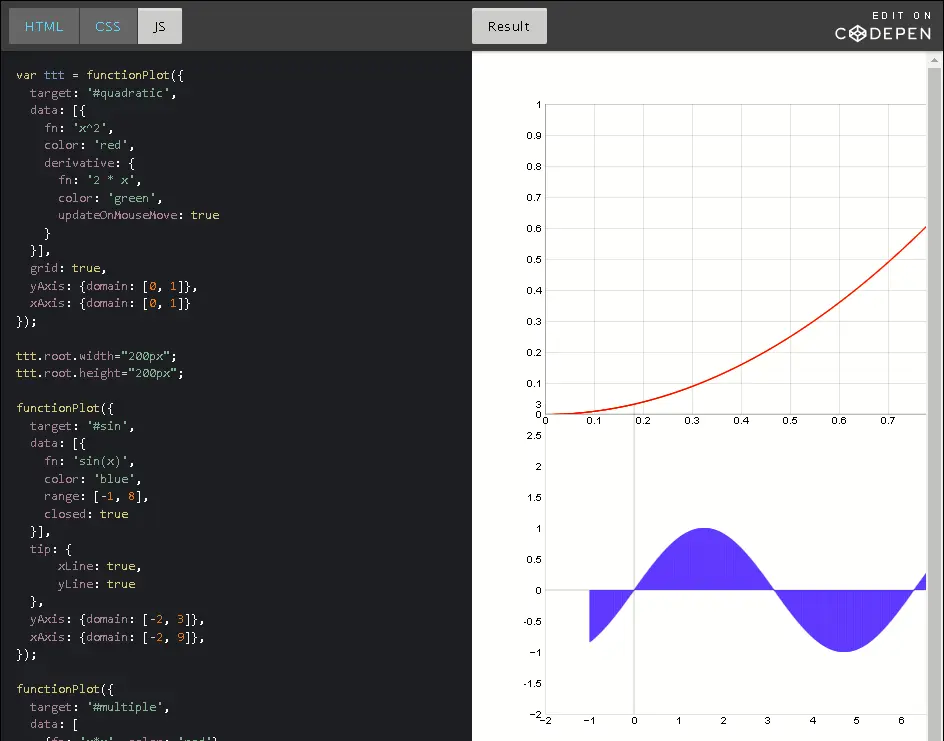
Here is another much simpler example, please edit the code (click on "edit on codepen") and change the function for something like f(x) = x^3 and look at the result (don't forget to change the xRange and yRange values). If you have trouble, look here for a solution.
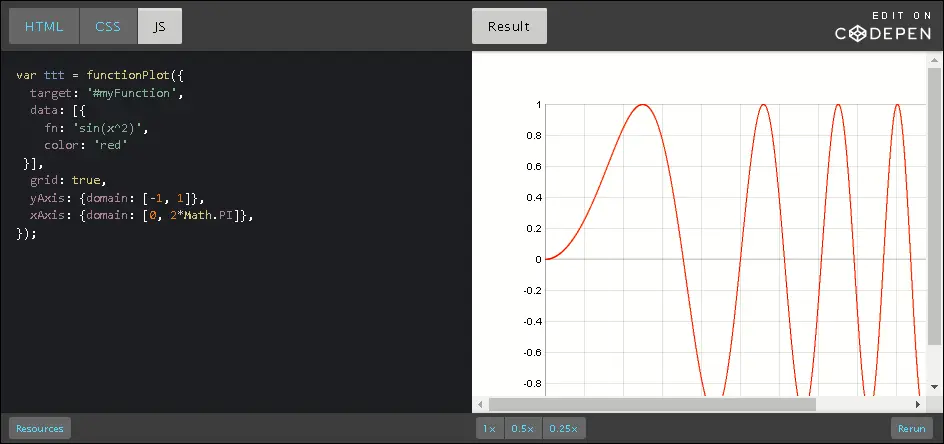
Try to click and drag nodes... All the graphics, animation and force repulsion, is done using the very powerful d3.js plotting library. Look at the HTML source code to see how we included this library in our HTML page. Look at the JS part; it seems complicated, but hey! I guess you can make your own graph with your own colors and your own node labels, without mastering JavaScript ;-) The beauty of this language is that you can find so many examples on the Web that you can easily learn by copying and pasting, tweaking code you haven't even written, etc. Go to codepen.io and use the search button for "d3" and you will find plenty of examples that use that library.
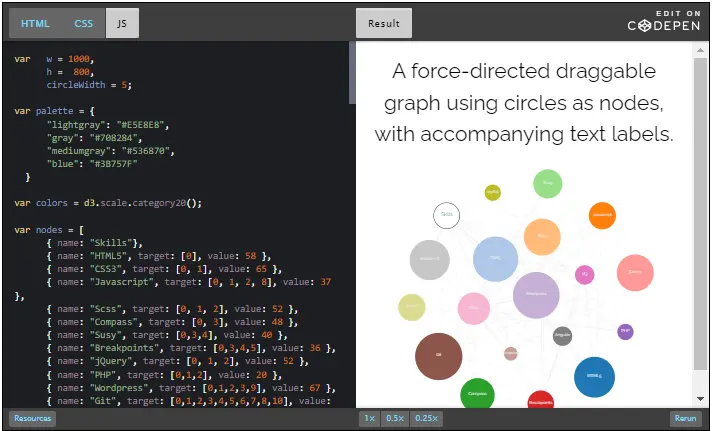
I really like this example, as it takes me back to my youth playing games on the Commodore 64, the Nintendo NES console, etc. In that prehistoric age, there weren't a lot of kilobytes available in the memory, and most sounds were synthesized, not audio samples. The audio resolution in the past was lower than it is today. Audio chips utilized simpler DSP algorithms with less accuracy, and the sample rate was not the familiar 44.1 kHz that we are accustomed to now. Musicians used tools called "mod players/editors" for creating the music score (you can try a re-creation on the browser of a mod editor to see how it looked in the late 80's).
To try the example below, click on "load demo song", then on the play button. If you want to try other compatible songs, look for any .mod, .it, .xm song on the Web and drag and drop it into the example page. A good resource for such files is The Mod Archive, you can download plenty of chiptune files from there.
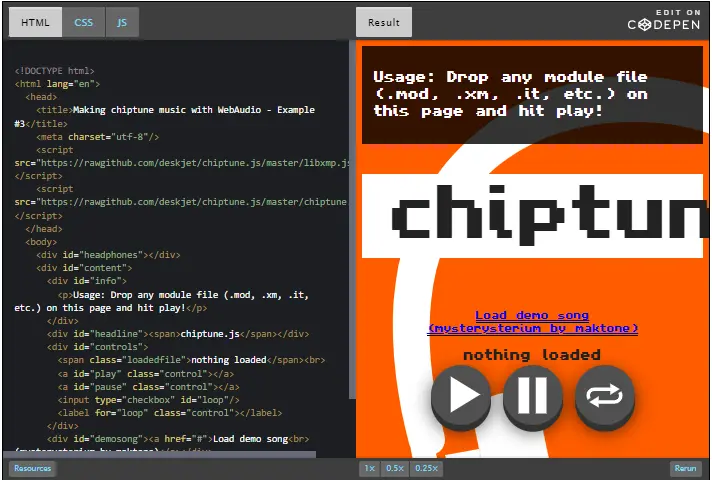
This is just a small example of the use of the sprite.js library, which makes it easier to animate sprites (sub images from a big image called a "sprite sheet") in an HTML5 canvas. We will see how to use the HTML5 canvas later on in this course. The example is just here to illustrate what can be done using external libraries.
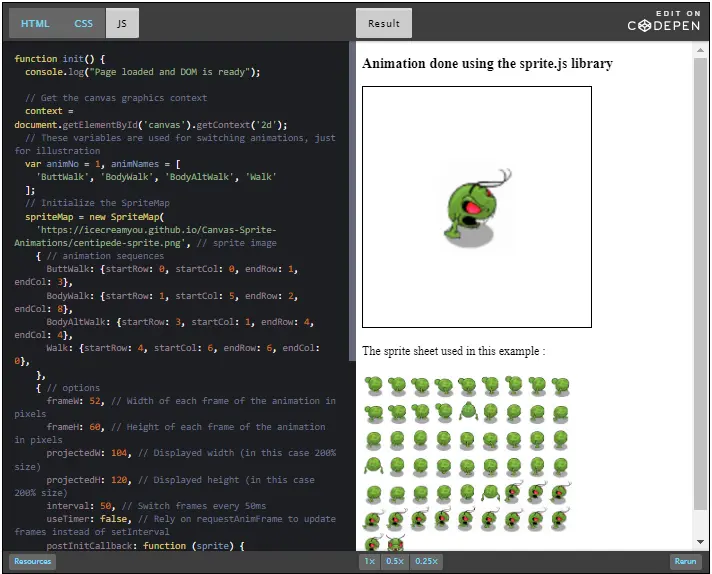
Let's see a few examples on how to work with remote data.
This example downloads and displays a list of users in a table (see remote data):
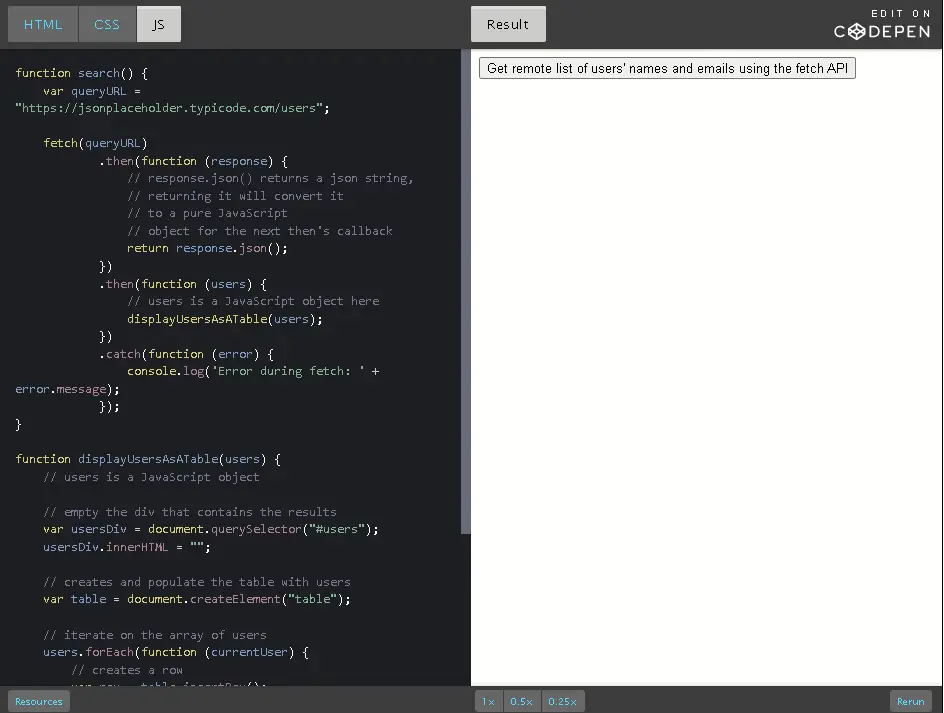
This example just shows how to use the HowlerJS external library to load remote sounds, decode them and play them as samples in memory (useful for video games):
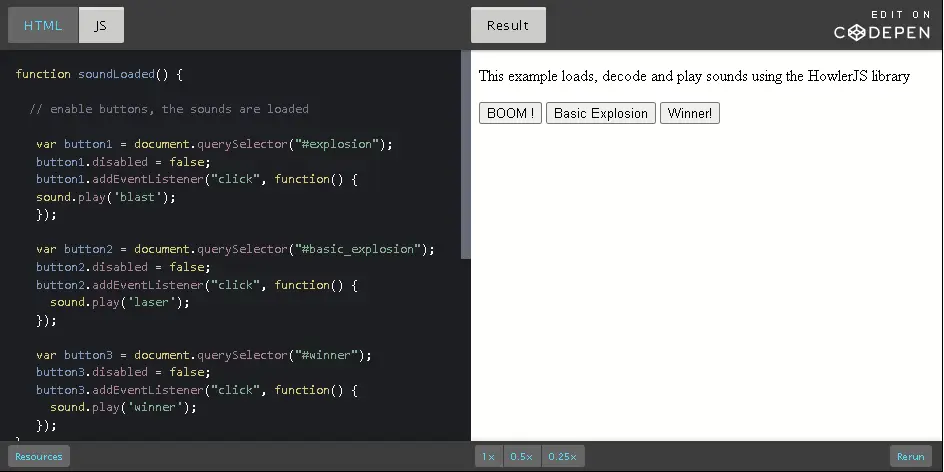
Lesson: Introduction to Module 2
In this module, you will learn how to handle events (using a keyboard, a mouse, or a game pad), detect which button has been pressed, what is the position of the mouse pointer, what key has been pressed, etc.
You will discover the DOM API, as this is the standard application programming interface that will be used for interactive with the content of an HTML document.
In addition, we will introduce some new fundamental JavaScript bricks, such as conditional statements, logical operators (if, then, else), and loops. How to display multiple rows in a table, how to draw multiples graphical objects on the screen.

Finally, we will write together a small JavaScript game using the HTML5 canvas API. Animating and drawing shapes at 60 frames/second is a lot of fun, and we'll make you play with the most of the language elements seen so far. And please, as I like video game, don't forget to share your project in the forum. And let other students enjoy your creation :D
What you will learn in Module 2: Interactivity with JavaScript
Live coding video: boolean value, if…else statement and comparison operators
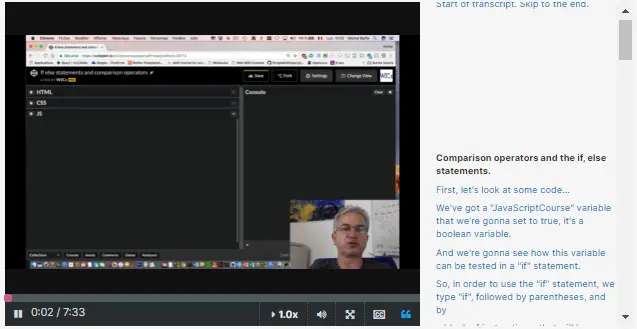
Comparison operators and the if, else statements.
First, let's look at some code… We've got a "JavaScriptCourse" variable that we're gonna set to true, it's a boolean variable. And we're gonna see how this variable can be tested in a "if" statement. In order to use the "if" statement, we type "if", followed by parentheses, and by a block of instructions, that will be executed only if what is between the parentheses here, is true.
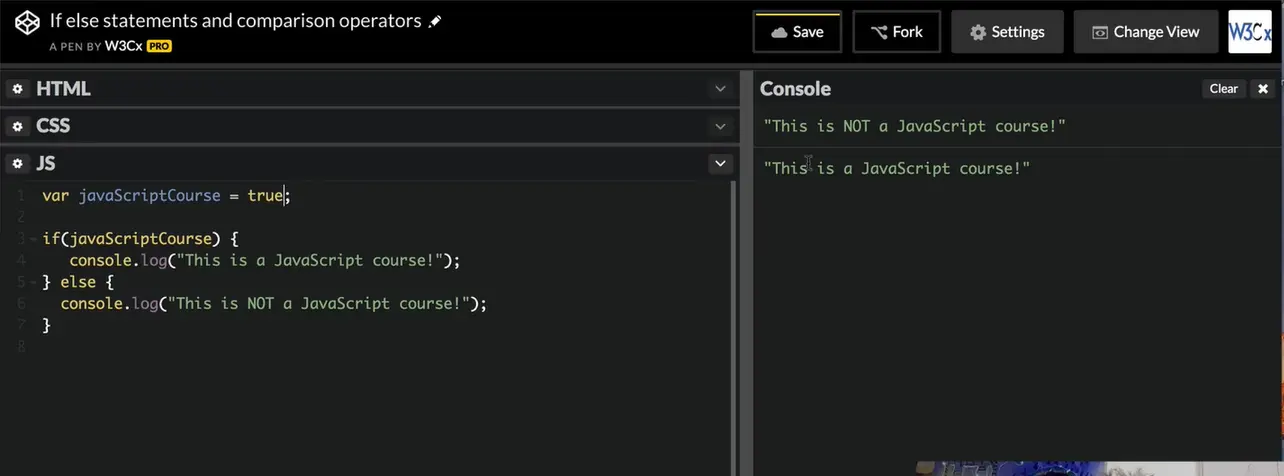
I'm gonna put this variable that we set to true, and add an instruction inside. We can see in the console that the instruction in the block has been executed, and "This is a JavaScript course" has been printed to the console log. This is because when the thing we test -the expression we test between the parentheses-is true, the block of instructions that follows the "if" statement, is executed.
If I set the variable to false and run the example again, then nothing is executed because the expression is false and the block of instructions is completely avoided. We can improve this example using an else statement. "This is NOT a JavaScript course!" I run it again. And the thing that is executed is the else block of instructions "This is NOT a JavaScript course!". If I set it back to true, you can see that it's a bit like a switch. It prints: "This is a JavaScript course!"
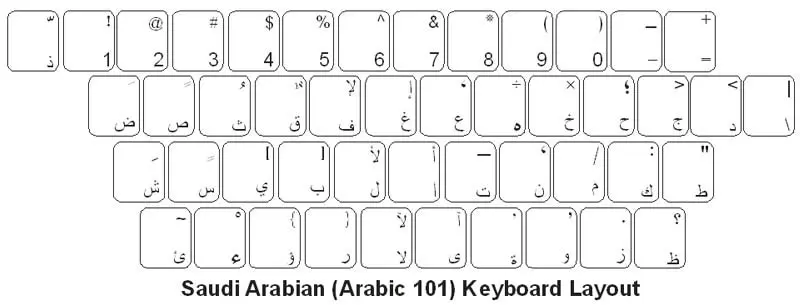
Ok, let's see now comparison operators. They are: less than, more than, less or equals to, more or equals to, equals equals (that means "equals"), not equals (that means "different"), and a different version of these last two operators, that are called strict equals and strict not equals operators. And they are written === and !== . These last two syntaxes are preferred because they will avoid you a lot of errors.
I will show the differences in a minute, but consider these last with the three equals (===) and not equals equals (==), to be the ones you must use.
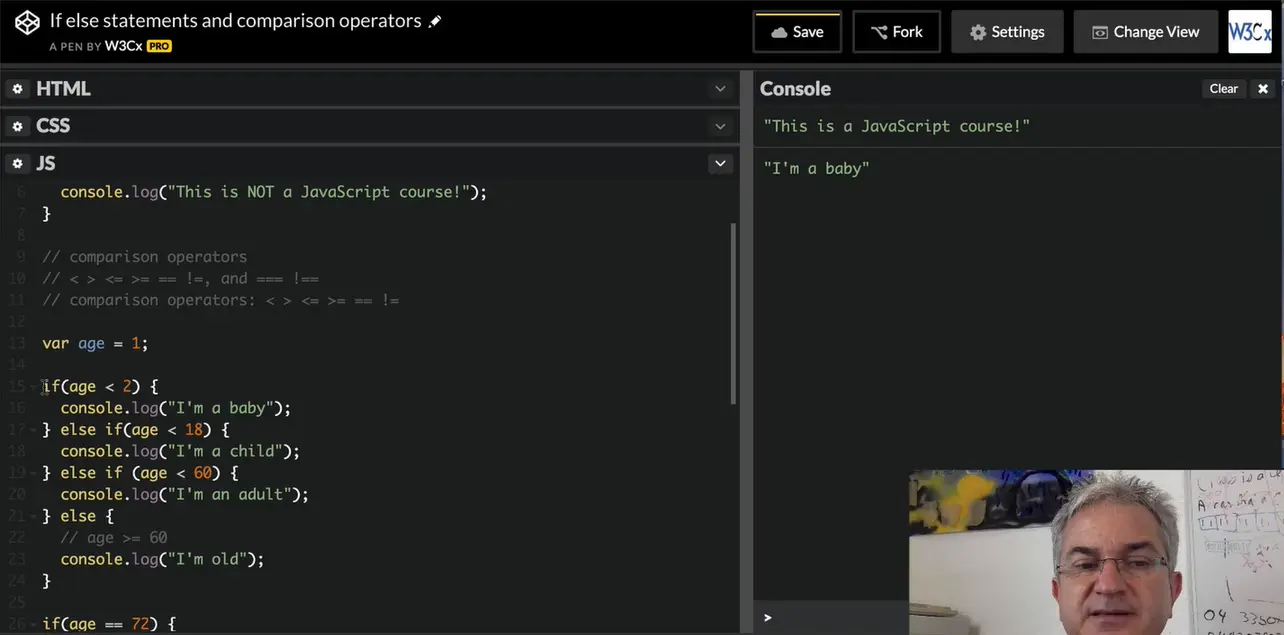
Let's see some code now... I declared the variable "age" with a value of 1, and I added some if… else statements. If "age" is less than 2, print "I'm a baby", and you can see that this has been executed, because the variable is 1, 1 is less than 2. It's been executed... I can add some "else…if" statements.
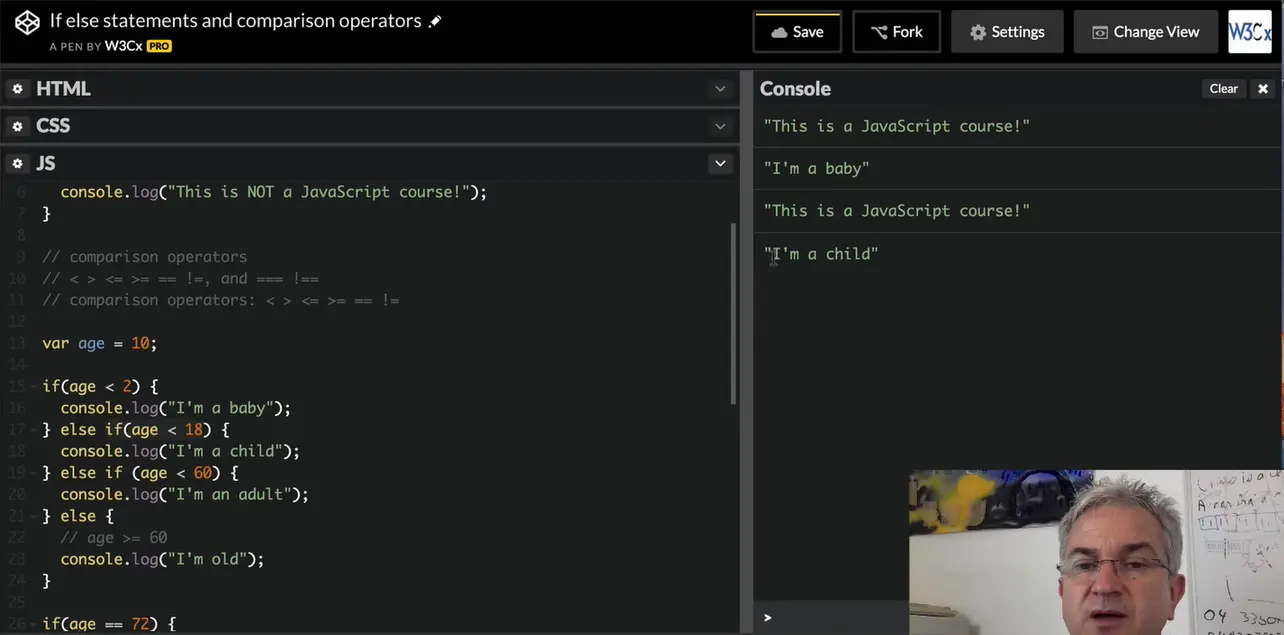
If age is 10, then in that case I'll go to the else statement and I will test again if in this case, age is less than 18. I'll print "I'm a child". And this works too. Only the second case has been executed.
The "if" block of instructions has been ignored, and the second "if" block of instructions has been executed. I can chain the "else…if" statements like that. And you can notice that I added at the end only an "else" statement, without an "if" behind. This means: "when all the other cases are false, please come here!".
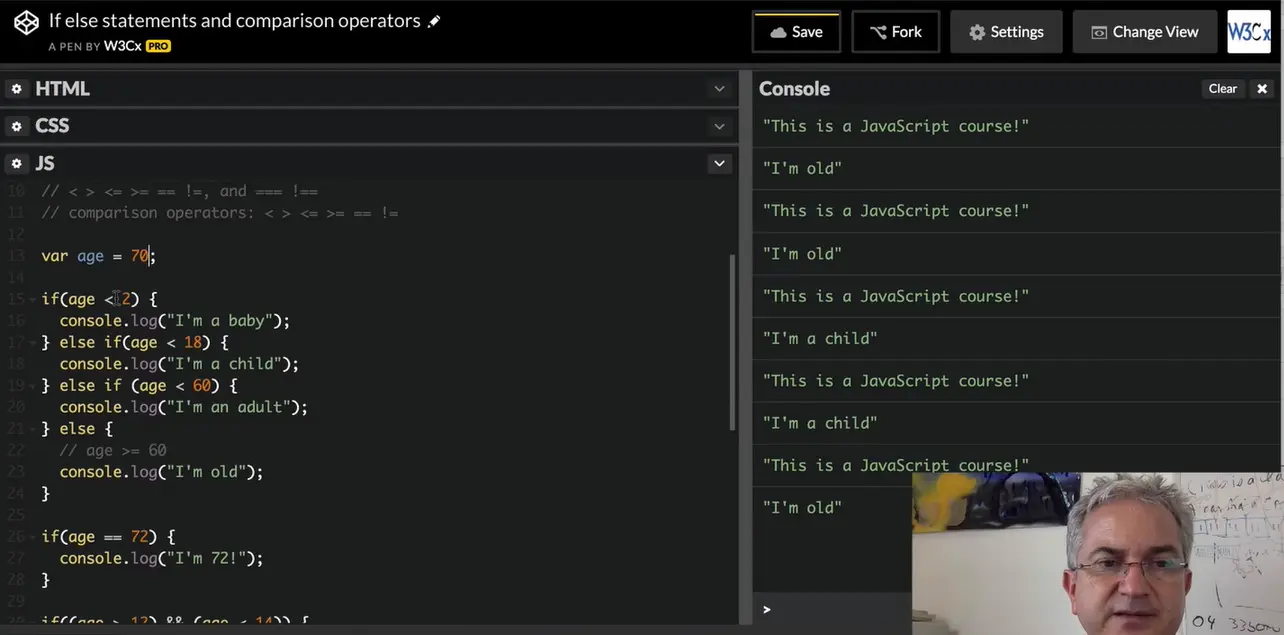
If I set my age to be 70, then in that case, all the tests will be false, and I will execute the block of instructions that is just after the last "else", and it prints "I'm old".
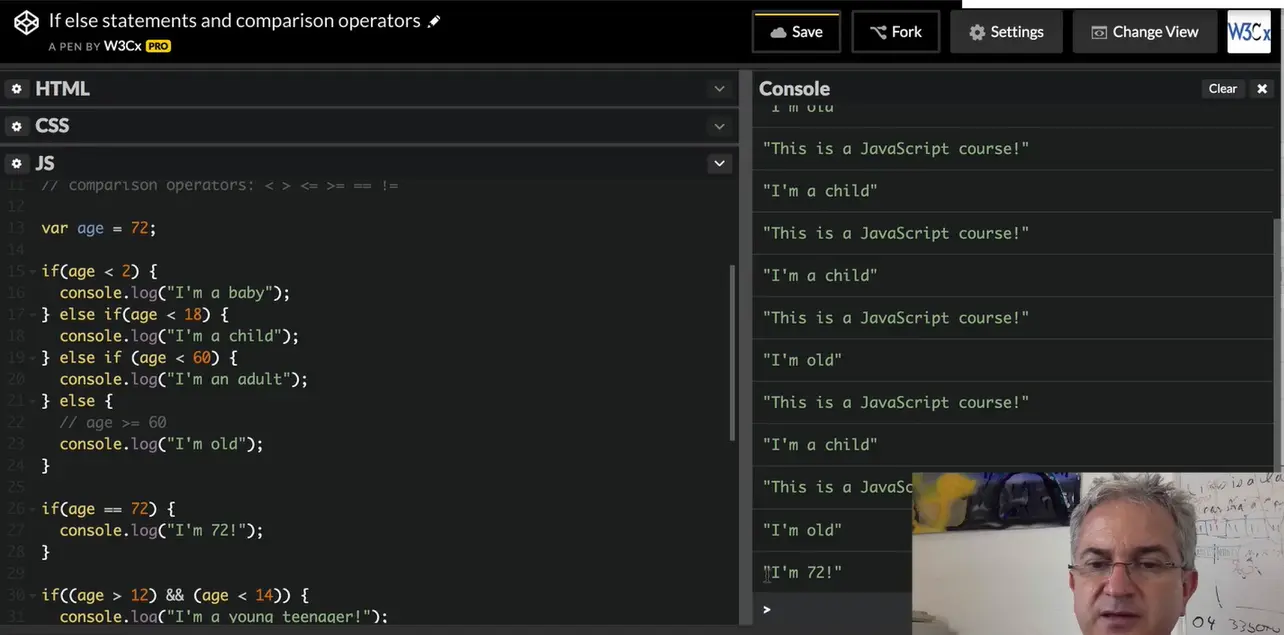
I can also try… if the variable has some exact value using the == operator. If I set the variable to be 72, then this test is true and it prints "I'm 72" in the devtool console.
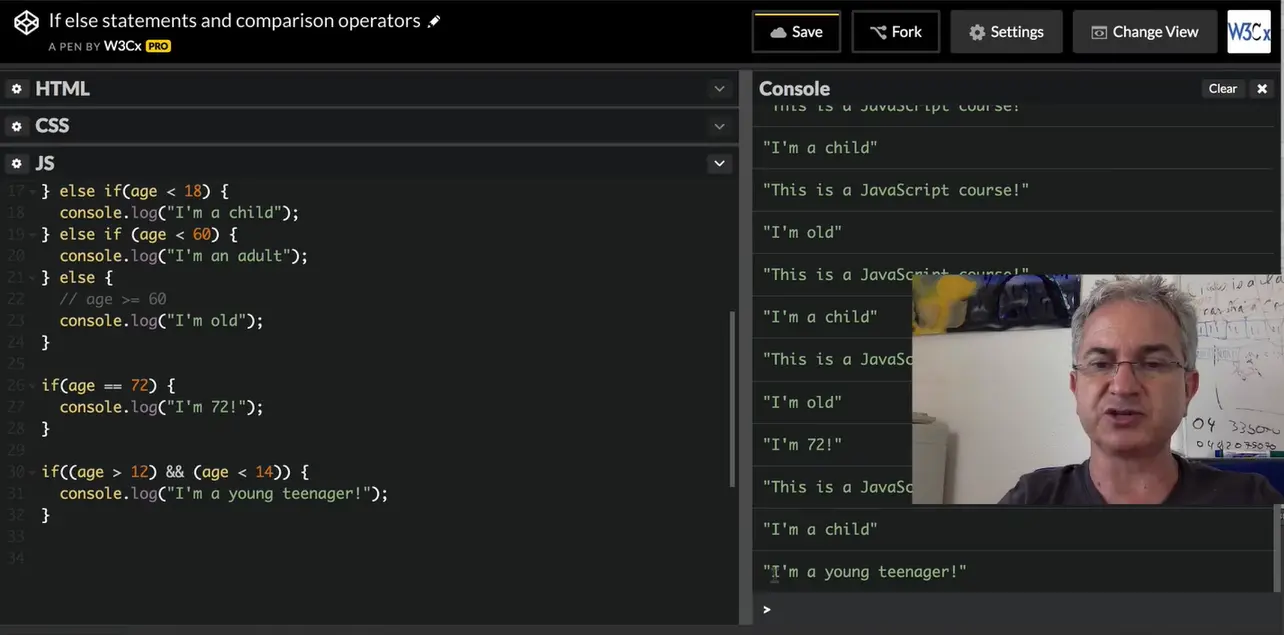
We can also use more than one test at once using logical operators. The double ampersand (&&) here is the AND operator. This will be true only is age is more than 12 and less than 14. If I set the variable to 13, it will print "I'm a young teenager" because both tests here, > 12 and < 14, are true.
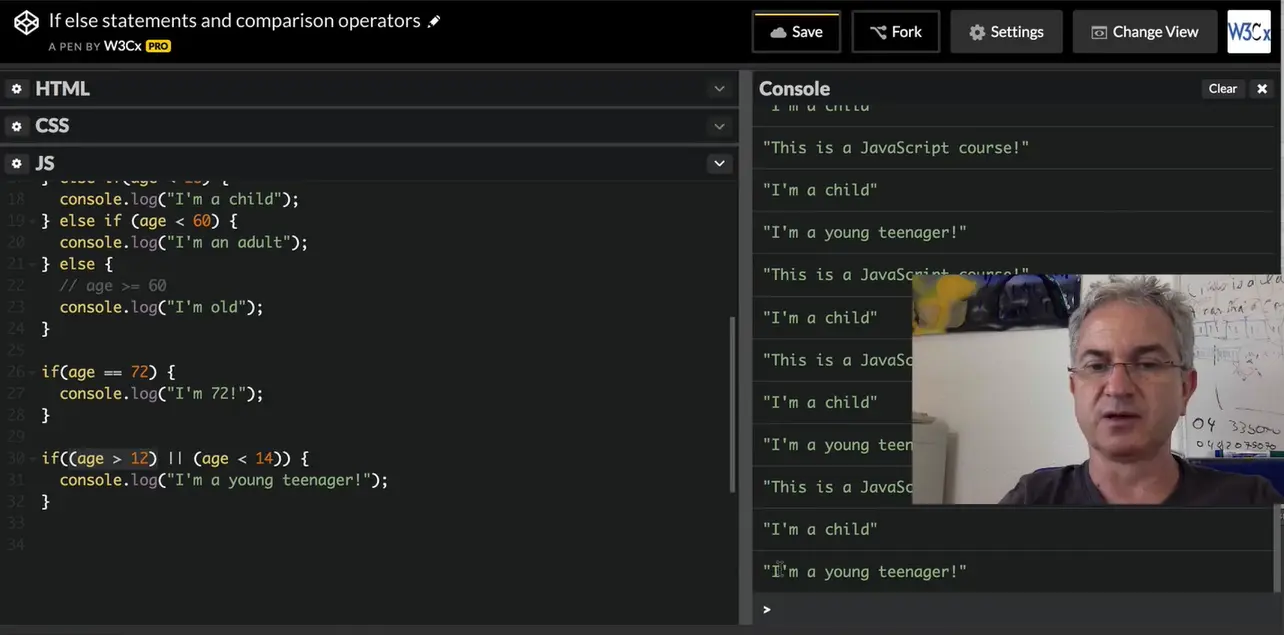
I can use also the OR operator. In that case, it will be true if one of the two are true. Let's try with age = 8. With age equals to 8, this is false, age > 12, but age < 14 is true, it prints "I'm a young teenager".
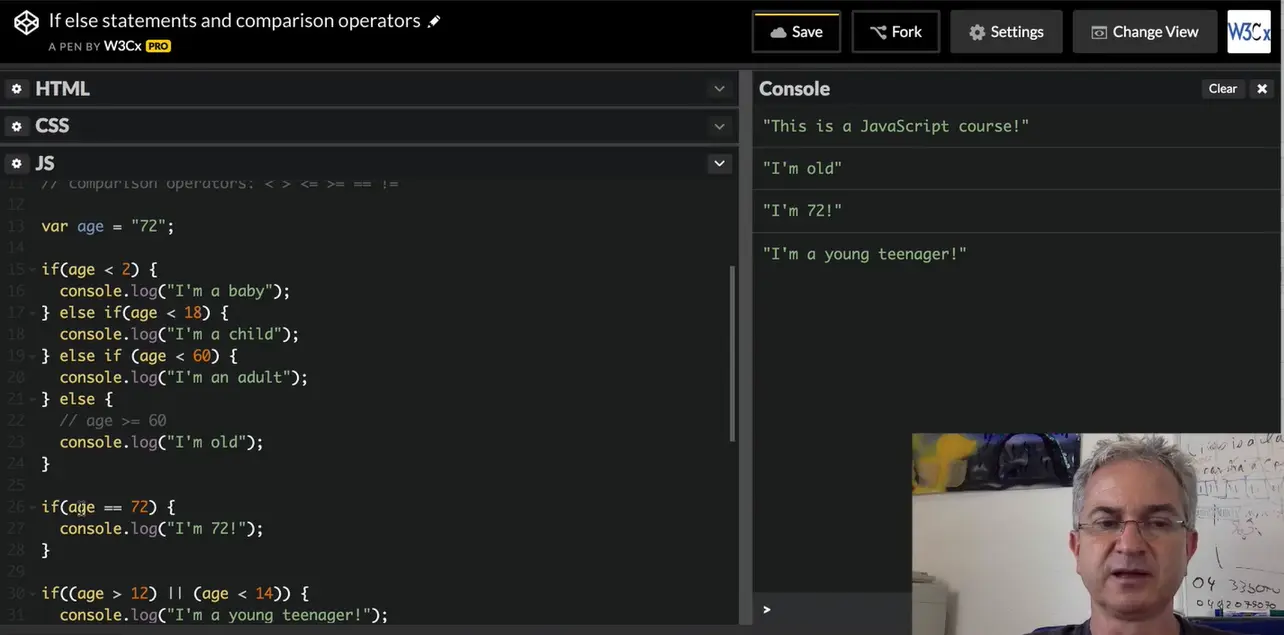
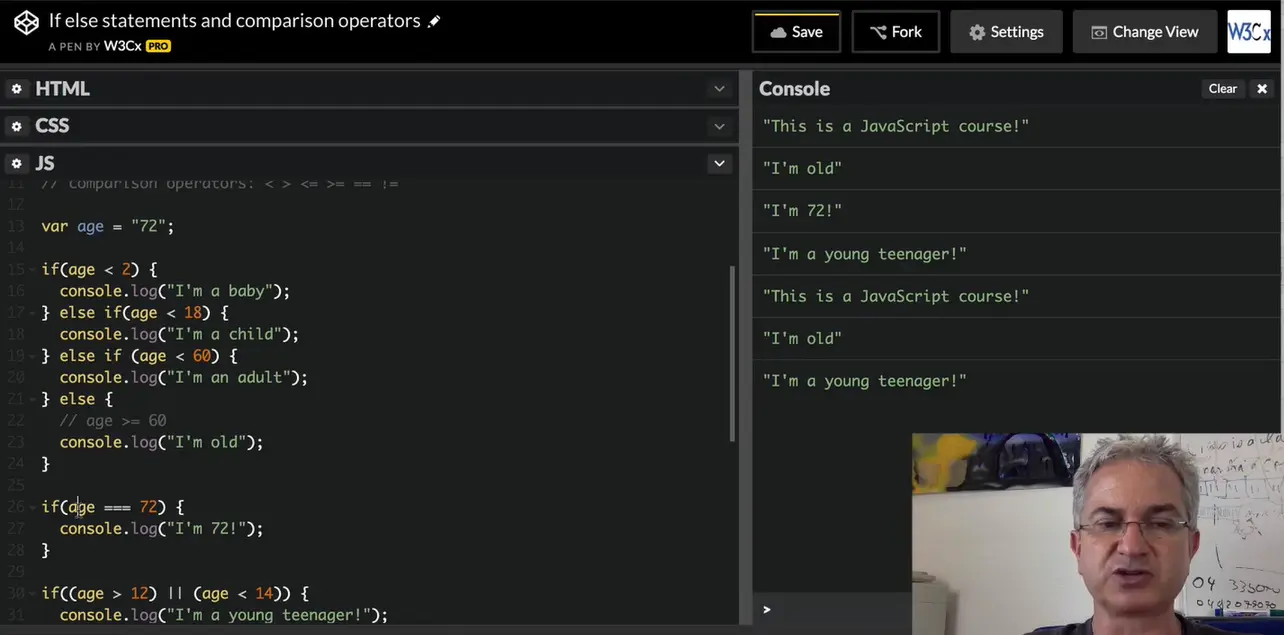
Finally, let's have a look at the === operator. If I set the age to be "72", but as a string, like this... it prints... let me clear the devtool console and execute it again... it prints "I'm 72" because the age variable, that is a string, has been converted implicitly to a number. If I use the triple equal sign, then it does not print anymore "I'm 72" because age, as a string, has not been converted to a number. And thrust me, it's much better to use the triple equals operator, it will avoid you many errors like considering a string as a number, and so on.
Before talking about how your JavaScript program can make decisions, such as "if this condition is fulfilled then I'll do this, otherwise I'll do that…", we need to define a few more concepts.
Let's start with "boolean values" and "logical operators".
The boolean type represents a logical entity having two values: true and false.
Use of the keywords true and false:
var b = true;
var b = false;
A boolean variable should not be enclosed in quotation marks, otherwise it becomes a string variable:
var b = 'true'; // b is not a boolean but a string
undefined is returned when a variable has not been assigned:
var foo;
> foo
undefined
> typeof foo;
'undefined'
> if (foo === undefined) {
  console.log('The variable foo has no value and is undefined');
}
'The variable foo has no value and is undefined'
The above example shows how we can test whether a variable has a value (line 8 uses a conditional statement).
The keyword "undefined" is part of the JavaScript language, so you can assign the undefined value to a variable:
> var foo = undefined; // equivalent to var foo; without giving any value
undefined
> foo;
undefined
var foo; and var foo = undefined; are equivalent but we recommend that you use the first version to declare the variable (it is shorter, and that reduces the code).
If you try to access a variable that has not been declared before, a ReferenceError will be raised. But the typeof operator will return "undefined":
> bar;
ReferenceError
> typeof bar;
'undefined'
var b = !true;
b; // false
var b = !!true;
b; // true
var b = "one";
!b;   false // implicit conversion of "one" to a boolean value
var b = "one"; // implicit conversion of "one" to a boolean value
!!b; // true
In an expression with logical operators, as shown in lines 8 and 11 of the previous example, non-boolean values are implicitly converted to boolean.
Logical expressions are evaluated from left to right. JavaScript uses a mechanism known as "short-circuit evaluation" to prevent the second, third, and nth conditions from being tested in certain cases:
Examples:
var b = 5;
var c = 6;
if ((b === 5) || (b === 6))  { // the second part is never tested
  console.log('b is equal to 5 or equal to 6');
}
if ((b === 5) && (c === 6)) {  // second part is evaluated
  console.log('b  is equal to 5 and c is equal to 6');
}
if ((b === 15) && (c === 6)) {  // second part is never evaluated
  console.log('b  is equal to 5 and c is equal to 6');
} else {
  console.log('b not equal to 15 or c not equal to 6');
}
Used with logical operators or within statements, non-boolean values are implicitly converted to booleans.
All the following values are evaluated as false:
Everything else is evaluated as true!
var boo = 'hello' && 'world'; // boo is equal to 'world' that is 'true'.
In the above example, 'hello' && 'world' is evaluated as true but will return a value! Indeed, boo will equal 'world' because 'hello' is a string value that is evaluated as true. And 'world' is in also true as it's not one of the value cited in the previous paragraph. If we do : if (boo) then…. we will enter the if statement.
The rule is that both && and || result in the value of (exactly) one of their operands:
External resource: The && and || Operators in JavaScript
TO SUM UP: it works "normally" if you just think true/false, but the real value affected is not true false, it's one of the operands, that can be seen as true/false.
var boo2 = (0/0) || 43.2 ;
boo2 equals 43.2 because the expression 0/0 equals NaN, which is evaluated as false.
Question:
What is the value of the variable myNumber after the execution of this code?
var myNumber = !1;
if(myNumber == null){
  myNumber = 3;
}
myNumber = myNumber || 2;
Explanation: after the first line, myNumber equals false. In the if statement, at line 3, false does not equal null. Therefore, the value 3 is not assigned to the var myNumber. In the last line, myNumber is evaluated as false, then the value 2 is given to the variable myNumber.
Returns true if the operands are strictly equal with type conversion.
Returns true if the operands are strictly equal with no type conversion.
The triple-equals operator never does type coercion. It returns true if both operands reference the same object, or in the case of value types, have the same value.
1 == 1;
// true
1 == 2;
// false
/* Here, the interpreter will try to convert the string '1'
into a number before doing the comparison */
1 == '1';
// true:
// with strict equal, no conversion:
1 === 1;
// true
1 === '1';
// false
Depending on the context, generally strict equal (or strict not equal) is preferred.
Best practice for beginners: always use === or !== for comparisons.
As we have already seen, JavaScript has some special values. One of them is NaN: "Not-a-Number".
NaN == NaN;
// false
NaN === NaN;
// false
Nan is equal to nothing - not even to itself!. But you do have a function to check the NaN value: isNaN(expr).
isNaN(NaN);
// true
isNaN(0/0);
// true
isNaN(12);
// false
isNaN('foo');
// true
"A reliable way for ECMAScript code to test if a value X is a NaN, is an expression of the form X !== X. The result will be true if, and only if, X is a NaN. " (see the isNan documentation).
var num =0/0;
if(isNaN(num)){
  num = 0;
}
// shortened version with the conditional operator
var num = isNaN(num) ? 0 : num
// version with logical operator (implicit conversion)
var num = num || 0;
/*
  <=> num = NaN || 0
  <=> num = false || 0
*/
num;
// returns 0 in this three cases
Of course 0/0 rarely happens, but there are other cases where NaN can appear, for example:
Live coding transcript: switch statement
Hi! Let's have a look at the switch statement.
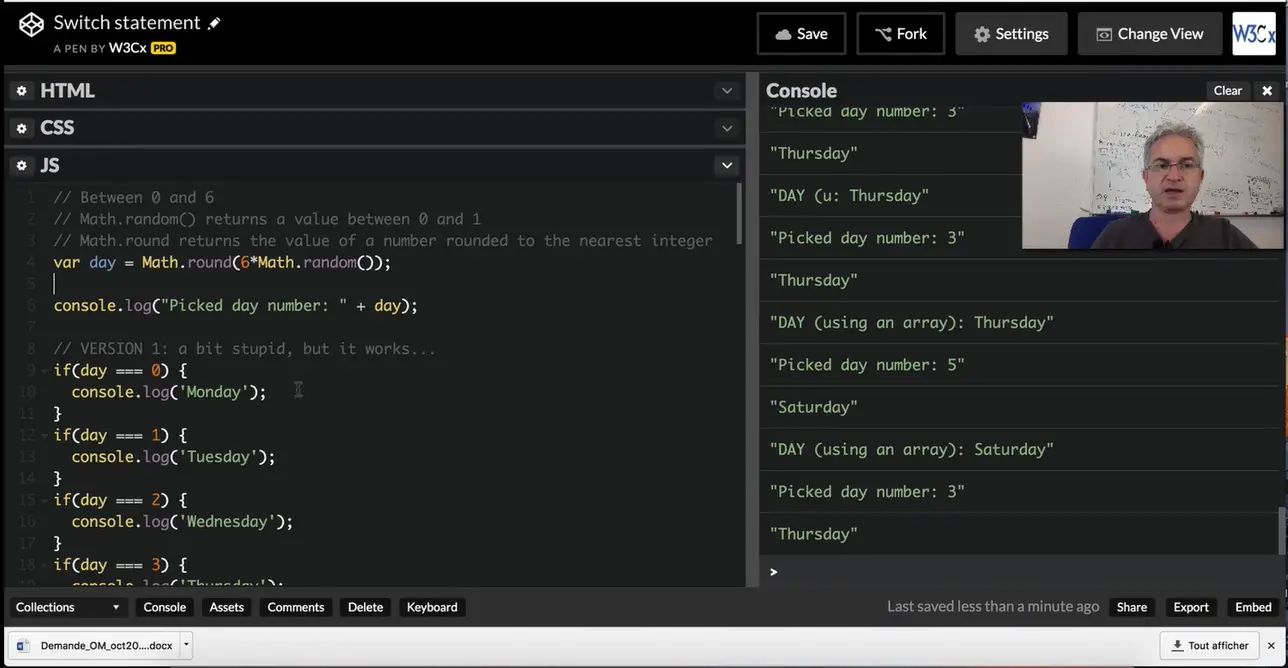
I prepared a small example in which we take a day number between 0 and 6, 0 for Monday, 1 for Tuesday, and so on... And to pick a random number that is an integer, we used a formula like this, that uses a predefined object called Math.
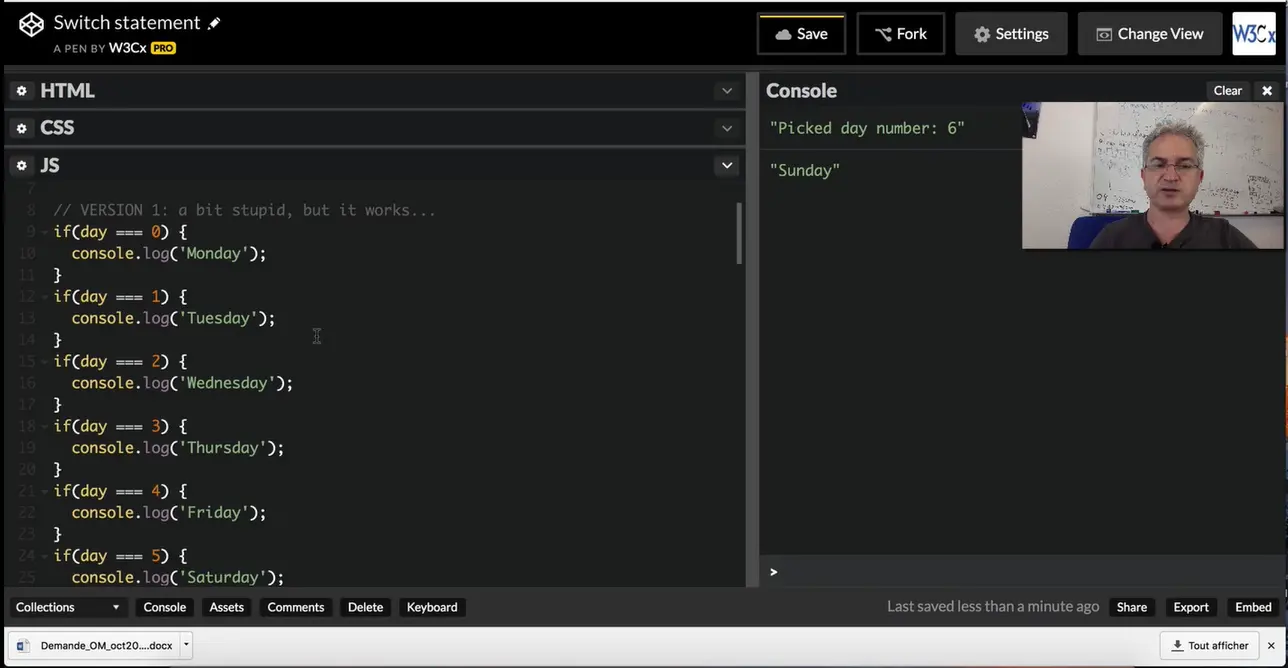
Math.random() returns a number between 0 and 1, 6 multiplied by this, will give a number between 0 and 7, and we just return the rounded nearest integer. When we execute this, "picked day number…" you see that it takes some random values each time we execute.
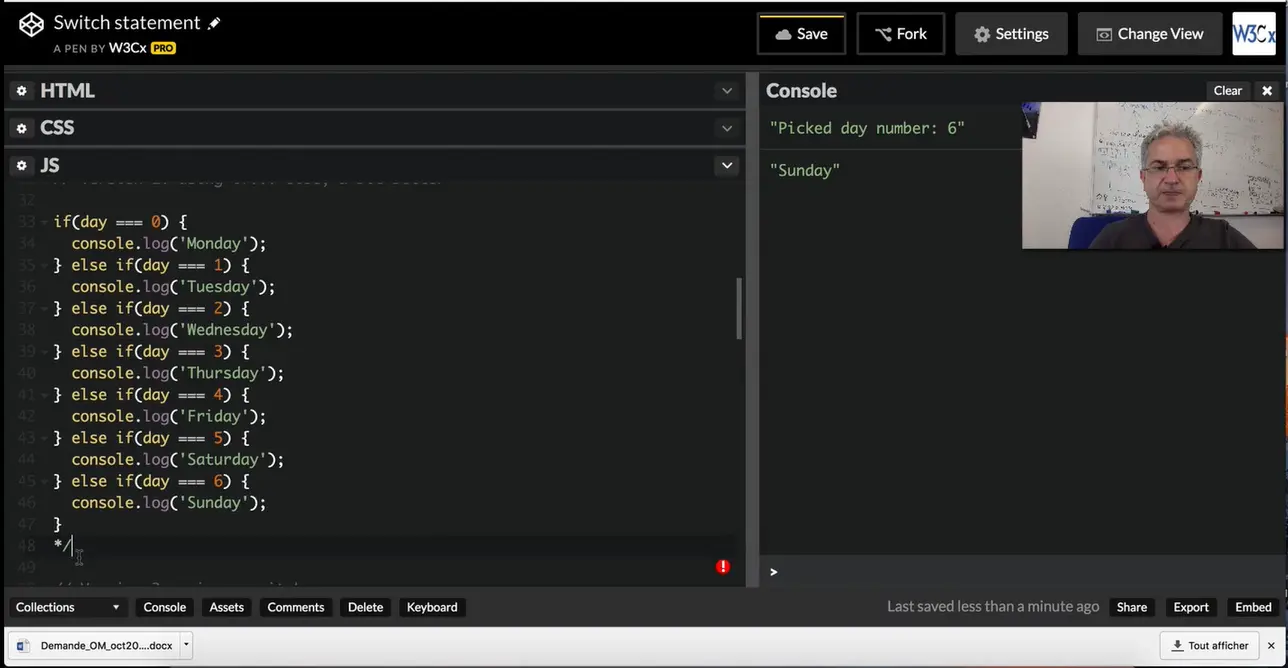
If I clear the console and execute this, it will pick a number. And then, here is a first version that uses "if statements" that is a bit naïve. It says: if day equals 0, then print Monday; if day equals 1 ... ; and so on. Why is it naïve? Because we're going to execute all the tests and we all know that only one of them will be true.
Instead of multiplying series the tests, a better version is to use "if… else" statements, like this… so if day equals 0, then print Monday, else if day equals 1, print Tuesday… In that case, we're gonna test just until we find the day, and all the else will be ignored.
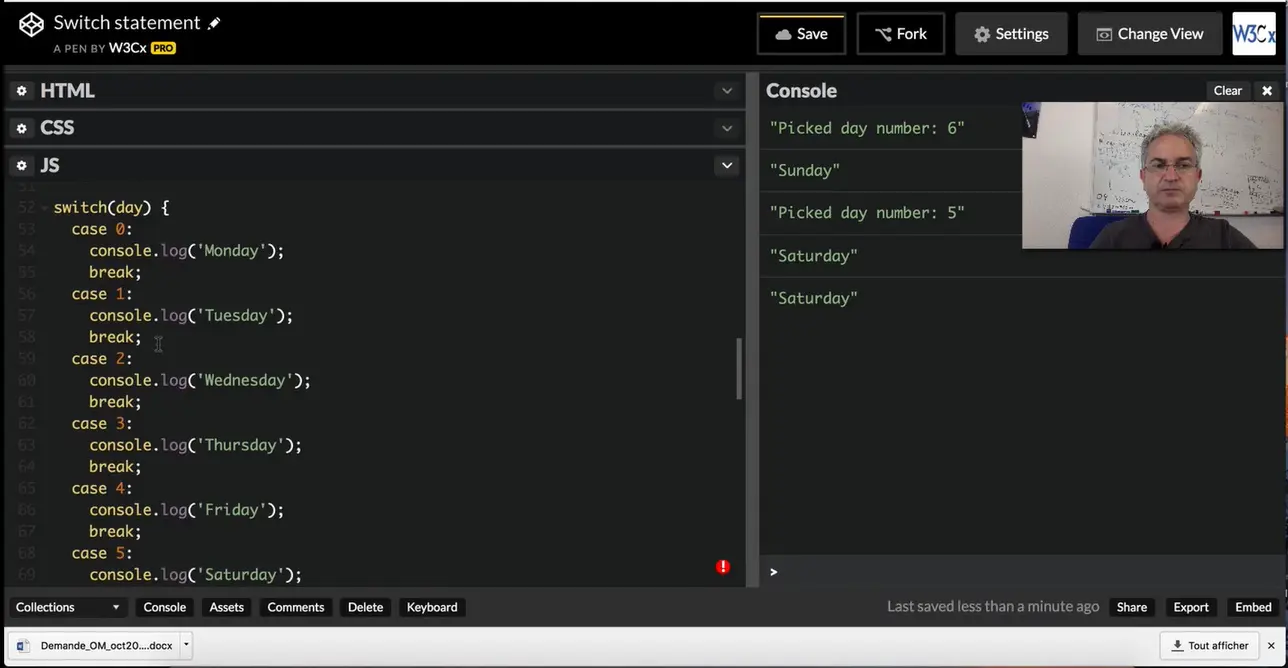
A much better version uses a switch. When you've got to make multiple tests, it might be more interesting to use a switch. switch(day). Then you test with the different possible values, using the "case" keyword. "case 0": that means that "if day equals 0, then execute console.log('Monday'). The break here means "ignore all the other cases".
When you put a break after each case, it's a bit like the "if…else" example we saw earlier: only one block of instructions will be executed here...You can see that the 3 different versions with the naive if, the if-else statement and the switch, give the same result.
Be careful because sometimes, if you forget to use a "break", you can enter different case statements. You can make errors if you don't know what to break keyword means, but it can also be useful to regroup cases.
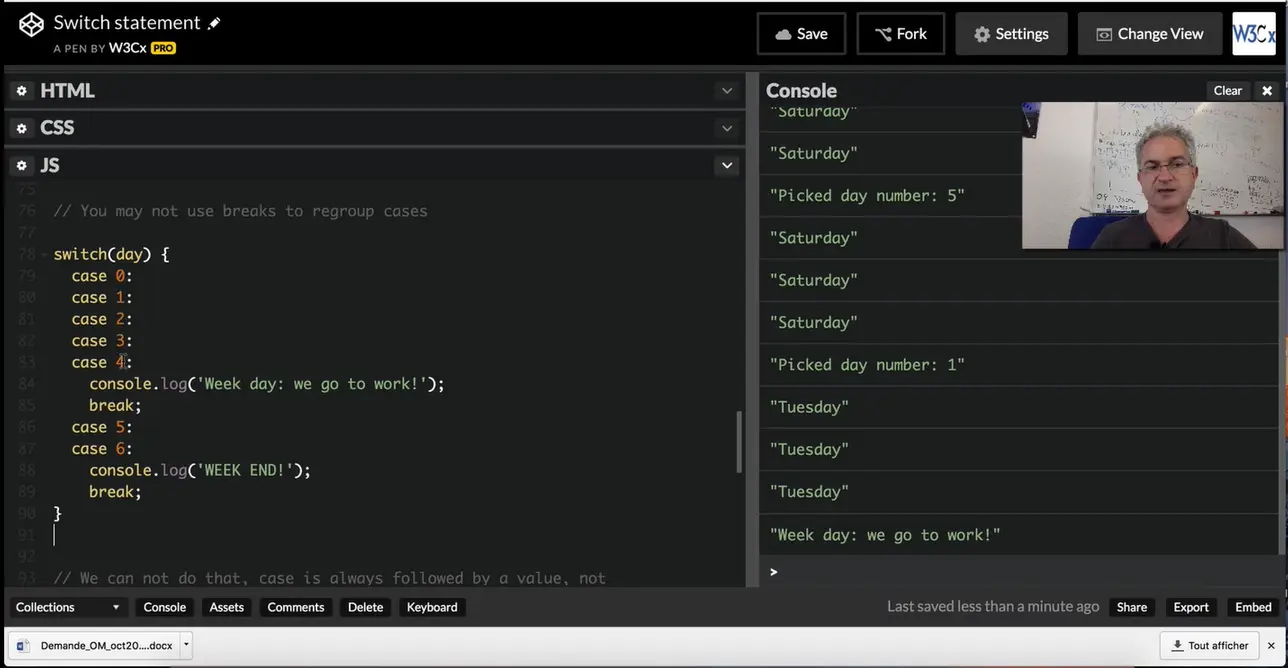
For example, if I want to print "This is a week day, we go to work!", when we've got Monday, Tuesday… any day of the week! And if I want to print "Week end!" for Saturday and Sunday, then I can regroup cases like that.
You see case 0, case 1, case 2, case 3, case 4… and then just use a break after we executed the block of instructions that is related to all these five cases. Doing this, we will print "Week Day…" only if the day has a value of 0, 1, 2, 3 or 4, and we will print "Week end!" if it has a value of 5 or 6.
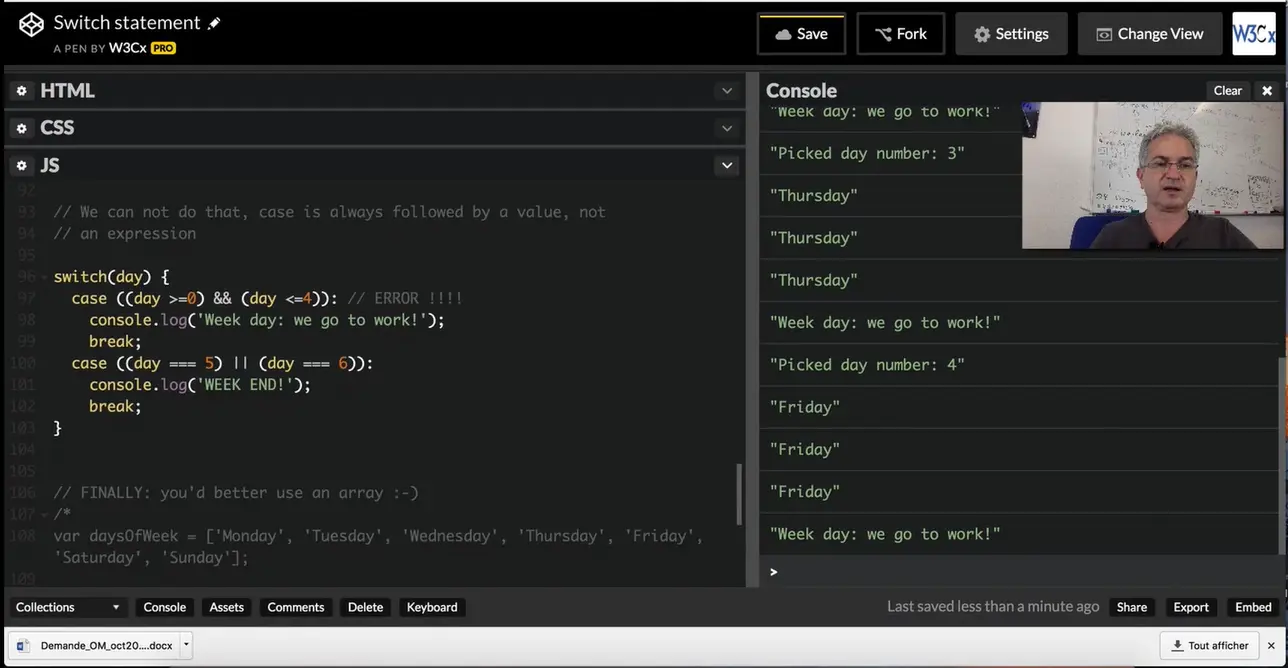
Be careful because I saw this error a lot of time with beginners: you must use "case" only with a value after it, not an expression! This thing here case "day greater or equal than 0" or "day less than 4" is not valid. You cannot use an expression here, after the case. This is not going to work. Avoid! This… error!
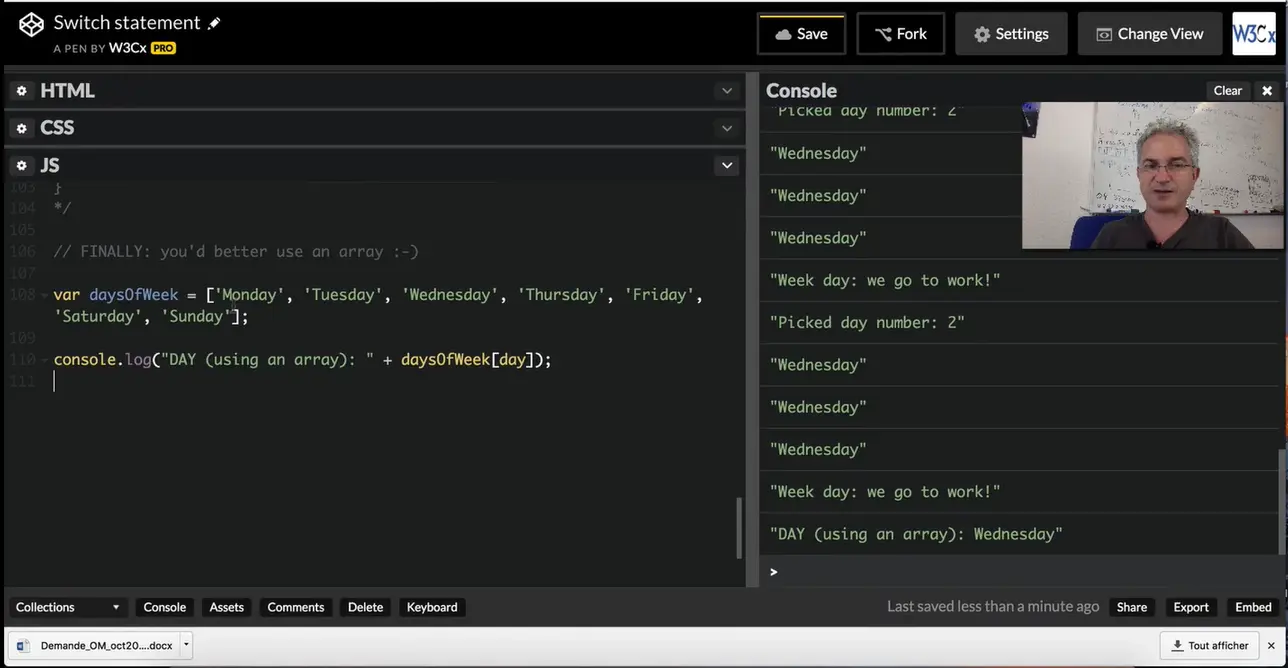
And finally, there is a better solution to the problem I've illustrated. It's not to use any if or any switch…but use an array! If we've got an array that contains all the string values for the days of the week, we can just do a console.log… daysOfTheWeek… brackets, and use the day as an index. And this works too and it's only two lines of code.
CodePen example from the lesson above
JavaScript source code is a set of statements. There are a couple of different statement types. We have already seen one of them, the variable statement:
var myVar = 'hello ' + 'world';
We've also seen the expression statement:
3 + 4;
// more often like this
var x = (3 + 4);
var y = (5 + x);
A statement closes with a semicolon, but we will see later that missing semicolons are automatically inserted (for readability reasons, we highly recommend systematically adding a semicolon at the end of all statements).
Statements are generally executed sequentially from top to bottom of the script. However, this flow can be modified by statements such as conditional statements and iteration statements.
The block statement is a simple statement which allows us to group a set of statements wrapped in curly braces.
{
var i = 0;
var result = false;
console.log('i = ' + i);
}
The block statement is used by other statements such as the if-statement or for-statement. We will see these statements below.
All the examples for this section are in this codepen (to run it: click on the "edit on CodePen" label, and once in CodePen, open the devtool console to see the outputs of this program):
(Please look, edit and try whatever you want. There are parts that are commented - please remove comments and try to understand the results).
Conditional statements are used to execute a unit of code only if a condition is evaluated as true.
if ( Expression ) Statement else Statement
if ( Expression ) Statement
var num = 10;
if (num === 10) {
  num = 20;
}
// num equals 20
var num = 10;
if (num >; 10) {
  num = 20;
} else {
  num = 0;
}
// num equals 0
The following values will evaluate to false:
All other values, including all objects, evaluate to true when passed to a conditional statement.
This ternary operator is a shortcut version of if…then…else.
var max;
var min = 2;
if (min < 10) {
  max = min + 10;
} else {
  max = min;
}
Explanation: You can replace this "if-then-else" statement with the ternary operator that uses a syntax with "?" and ":"
var max;
var min;
max = (min < 10)? min+10 : min;
Line 3 can be read as if (min < 10) then max = min+10, else max = min. The "then" part is after the "?" and the "else" part is after the ":" part.
This "short" version is not recommended except for very simple statements that involve a very obvious block of instructions for the "then" and the "else". Usually this syntax is much harder to read for beginners.
Should we use them in if-then-else statements? There are examples without curly braces on the Web: what does this mean?
Here are two versions of the same code.
if (a > 2)
  result = 'a is bigger than 2';
else
  result = 'a is not bigger than 2';
if (a > 2) {
  result = 'a is bigger than 2';
} else {
  result = 'a is not bigger than 2';
}
Version 1 and version 2 are equivalent. Indeed, version 1 is correct: you can omit curly braces if the "then" or "else" blocks are made of only one statement (one line of code).
But version 2 is cleaner and more readable, and, in particular, it is much better for maintainability (because you can add a statement just by pressing the enter key. And you can add some extra lines of code without worrying about adding curly braces because you broke the "1 line statement rule").
It is strongly recommended that you always use if-statements enclosed in curly braces.
Of course, one-line if-statements like this:
if (true) doSomething();
…are fast to write, but if you want to add a second statement later it will become more time consuming.
In order to avoid having a series of ifs and elses, it is possible to use a switch statement.
switch (expression) {
  case value1:
    Statement
    break; // break can be omitted in that case
           // the second test case will be executed
           // most of the time we add a break; at the end
           // of a "case"
  case value2:
    Statement
    break;
  case value3:
    Statement
    break;
  default: // if no case tested true
    Statement
    break;
}
If the value of an expression equals one of the cases (the equality operator evaluated is ===), all the statements next to this case block are executed sequentially until the keyword break is reached.
var gear = '';
switch (cloudColor) {
  case 'green':
    gear = 'spacesuit';
    break;
  case 'black':
    gear = 'boots';
    break;
  case 'grey':
    gear = 'umbrella';
    break;
  case 'white':
    gear = 'jacket';
    break;
  default:
    gear = 'watch';
    break; // useless if in the last case
}          // end of the switch statement
In this example, if the clouds are grey, then my gear will be just an umbrella. If they are white, I'll wear only a jacket, if they are black I'll be nude with just boots (!), and if they are green I'll get a spacesuit. And if the cloud color is none of these, then I'll only wear a watch. The presence of the break keyword at the end of the different cases make the choices 100% exclusive. Only one case can be executed!
var gear = '';
switch (cloudColor) {
  case 'green':
    gear += 'spacesuit';
   break;
  case 'black':
    gear += 'boots, ';
  case 'grey':
    gear += 'umbrella, ';
  case 'white':
    gear += 'jacket, ';
  default:
    gear += 'watch';
} // end of the switch statement
Explanation: if the clouds are black, then my gear will be 'boots, umbrella, jacket, watch'. If the clouds are green, my gear is a spacesuit (because of the break keyword, other cases will not be tested). If the cloud color is not in the listed colors, then my gear is only a watch (default case).
To finish up this section, here is a complete example (to run it: click on the "edit on codepen" label and once in codepen, open the devtool console to see the outputs of this program):

Live coding video: loop statements
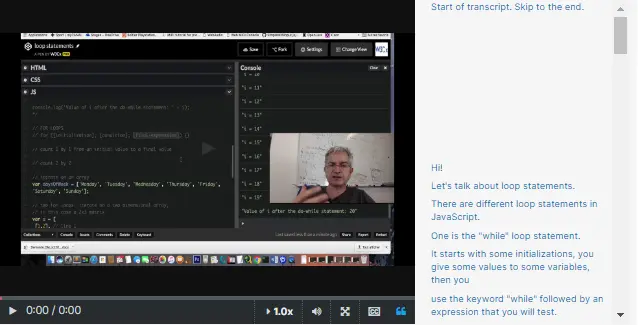
Let's talk about loop statements.
There are different loop statements in JavaScript.

One is the "while" loop statement. It starts with some initializations, you give some values to some variables, then you use the keyword "while" followed by an expression that you will test. It will be evaluated as "true" or "false".
When this expression is false, you continue after the block of instructions that is inside the loop. Let's start with an example. We've got here some initialization: "var n = 1, m = 1;". We've got the keyword "while" followed by the condition, "n less than 4", followed by a block of instructions that will be executed as long as the condition is evaluated as true.
With n = 1, n is less than 4, we execute the block of instructions. Inside the block, n is incremented, n += 1, then n = 2, it's still less than 4, we continue, n = 3, it's still less than 4, we continue, n = 4, then the condition is false: 4 is not strictly less than 4, and we continue after the loop and the console.log is executed.

Let's have a look at the execution of this program. While it's executed, it prints in the body of the loop console.log, it prints n = 1, this is the initial value, n = 2, n = 3… when n = 4 the condition is no more true and we go at the next instruction after the block of instructions of the loop. Inside the loop, we also incremented the variable m by adding the consecutive values of n. And m had a starting value of one. 1 + 1 + 2 + 3 + 4 …. the final result is 10 as you can see.
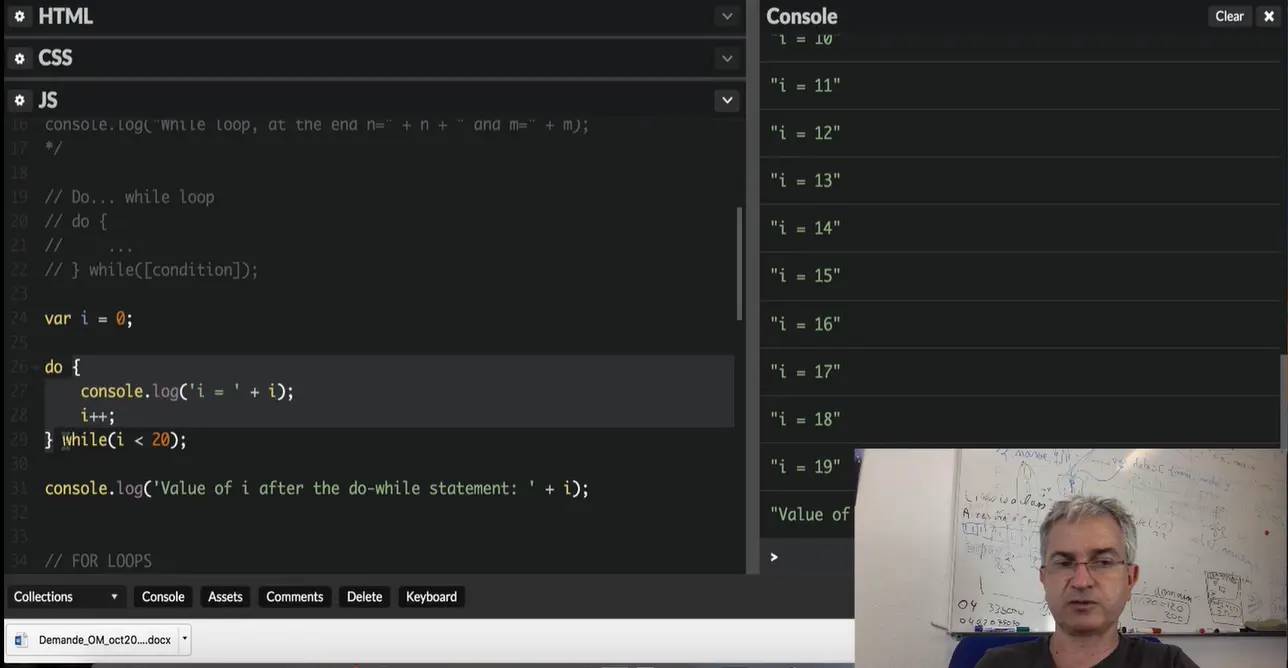
The second kind of loops you can use are called the "do…while" loops.
They are very similar to the while loops except that the first execution of the block of instructions does not depend on any condition. The condition of the loop is at the end, after the keyword "while". Do something… while the condition is true… Let's look at this example: we've got a variable i that has a value of zero, and we increment it in the loop, but before incrementing it we print its value.
The final condition is "i strictly less than 20". We are going to execute this for 0, 1, 2... and when i++ will give a value to i that is 20, then the condition will be no more true, and we will finish the execution of the loop and execute the console.log that is here.
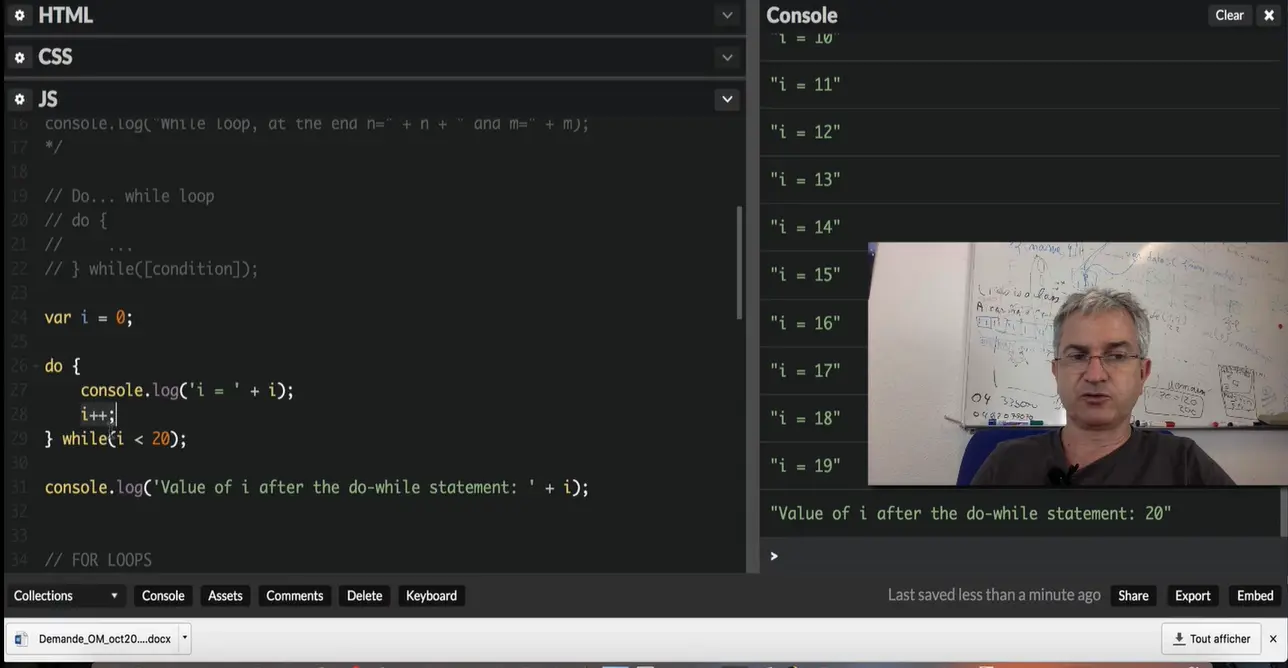
Look at the devtool console:
We executed the loop for i = 0 to i = 19. After the last display of the value, we incremented i, the condition was false, i is 20 now, and we printed its value.
The last sort of loop statements you can use are called "for" loops. The syntax is like that: "for" followed by parenthesis, followed by a block of instructions. And in the parenthesis you've got three different parts separated by semicolons.
The first part is the initialization part, then the "condition ». As long as the condition is true, the block of instructions will be evaluated. And there is something called the "final expression": it's a set of instructions that will be executed like if they were located at the very end of the loop, as the last instruction.
Usually we increment some variables, or decrement some variables that will make, after a certain number of executions of the loop, the condition false.
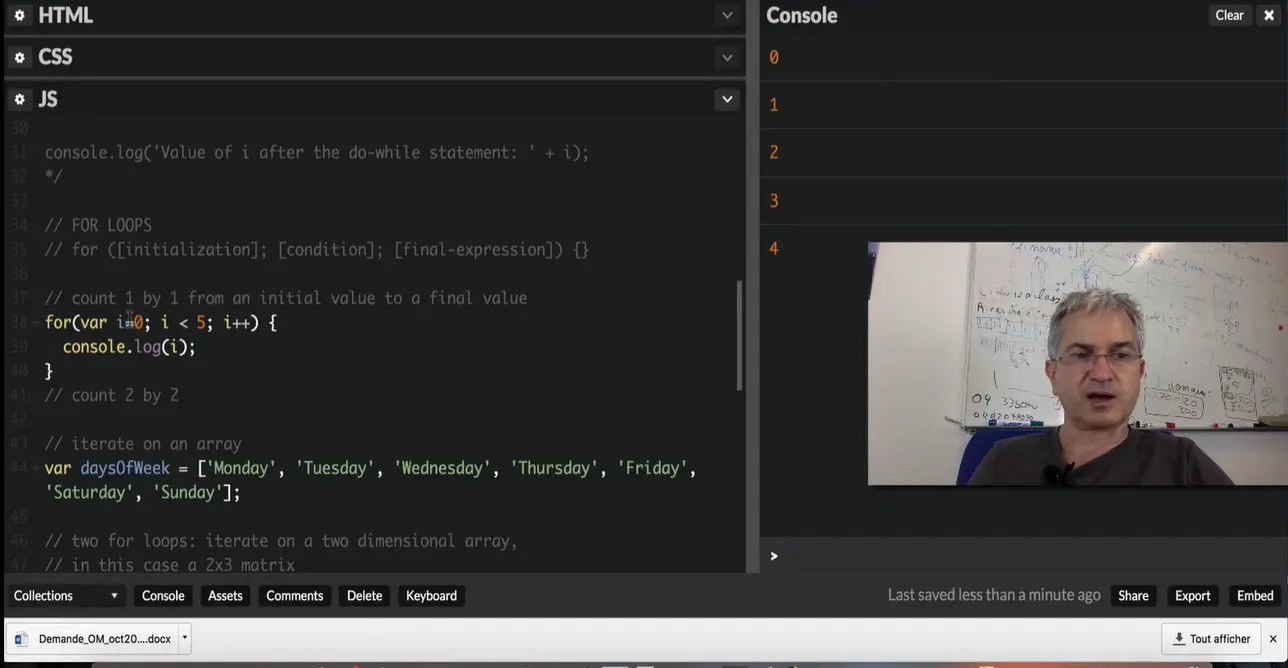
Let's try a small example: we are going to count one by one from an initial value to an end value. You see: I counted from 0 to 5, not included, because of the "less than" operator here. I counted for i equals 0, 1, 2, 3, 4… then, when i is equal to 5 the condition is no more true and we exit the loop.
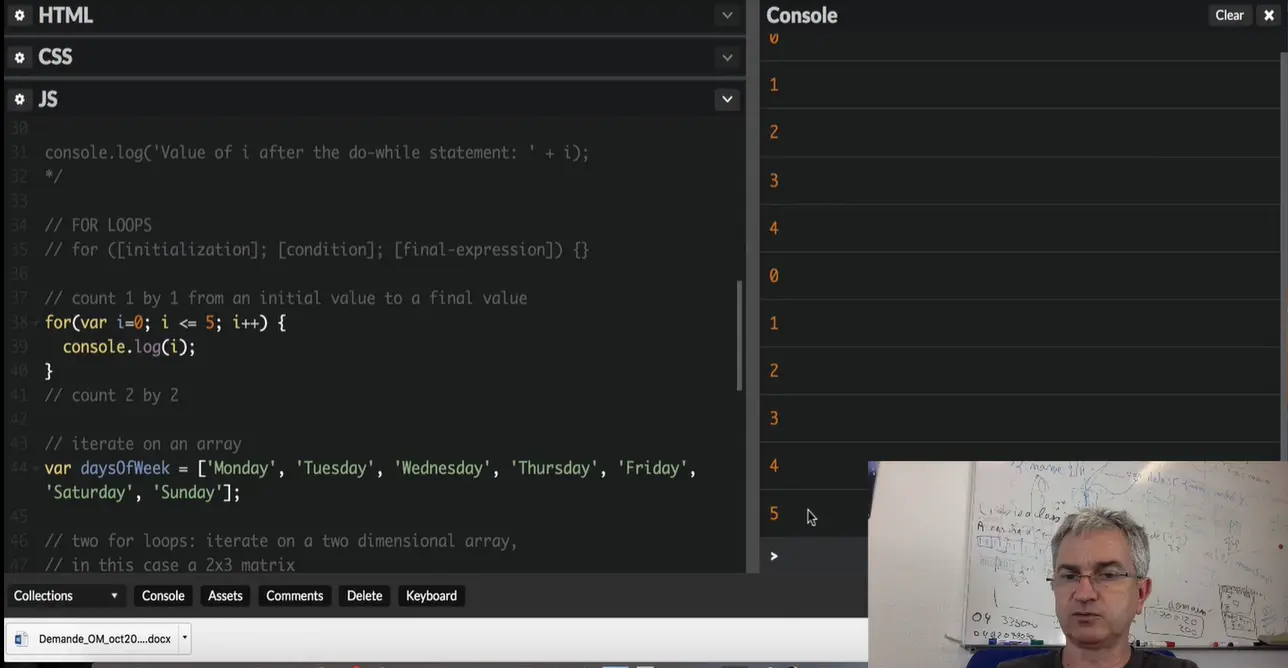
We can also use less than or equal to. In this case we counted to the final value and included it.
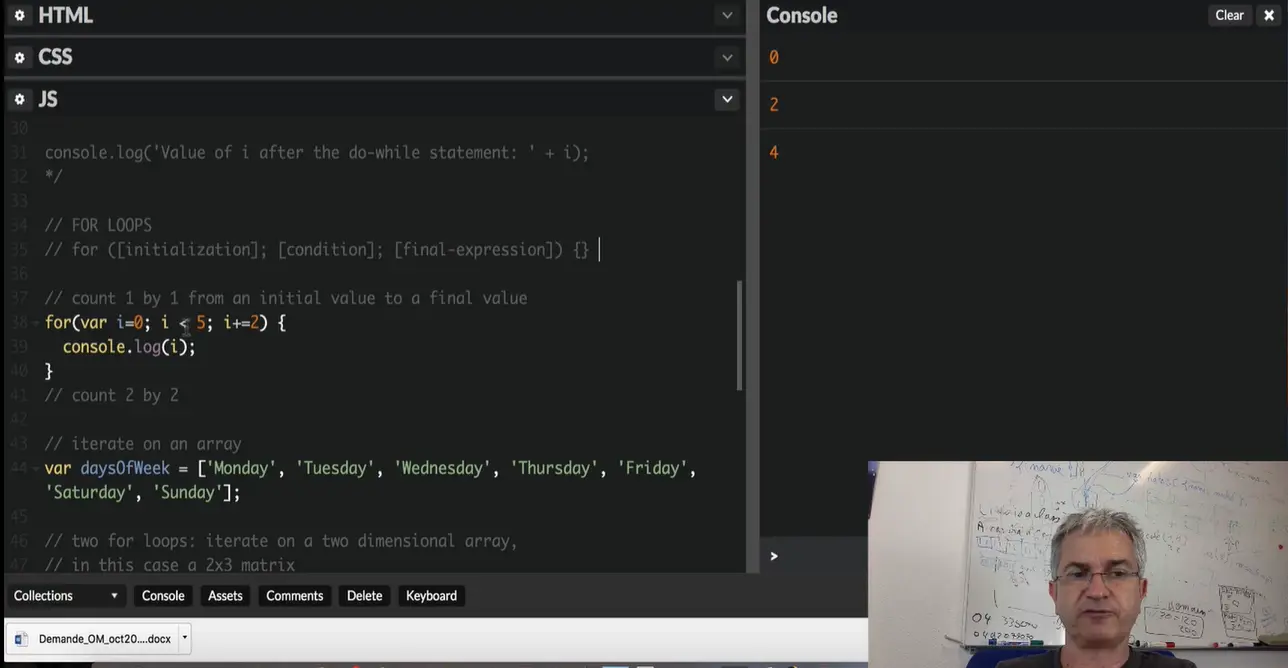
We can also increment the loop 2 by 2. In that case (let me clear and execute again), we run the loop with a value of i = 0, i=2, i=4, i=6, the condition is no more true, we exit from the loop.
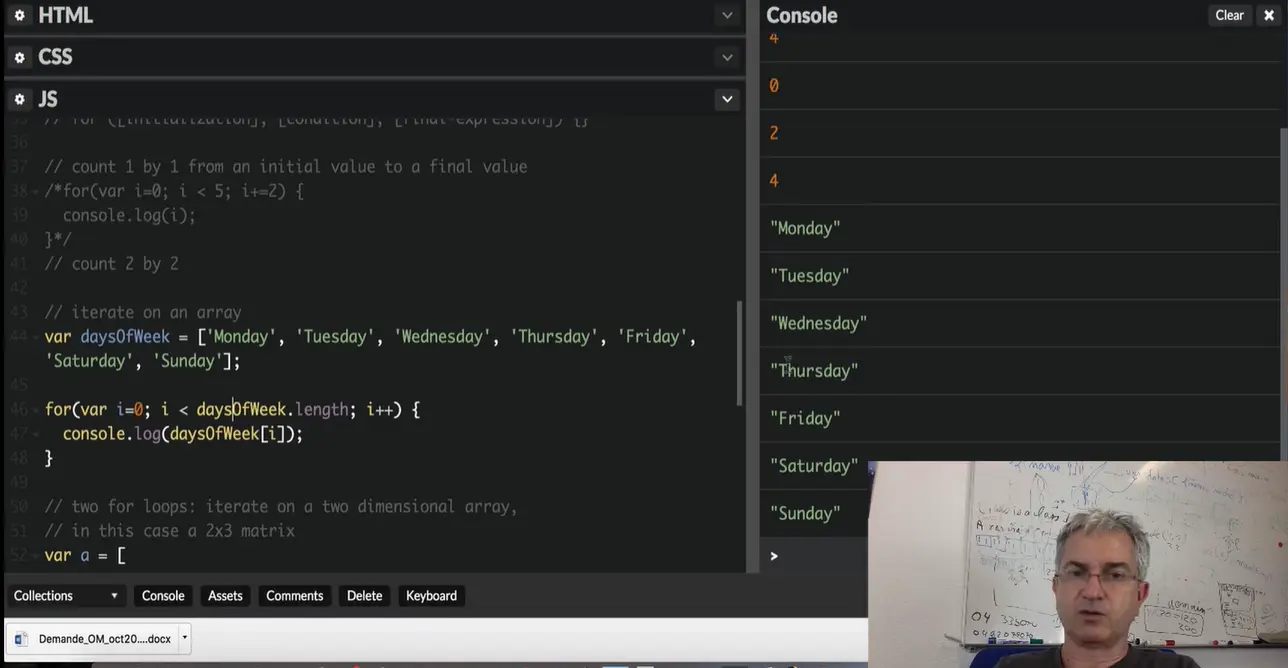
We can also iterate on the elements of an array. This is very common. We've got an array here called "daysOfTheWeek" and we are going to enumerate all the elements inside.
Let's make a "for" loop, and the final value… the number of times we are going to iterate is the number of elements in the array. It's given by the "length" property of the array. What we did: we executed the loop from i = 0, to i = 1, 2, 3, 4, 5, 6, 7! This is the value of "daysOfWeek.length", and we incremented the i variable at the end. We did this for i = 0, 1, 2, 3, 4, 5, 6 and we displayed the element with the index equal to i, inside the loop.

A loop is used to run the same block of code several times while a condition is satisfied.
If you have trouble with loops, the online tool slowmoJS can be really useful: you just have to copy and paste an example into it to run it step by step and see how your program executes loops.
With a while statement, a block of code is executed repeatedly while the specified condition is satisfied (evaluates to true).
while ( condition ) statement
The condition is an expression, and the statement can be a block statement.
Typical example of a while statement:
var i = 1, j = 1;
while ( i < 4 ) {
  j += i;
  i += 1;
}
…
The block inside the while (lines 4 and 5) will be executed three times:
Of course, if the condition never evaluates to false, the block will be executed infinitely until the machine crashes… a test like while (i > 0) { …..} will never stop and will eat all the CPU.
Try this example now with slowmoJS!
The do-while statement is very similar to the while statement, but its syntax is different:
var i = 0;
do {
  console.log('i = ' + i);
    i++;
} while(i < 20);
console.log('Value of i after the do-while statement: ' + i);
The do-while statement executes the content of the loop once before checking the condition of the while, whereas a while statement will check the condition first before executing the content.
A do-while is used for a block of code that must be executed at least once.These situations tend to be relatively rare, thus the simple while-statement is more commonly used.
If you want to "see" the difference, look at the "do-while" statement with slowmoJS and the "while" statement slowmoJS.
This statement adds some things to the while and do-while statements: an initialization expression and an incrementing expression.
for (initialization; condition; incrementation) statement
The three expressions within the parentheses are optional. If the condition is omitted, it is replaced by true (infinite loop).
for (var i = 0; i <= 10; i++) {
  console.log('i = ' + i);
}
We can have more than one instruction in the "initialization part" (var i = 0), and more than one instruction in the "incrementation part" (i++). Here is another example:
for (var i = 1, j = 1; i <= 10; i++, j+=2) {
console.log('i = ' + i + ' j = ' + j);
}
In this example, two variables are defined and assigned within the initialization expression. Before each execution of the block statement, the condition is checked; here we need i <=10. After each execution of the block statement, the incremental expression is executed to increment the variables i by 1 and j by 2.
Open the devtool console of your browser and copy and paste the above code, or look at the slowmoJS execution.
The for-in statement is used to iterate through an object (or through an array, which is also an object).
for ( variable in expression ) statement
var michel = {              // michel is an object
  familyName:'Buffa',     // familyName, givenName, age
                          // are its properties
  givenName: 'Michel',
  age: 51
}
for(var property in michel) {   // the for-in will
                                // enumerate properties
  console.log(property);      // will print "familyName",
                              // "givenName",
                              // "age"
  console.log(michel[property]);  // michel['givenName']  same
                                  // as michel.givenName
}
Before each execution of the block statement, the variable named "property" is assigned with the name of one of the properties (the keys) of the object. We will see further examples of this statement in module 4, which is devoted to the study of JavaScript objects.
The continue statement is used to stop the execution of a block and start the next iteration of the loop. The difference from the "break" statement is that the loop continues.
continue [label]
The label is optional.
for(var i = 1, k = 0; i < 5; i++) {
  if (i === 3) {
    continue;
  }
  k += 2*i;
    console.log('k += ' + (2*i));
}
console.log('Final k value:' + k)
Copy and paste this example in your devtool console, but first, try to guess what the value of k will be!
Hint: lines 2-4 mean that line 6 will never be executed for i = 3. That means that i*2 will only be added to k for i = 1, 2 and 4...
The break statement is used to stop an iteration, a switch or a labelled statement.
break [label]
var tab = ['michel', 'john', 'donald', 'paul']; // johh at index = 1
function isNameInTheArray(name, theArray) {
  console.log("Number of elements in the array : " + theArray.length);
  for(var i=0; i < theArray.length; i++) {
    console.log('comparing with element in the array at pos ' + i);
    if(theArray[i] === name) {
      console.log('the name ' + name +
      ' is in the array at pos: ' + i);
      break;
    } else {
      console.log(name + ' is not at pos ' + i);
    }
  }
}
// Execute the function
isNameInTheArray('john', tab);
Copy and paste in the devtool console. You'll see that the function that compares each element in the array passed as the second parameter with the name 'john', will stop looping after 'john' has been found at index = 1.
Here is the discussion forum for this part of the course. Please either post your comments/observations/questions or share your creations.
Hint: use the Math.random and Math.round methods, such as in let randomNumber = Math.round(Math.random() * 10); to get a random value between 0 and 10.
For working with input fields, look at section 1.4 from the first module, the math function plotter example used input fields. Or look at the section about DOM in this module.

Let's see how to declare a function and a callback.
There are two ways to declare a function.
We've already seen that functions can be declared using this syntax:
function functionName(parameters) {
// code to be executed
}
A function declared this way can be called like this:
functionName(parameters);
Notice that we do not add a semicolon at the end of a function declaration. Semicolons are used to separate executable JavaScript statements, and a function declaration is not an executable statement.

In the above example, the sum function returns a value, and the displayInPage function does not return anything.
A JavaScript function can also be defined using an expression that can be stored in a variable. Then, the variable can be used as a function:
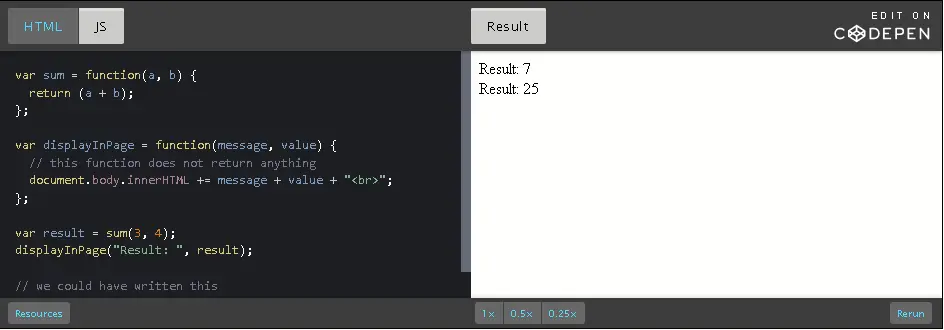
Notice how the sum and displayInPage functions have been declared. We used a variable to store the function expression, then we can call the functions using the variable name. And we added a semicolon at the end, since we executed a JavaScript instruction, giving a value to a variable.
The "function expression" is an "anonymous function", a function without a name, that represents a value that can be assigned to a variable. Then, the variable can be used to execute the function.
We say that functions are "first class objects" which can be manipulated like any other object/value in JavaScript.
This means that functions can also be used as parameters to other functions. In this case they are called "callbacks".
Indeed, as functions are first-class objects, we can pass a function as an argument, as a parameter to another function and later execute that passed-in function or even return it to be executed later. When we do this, we talk about callback functions in JavaScript: a function passed to another function, and executed inside the function we called.
All the examples of event listeners that you've seen used callback functions. Here is another one that registers mouse click listeners on the window object (the window objects represent the whole HTML document):
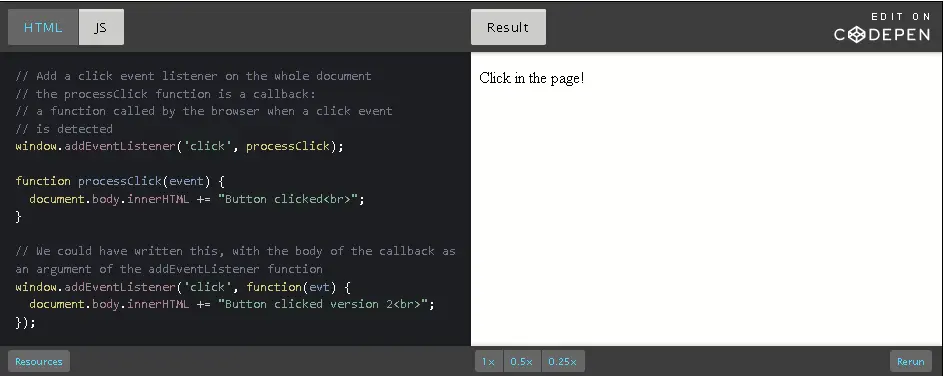
In this case, the processClick function is passed as a parameter to the addEventListener method/function.
Callback functions are derived from a programming paradigm known as functional programming. They are very common in JavaScript. We'll use them a lot in the next section of the course, called "Handling events".
Adding interactivity to a Web application can be achieved by using only CSS, such as by using the :hover pseudo CSS class.

However, firing a specific action when the button is clicked, knowing which mouse button has been used, computing the (x, y) mouse pointer position in the button system coordinate, or executing more complex tasks can only be done through JavaScript.
With JavaScript, a button click, a move of the mouse, a resized window, and many other interactions create what are called "events". The timing and order of events cannot be predicted in advance. We say that "event processing" is asynchronous. Web browsers detect events as they occur, and may pass them to JavaScript code. They do this by allowing you to register functions as event listeners, also called handlers or callbacks for specific events.
Each time an event occurs, the browser puts it in a "queue of events". Then the browser looks at a list of "Event Listeners" and calls the ones that correspond to the type of event "they listen to".
Hello. Let's see how events work in JavaScript. In this video, I will show you how to add a simple event listener for detecting clicks or mouse moves, and we will start with the simplest example.
It's listening for events that will occur anywhere on the Web page.
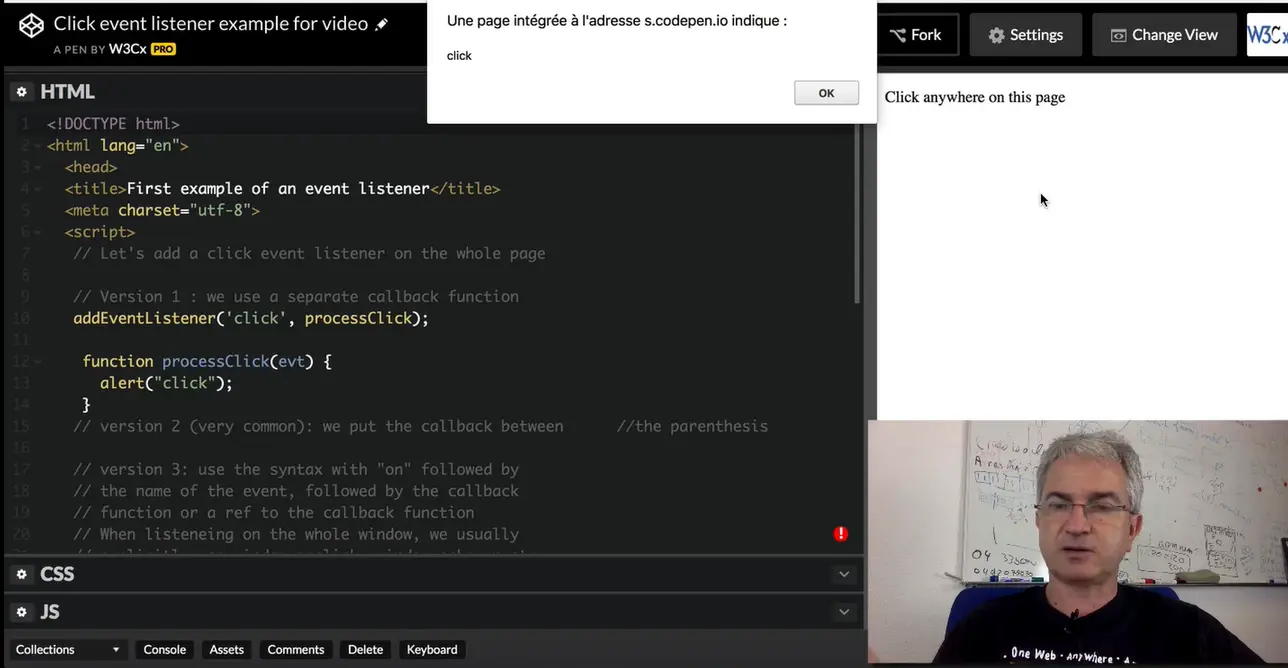
When we add an event listener to the whole page, the syntax is this one: you can type "AddEventListener", followed by the name of the event.
Here we are going to listen to mouse clicks. And then indicate the reference of the callback function that will process the event. Let's write this callback... and let's try it! I clicked on the page anywhere, and an alert message appeared.
This is the first syntax, and there is a variant that is very common in JavaScript, when the length of the callback (source code) is small, you can directly add the callback inside the parenthesis of the AddEventListener call.
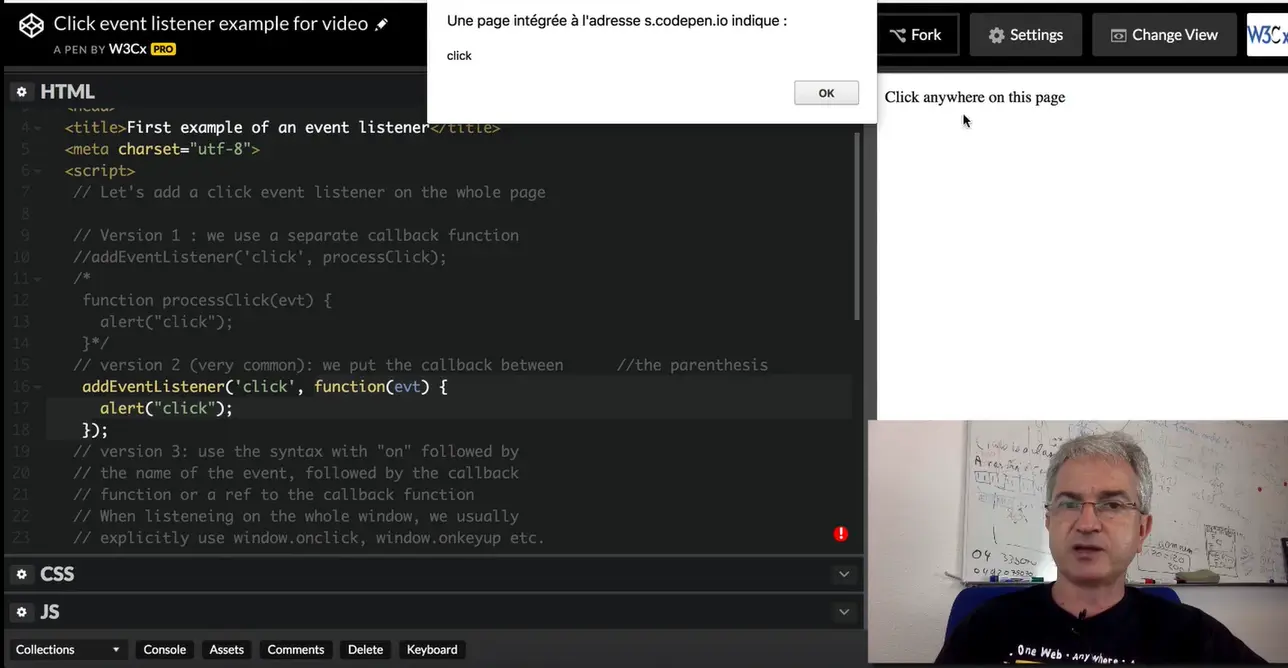
Let's see this example… I'm going to comment the first example, and this time, instead of just adding as an argument the name of the callback, we directly put the body of the callback.
A function... and we don't have to indicate a name: it's an anonymous function, an anonymous callback. When we click on the page, we will execute this callback that is located exactly as the second argument.
If I click on the page, you can see that it works again. And this syntax is very common! Notice the parenthesis, followed by a semicolon at the end, because this is just like a parameter.
It's an anonymous callback function, that is the second argument.
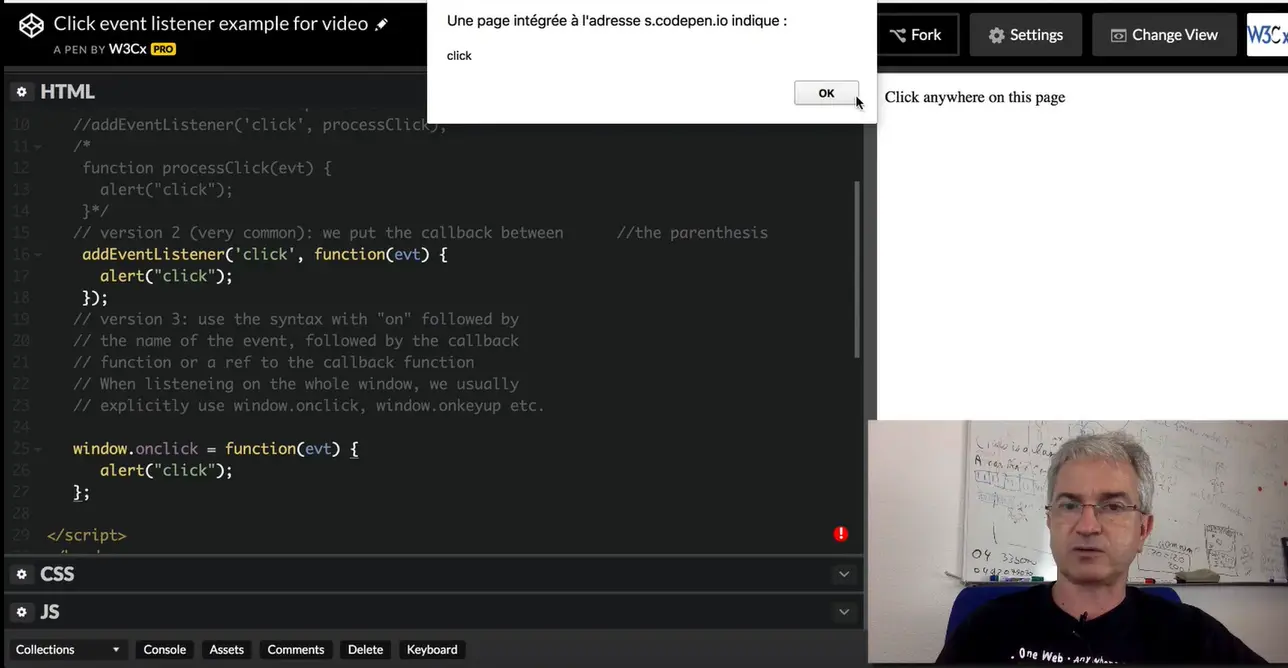
Finally, there is a first syntax, that uses the the object that will fire the event. The window object is the whole document. We start with "on" followed by the name -in lowercase- of the event, and we assign to this property "onclick", we assign directly the function.
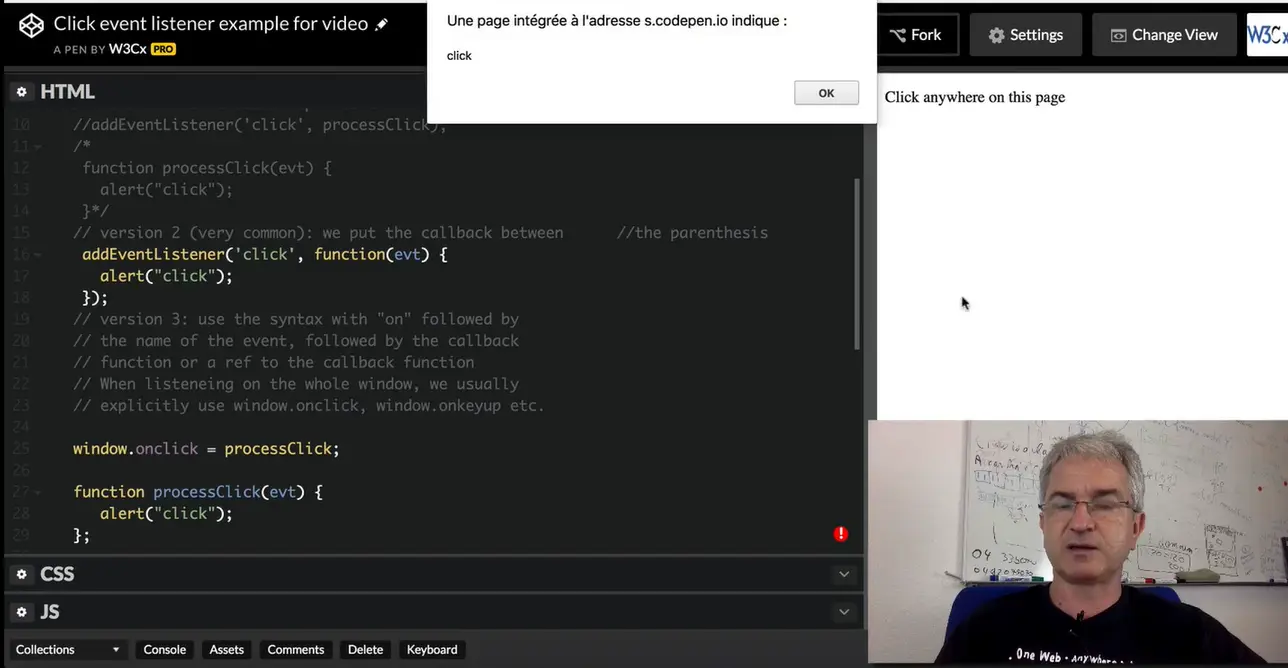
We can directly type the anonymous function, like that. We add a semicolon because this is a an executable statement. And if I click… …it works. Okay, or I could have used the same syntax we saw earlier, with a regular callback function with a name, and we just indicate onclick equal the name of the callback, like this, which is the same name… So if I click, it works.
Live coding transcript: adding an event listener to a specific HTML element.
In this lesson, I will show you how to add an event listener to an html element, and not to the whole document, like in the previous lesson.
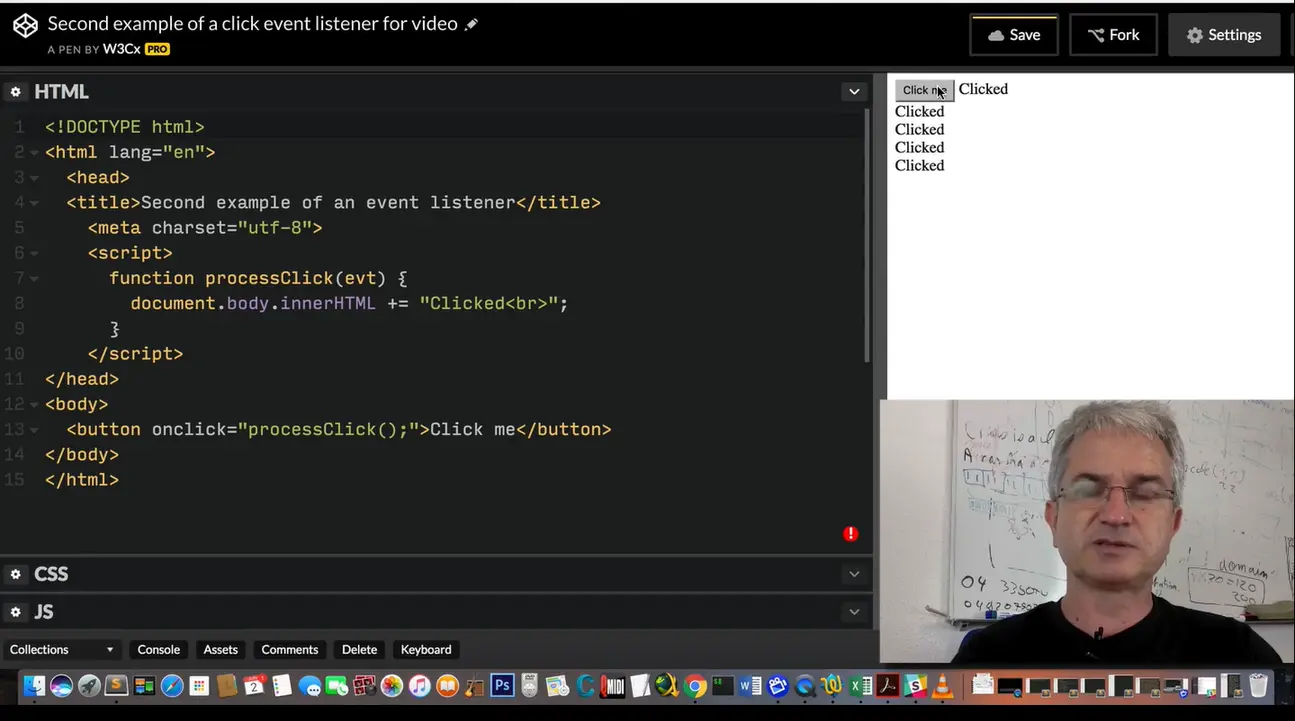
Let's try with a button. One of the easiest way to detect a click on a button is to use the onclick = name of the function, name of the callback that will process the function. In that case, we can locate the body of this callback anywhere in the script element.
We can, for example, put the script element in the head element at the top of the html document. Let's try like that… In that case, you see, when I click, the processClick callback is called. I always add an argument here, that is not used in this example, but it will be the topic of a next video. Here, I'using just the DOM API for adding some text to the document.
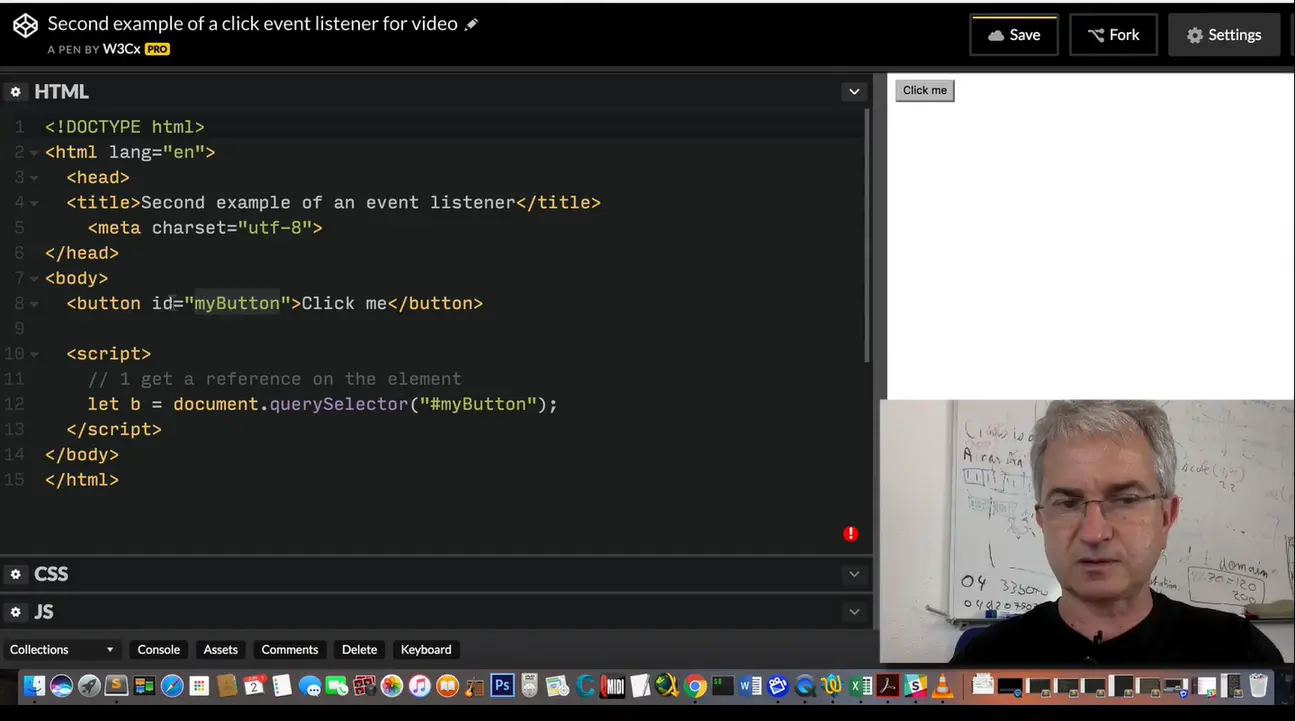
If you want to use the other syntax with addEventListener, you must take some precautions. You will need first to locate the element, so that you can manipulate it from JavaScript. For that, we usually add an id attribute so that we can identify the element. And then we use a script element. I'm putting this one at the end of the document.
There is a good reason for that, that I will explain. And first, I get a reference on the element. For that, we use the selector API: it's a built-in feature that is in your browser, that is very useful for getting references on elements. document.querySelector is the name of the method we are going to use.
And then, we use a CSS3 selector. Notice that the id I use is the same I used in the declaration of the html button.
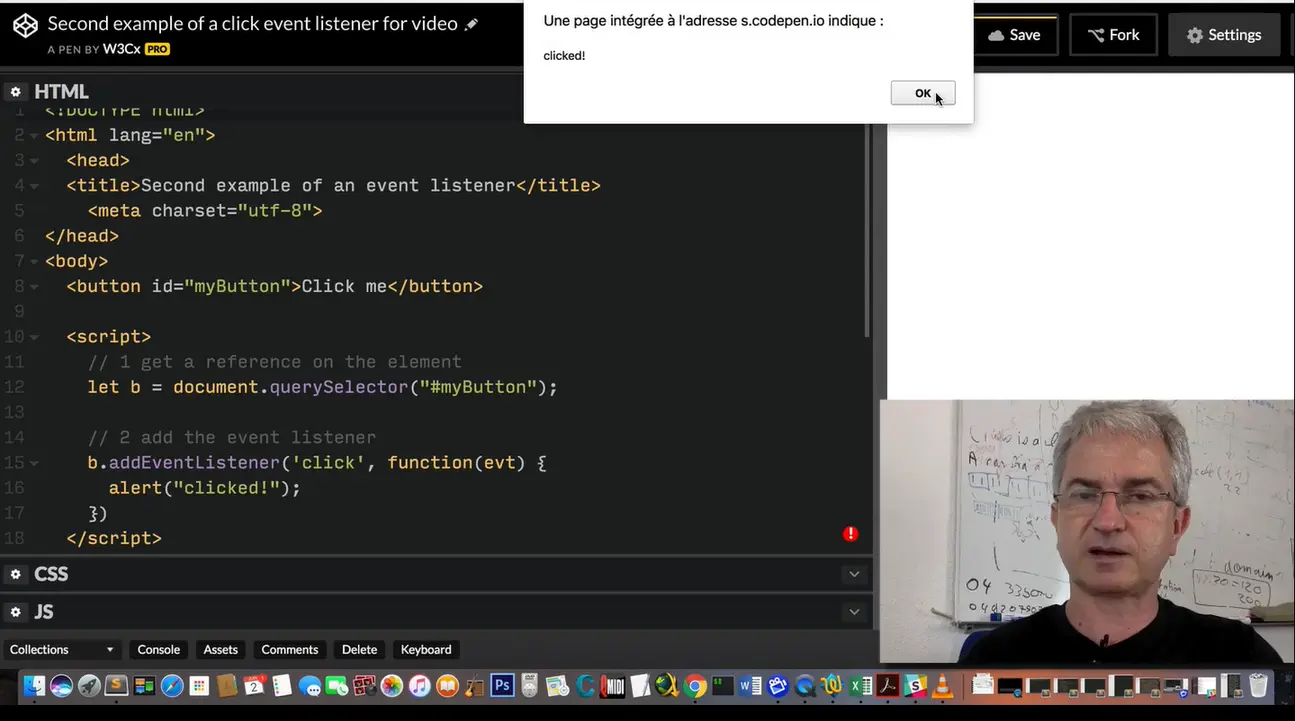
Once I've got the reference on the object, I can add the event listener. Let's try it. I click on the button and I get an alert. You must understand that when you execute document.querySelector, the button must exist in the page and must has been rendered. We say that "the DOM of the page must be ready".
When an HTML page is rendered, it's sequential, it goes from top to bottom, so in that case, the button is created, added to the DOM, then the script is executed, and document.querySelector will return a reference on the button.
If I move this script tag before the button, in that case, it's not going to work because the b variable here will correspond to nothing, it will be null because there is not yet a button in the DOM. And if we look at the devtool console, we see "cannot read property addEventListener of null". This occurs at this line, we try to run addEventListener on a variable that is null. Be very careful, do not try to select an HTML element when the DOM is not yet ready.
Here is one possible syntax for registering an event listener that listens to "click" events on any part of the window (clicks anywhere on a web document will be processed by this event handler):
<script>
  addEventListener('click', function(evt) {
    document.body.innerHTML += 'Button clicked!';
  });
</script>

The addEventListener function is one possible syntax for registering a function to be called when a given type of event occurs.
addEventListener(type_of_event, callback_function)
In the example below, the type of event is a 'click', and the callback function is the part in bold:
function(evt) {
  console.log("Button clicked!");
}
When this function is small (a few lines of code), it's common practice to put its body as the second parameter of the addEventListener function.
In other words, this:
<script>
addEventListener('click', function(evt) {
  document.body.innerHTML += 'Button clicked!';
});
</script>
… is the same as this (the function called when a click occurs has its body "outside" of the addEventListener parameters, and we use its name as the second parameter):
<script>
  addEventListener('click', processClick);
  function processClick(evt) {
    console.log("Button clicked!");
  }
</script>
Instead of listening to event on the whole document (using addEventListener is the same as using window.addEventListener), we can listen to specific DOM elements. For example, here is how we can listen to clicks on a specific button (whereas clicks on the rest of the document will be ignored).

In this example, instead of using the addEventListener method directly, we used it on a DOM object (the button):
Every DOM object has an addEventListener method. Once you get a reference of any HMTL element from JavaScript, you can start listening to events on it.
Instead of using b.addEventListener('click', callback), it's possible to use an onclick='doSomething();' attribute directly in the HTML tag of the element:

<button id="myButton" onclick="processClick(event);">Click me!</button>
… is ok when you only need a single event listener to click events for this button, as there can be only one onclick attribute per element. Using the b.addEventListener('click', callback) syntax, you can register more than one event listener. You'll need rarely to do this, so in my opinion it's fine to choose whichever syntax you like.
Remember that for big projects, it's always better to separate the HTML, CSS and JavaScript code. In this case, I'd recommend that you put all your event listener definitions in a separate JavaScript file, and use the addEventListener syntax in preference to the "on" attributes syntax.
When we click on the button, we execute the processClick(evt) callback function, and inside we remove the listener we previously registered. Consequence: if we click on the button again, nothing happens as there is no longer a click event listener attached to it.

Note that to remove an event listener, you should have added it with its named function, so that we can pass it to both addEventListener and removeEventListener.
The event object is the only parameter passed to event listeners.
Typical example:
function processClick(evt) {
  alert("Button clicked!");
}
Each event listener has a single parameter that is a "DOM event object". It has various properties and methods that can be very useful.
For example, with a 'keyup', 'keydown' or 'keypress' event, the event object contains the code of the key that has been pressed/released, with a 'mousemove' listener we can get the relative position of the mouse in the DOM element that has generated the event, etc.
The event object contains some important properties and methods that are common to all types of events:
It also contains properties that are associated with the type of the event, for example:
In the subsequent sections of this course we will look at the most common types of events in detail.
The most useful common properties are:

The most useful common methods are:

Live coding video: page ‘load’ event and the event object
This time let's talk about the event object, and we'll start looking at different types of events.

One of the events you will use is called the 'load' event, and you can apply it on the page using onload equal followed by the name of the callback.
I usually call this callback "init" and this is a good practice: always use a function that will be called when the page is loaded. I'm adding a console.log message just to verify.

I open the console, and you can see that if I save the document and run again the example, or if I clear the console and execute it again, this callback is called when the page is loaded… that means "when the DOM is ready".Then, from this function, I can call any other function, I can execute any kind of code, I will never have to wonder… to think: "is the DOM ready?"
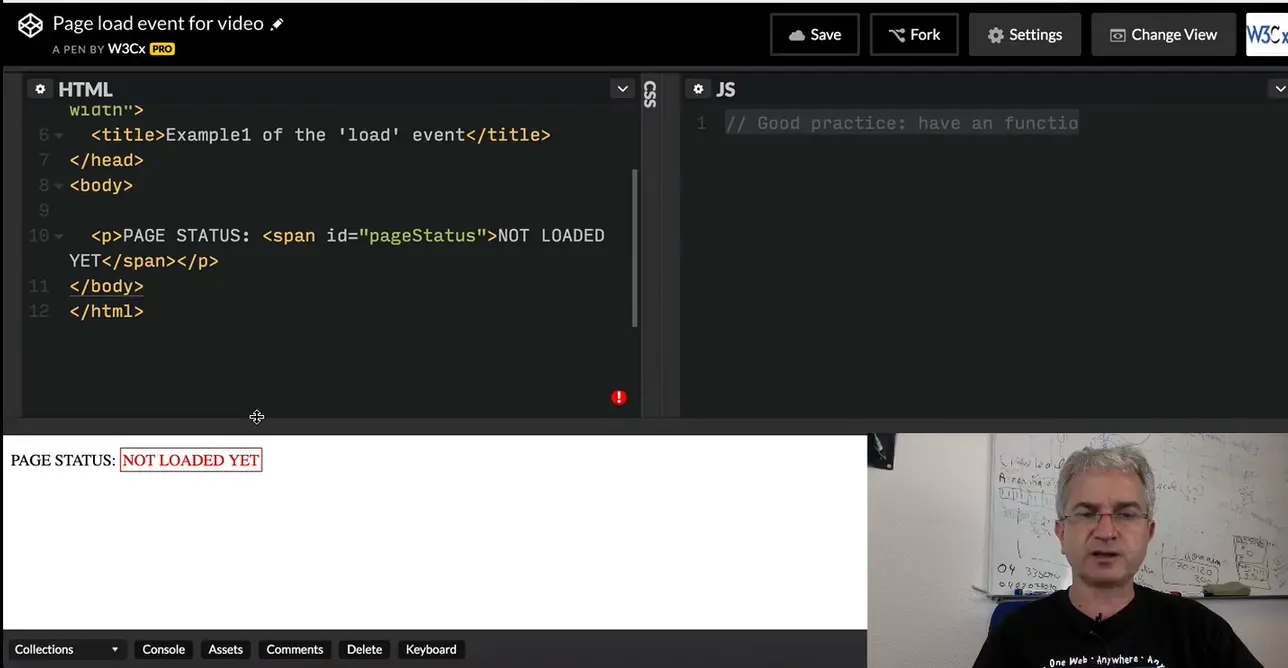
For example, to update this part of the page… I use a span with an id attribute. I can locate the span… and like this… using the querySelector method and a CSS selector on the id… "pageStatus" is the id of the element… Then I can change the content of the page… If you look at what is happening when I execute the code, it says "page loaded". This is a very good practice. I nearly always do this on my own softwares.
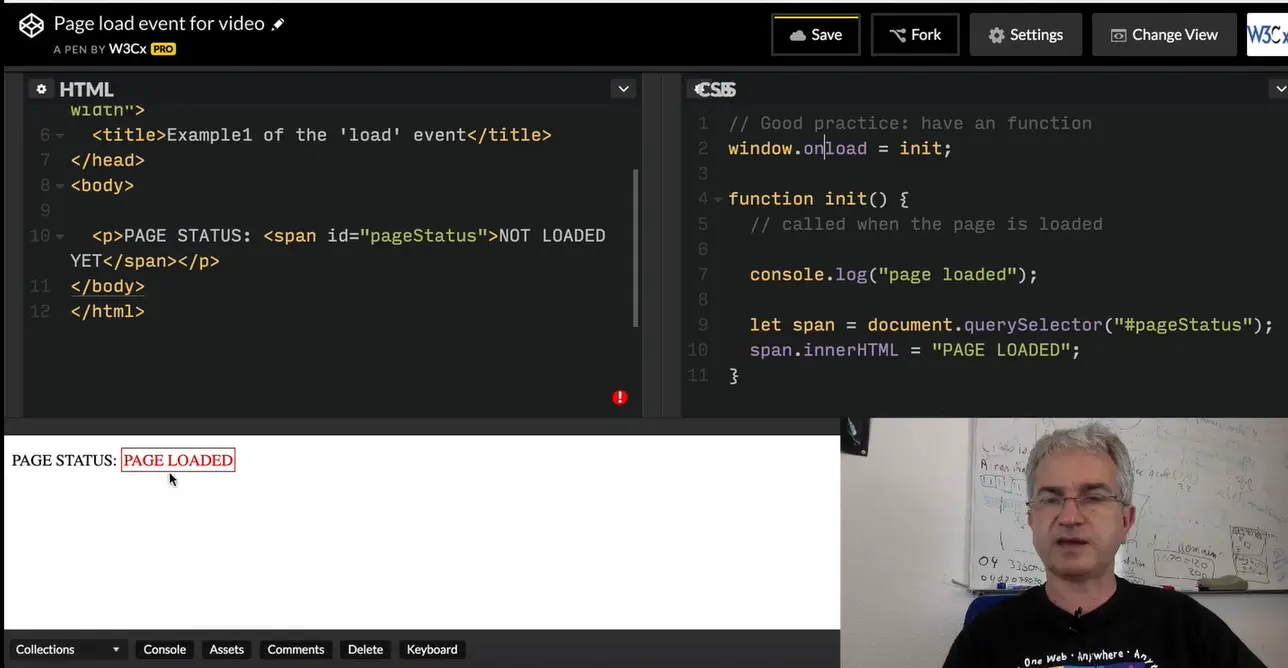
Another variant is that instead of using the "onload" syntax, you can just write window.load = init.
This will produce the same result… onload… and in that case, instead of using body onload…you use window.onload. It's a bit better because you do not mix JavaScript and html, it's a better separation of the different parts of your Web application. You may notice that here I haven't typed the event argument. Every event callback will have an event object passed by the browser when the event is processed.
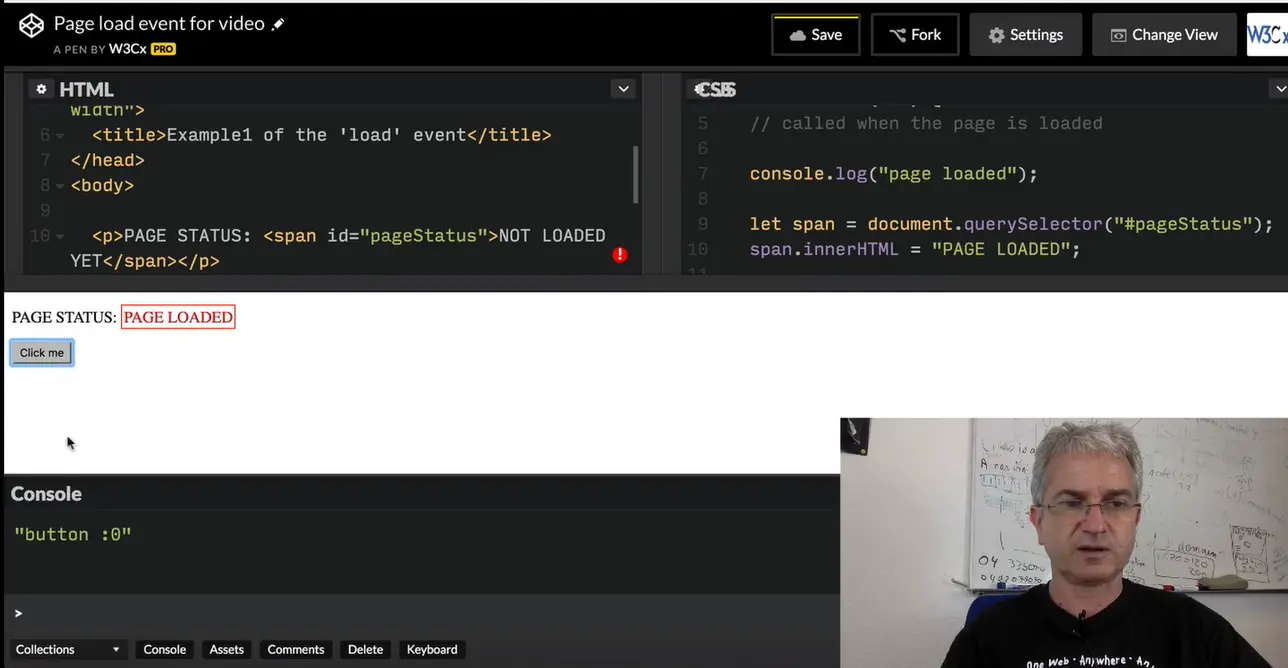
And this event object can be used to guess what type of event has been fired, can be used to get the different properties of the event, such as the x and y positions of the mouse, the button that has been clicked, the target element that fired the event and so on…
If now, for example, I want to listen to events on a button… a bit in a similar way we presented in a previous example… I can add a listener in the init function…and in this listener, I can, for example, display the name of the button that has been used for clicking. Let's try it… here is the console, I clear it, then I click on the button, and it says it's button 0.
You can also try different types of events, like detecting mouse moves. In that case, we are going to detect mouse moves on the button, and you can see in the console that it works.
You can, for example, use the event object to detect the x position of the mouse.
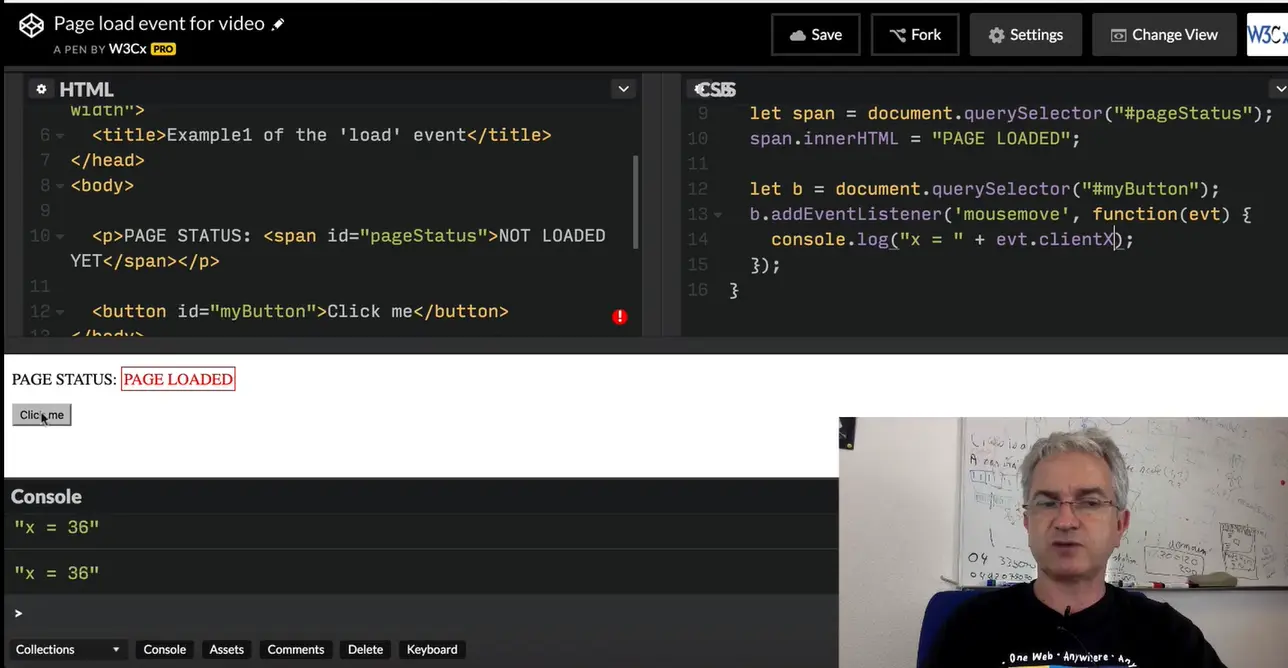
There are different properties for getting the position of the mouse, relative to top of the page, relative to the top of the viewport or relative to the the element that fired the event. This is detailed in the section about mouse events.
But here, I'm just showing you one the most common property, that is called clientX: it gives the position of the cursor, relative to the top of the page. Just as an example of using the different properties of the event element.
In the next sections, for each kind of event, we'll detail the different properties and provide examples that show how to use them.
The page lifecycle events detect when the page is loaded and when the DOM is ready.
There are many other events related to the page life cycle. The most useful ones for an introduction course are shown below:

There are no particular properties that need to be mentioned here. Usually, the load event listener corresponds to a JavaScript function that can be seen as "the main" function of your Web application. It is a best practice to start everything after the page has been completely loaded.
In the resize listener, you get the new size of the window, or the new size of some HTML elements in the page (as they might have been resized too when the window was resized), and then you do something (redraw a graphic in an HTML canvas that takes into account the new canvas size, for example).
This first variant that uses <body onload="init();">

This second variant: using window.onload = init; in the JavaScript code…

In this example, we're listening to page load and page resize events. When the window is loaded for the first time, or resized, we call the resize() callback function.
The window.innerWidth and window.innerHeight properties are used to display the updated size of the window. We also use screen.width and screen.height to display the screen size.


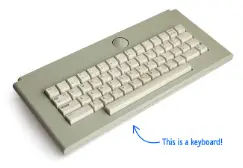
When you listen to keyboard related events (keydown, keyup or keypressed), the event parameter passed to the listener function will contain the code of the key that fired the event. Then it is possible to test which key has been pressed or released, like this:
window.addEventListener('keydown', function(event) {
  if (event.keyCode === 37) {
    //left arrow was pressed
  }
});
At line 2, the value "37" is the key code that corresponds to the left arrow. It might be difficult to know which codes represent which real keyboard keys, so here are some handy pointers:

These are legacy properties, still used by many JavaScript code around the world. However, we do not recommend that you use them if you are targeting modern browsers. keyCode has a more powerful/easy to use replacement called code (not yet supported by all browsers), that comes with a new key property (see the following pages of the course).


See the Pen keyup and keydown events on window by W3Cx ( @w3devcampus)on CodePen
Try to type shift-a for example, ctrl-shift-b or alt-f…

Please do not assume that each key is at the same location on the keyboard in every country!
We've shown how to detect keyup, keydown and keypress events using the DOM API, and how to use the keyCode property of the DOM event.
Be careful when you use the key events in your application, as keyboard layouts vary from one country to another. Most first person shooter games (FPS) use three keys located on the top left of your keyboard to move your character. French AZERTY keyboards will use ZQSD for this (Z = up/move forward, Q and D are for left/right and S is for down/move backward), while US keyboards will use WASD, for example. So keep in mind that keys are not located at the same place on keyboards from different countries.
Extract from the " Internationalize your keyboard controls" article on MDN:
"Recently I came across two lovely new graphical demos, and in both cases, the controls would not work on my French AZERTY keyboard.
There was the wonderful WebGL 2 technological demo After The Flood, and the very cute Alpaca Peck. Shaw was nice enough to fix the latter when I told him about the issue. It turns out the Web browser actually exposes a useful API for this."
For details, see Wikipedia's keyboard layout page!


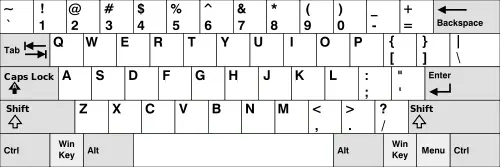
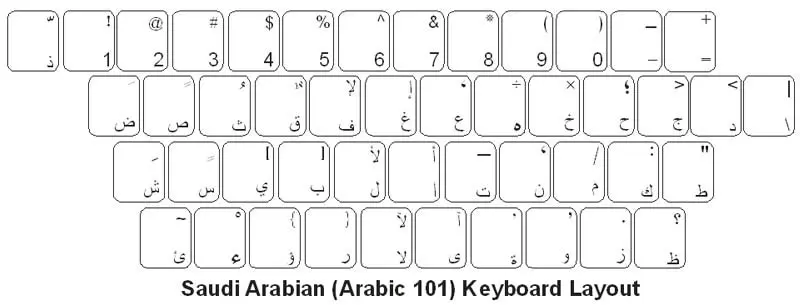
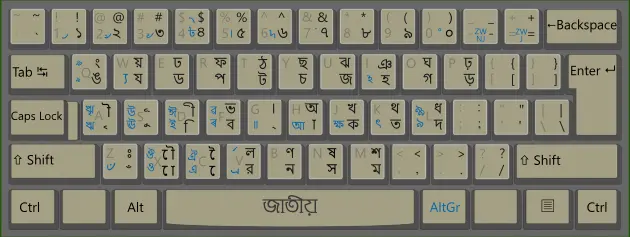
key and code are new recommended properties you can use with modern browsers.
You may have noticed that in some examples from the previous course page about key events, we used event.key in order to display the character that has been typed. The key property has been introduced with a new W3C API called UI Events (or DOM level 3 events), that has been discussed since 2000. All major browsers have implemented this very practical key property. It comes with another property named code, which is what keyCode should have been. The value of the code property corresponds to a code that is more readable than the value of the old keyCode property.
But when an AZERTY keyboard user presses the A key, he also gets 'KeyQ' as event.code, yet event.key contains 'a'. This happens because the A key on a AZERTY keyboard is at the same location as the Q key on a QWERTY keyboard.
As for numbers, the top digit bar yields values like 'Digit1', while the numeric pad yields values like 'Numpad1'.
There's no existing keyboard with all the possible keys. That's why the W3C published a specification just for this. You can read about the existing mechanical layouts around the world, as well as their reference keyboard. For instance here is their reference keyboard for the alphanumerical part:
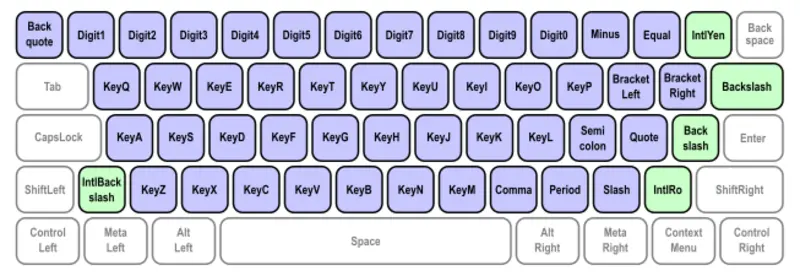
Also, please read through the examples given in the specification. They show very clearly what happens when the user presses various types of keys, both for code and key.
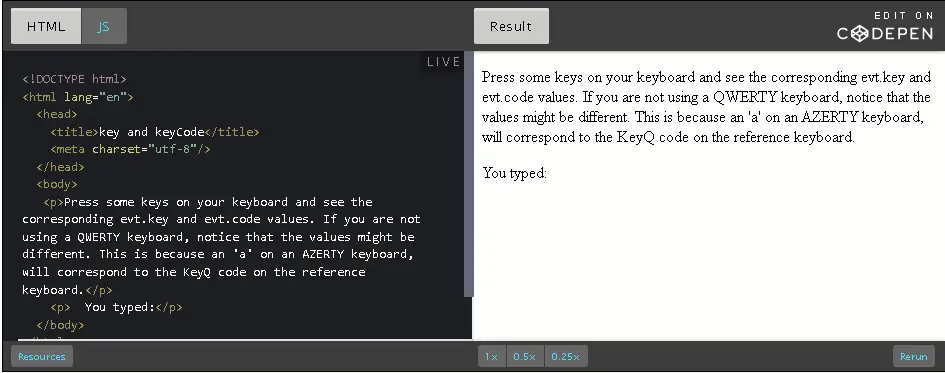
I encourage you to take a look and get at least an overview of this specification.
Please note that the W3C has also published a sibling specification describing the values for the key property.
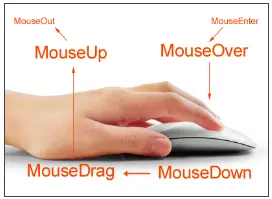
Important note: Remember that many people do not use the mouse and rely on the keyboard to interact with the Web. This requires keyboard access to all functionality, including form controls, input, and other user interface components ( learn more).
Detecting mouse events in a canvas is quite straightforward: you add an event listener to the canvas, and the browser invokes that listener when the event occurs.
The example below is about listening to mouseup and mousedown events (when a user presses or releases any mouse button):
canvas.addEventListener('mousedown', function (evt) {
  // do something with the mousedown event
});
canvas.addEventListener('mouseup', function (evt) {
  // do something with the mouseup event
});
The event received by the listener function will be used for getting the button number or the coordinates of the mouse cursor. Before looking at different examples, let's look at the different event types we can listen to.
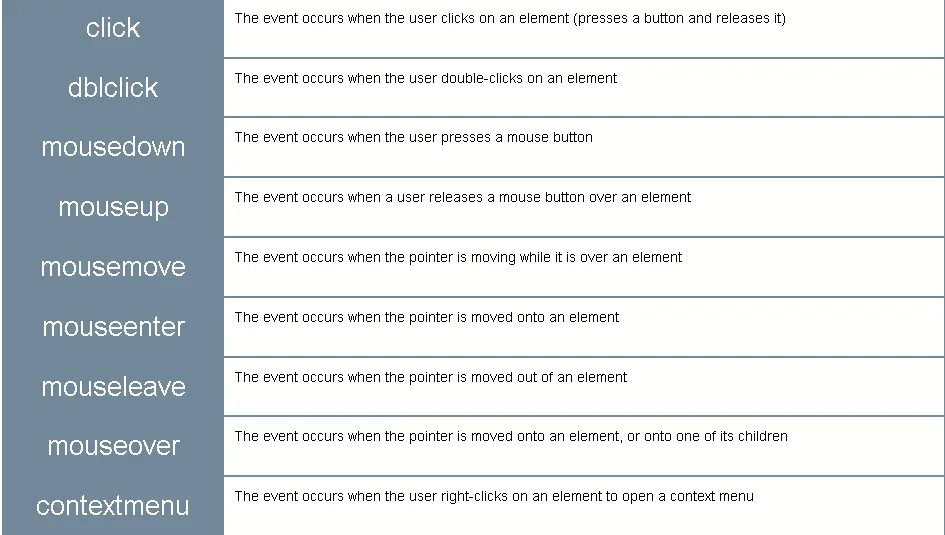
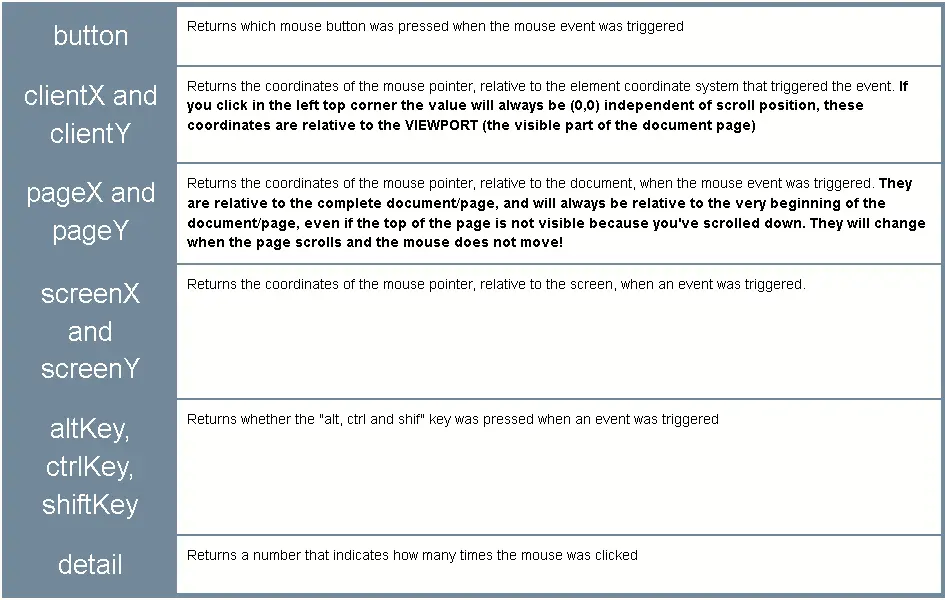

The source code is not meant to be understood. It uses the jQuery lib. Please move the mouse pointer, and look at the different properties. Then scroll the page (the table at the top will not move), and look at the properties again; notice how pageX/pageY change, since they are relative to the top of the page, even if they are not visible. Click on the codePen label on top right and run this example! It does not work when embedded in this page!


Here is a first version that does not work well due to a naive use of clientX/PageX and clientY/pageY mouse event properties:

Here is another version that uses clientX/clientY and the e.target.getBoundingClientRect() method that returns the bounding rectangle that contains the element that fired the event. The return value has top, left, width, and height properties that describe this rectangle. We can use the top and left properties along with evt.clientX and evt.clientY to fix the mouse position and to get a real position relative to the top left corner of the canvas:
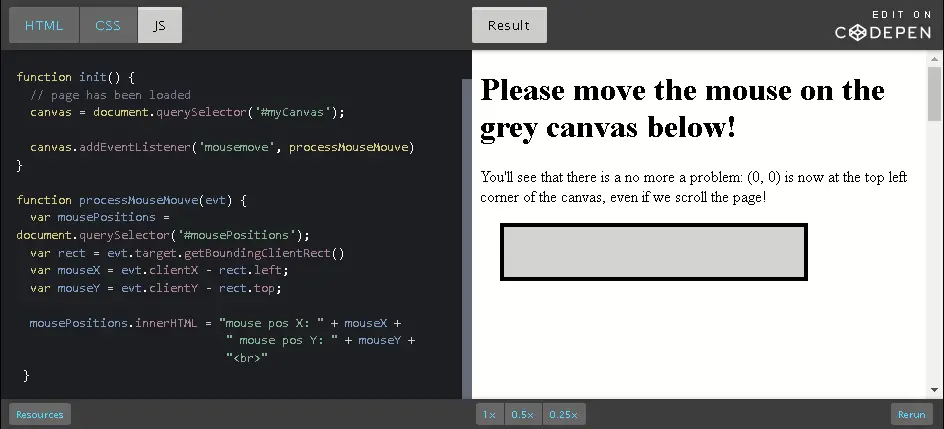
function processMouseMouve(evt) {
  var mousePositions = document.querySelector('#mousePositions');
  // adjust mouse position relative to the canvas
  var rect = evt.target.getBoundingClientRect()
  var mouseX = evt.clientX - rect.left;
  var mouseY = evt.clientY - rect.top;
  mousePositions.innerHTML = "mouse pos X: " + mouseX +
                             " mouse pos Y: " + mouseY +
                             "
"
}
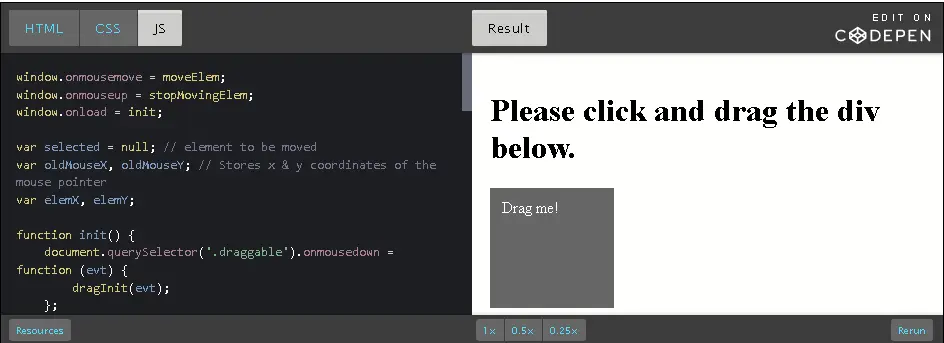
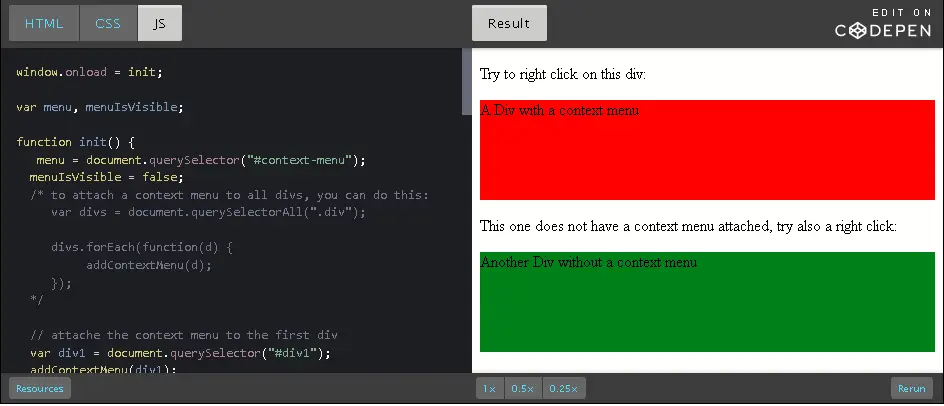
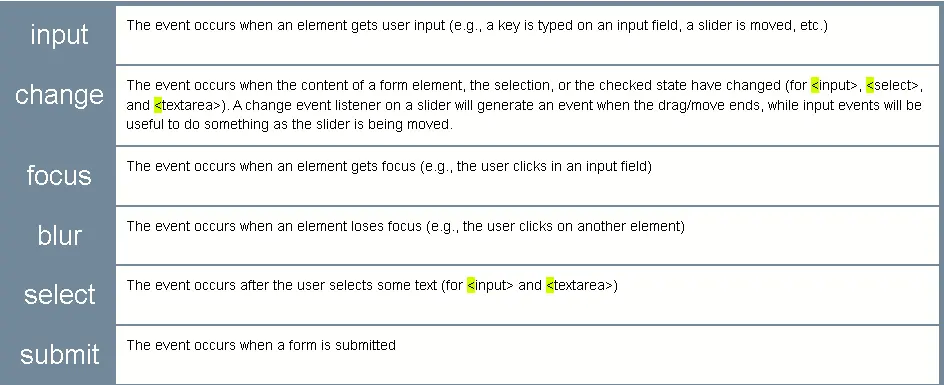
There are no particular properties that need to be mentioned here. Usually, on a form event listener, we check the content of the different input fields, using their value property. See examples in the part of the course that deals with form events.
First variant: using the 'input' event:
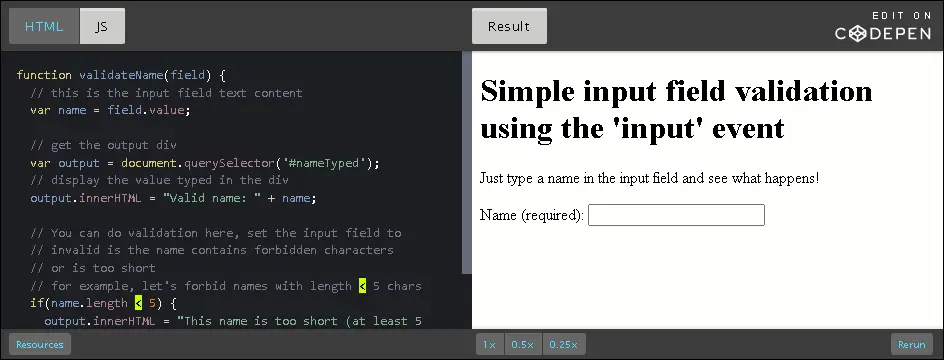
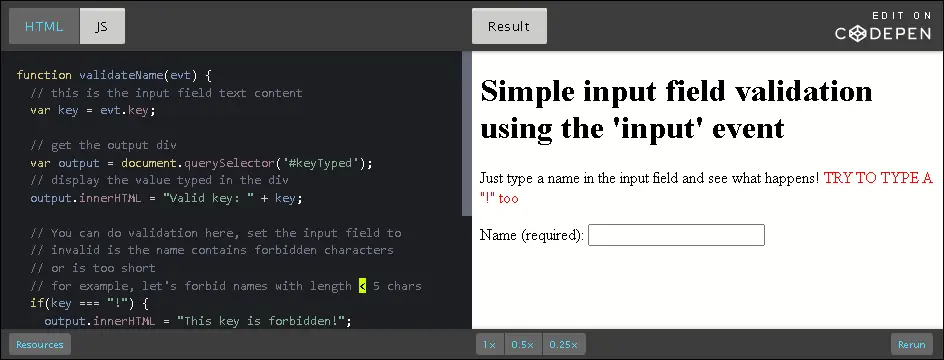
Note that HTML5 forms and the multiple facets of form and input field validation are covered in depth in the W3C.
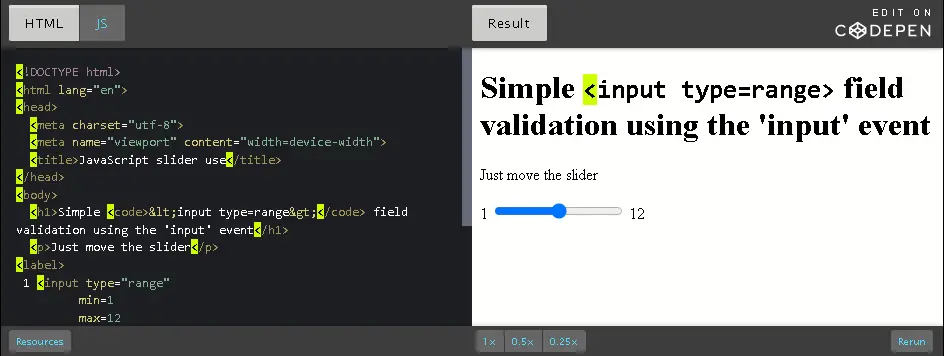
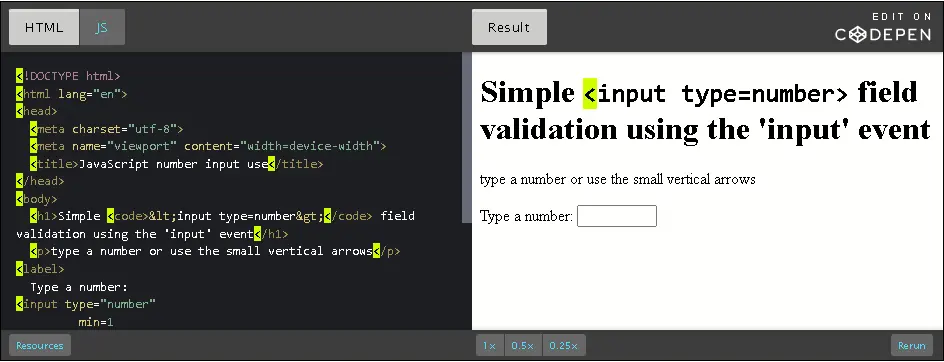


There is no input or output in JavaScript. We treat events caused by user actions as inputs, and we manipulate the DOM structure as output. Usually in a JavaScript application, we will get info such as the key strokes, the mouse button clicks and the mouse position, and we will refer to these variables when determining what action to perform.
In any case, the events are called DOM events, and we use the DOM APIs to create event handlers.
There are three ways to manage events in the DOM structure. You could attach an event inline in your HTML code like this:
<div id="someDiv" onclick="alert('clicked!')"> content of
  the div </div>
This method is very easy to use, but it is not the recommended way to handle events. Indeed, although it currently works, it is deprecated (will probably be abandoned in the future). Mixing 'visual layer' (HTML) and 'logic layer' (JavaScript) in one place is really bad practice and causes a host of problems during development.
document.getElementById('someDiv').onclick = function() {
  alert('clicked!');
}
This method is fine, but you will not be able to attach multiple listener functions. If you need to do this, use the version shown below.
document.getElementById('someDiv').addEventListener('click', function() {
  alert('clicked!');
}, false);
Note that the third parameter describes whether the callback has to be called during the captured phase. This is not important for now, just set it to false or ignore it (you can even pass only two parameters to the addEventListener function call and do not set this boolean parameter at all).
When you create an event listener and attach it to an element, the listener will create an event object to describe what happened. This object is provided as a parameter of the callback function:
element.addEventListener('click', function(event) {
  // now you can use event object inside the callback
}, false);
Depending on the type of event you are listening to, you will consult different properties from the event object in order to obtain useful information such as: "which keys are pressed down?", "what is the location of the mouse cursor?", "which mouse button has been clicked?", etc.
In the following lessons, we will remind you how to deal with the keyboard and the mouse.
In method 1 (above), we mentioned that "mixing 'visual layer' (HTML) and 'logic layer' (JavaScript) … is bad practice", and this is similarly reflected in many style features being deprecated in HTML5 and moved into CSS3. The management philosophy at play here is called "the separation of concerns" and applies in several ways to software development - at the code level, through to the management of staff. It's not part of the course, but professionals may find the following references useful:
These tables are provided as a reference. They are a compilation of the most common event types sorted by domain (key, mouse, forms, etc.). For each domain you will see the most useful event types and their properties. In the following course pages, we will show examples that use most of the events displayed in these tables.
Most useful common properties:

Most useful common methods:

There are many other events related to the page life cycle. Below are the most useful ones for an intro course:

There are no particular properties that need to be mentioned here. Usually, the load event listener corresponds to a JavaScript function that can be seen as "the main" function of your Web Application. It is good practice to start everything after the page has been completely loaded. In the resize listener, you get the new size of the window, or the new size of some HTML elements in the page (as they might have been resized too when the window was resized) and then you do something (redraw a graphic in an HTML canvas that takes into account the new canvas size, for example).


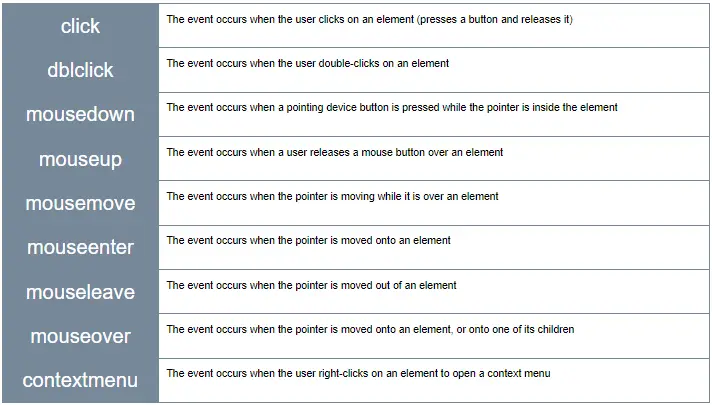
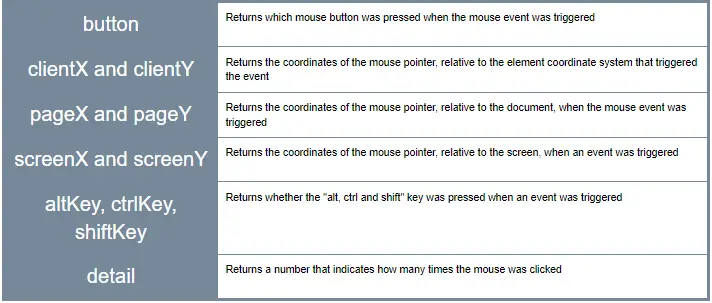
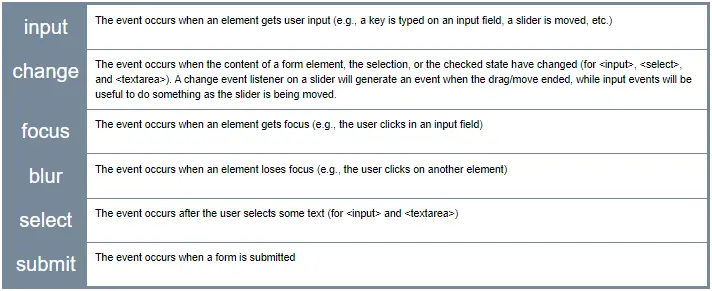
There are no particular properties that need to be mentioned here. Usually, on a form event listener, we check the content of the different input fields, using their value property. See examples in the course, in the part dealing with form events.
Here is the discussion forum for this part of the course. Please either post your comments/observations/questions or share your creations.

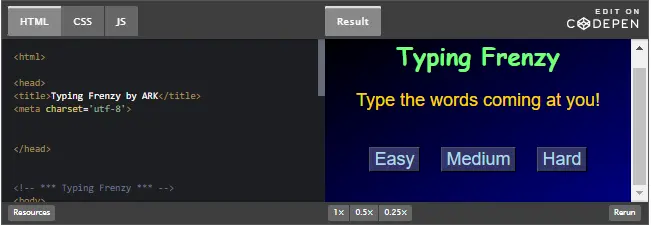
When a user clicks on a link or enters a URL in the address of your Web browser, it downloads the page's HTML text and builds up a model of the document's structure called the DOM (Document Object Model). This model is used to render the HTML page on the screen.
The DOM is a standard that describes how a document must be manipulated. It defines a "language- and platform neutral interface". So, every browser offers the same JavaScript DOM API.
The DOM API is a programming interface the JavaScript programmer can use to modify the HTML content or the CSS style of HTML elements on the fly.
The DOM API provides the document object as a structured object, a group of nodes represented as a tree. We saw this in Module 1 when we revised the basic principles of HTML.
The document object also exposes a large set of methods to access and manipulate the structured document. Through the DOM, look for nodes (html elements that compose the page), move nodes, delete nodes, modify nodes (attributes, content), and also handle their associated events.
In JavaScript, the DOM is accessible through the property document of the global object window. We rarely manipulate the window object directly as it is implicit: window.document is the same as document.
So by using this object, we can access and manipulate our page from JavaScript as a structured document.
'Elements' are the pieces themselves, i.e., a paragraph, a header, and even the body are elements. Most elements can contain other elements - for example, the body element would contain header elements, paragraph elements, in fact pretty much all of the visible elements of the Document Object Model (developers call it the "DOM").
Let's take, for example, a simplified version of the last HTML code we showed you:
<!DOCTYPE html>
<html lang="en">
  <head>
    <title>Your first HTML page</title>
    <meta charset="utf-8">
  </head>
<body>
  <h1>My home page</h1>
  <p>Hi! Welcome to my Home Page! My name is Michel Buffa,
    I'm a professor at the University of Côte d'Azur, in France,
    and I'm also the author
    of two other W3CX MOOCS.
  </p>
</body>
</html>
Click the red circle next to HTML to unfold this HTML document structure (we can also say "see its DOM structure"):
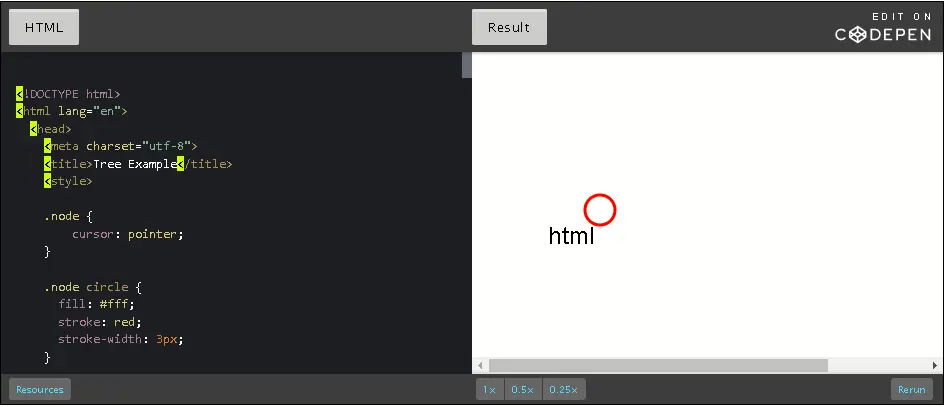
Consider the figure above. It contains a single html element. It turns out this includes within it the entire content of your html file. If you click on the "html" red node, you'll find that it contains two components, a head and a body. Clicking on each of these will reveal their respective contents. This structure is what we computer scientists call a "tree". Any given element (except for the outermost 'html' element) is wholly contained inside another element, referred to as the "parent" element. Not surprisingly, the elements that a given element contains are its "child" elements. And, yes, children of a common parent are often referred to as "siblings".
Thus, in the example above, the top element is the html element, which contains just two elements, the head and body. The head element contains a title element and the body contains an h1 element and a p element. In a more typical example, the body would contain many more children, but for our purposes this is enough. p is for "paragraph" (the text between <p> and </p> will be separated by some space before the next element is displayed in the final HTML page rendering), h1 means "heading level 1", and will be rendered by default in bold with a bigger char size than any other text element, etc.
There are different types of nodes, but don't worry - the most useful ones are highlighted in bold.
You can explore the DOM with the devtool console. This time we used Firefox for exploring the DOM, as it proposes a good structured view of the DOM and of its properties/methods:
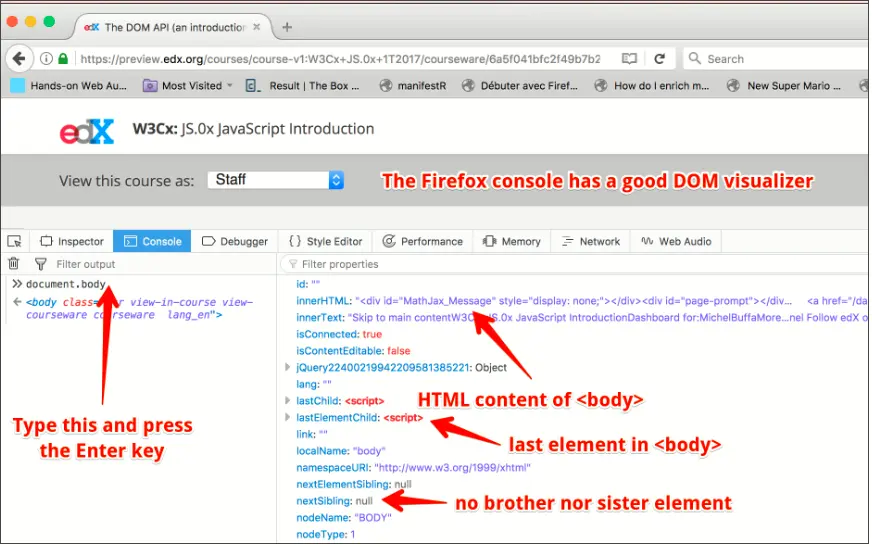
If you scroll down the right panel of the devtool console, as in the above screenshot, you will be able to look at all the properties, all the methods, all the event listeners:
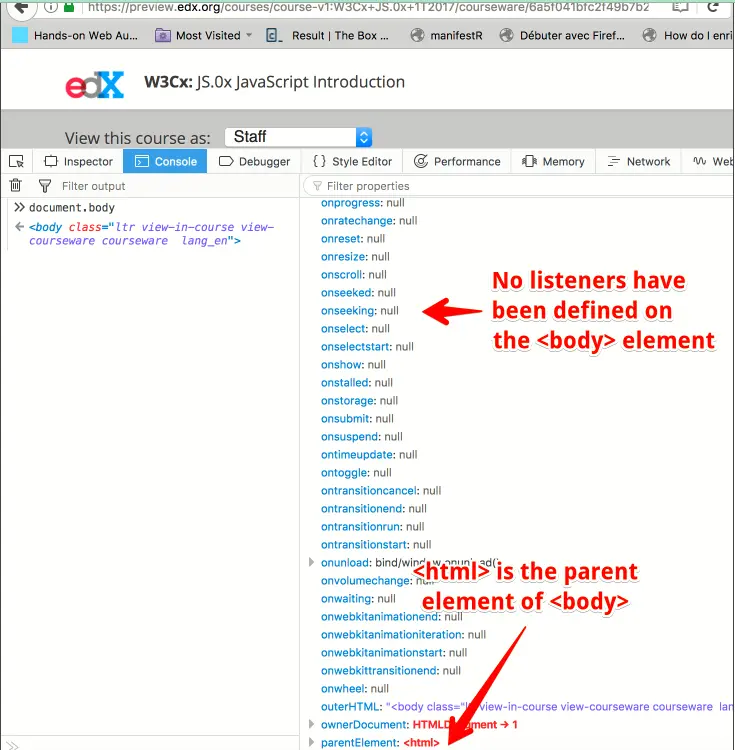
You can also use the "DOM inspector" to locate a particular element with the mouse: click the target icon and click on the element on the page that you want to inspect, this time with Google Chrome, but you will find this option in all modern browsers' devtool consoles:
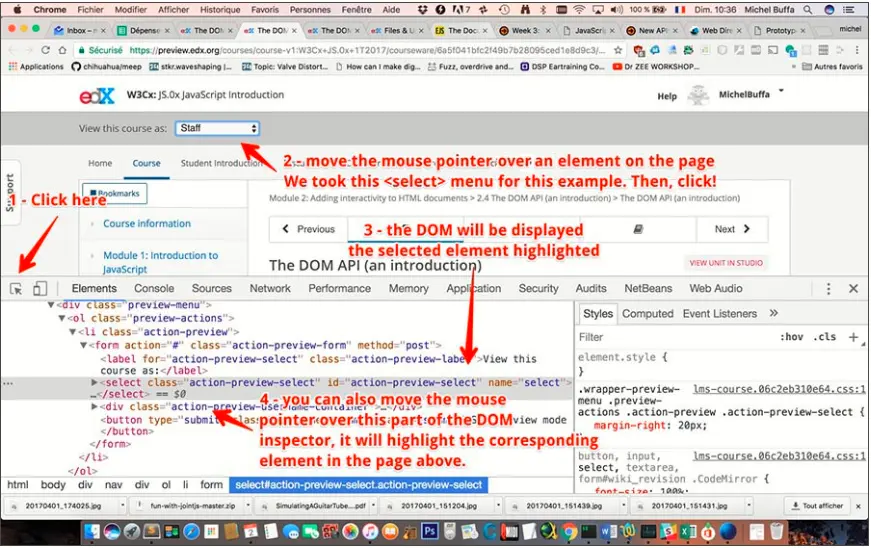
The DOM and the DOM API can be cumbersome and complicated. There are many methods and properties for manipulating the DOM tree, that are not "very JavaScript". There are historical reasons for this: the DOM wasn't designed exclusively for JavaScript. Rather, it tries to define a language- neutral interface that can be used in other systems as well --- not just HTML but also XML, which is a generic data format with an HTML-like syntax.
HTML5 made some additions that are not in the DOM API but which greatly help the JavaScript programmer (we'll see this in a minute with the "selector API", for example).
We've decided to focus on only 20% of the DOM API and on the selector API (for selecting elements in the DOM). These are the most useful parts and it will give you enough knowledge to solve nearly every problem where you need to manipulate the DOM.

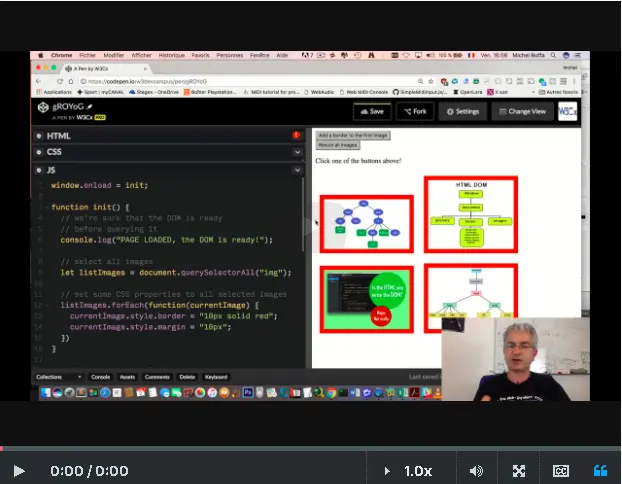
This time, let's look a bit more in depth to the different methods for selecting elements in an HTML page, and then do something with these elements.
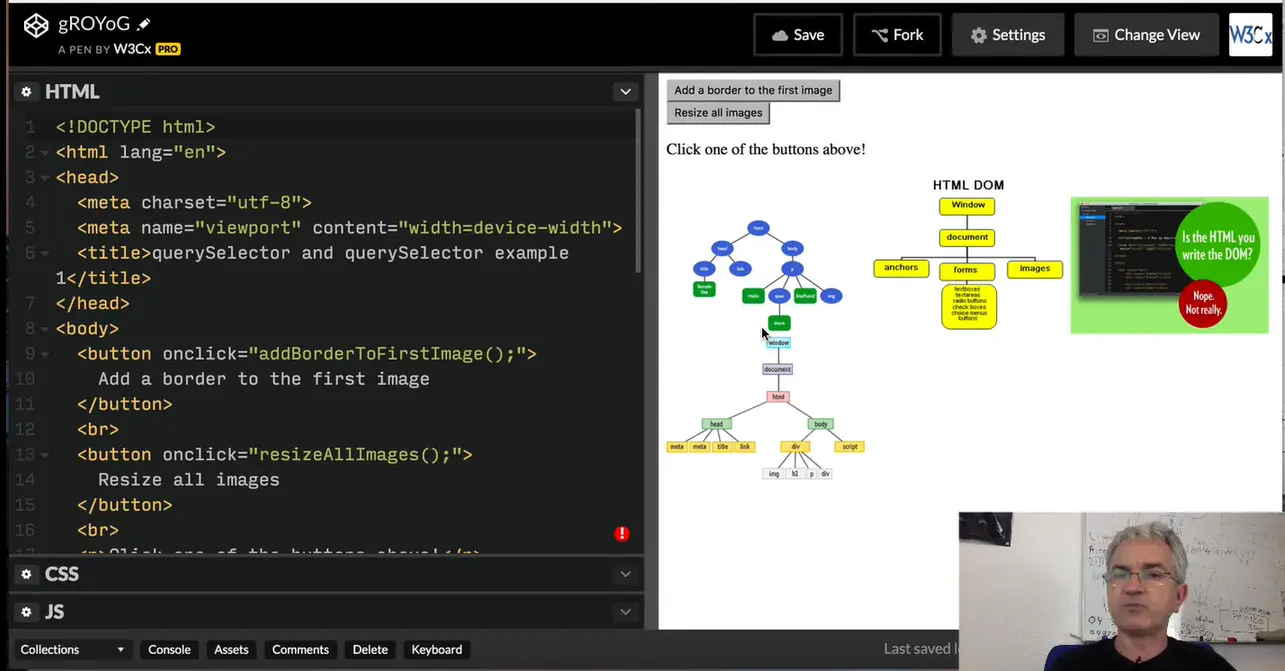
I prepared here an HTML document that contains two buttons that do nothing for the moment, and it contains also 4 images.
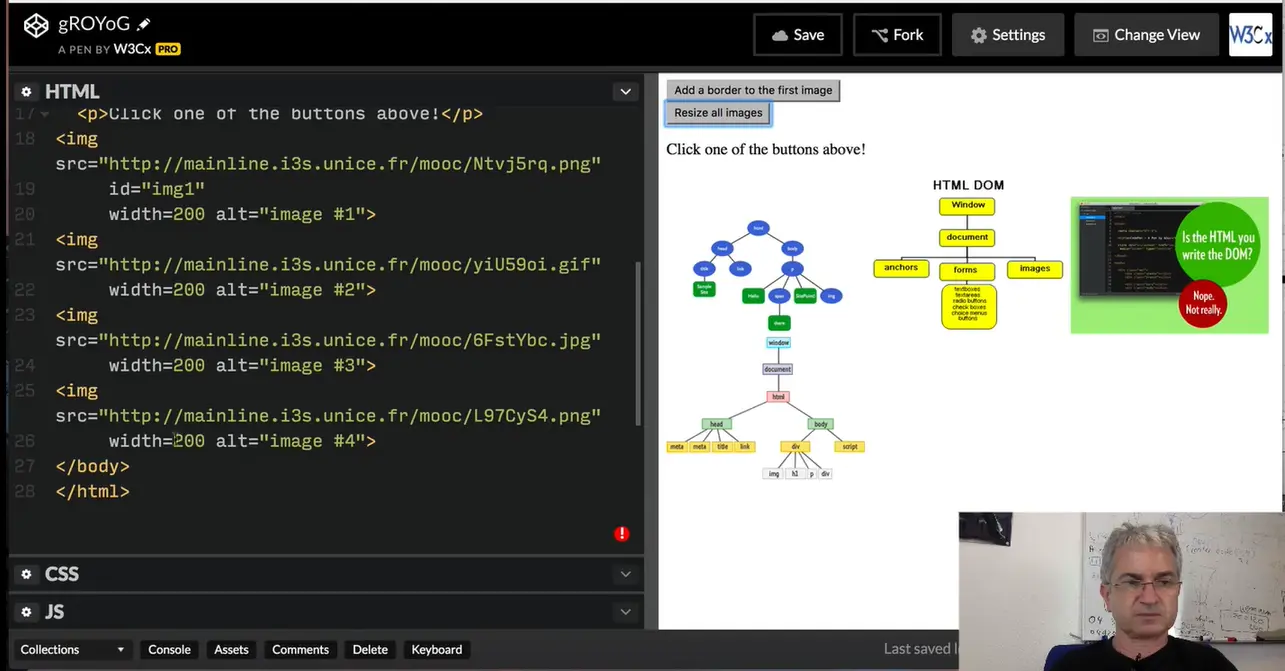
Here are the images... They've got an id: img1, img2, and so on. They've got some URLs and a width.
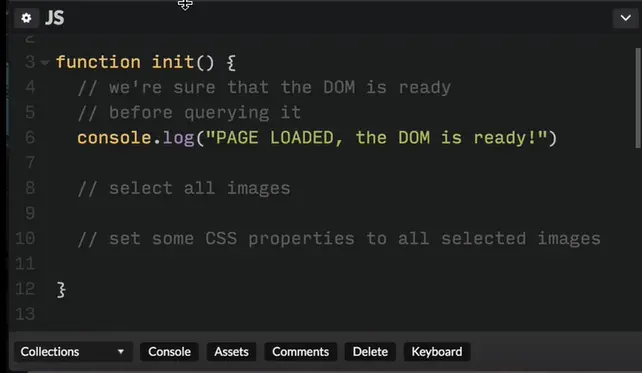
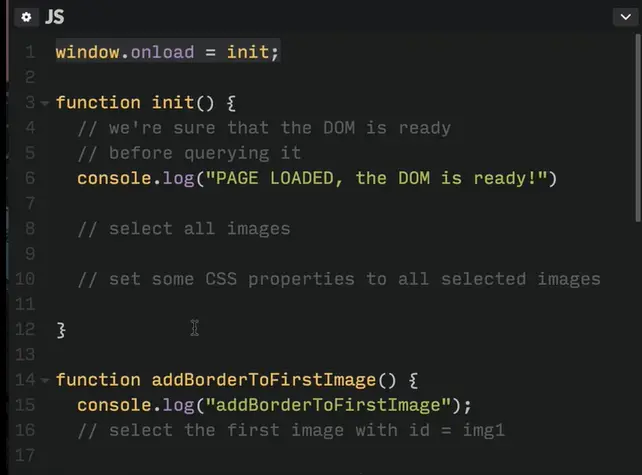
If we look at the JavaScript code I prepared, I added an init function that is called when the page is loaded.
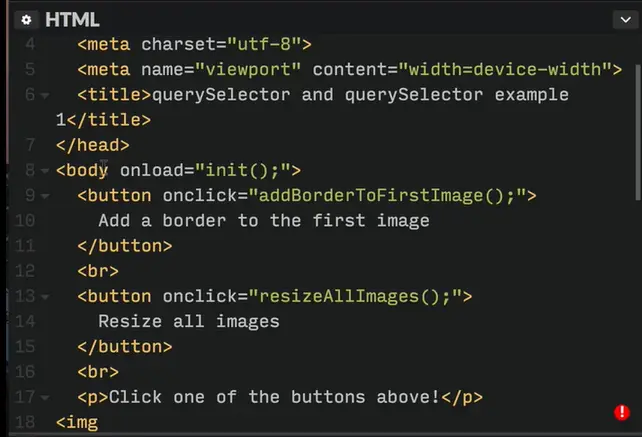
You remember from a previous video that we can do that using body onload=init. Or we can use (this is an alternative): window.onload=init.
This is what I did here. When the page is loaded, we are going to first check that the init function is executed. And it's executed after the page is loaded, after the DOM is ready. Then we will select all images, and set some CSS properties.
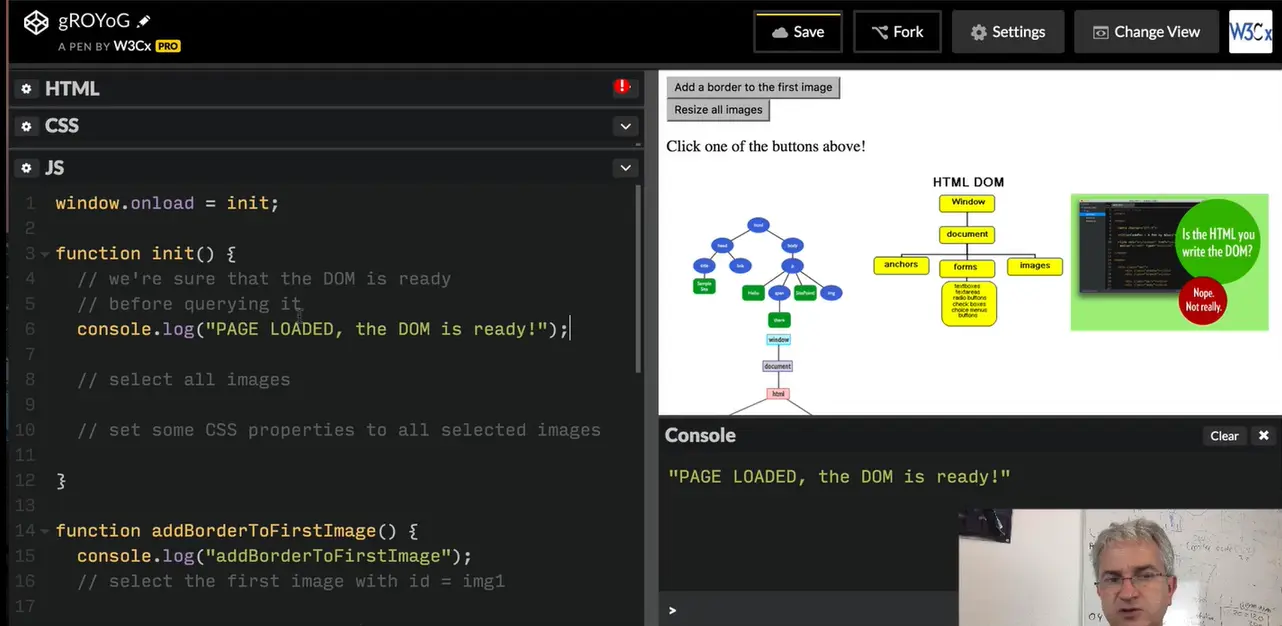
I can have a look at the console, and if I just type anything, it executes again the example, and we see that the console.log in the init function has been executed.
That means that the load event listener has been defined correctly. In order to select all the images, and not only one, we can use the query.SelectorAll method from the document object. I'm using querySelectorAll and by just typing the name of an element, it will select all the elements, the html elements, of this type.
Now, in order to iterate on the collection of elements, you can use the forEach iterator. This one will be detailed later but let's see now a very simple use of it. It takes a single argument that is a callback. Here I'm using just a variable that corresponds to the current image. You can name it as you like. In that case it's "currentImage".
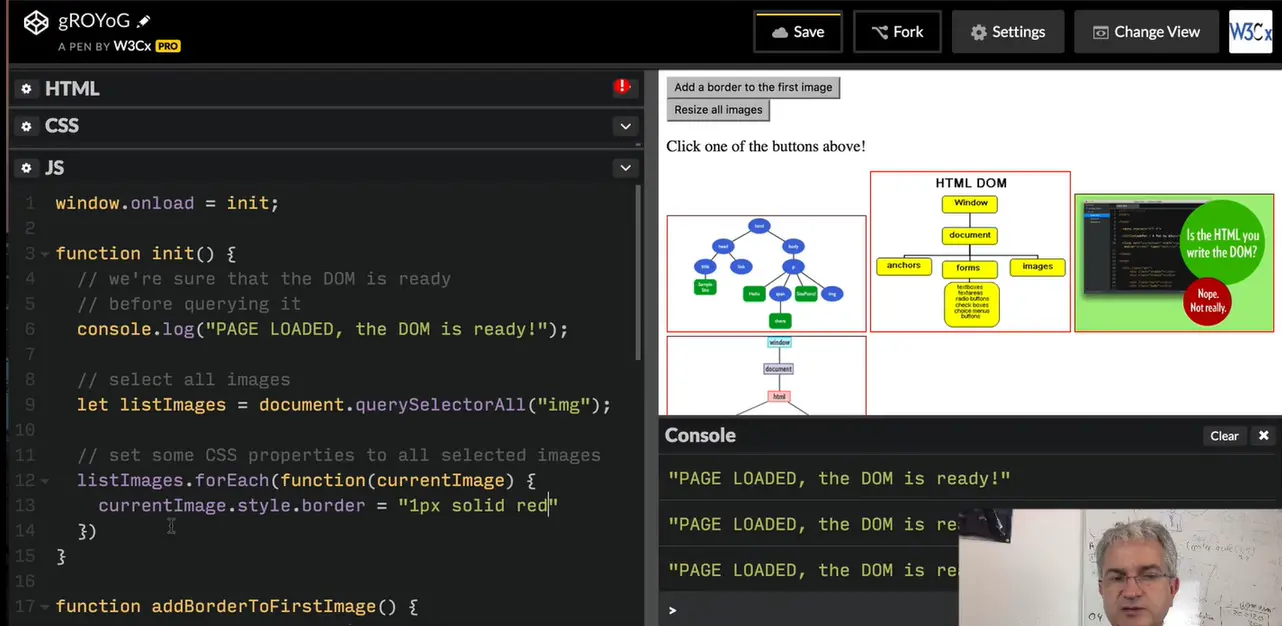
If I do currentImage.style.border… you see that when the page is executed, it will take each element from the list of images, and add to each image a border.
Let's make it larger! You see, we added a border of 10 pixels width. You can also add a margin. In that case I've got the different images with a margin of 10 pixels at top, left, right and bottom.
Let's try to add a border only to the first image. When we click on the first button. If we look at the HTML code, we added an onlick event listener that will call addBorderToFirstImage, a callback defined in the JavaScript code. We can check that the listener works by adding a console.log and clicking on the button. It works!
How to select the first image? We use document.querySelector, and here I can use the id of the image… img1, and then use the style property of the object:
img1.style…, and you see that if I click on the button, then it adds a border. I could have used just "img", in order to select only the first element of type "img". It's the same syntax I used for querySelectorAll, except that in that case it selects just the first one, and you've got the same result.
If I want to resize all the images, I can, in that case, use CSS properties, or you can use the width attribute of the images. In order to select all the images, I'm going to use the same technique I used for adding a border to all the images earlier. I will first select all the images using querySelectorAll, then I will use the foreach iterator, and use the width attribute of each individual image, to set this attribute to a given value…so… if I click here…Oh! The images are only 10 pixels… then maybe this is too small!
Let's try 70 pixels…I click on the button and the images are resized!
I can click on the first button to add a border. You saw the different possibilities.
Extract from HTML5 selectors API -- It's like a Swiss Army Knife for the DOM) : "One of the many reasons for the success of JavaScript libraries like jQuery and Prototype, on top of their easing the pain of cross-browser development was how they made working with the DOM far less painful than it had previously been, and indeed how it was with the standard DOM. Being able to use arbitrary CSS selector notation to get matching elements from a document made the standard DOM methods seem antiquated, or at the very least, far too much like hard work.
Luckily, the standards and browser developers took notice. The W3C developed the Selectors API, a way of easily accessing elements in the DOM using standard CSS selector concepts, and browser developers have baked these into all modern browsers, way back to IE8."
Ah… these methods owe a lot to jQuery ! They introduce a way to use CSS selectors (including CSS3 selectors) for requesting the DOM, like jQuery introduced ages ago.
Any CSS selector can be passed as a parameter for these methods.
Looking for an element in the whole document (the whole HTML page): call the querySelector method (or querySelectorAll) on the document object, that corresponds to the whole DOM tree of your web page:
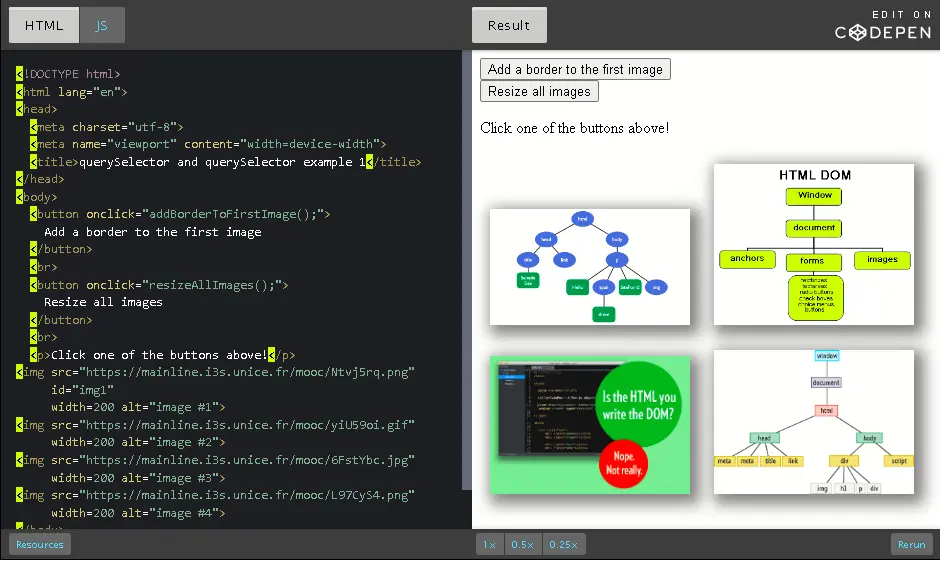
Source code from the above example:
HTML part: we have two buttons that will call a JavaScript function (lines 2 and 6) where we will manipulate the DOM), and we have four images, the first one with an id equal to "img1" (lines 11, 14, 16 and 18).
…
<button onclick="addBorderToFirstImage();">
  Add a border to the first image
</button>
<br>
<button onclick="resizeAllImages();">
  Resize all images
</button>
<br>
<p>Click one of the buttons above!</p>
<img src="https://i.imgur.com/Ntvj5rq.png"
  id="img1"
  width=200>
<img src="https://i.imgur.com/yiU59oi.gif"
  width=200>
<img src="https://i.imgur.com/6FstYbc.jpg"
  width=200>
<img src="https://i.imgur.com/L97CyS4.png"
  width=200>
…
JavaScript part: the init function is executed as soon as the page is loaded (and the DOM is ready), in this function we add a shadow and margins to all images (lines 3-21). The two other functions are called when one of the HTML buttons is clicked (line 23 and line 31).
window.onload = init; // run init once the page is loaded
function init() {
  // we're sure that the DOM is ready
  // before querying it
  // this function runs once the page is loaded
  // add a shadow to all images
  // select all images
  var listImages = document.querySelectorAll("img");
  // change all their width to 100px
  listImages.forEach(function(img) {
    // img = current image
    // add a shadow 5px left, 5 pixel down, 15px blur, 5px spread
    // grey
    img.style.boxShadow = "5px 5px 15px 5px grey";
    // add a margin 10px on each side
    img.style.margin = "10px";
  });
}
function addBorderToFirstImage() {
  // select the first image with id = img1
  var img1 = document.querySelector('#img1');
  // Add a red border, 3px wide
  img1.style.border = '3px solid red';
}
function resizeAllImages() {
  // select all images
  var listImages = document.querySelectorAll("img");
  // change all their width to 100px
  listImages.forEach(function(img) {
    // img = current image, we resize it by changing its
    // width attribute
    img.width = 100;
  });
}
Here are some other examples that use more complicated CSS selectors. If you are not familiar with their syntax, we recommend that you follow the CSS basics, and HTML5 and CSS fundamentals courses from W3Cx.
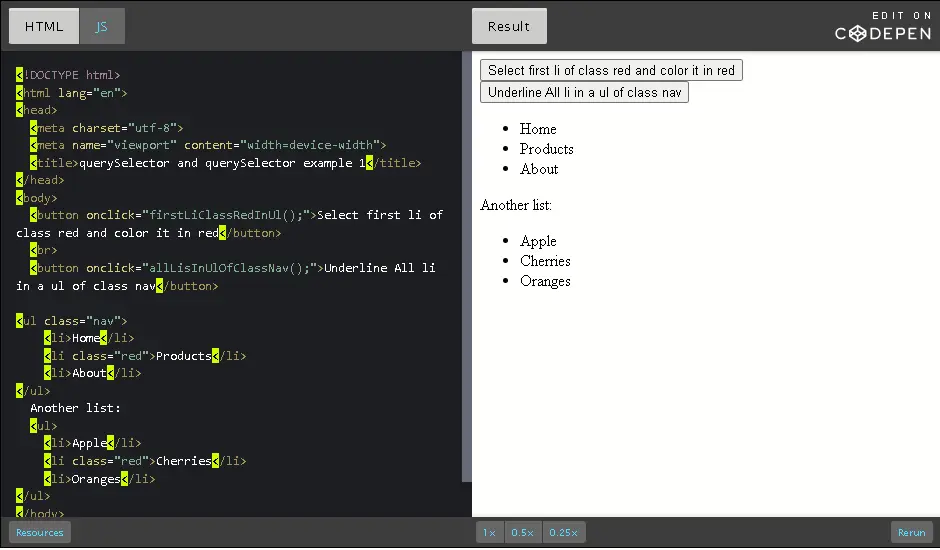
<button onclick="firstLiClassRedInUl();">Select first li of
class red and color it in red</button>
<br>
<button onclick="allLisInUlOfClassNav();">Underline All li in a
    ul of class nav</button>
<ul class="nav">
  <li>Home</li>
  <li class="red">Products</li>
  <li>About</li>
</ul>
Another list:
<ul>
  <li>Apple</li>
  <li class="red">Cherries</li>
  <li>Oranges</li>
</ul>
function firstLiClassRedInUl() {
  // first li of class="red" in a ul
  var elm = document.querySelector("ul li.red");
  elm.style.color = 'red';
}
function allLisInUlOfClassNav() {
  // get all li directly in a ul of class nav
  var list = document.querySelectorAll("ul.nav > li");
  list.forEach(function(elm) {
    elm.style.textDecoration = "underline";
  })
}
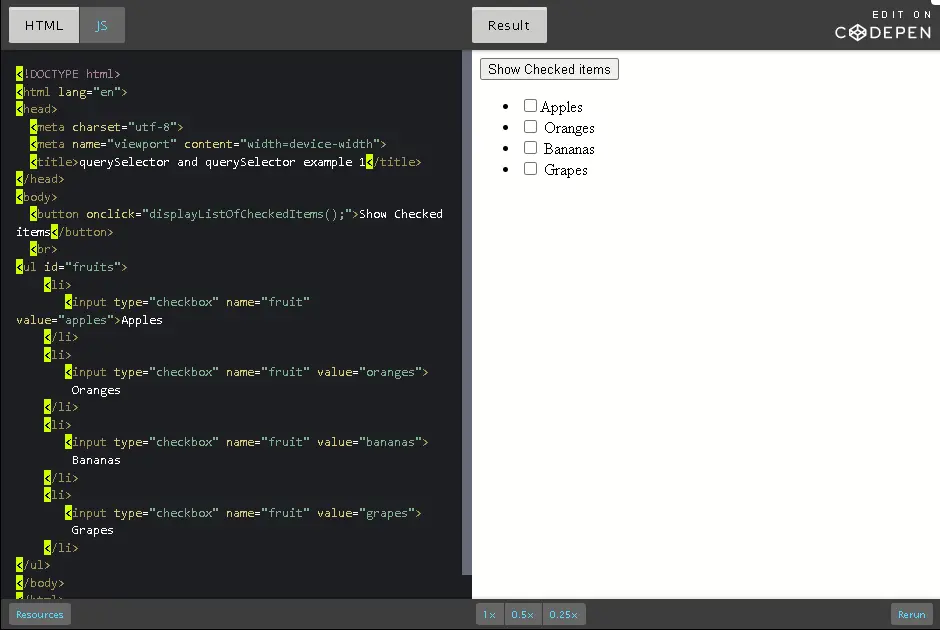
<button onclick="displayListOfCheckedItems();">
  Show Checked items
</button>
<br>
<ul id="fruits">
  <li>
    <input type="checkbox" name="fruit" value="apples">
      Apples
  </li>
  <li>
    <input type="checkbox" name="fruit" value="oranges">
      Oranges
  </li>
  <li>
    <input type="checkbox" name="fruit" value="bananas">
      Bananas
  </li>
  <li>
    <input type="checkbox" name="fruit" value="grapes">
      Grapes
  </li>
</ul>
JavaScript code: we select all elements of type input that have an attribute checked equal to true, and located inside an element whose id is "fruits". Notice the use of document.querySelectorAll, for selecting more than one element (line 6), then, we iterate on the list (line 8) and concatenate to the string variable listOfSelectedValues the value of each element (located in its value attribute). This is done in line 9.
Lines 9-12 use the parentNode property of the selected nodes in order to change the color of the <li> (parents of <input> elements selected) in red. In the DOM tree, we selected input elements that are each a child of a <li> element. The text displayed: "Apples", "Oranges" etc. belong to the <li> element. In order to access it from the <input> child we selected, we use elm.parentNode.
Finally, at the end of the document, line 14 adds a message followed by this list:
function displayListOfCheckedItems() {
  // all inputs that have been checked
  var listOfSelectedValues="";
  var list = document.querySelectorAll("#fruits input:checked");
  list.forEach(function(elm) {
    listOfSelectedValues += elm.value + " ";
    // Put the li in red.
    // the li is the parent of the current input elem stored
    // in the elm variable
    elm.parentNode.style.color = 'green';
  });
  document.body.append("You selected: " + listOfSelectedValues);
}
We select all elements of type input that have an attribute checked equal to true, and located inside an element whose id is "fruits". Notice the use of document.querySelectorAll, for selecting more than one element (line 6), then, we iterate on the list (line 8) and concatenate to the string variable listOfSelectedValues the value of each element (located in its value attribute). This is done in line 9.
Lines 9-12 use the parentNode property of the selected nodes in order to change the color of the <li> (parents of <input> elements selected) in red. In the DOM tree, we selected input elements that are each a child of a <li> element. The text displayed: "Apples", "Oranges" etc. belong to the <li> element. In order to access it from the <input> child we selected, we use elm.parentNode.
Finally, at the end of the document, line 14 adds a message followed by this list:
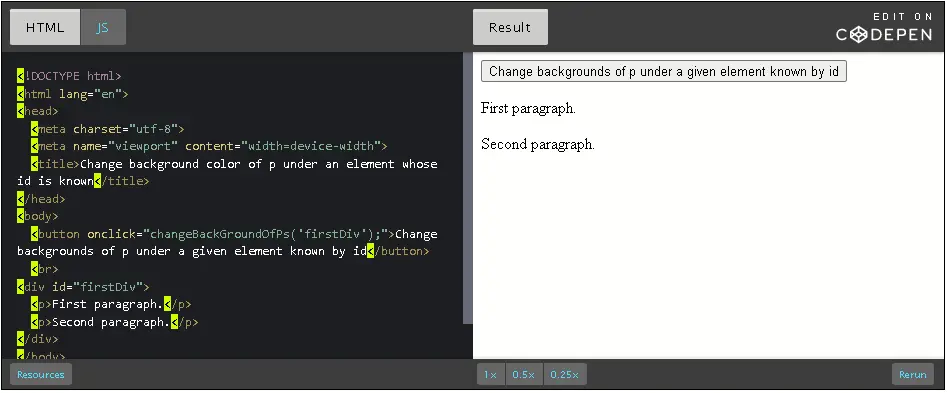
<button onclick="changeBackGroundOfPs('firstDiv');">Change
backgrounds of p under a given element known by id</button>
<br>
<div id="firstDiv">
  <p>First paragraph.</p>
  <p>Second paragraph.</p>
</div>
JavaScript code: we build a CSS selector using the id passed as a parameter. In this example, the id is 'firstDiv', the id of the div at line 3 in the above code.
The variable CSS selector at line 2 in the JavaScript code below will have a value equal to "#firstDiv p", that means: select all <p> under an element whose id is "firstDiv". The paragraphs variable is a list that contains the paragraphs selected. Then we iterate on this list (this time using a for loop, which is an alternative method to using the forEach method used in previous examples) (lines 5-7), and we change the background of all selected paragraphs (line 6).
function changeBackGroundOfPs(id) {
  var paragraphs = document.querySelectorAll("#" + id + " p");
  // Another way to iterate on all elements in a collection
  for (var i = 0; i < paragraphs.length; i++ ) {
    paragraphs[i].style.backgroundColor = "lightGreen";
  }
}
// all elements li in ul elements in an element of id=nav
var el = document.querySelector('#nav ul li');
// all li in a ul, but only even elements
var els = document.querySelectorAll('ul li:nth-child(even)');
// all td directly in tr in a form of class test
var els = document.querySelectorAll('form.test > tr > td');
// all paragraphs of class warning or error
querySelectorAll("p.warning, p.error");
// first element of id=foo or id=bar
querySelector("#foo, #bar");
// first p in a div
var div = document.getElementById("bar");
var p = div.querySelector("p");
These methods are from the DOM API and can all be replaced by the querySelector and querySelectorAll methods that we've discussed. They are still used in many JavaScript applications, and are very simple to understand.
From the document we can access the elements composing our Web page in a few ways:
This is equivalent to document.querySelector("#identifier'); (just add a # before the id when using a CSS selector).
Example: var elm = document.getElementById('myDiv'); is equivalent to document.querySelector('#myDiv');
This is equivalent to document.querySelectorAll(tagName);
Example: var list = document.getElementByTagName('img'); is equivalent to document.querySelector('img');
This is equivalent to document.querySelectorAll('.className');
Example: var list = document.getElementByClassName('important'); is equivalent to document.querySelector('.important'); (just add a '.' before the class name when using a CSS selector).
Notice that identifier, tagName and className must be of type String.
How to modify an HTML element's CSS properties from JavaScript?
The most common way to modify the CSS style of one of several elements you selected using the DOM or Selector API, is to use the style attribute.
// select the paragraph with id = "paragraph1"
var p = document.querySelector('#paragraph1');
// change its color
p.style.color = 'red';
Warning: with the style attribute, you can modify (or read) any CSS property, but be careful: the syntax changes a little due to the fact that in JavaScript the "-" is a math operator, while in CSS it is used to separate properties made of multiple words, such as background-color.
When using such properties from JavaScript, the rule is simple:
Simple, isn't it?
The most useful CSS properties (we do recommend that you follow the W3Cx courses CSS basics, CSS and HTML5 fundamentals from W3Cx to learn more about CSS):
Here are some examples:
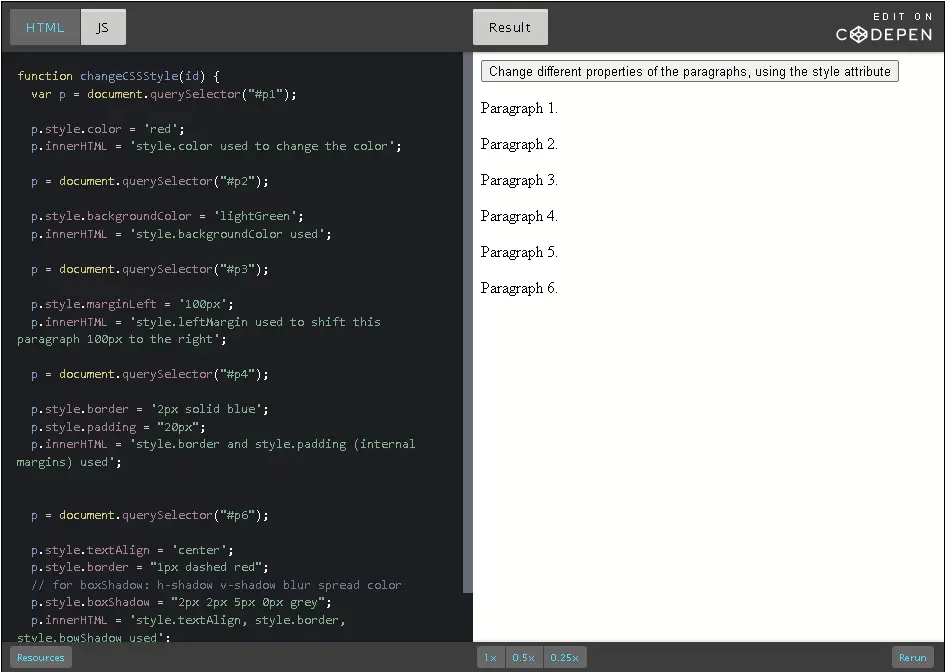
Until now, to manipulate CSS classes of an HTML element was a bit complex, both for verifying the presence of a class name in an element, and for adding or removing classes associated with a given element.
The ClassList interface simplifies it all by acting as a container object and by providing a set of methods to manipulate its content.
The classList property applies to an HTML element, and returns a collection of class names:
var elem= document.querySelector("#id1");
var allClasses = elem.classList;
The list of methods usable on a classList object are add(), remove(), toggle() and contains().
// By default, start without a class in the div: <div class=""/>
// Set "foo" as the class by adding it to the classList
div.classList.add('foo'); // now <div class="foo"/>
// Check that the classList contains the class "foo"
div.classList.contains('foo'); // returns true
// Remove the class "foo" from the list
div.classList.remove('foo'); // now <div class=""/>
// Check if classList contains the class "foo"
div.classList.contains('foo'); // returns false: "foo" is gone
// Check if class contains the class "foo",
// If it does, "foo" is removed, if it doesn't, it's added
div.classList.toggle('foo'); // class set to <div class="foo"/>
div.classList.toggle('foo'); // class set to <div class=""/>
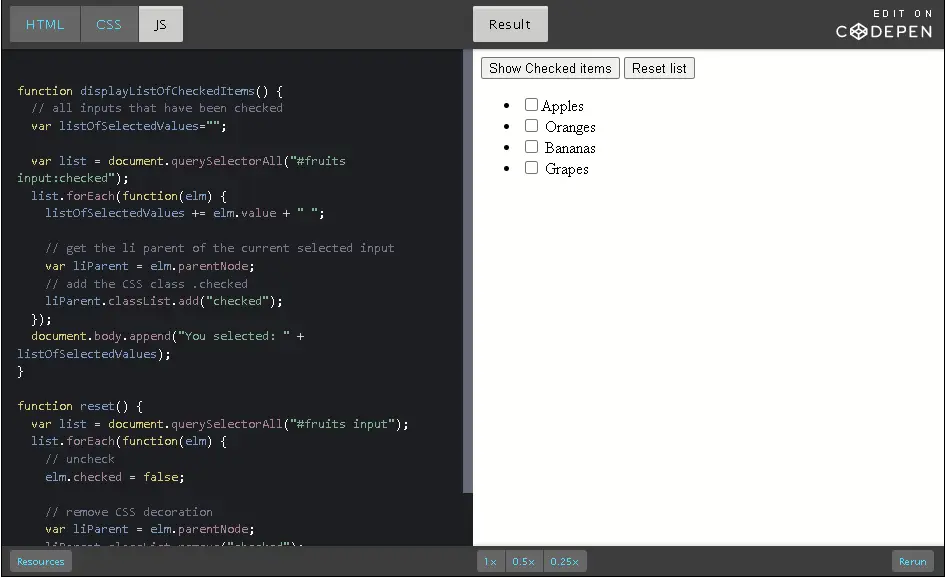
This is a variation of an example from a previous section. This time, when the <input type="checkbox"> elements have been checked, in order to give the parent <li> a background color, a border, and to change the text color, we use a CSS class named "checked":
.checked {
  border: 2px dashed #000;
  background-color: green;
  color:yellow;
}
… and the classList.add(CSS_class) and classList.remove(CSS_class) methods on the <li> elements:
function displayListOfCheckedItems() {
  // all inputs that have been checked
  var listOfSelectedValues="";
  var list = document.querySelectorAll("#fruits input:checked");
  list.forEach(function(elm) {
    listOfSelectedValues += elm.value + " ";
    // get the li parent of the current selected input
    var liParent = elm.parentNode;
    // add the CSS class .checked
    liParent.classList.add("checked");
    document.body.append("You selected: " + listOfSelectedValues);
  }
}
function reset() {
  var list = document.querySelectorAll("#fruits input");
  list.forEach(function(elm) {
    > // uncheck
    >
    > elm.checked = false;
    >
    > // remove CSS decoration
    >
    > var liParent = elm.parentNode;
    >
    > liParent.classList.remove("checked");
  });
}
We've already seen many examples in which we selected one or more elements, and modified their content. Let's summarize all the methods we've seen, and perhaps introduce a few new things…
Properties that can be used to change the value of selected DOM node.
This property is useful when you want to change all the children of a given element. It can be used to modify the text content of an element, or to insert a whole set of HTML elements inside another one.
var elem = document.querySelector('#myElem');
elem.innerHTML = 'Hello '; // replace content by Hello
elem.innerHTML += 'Michel Buffa', // append at the end
// Michel Buffa in bold
elem.innerHTML = 'Welcome' + elem.innerHTML; // insert Welcome
// at the beginning
elem.innerHTML = ''; // empty the elem
It's also possible, with selected nodes/elements that contain text, to use the textContent property to read the text content or to modify it. There are subtle differences that can be seen in the above example (click the 'edit on CodePen" part on the top left, and once in codePen, open the devtool console):
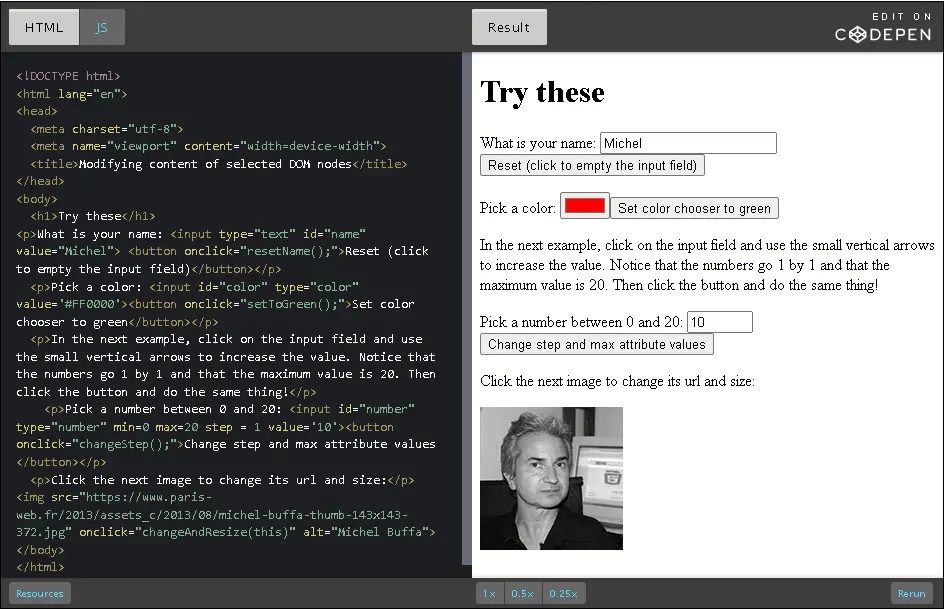
<p id="first">first paragraph</p>
<p id="second"><em>second</em> paragraph</p>
JavaScript code: the comments after lines that start with console.log correspond to what is printed in the devtool debug console. Notice the difference between the textNode value and the innerHTML property values at lines 13-14:
While textContent returns only the text inside the second paragraph, innerHTML also returns the <em>…</em> that surrounds it. However, when we modify the textContent value, it also replaces the text decoration (the <em> is removed), this is done at lines 16-20.
window.onload = init;
function init() {
  // DOM is ready
  var firstP = document.querySelector("#first");
    console.log(firstP.textContent); // "first paragraph"
    console.log(firstP.innerHTML);   // "first paragraph"
    firstP.textContent = "Hello I'm the first paragraph";
    console.log(firstP.textContent); // "Hello I'm the first paragraph"
    var secondP = document.querySelector("#second");
    console.log(secondP.textContent); // "second paragraph"
    console.log(secondP.innerHTML);   // "<em>second</em> paragraph"
    secondP.textContent = "Hello I'm the second paragraph";
    console.log(secondP.textContent); // "Hello I'm the second
                                      // paragraph"
    console.log(secondP.innerHTML);   // "Hello I'm the second
                                      // paragraph"
}
It's very common to modify the attributes of selected elements: the width of an image, CSS style with the style attribute, value of an input field, etc.
This example shows some of the things we can do:
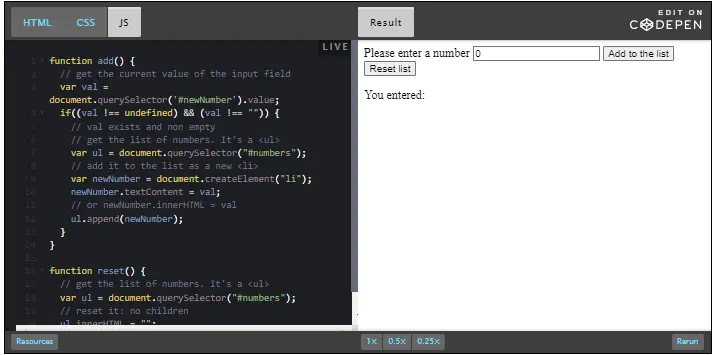
The DOM API comes with a set of methods you can use on DOM elements.
In general, to add new nodes to the DOM we follow these steps:
var elm = document.createElement(name_of_the_element)
var li = document.createElement('li');
var img = document.createElement('img'); etc.
li.innerHTML = 'This is a new list item in bold!'; // can add HTML in it
li.textContent = 'Another new list item';
li.style.color = 'green'; // green text
img.src = "https://..../myImage.jpg"; // url of the image
img.width = 200;
Add the newly created element to another element in the DOM, using append(), appendChild(), insertBefore() or the innerHTML property.
var ul = document.querySelector('#myList');
ul.append(li); // insert at the end, appendChild() could also be used (old)
ul.prepend(li); // insert at the beginning
ul.insertBefore(li, another_element_child_of_ul);// insert in the middle
document.body.append(img); // adds the image at the end of the document

The DOM API comes with a set of methods you can use on DOM elements.
In general, to add new nodes to the DOM we follow these steps:
var elm = document.createElement(name_of_the_element)
var li = document.createElement('li');
var img = document.createElement('img'); etc.
li.innerHTML = '<b>This is a new list item in bold!</b>'; // can add HTML in it
li.textContent = 'Another new list item';
li.style.color = 'green'; // green text
img.src = "https://..../myImage.jpg"; // url of the image
img.width = 200;
var ul = document.querySelector('#myList');
ul.append(li); // insert at the end, appendChild() could also be used (old)
ul.prepend(li); // insert at the beginning
ul.insertBefore(li, another_element_child_of_ul);// insert in the middle
document.body.append(img); // adds the image at the end of the document
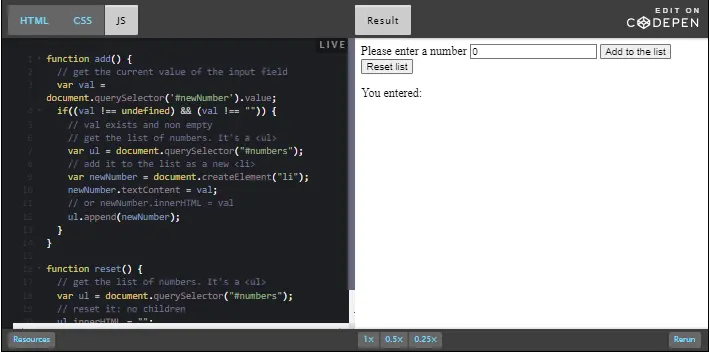
HTML code extract: we use an <input type="number"> for entering a number (line 2). Then if one clicks on the "Add to the list" button, the add() JavaScript function is called (line 3), this will add the typed number to the empty list at line 7. If one presses the "reset" button, it will empty this same list by calling the reset() JavaScript function.
<label for="newNumber">Please enter a number</label>
<input type="number" id="newNumber" value=0>
<button onclick="add();">Add to the list</button>
<br>
<button onclick="reset();">Reset list</button>
<p>You entered:</p>
<ul id="numbers"></ul>
JavaScript code extract: notice at line 25 the use of the innerHTML property for resetting the content of the <ul> list. innerHTML corresponds to all the sub DOM contained inside the <ul>...</ul>. innerHTML can be used for adding/deleting/modifying a DOM node's content.
function add() {
  // get the current value of the input field
  var val = document.querySelector('#newNumber').value;
  if((val !== undefined) && (val !== "")) {
    // val exists and non empty
    // get the list of numbers. It's a <ul>
    var ul = document.querySelector("#numbers");
    // add it to the list as a new <li>
    var newNumber = document.createElement("li");
    newNumber.textContent = val;
    // or newNumber.innerHTML = val
    ul.append(newNumber);
  }
}
function reset() {
  // get the list of numbers. It's a <ul>
  var ul = document.querySelector("#numbers");
  // reset it: no children
  ul.innerHTML = "";
}
This is the same example, but in an abbreviated form, using the innerHTML property:
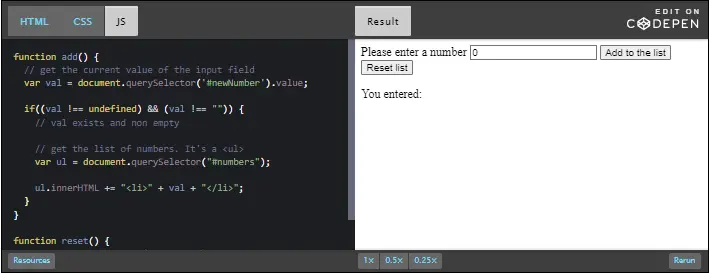
The append(), appendChild() methods normally adds a new element to an existing one, as shown in this example:
var li = createElement('li');
ul.append(li); // adds the new li to the ul element
One interesting thing to know is that if we do not create the new element, but rather get it from somewhere else in the document, it is then removed from its parents and added to the new parent.
In other words: it moves from its original location to become a child of the targetElem.
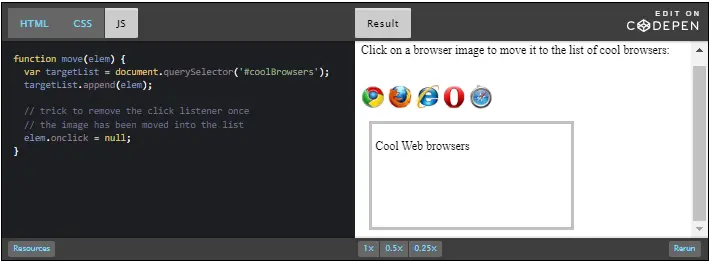
Note that this example comes from the HTML5 Apps and Games course. Our plan here is not to explain drag'n'drop in detail, but to show how append() can be used to move an element.
When a user starts to drag an element, the drag() JavaScript function is called. In this function we use the drag'n'drop clipboard to store the id of the image that is being dragged.
When the image is dropped, the drop() method is called. As the drop event listener is declared on the two divs (on the left and the right), we just call append() on the target div element, and this will add the dragged image to the div, while removing it from its original location.
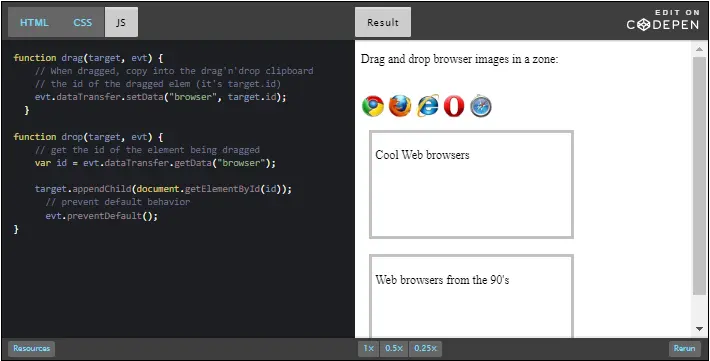
Let's take an example that we've already encountered. This time, you will check the elements you want to remove from the list!
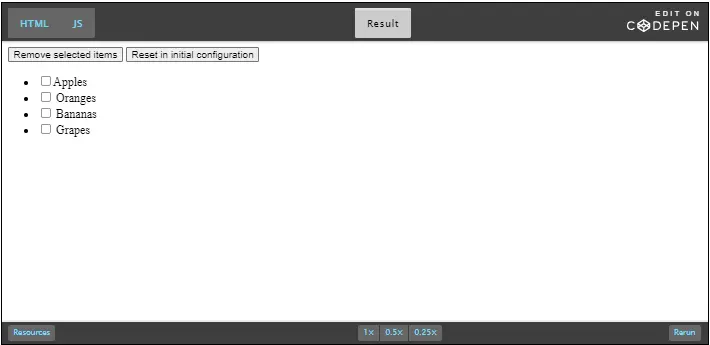
JavaScript code extract: we need to get the <ul> that contains all the <li><input type="checkbox"></li> elements (line 3). This is the element we will use for calling removeChild(...).
The loop on the checked element (lines 5-12) iterates on a list of checked input elements. In order to make both the text (Apples, Oranges, etc.) AND the checkbox disappears, we need to access the different <li> elements that contain the selected checkboxes. This is done in line 10.
Then, we can call ul.removeChild(li) on the <ul> for removing the <li> that contains the selected element (line 11).
function removeSelected() {
  var list = document.querySelectorAll("#fruits input:checked");
  var ul = document.querySelector("#fruits");
  list.forEach(function(elm) {
    // elm is an <input type="checkbox">, its parent is a li
    // we want to remove from the <ul> list
    // when we remove the <li>, the <input> will also
    // be removed, as it's a child of the <li>
    var li = elm.parentNode;
    ul.removeChild(li);
  });
}
In the same example, if you look at the reset() JavaScript function, we use the ul's innerHTML property both for emptying the list (lines 3-4) and for appending to it all the initial HTML code (lines 6-17):
function reset() {
  var ul = document.querySelector("#fruits");
  // Empty the <ul>
  ul.innerHTML = "";
  // Adds each list item to the <ul> using innerHTML += ...
  ul.innerHTML += "<li><input type='checkbox' name='fruit'
                  value='apples'>Apples</li>";
  ul.innerHTML += "<input type='checkbox' name='fruit'
                  value='oranges'>Oranges</li><br>";
  ul.innerHTML += "<input type='checkbox' name='fruit'
                  value='bananas'>Bananas</li><br>";
  ul.innerHTML += "<input type='checkbox' name='fruit'
                  value='grapes'>Grapes</li>";
}
Live coding lesson: basic example showing how to draw in a canvas.
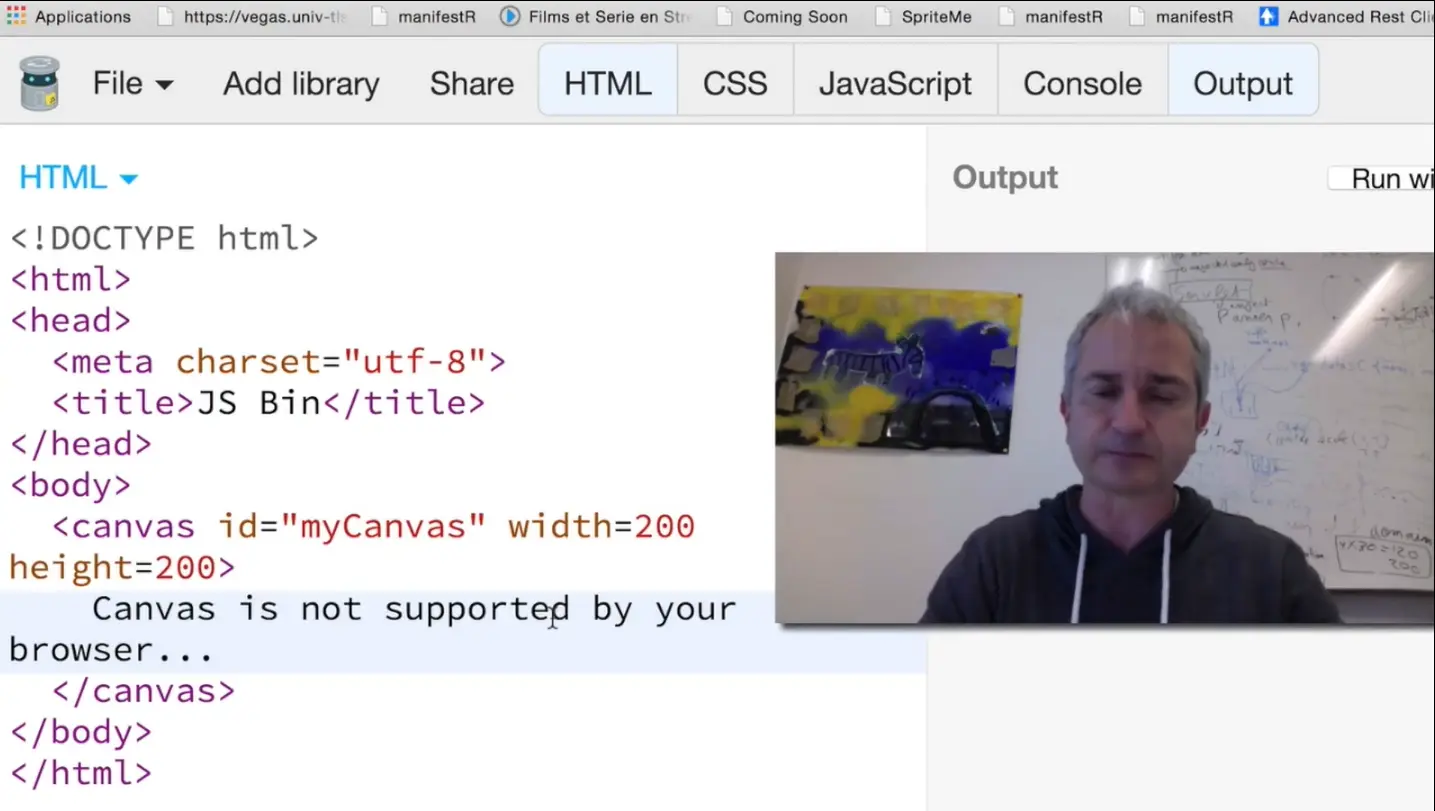
The HTML5 canvas is a transparent element that is useful for drawing and animating. We'll see some simple examples here, as we're going to finish this week by writing a small, simple game together, that will use most of what we've learnt so far: loops, conditional statements, events, functions, callbacks, simple objects, a few input fields, etc.
<!DOCTYPE html>
<html lang="en">
<head>
<meta charset="utf-8">
<title>Draw a monster in a canvas</title>
</head>
<body>
<canvas id="myCanvas" width="200" height="200"></canvas>
</body>
</html>
The canvas declaration is at line 8. Use attributes to give it a width and a height, but unless you add some CSS properties, you will not see it on the screen because it's transparent!
Let's use CSS to reveal the canvas, for example, add a 1px black border around it:
canvas {
  border: 1px solid black;
}
And here is a reminder of best practices when using the canvas:
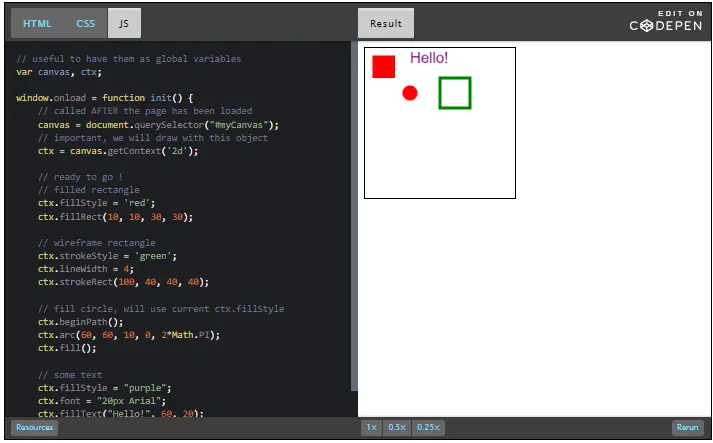
// useful to have them as global variables
var canvas, ctx;
window.onload = function init() {
  // called AFTER the page has been loaded
  canvas = document.querySelector("#myCanvas");
  // important, we will draw with this object
  ctx = canvas.getContext('2d');
  // ready to go! We can use the context for drawing
  // or changing colors, line widths, etc.
  // filled rectangle
  ctx.fillStyle = 'red';
  ctx.fillRect(10, 10, 30, 30);
  // wireframe rectangle
  ctx.strokeStyle = 'green';
  ctx.lineWidth = 4;
  ctx.strokeRect(100, 40, 40, 40);
  // fill circle, will use current ctx.fillStyle
  ctx.beginPath();
  ctx.arc(60, 60, 10, 0, 2*Math.PI);
  ctx.fill(); // or ctx.stroke() for a wireframe circle
  // some text
  ctx.fillStyle = "purple";
  ctx.font = "20px Arial";
  ctx.fillText("Hello!", 60, 20); // or ctx.strokeText for wireframe
}
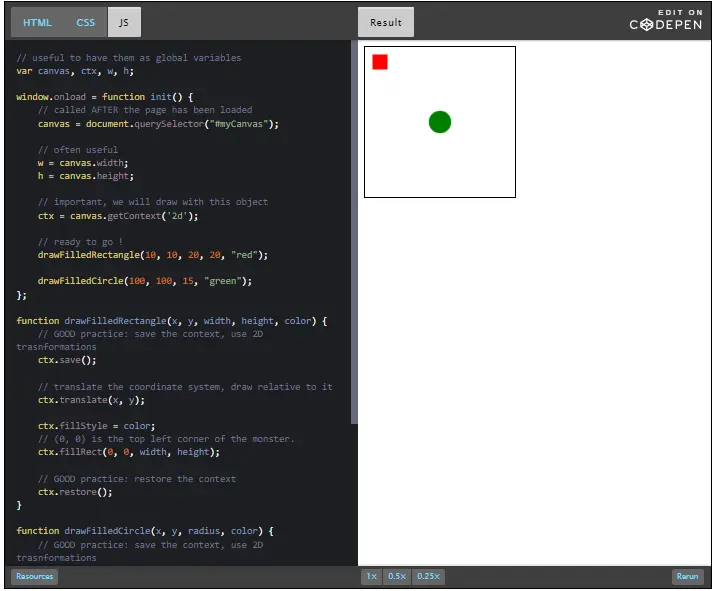
This time we've written two functions for a cleaner code: one function that draws a filled rectangle with a given color, and one function that draws a filled circle, with a given color.
The values for x, y, width, height, radius, color can be passed as parameters to these functions.
When a function changes anything to the "global context": filled or stroke color, line width, or the position of the coordinate system (located by default in 0, 0, at the top left of the canvas), then it is good practice to save this context at the beginning of the function, with a call to ctx.save(), and to restore it at the end of the function, with a call to ctx.restore(). In this way, any change to the "global context" won't have any effect outside of the function.
We used also ctx.translate(x, y) in order to move the rectangle and the circle (look, they have been drawn at x=0, y=0, but as we translate the origin of the coordinate system with ctx.translate, the shapes are located in x, y on in the canvas). This is also a good practice: indeed, if we add more shapes (like eyes in the rectangle, in order to draw a monster), using coordinates relative to 0, 0, the whole set of shapes will be translated by the call to ctx.translate(x, y). This will make it easier to draw characters, monsters, etc. as we will see in a third example.
This is where you reap the benefits of your good habits of saving/restoring the context and using ctx.translate(x, y)!
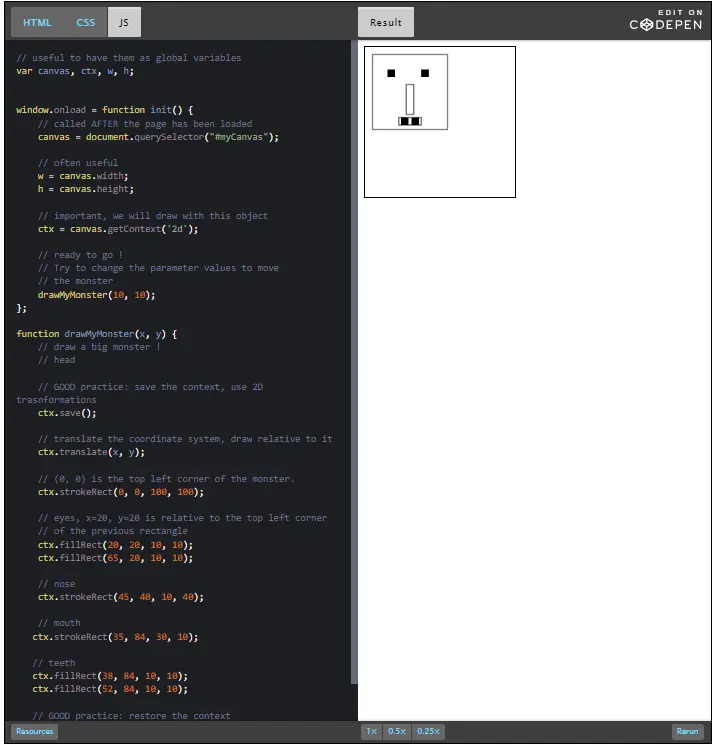
Here is JavaScript code that implements these best practices:
// useful to have them as global variables
var canvas, ctx, w, h;
window.onload = function init() {
  // Called AFTER the page has been loaded
  canvas = document.querySelector("#myCanvas");
  // Often useful
  w = canvas.width;
  h = canvas.height;
  // Important, we will draw with this object
  ctx = canvas.getContext('2d');
  // Ready to go!
  // Try to change the parameter values to move
  // the monster
  drawMyMonster(10, 10); // try to change that
};
function drawMyMonster(x, y) {
  // Draw a big monster!
  // Head
  // BEST practice: save the context, use 2D transformations
  ctx.save();
  // Translate the coordinate system, draw relative to it
  ctx.translate(x, y);
  // (0, 0) is the top left corner of the monster.
  ctx.strokeRect(0, 0, 100, 100);
  // Eyes
  ctx.fillRect(20, 20, 10, 10);
  ctx.fillRect(65, 20, 10, 10);
  // Nose
  ctx.strokeRect(45, 40, 10, 40);
  // Mouth
  ctx.strokeRect(35, 84, 30, 10);
  // Teeth
  ctx.fillRect(38, 84, 10, 10);
  ctx.fillRect(52, 84, 10, 10);
  // BEST practice: restore the context
  ctx.restore();
}
In this small example, we used the context object to draw a monster using the default color (black) and wireframe and filled modes:
A typical animation loop does the following at regular intervals:
Optional steps can be:
There are different methods for coding an animation loop in JavaScript, as described in the above video.
The trick is to write a function, and at the end of this function, to ask the browser to call it again in 1/60th of a second if possible. See the CodePen example below:
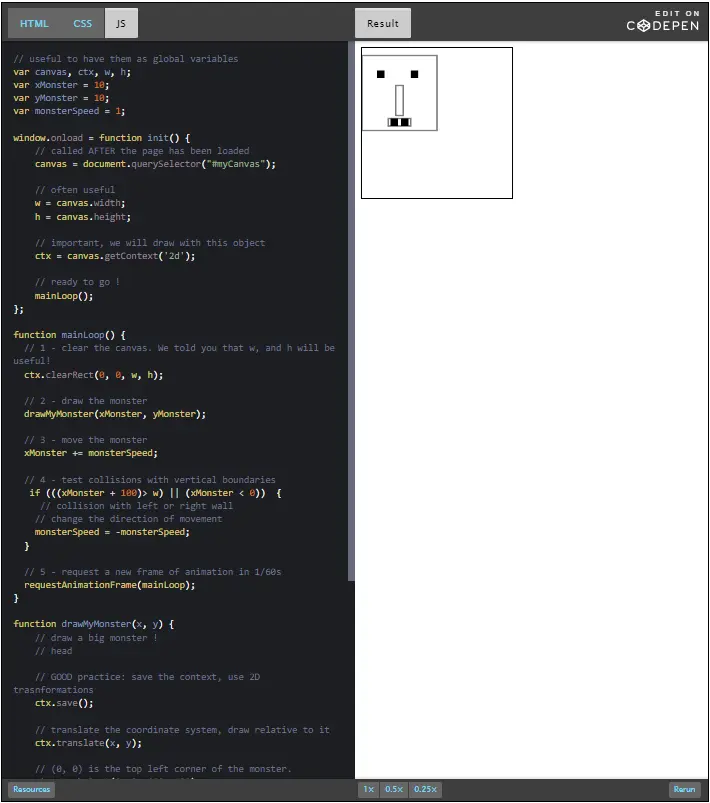
Here the balls bounce on the sides of the canvas (walls).
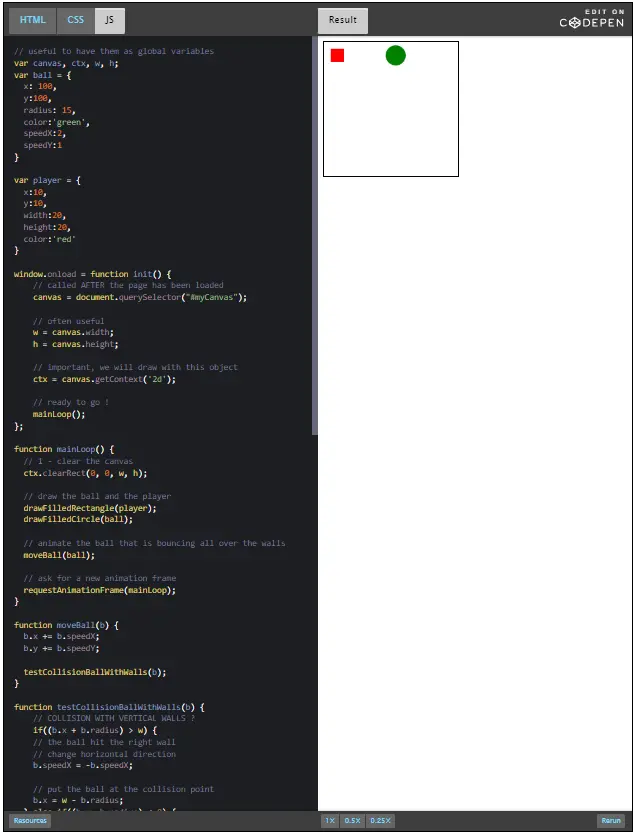
This time, we've used "simple objects" for the circle and the rectangles, and we've called them "player" and "ball":
var ball = {
  x: 100,
  y:100,
  radius: 15,
  color:'green',
  speedX:2,
  speedY:1
}
var player = {
  x:10,
  y:10,
  width:20,
  height:20,
  color:'red'
}
With this syntax, it's easier to manipulate "the x pos of the ball" - you just have to use ball.x. we added two properties to the ball object: speedX and speedY. Their value is the number of pixels that will be added to the current ball.x and ball.y position, at each frame of animation.
function mainLoop() {
  // 1 - clear the canvas
  ctx.clearRect(0, 0, w, h);
  // draw the ball and the player
  drawFilledRectangle(player);
  drawFilledCircle(ball);
  // animate the ball that is bouncing all over the walls
  moveBall(ball);
  // ask for a new animation frame
  requestAnimationFrame(mainLoop);
}
Now, let's decompose the animation loop in some external functions to make it more readable. At each frame of animation, we will clear the canvas, draw the player as a rectangle, draw the ball as a circle, and move the ball.
You can take a look at the new versions of drawFilledRectangle that now take only one parameter named r, instead of x, y, width, height and a color. We've only changed a few things in its code (changed x to r.x, y to r.y, color to r.color etc.)
function moveBall(b) {
  b.x += b.speedX;
  b.y += b.speedY;
  testCollisionBallWithWalls(b);
}
This function is called 60 times per second. So, 60 times per second we modify the b.x and b.y positions of the ball passed as parameter by adding to them the b.speedX and b.speedY property values.
Notice that we call moveBall(ball) from mainLoop. In the moveBall function, the ball passed as a parameter becomes the b parameter. So, when we change the b.x value inside the function, we are in reality changing the x value of the global object ball!
Ok, and at line 5 we call testCollisionBallWithWalls(b), which will test if the ball b hits a vertical or horizontal wall. Let's see an extract of this function now:
function testCollisionBallWithWalls(b) {
  // COLLISION WITH VERTICAL WALLS?
  if((b.x + b.radius) > w) {
    // the ball hit the right wall
    // change horizontal direction
    b.speedX = -b.speedX;

    // put the ball at the collision point
    b.x = w - b.radius;
  } ...
  ...
}
At line 3 you can see the test that checks if the ball b hits the right side of the canvas. The right wall is at w (the width of the canvas) on the X-axis. If we compare (b.x + b.radius) with w, we can check if a part of the ball extends beyond the right wall.
Remember that each 1/60th of a second, the ball moves a certain number of pixels to the right (the exact value is b.speedX). Imagine that the ball moves 10 pixels to the right at each frame of animation. At some point, it will "cross the right wall". We cannot just change the sign of b.speedX to make it go to the other side. If we did this, it may stay stuck against the side with one half of the ball on either side of the wall.
If we now remove b.speedX to the ball.x position, we return the ball to the position it was in before it hit the wall. If we then reverse speedX, the ball will indeed start moving with a reverse horizontal speed. This will work but can give a strange visual effect if the balls moves, say, 20 pixels per frame or more. The ball will never be in a position where the eye can "see it against the wall". This is why experienced game coders know that you just need to put the ball "at the contact position", not to its previous position, before reversing the speed value. This is done at lines 8-9. Try changing speedX to say, 20, and you'll see what we mean.
Let's animate balls and let's start with 3 the animation of 3 balls: ball1, ball2 and ball3. In the animation loop, we draw and move these three balls. Here is the result:
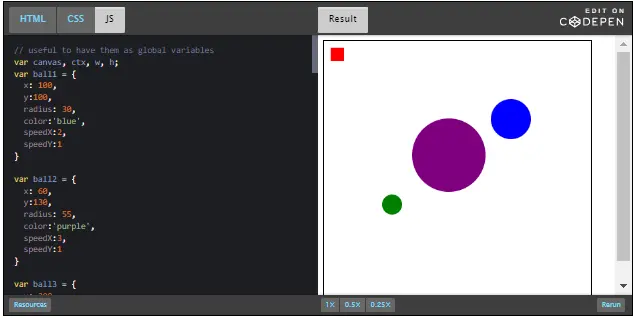
function mainLoop() {
  // 1 - clear the canvas
  ctx.clearRect(0, 0, w, h);
  // draw the balls and the player
  drawFilledRectangle(player);
  drawFilledCircle(ball1);
  drawFilledCircle(ball2);
  drawFilledCircle(ball3);
  // animate the balls bouncing all over the walls
  moveBall(ball1);
  moveBall(ball2);
  moveBall(ball3);
  // ask for a new animation frame
  requestAnimationFrame(mainLoop);
}
And what if we have 100 balls? We're not going to copy and paste the lines that draw and move the balls 100 times!
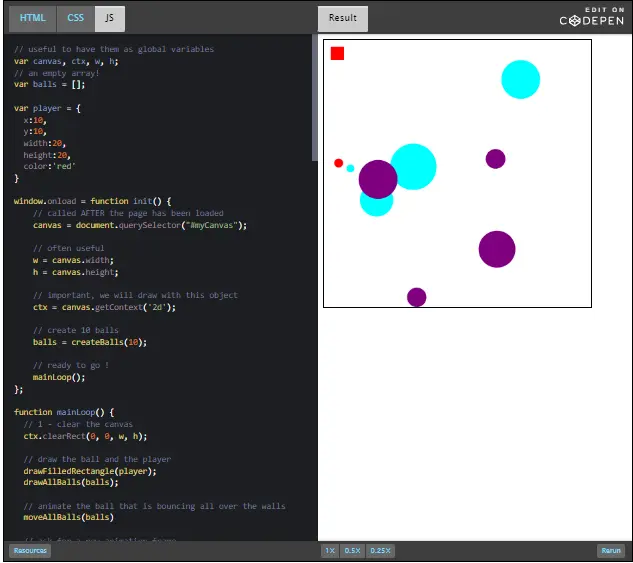
function createBalls(n) {
  // empty array
  var ballArray = [];

  // create n balls
  for(var i=0; i < n; i++) {
    var b = {
      x:w/2,
      y:h/2,
      radius: 5 + 30 * Math.random(), // between 5 and 35
      speedX: -5 + 10 * Math.random(), // between -5 and + 5
      speedY: -5 + 10 * Math.random(), // between -5 and + 5
      color: getARandomColor(),
    }
    // add ball b to the array
    ballArray.push(b);
  }
  // returns the array full of randomly created balls
  return ballArray;
}
function getARandomColor() {
  var colors = ['red', 'blue', 'cyan', 'purple',
  'pink', 'green', 'yellow'];
  // a value between 0 and color.length-1
  // Math.round = rounded value
  // Math.random() a value between 0 and 1
  var colorIndex = Math.round((colors.length-1)*Math.random());
  var c = colors[colorIndex];
  // return the random color
  return c;
}
function drawAllBalls(ballArray) {
  ballArray.forEach(function(b) {
    drawFilledCircle(b);
  });
}
function moveAllBalls(ballArray) {
  // iterate on all balls in array
  ballArray.forEach(function(b) {
    // b is the current ball in the array
    b.x += b.speedX;
    b.y += b.speedY;
    testCollisionBallWithWalls(b);
  });
}

Detecting mouse events in a canvas is quite straightforward: you add an event listener to the canvas, and the browser invokes that listener when the event occurs.
The example below is about listening to mouseup and mousedown events (when a user presses or releases any mouse button):
canvas.addEventListener('mousedown', function (evt) {
  // do something with the mousedown event
});
canvas.addEventListener('mouseup', function (evt) {
  // do something with the mouseup event
});
The event received by the listener function will be used for getting the button number or the coordinates of the mouse cursor. Before looking at different examples, let's look at the different event types we can listen to.
In the last example, we saw how to detect the mouseup and mousedown events.
When you listen to any of the above events, the event object (we call it a "DOM event"), passed to the listener function, has properties that correspond to the mouse coordinates: clientX and clientY.
However, these are what we call "viewport coordinates". Instead of being relative to the canvas itself, they are relative to the viewport (the visible part of the page).
Most of the time you need to work with the mouse position relative to the canvas, not to the viewport, so you must convert the coordinates between the viewport and the canvas. This will take into account the position of the canvas in the viewport, and the CSS properties that may affect the canvas position (margin, etc.).
Fortunately, there is a method for getting the position and size of any element in the viewport: getBoundingClientRect().
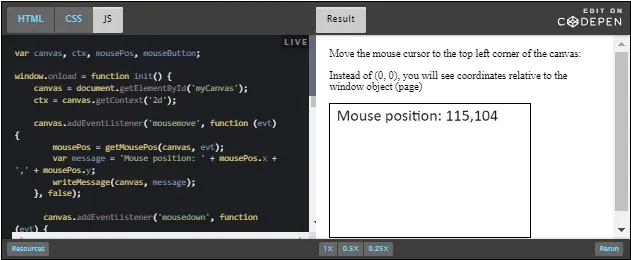
...
canvas.addEventListener('mousemove', function (evt) {
  mousePos = getMousePos(canvas, evt);
  var message = 'Mouse position:
    ' + mousePos.x + ',' + mousePos.y;
    writeMessage(canvas, message);
}, false);

  ...
function getMousePos(canvas, evt) {
  // WRONG!!!
  return {
    x: evt.clientX,
    y: evt.clientY
  };
}
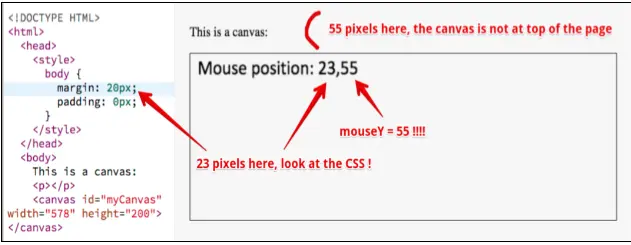
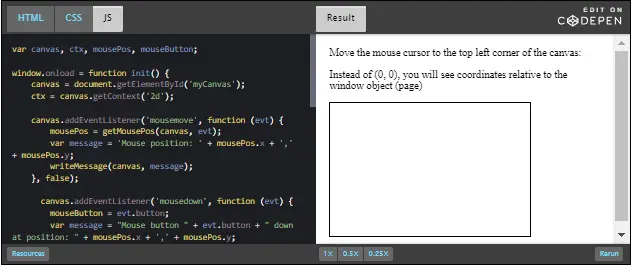
function getMousePos(canvas, evt) {
  // necessary to take into account CSS boundaries
  var rect = canvas.getBoundingClientRect();
  return {
    x: evt.clientX - rect.left,
    y: evt.clientY - rect.top
  };
}
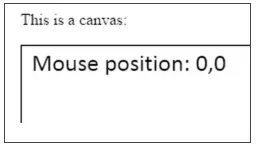
This example uses the previous function for computing the mouse position correctly. It listens to mousemove, mousedown and mouseup events, and shows how to get the mouse button number using the evt.button property.
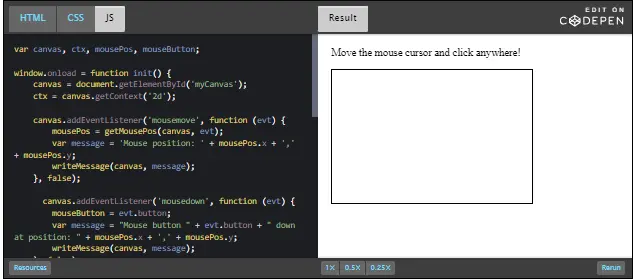
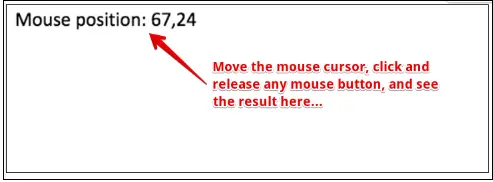
var canvas, ctx, mousePos, mouseButton;
window.onload = function init() {
  canvas = document.getElementById('myCanvas');
  ctx = canvas.getContext('2d');
  canvas.addEventListener('mousemove', function (evt) {
    mousePos = getMousePos(canvas, evt);
    var message = 'Mouse position:
      ' + mousePos.x + ',' + mousePos.y;
    writeMessage(canvas, message);
  }, false);
  canvas.addEventListener('mousedown', function (evt) {
    mouseButton = evt.button;
    var message = "Mouse button " + evt.button + " down at position:
          " + mousePos.x + ',' + mousePos.y;
    writeMessage(canvas, message);
  }, false);
  canvas.addEventListener('mouseup', function (evt) {
    var message = "Mouse up at position:
      " + mousePos.x + ',' + mousePos.y;
      writeMessage(canvas, message);
  }, false);
};
function writeMessage(canvas, message) {
  ctx.save();
  ctx.clearRect(0, 0, canvas.width, canvas.height);
  ctx.font = '18pt Calibri';
  ctx.fillStyle = 'black';
  ctx.fillText(message, 10, 25);
  ctx.restore();
}
function getMousePos(canvas, evt) {
  // necessary to take into account CSS boudaries
  var rect = canvas.getBoundingClientRect();
  return {
    x: evt.clientX - rect.left,
    y: evt.clientY - rect.top
  };
}
This time, we've added a mousemove event listener to the canvas in the init function, and reused the trick that you saw in the previous section to get the correct mouse position:
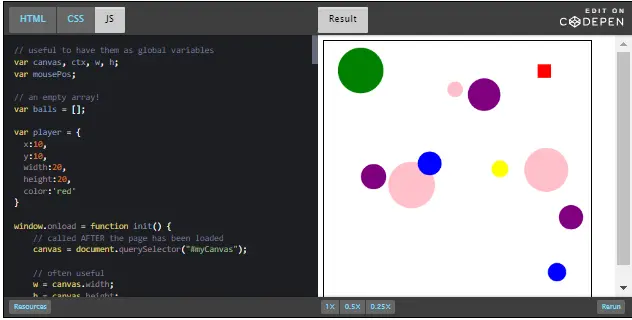
var mousePos;
window.onload = function init() {
  ...
  // create 10 balls
  balls = createBalls(10);
  // add a mousemove event listener to the canvas
  canvas.addEventListener('mousemove', mouseMoved);
  // ready to go !
  mainLoop();
};
function mouseMoved(evt) {
  mousePos = getMousePos(canvas, evt);
}
function getMousePos(canvas, evt) {
  // from the previous section
  var rect = canvas.getBoundingClientRect();
  return {
    x: evt.clientX - rect.left,
    y: evt.clientY - rect.top
  };
}
Line 9 defines a mousemove event listener: the mouseMoved callback function will be called each time the user moves the mouse on the canvas.
The mouseMoved(evt) function uses the trick from the previous section and puts the correct mouse position in the mousePos variable.
With this code, as soon as we move the mouse on top of the canvas, we'll have this mousePos global variable (line 1) that will contain the mouse position (in the form of the mousePos.x and mousePos.y properties).
function mainLoop() {
  // 1 - clear the canvas
  ctx.clearRect(0, 0, w, h);
  // draw the ball and the player
  drawFilledRectangle(player);
  drawAllBalls(balls);
  // animate the ball that is bouncing all over the walls
  moveAllBalls(balls);
  movePlayerWithMouse();
  // ask for a new animation frame
  requestAnimationFrame(mainLoop);
}
function movePlayerWithMouse() {
  if(mousePos !== undefined) {
    player.x = mousePos.x;
    player.y = mousePos.y;
  }
}
If the mouse position is defined, the player's x and y position will equal to the positions of the mouse pointer.
The mouse position may be undefined if the animation loop started without the mouse cursor being on top of the canvas. Remember that the mainLoop starts as soon as the page is loaded.
Perhaps it's occurred to you that it might be better to move the player "from its center" instead of from its top left corner. We leave this improvement to you! :-)
Let's make it a game by adding collision detection! And try to move the player to all the balls as fast as you can.
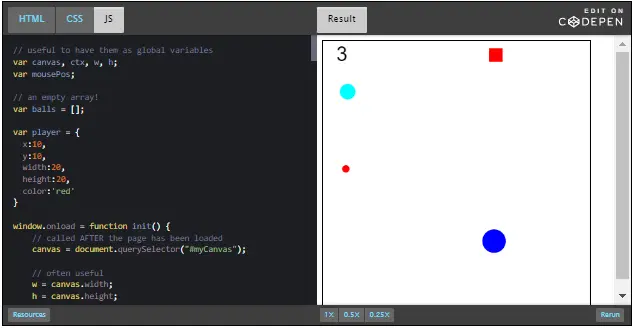
First, if you're into game programming, we have a full section about collision detection one of the W3Cx HTML5 Apps and Games course modules.
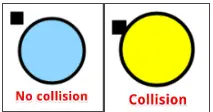
We have a player that is a rectangle and other objects that are circles. This is cool, as it allows us to find a short function that tests if a circle collides with a rectangle whose sides are aligned to the X-axis and Y-axis (we implemented this after reading this thread at StackOverflow):
// Collisions between rectangle and circle
function circRectsOverlap(x0, y0, w0, h0, cx, cy, r) {
  var testX=cx;
  var testY=cy;
  if (testX < x0) testX=x0;
  if (testX > (x0+w0)) testX=(x0+w0);
  if (testY < y0) testY=y0;
  if (testY > (y0+h0)) testY=(y0+h0);
  return (((cx-testX)...(cx-testX)+(cy-testY)...(cy-testY))< r...r);
}
Let's look at our game! This time, we've added into the loop a collision test between the player and the balls. If the player hits a ball, it's removed from the ball array. We did this test in the moveBalls function, as we were already testing collisions with walls for each ball in the array. Let's look at this new version:
function moveAllBalls(ballArray) {
  // iterate on all balls in array
  ballArray.forEach(function(b, index) {
    // b is the current ball in the array
    b.x += b.speedX;
    b.y += b.speedY;
    testCollisionBallWithWalls(b);
    testCollisionWithPlayer(b, index);
  });
}
function testCollisionWithPlayer(b, index) {
  if(circRectsOverlap(player.x, player.y,
    player.width, player.height,
    b.x, b.y, b.radius)) {
    // we remove the element located at index
    // from the balls array
    // splice: first parameter = starting index
    // second parameter = number of elements to remove
    balls.splice(index, 1);
  }
}
We've also added a function for displaying the number of balls in the array while we are playing. When this number reaches zero, we display "You Win!":
function drawNumberOfBallsAlive(balls) {
  ctx.save();
  ctx.font="30px Arial";
  if(balls.length === 0) {
    ctx.fillText("YOU WIN!", 20, 30);
  } else {
    ctx.fillText(balls.length, 20, 30);
  }
  ctx.restore();
}
This function is called by the mainLoop:
function mainLoop() {
  // 1 - clear the canvas
  ctx.clearRect(0, 0, w, h);
  ...
  drawNumberOfBallsAlive(balls);
  ...
  // ask for a new animation frame
  requestAnimationFrame(mainLoop);
}
Let's use some other techniques that we've learnt in this module. There are input fields: sliders, color chooser, number chooser. We are going to use the DOM API to handle them.
We use these input fields to indicate the number of balls we want, the max speed we would like, the color and size of the player, etc.
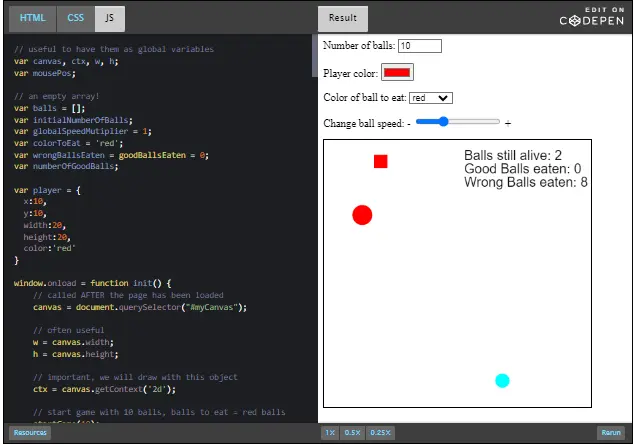
HTML code: this time we've used an oninput in each input field, and an onchange attribute on the <select> HTML drop down menu:
<div id="controls">
  <label for="nbBalls">Number of balls: </label>
  <input type="number" min=1 max=30
    value=10 id="nbBalls"
  oninput="changeNbBalls(this.value);">
  <p></p>
  <label for="nbBalls">Player color: </label>
  <input type="color" value='#FF0000'
    oninput="changePlayerColor(this.value);">
  <p></p>
  <label for="nbBalls">Color of ball to eat: </label>
  <select onchange="changeColorToEat(this.value);">
    <option value='red'>red</option>
    <option value='blue'>blue</option>
    <option value='green'>green</option>
  </select>
  <p></p>
  <label for="nbBalls">Change ball speed: </label>
  <input type="range" value='1'
    min=0.1 max=3 step=0.1
    oninput="changeBallSpeed(this.value);"> +
  <p></p>
</div>
JavaScript code: we've added some new variables in order to get closer to a real game with a goal, levels, game over menu and so on.
var initialNumberOfBalls; // number of balls at the beginning
var globalSpeedMutiplier = 1; // will change when we move the speed
// slider
var colorToEat = 'red';       // color of the "good" balls to eat
var wrongBallsEaten = goodBallsEaten = 0; // number of good/bad balls
// eaten
var numberOfGoodBalls;        // number of good balls in the set
function changeNbBalls(nb) {
  startGame(nb);
}
function changeColorToEat(color) {
  colorToEat = color;
  startGame(initialNumberOfBalls);
}
function changePlayerColor(color) {
  player.color = color;
}
function changeBallSpeed(coef) {
  globalSpeedMutiplier = coef;
}
Each time we change the number of balls in the game, or the color of the balls you need to eat, we need to restart the game.
function startGame(nb) {
  do {
    balls = createBalls(nb);
    initialNumberOfBalls = nb;
    numberOfGoodBalls = countNumberOfGoodBalls(balls, colorToEat);
  } while(numberOfGoodBalls === 0); // in case no good ball in the set
  wrongBallsEaten = goodBallsEaten = 0;
}
function countNumberOfGoodBalls(balls, colorToEat) {
  var nb = 0;
  balls.forEach(function(b) {
    if(b.color === colorToEat) // we count the number of balls
      nb++;                    // of this color in the balls array
  });
  return nb;                   // return this number to the caller
}
Here is the discussion forum for this part of the course. Please either post your comments/observations/questions or share your creations.

From what we've learned so far, it is time now to enjoy some of the standard API's your browser provides.
This module is centered around the BOM; the "Browser Object Model". That provides standard objects such as the navigator or the window object. We already had a glimpse of these, this time we look at them more into details. In addition, we will look at some HTML5 standards APIs provided by your browser.
For example, the geolocation API will help you display an interactive map centered on your location, or the multimedia API will give you complete controls over audio or video players.
Also, we'll look at persistence APIs that will enable you to load and save data on your hard disk. The next day if you open your Web application, you will able to retrieve these data. This is an important feature. We will come back to features we already played with, such as arrays and iterators, but the main topic is really about browser APIs. We will end this module with a mid-course project, and different difficulty levels will be proposed.

Note that this module is more "project oriented", meaning less fundamental concepts are presented.
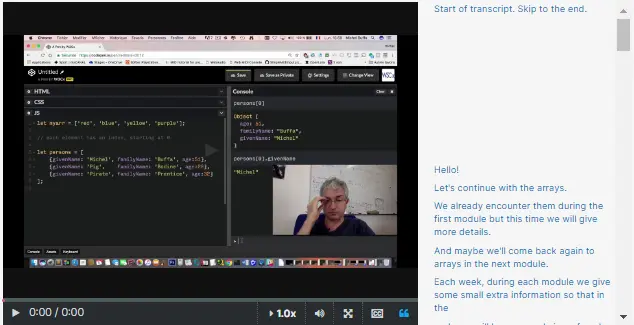
Let's continue with the arrays. We already encounter them during the first module but this time we will give more details. And maybe we'll come back again to arrays in the next module. Each week, during each module we give some small extra information so that in the end, you will have a good view of each JavaScript concepts.
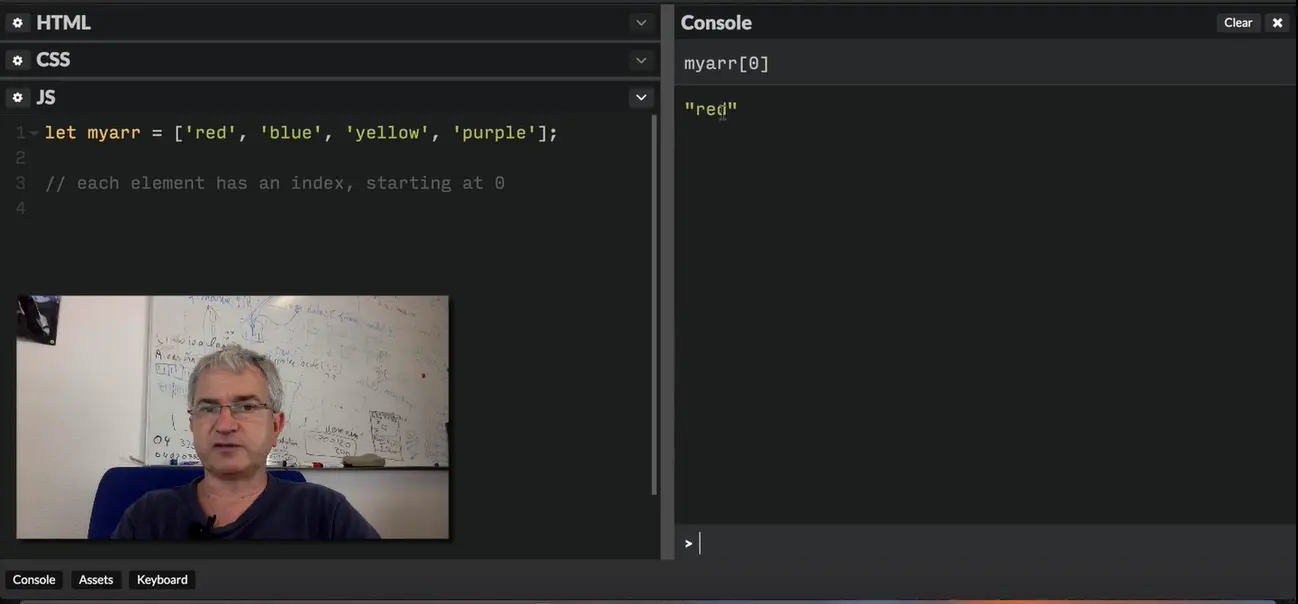
Let's start with an array called "myarr" that contains some colors. The first thing we must remind is that each element has an index. And the first index is at number 0. If I type in the console...it gives me the first element. "myarr[0]" gives the first element. Arrays in JavaScript are objects.
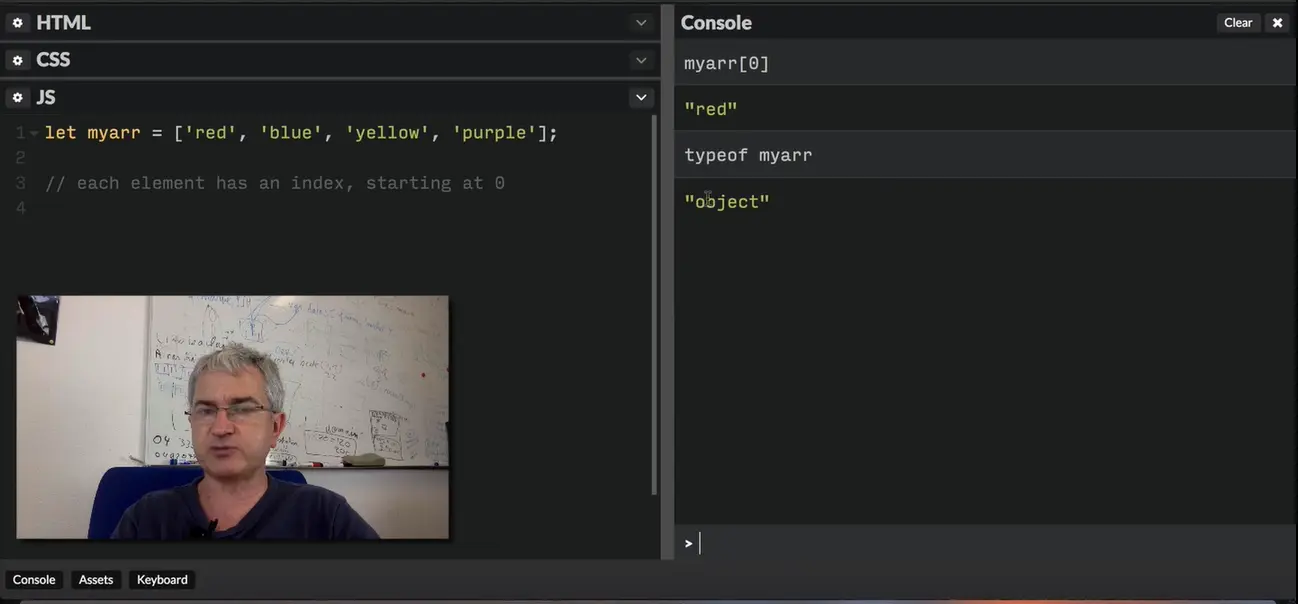
If I try "typeof myarr" it's says "objects". And objects, in an object-oriented languages, have properties. They are the DNA of the objects, like person has an age, person has a name, an array has the length. As the array is an object, it will have some interesting properties.
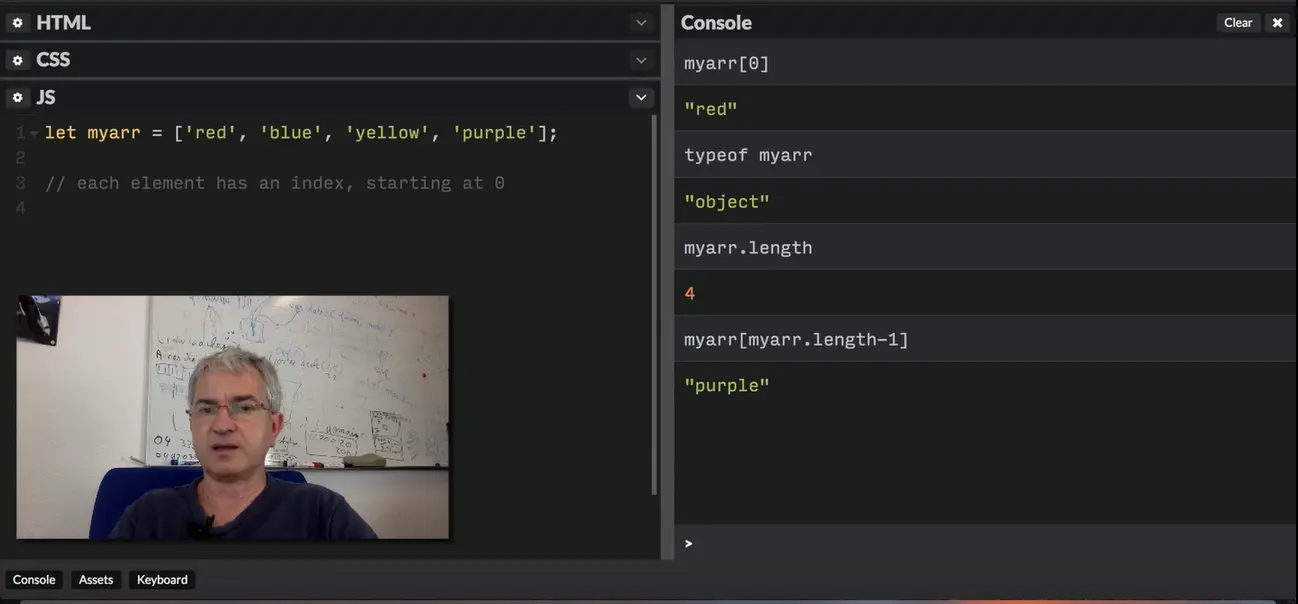
One of them is the length...and you access properties using the "." operator. This, the length, corresponds to the number of elements: 1, 2, 3 and 4. The last one, the last element is at index given by the length property -- 1. "purple", the last element, is located at index "myarr.length-1".
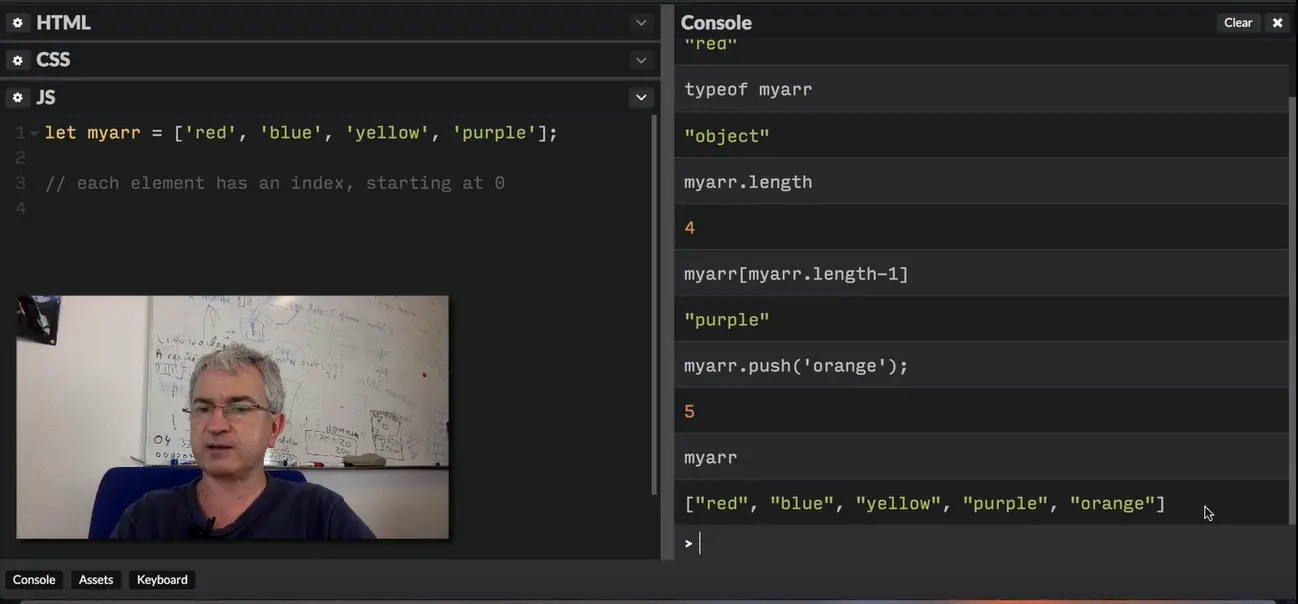
If you want to add an element to an array, you've got different possibilities. The most common one, the one that I recommend, is to use a method called "push". red, blue, yellow, purple. Let's add 'orange', like this. Like that, it returns the new length: 5 elements. And if I look at the content of my array, it now has, at the end, the last element I pushed inside: orange. "push" is very useful.
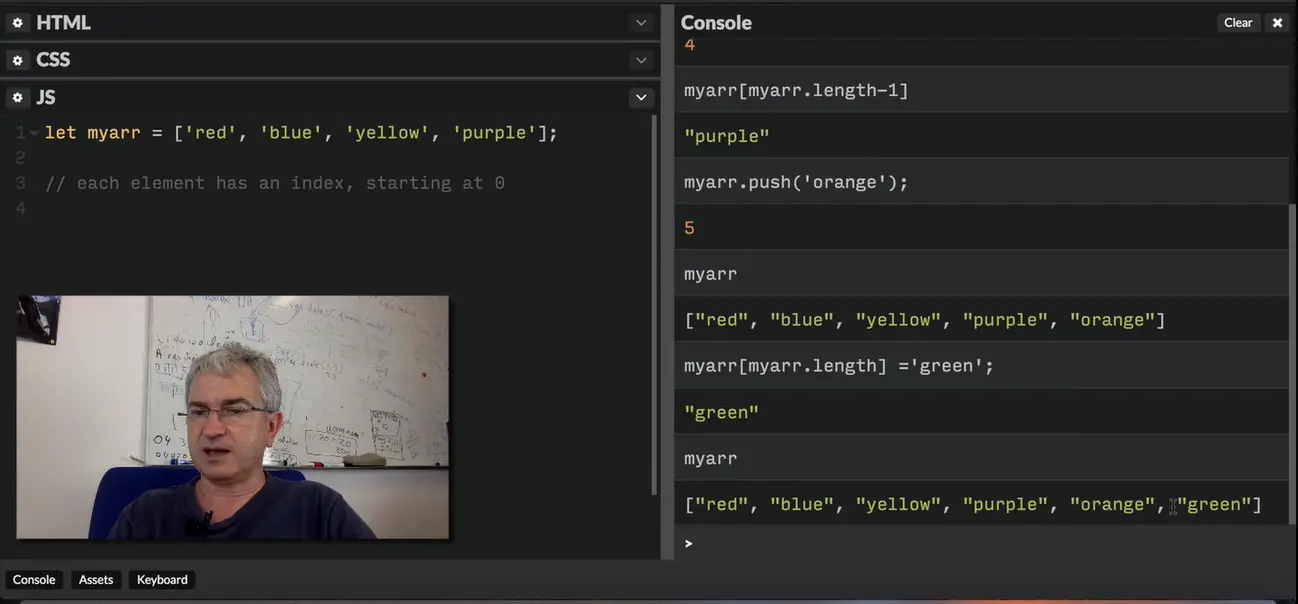
You can also add an element at the end of an existing array by adding it to the index equal to the length of the array. If I do this, we don't have any "green" here...You see, I'm using the index length. If I do like that, it returns the new element we added, and it adds at the end. To be frank, most of the time I use the "push" method.
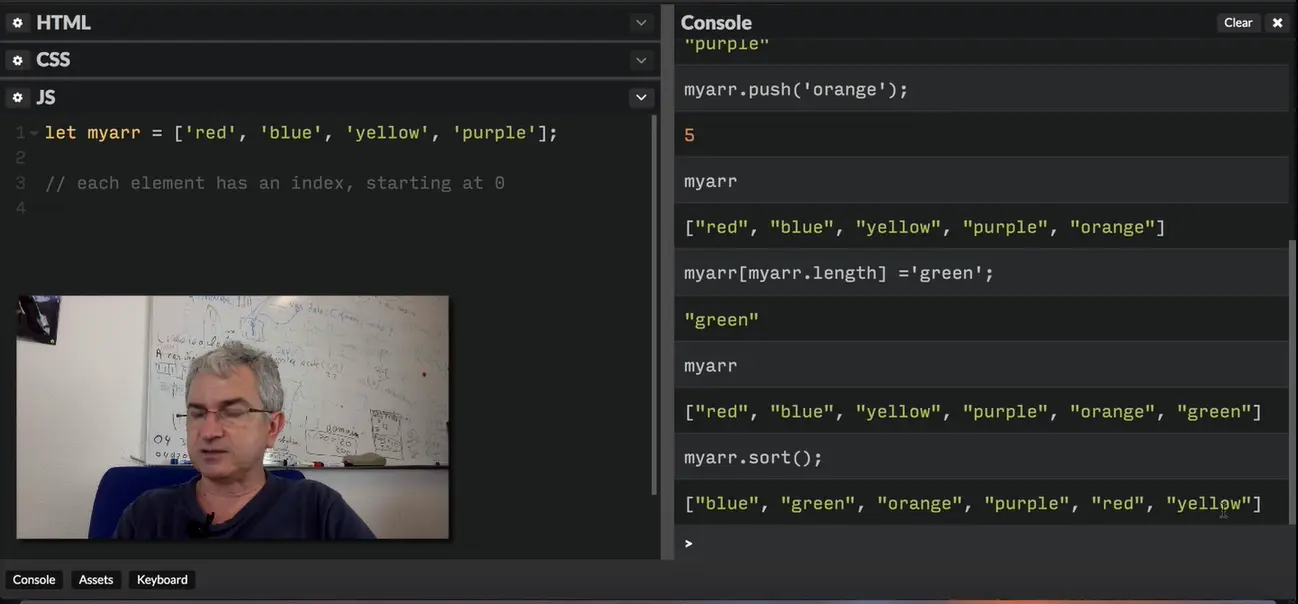
You can also sort the elements of an array using the "sort" method. Objects have properties: their DNA, their characteristics, and they have methods that correspond to their behavior. You can sort an array because it has a sort method. It's a sort of function associated with the array. If I just call "sort" without any parameter, it returns the array sorted by ascending alphabetical order.
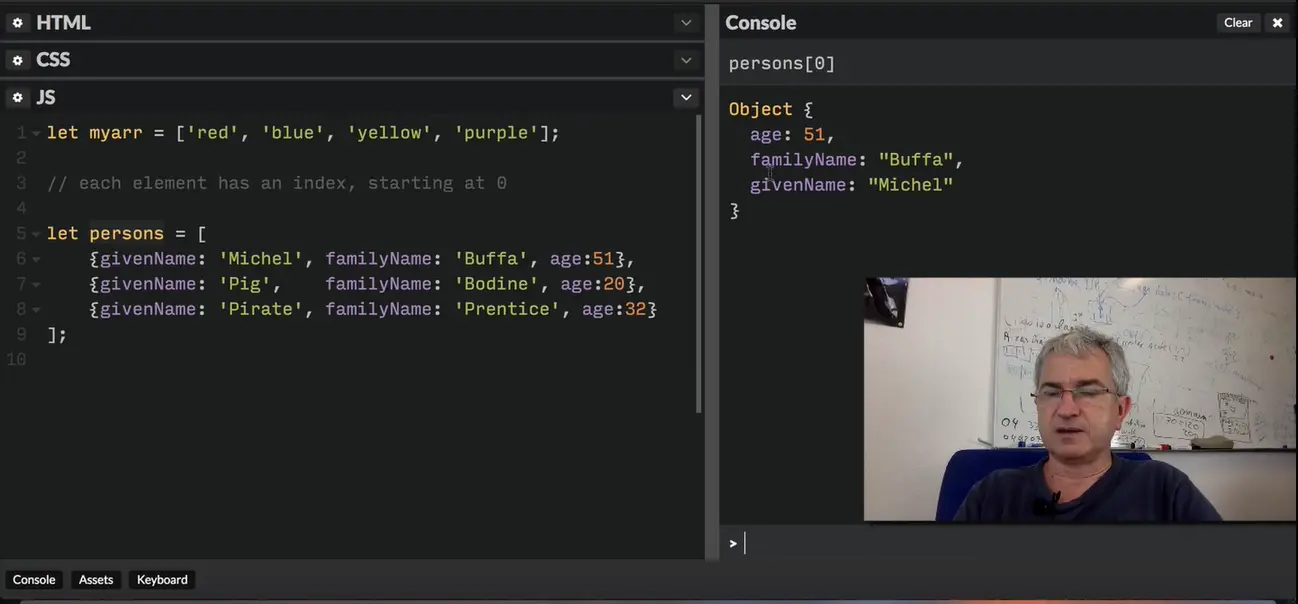
If I want to work with more complex elements, I can make an array with an object. I prepared an array that contains objects, it's called "persons" and each element is an object. If I look at the first element, here. It gives me a person whose familyName is Buffa, whose givenName is Michel, age 51. This corresponds to the first element of the array.
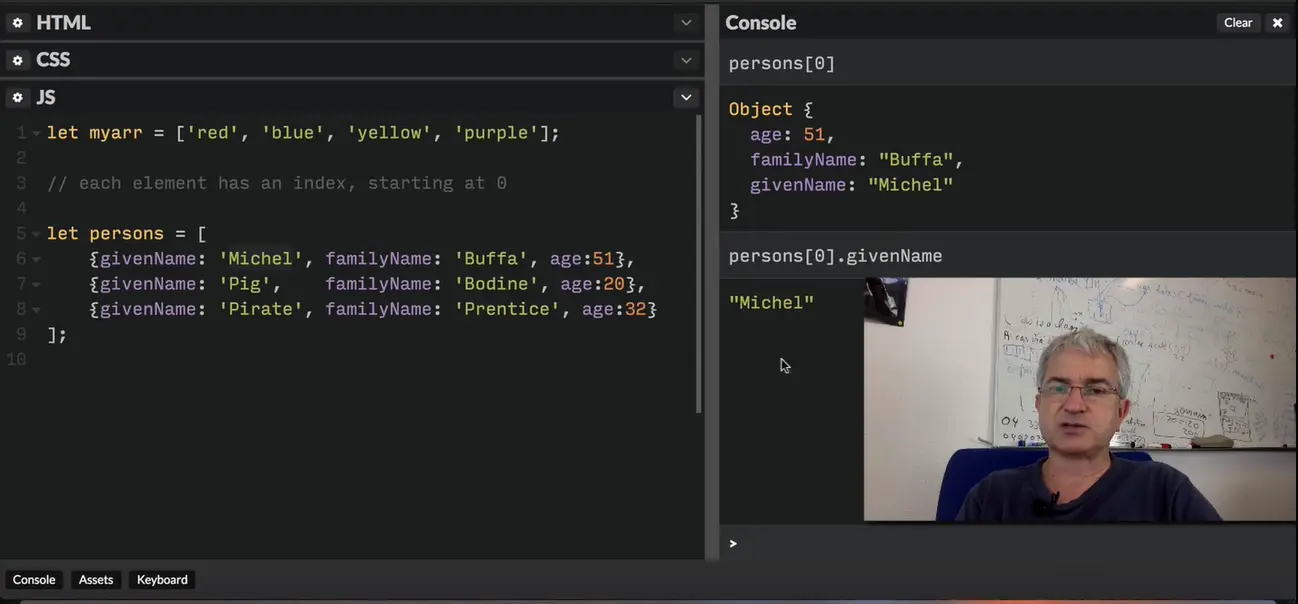
If I want to access some properties of this element, I will use the "." operator. So persons.0.givenName will correspond to Michel, persons.0 is this element, .givenName corresponds to this property.
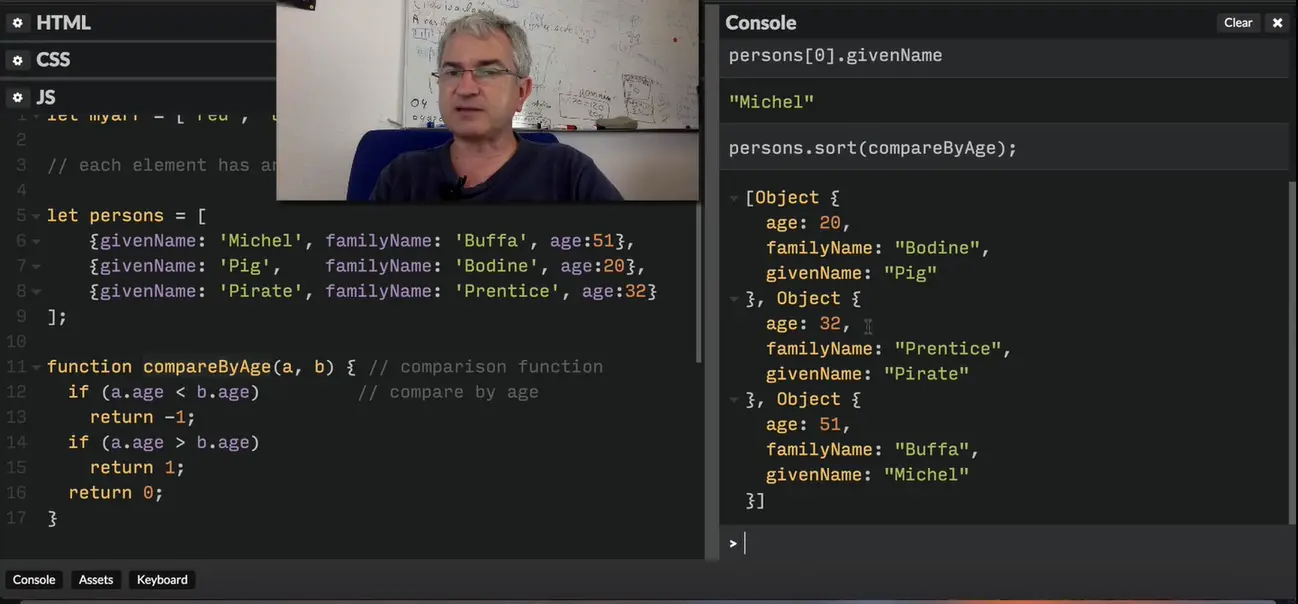
If I want to sort this array by age for example, I cannot use just persons.sort() as it will not know which criteria I must use or which property I want the sort to be done. We can pass an argument here, that will be a callback, a function called by the "sort" method from the API. And this callback will indicate how we compared 2 different elements. Let's try it! I prepared it.
We can define a function named, for example, compareByAge() that will compare an element named "a" with an element named "b". And we suppose that these elements have an age property, and then we compare. If "a" has a smaller age than "b", we return -1. If the age of the element "a" is bigger than the age of element "b", we return 1, else we return 0 if the ages are equal. And then, we just call "sort", and we pass the name of this comparison function. And in that case, the array is sorted by age: 20, 32, 51. When you call this method, it returns a sorted array but it also sorts the array itself. The array is no more the one we had first, now it's a sorted array.
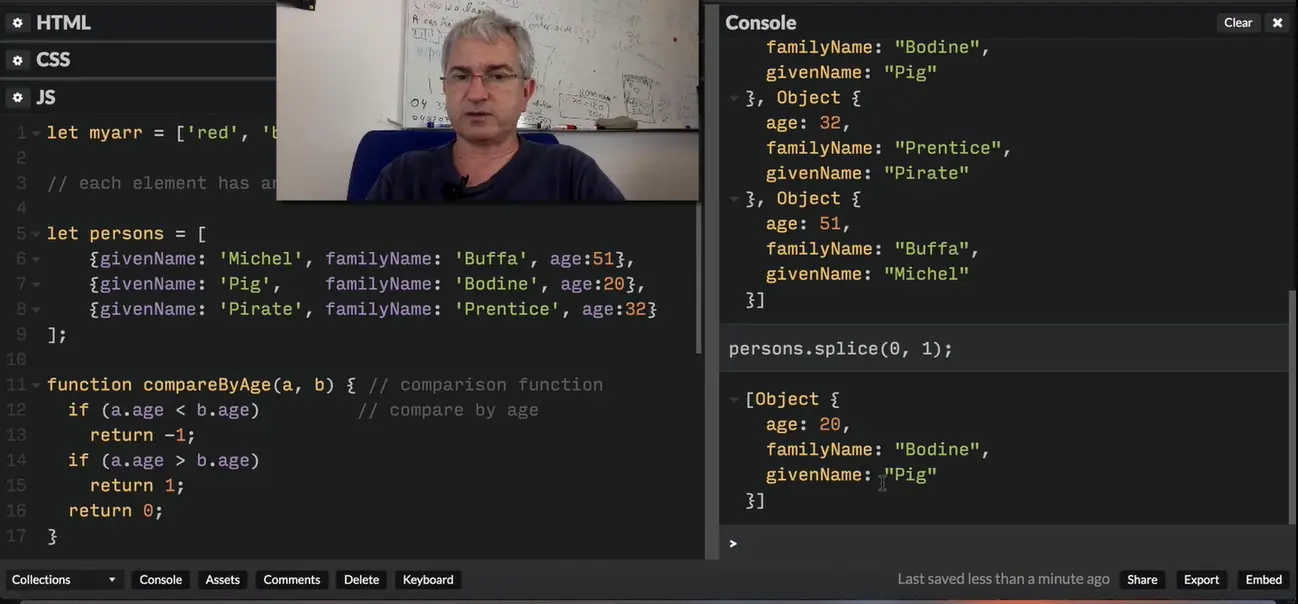
If I want to remove an element from the array, I will use the splice method. The first parameter is the index after which we will remove an element. If I say 0, it means start at index 0, remove 1 element. It will remove the element just after 0. It removed the element named Pig Bodine, it was in the middle. If I look at the array now, we just remove the element in the middle with the age 20.
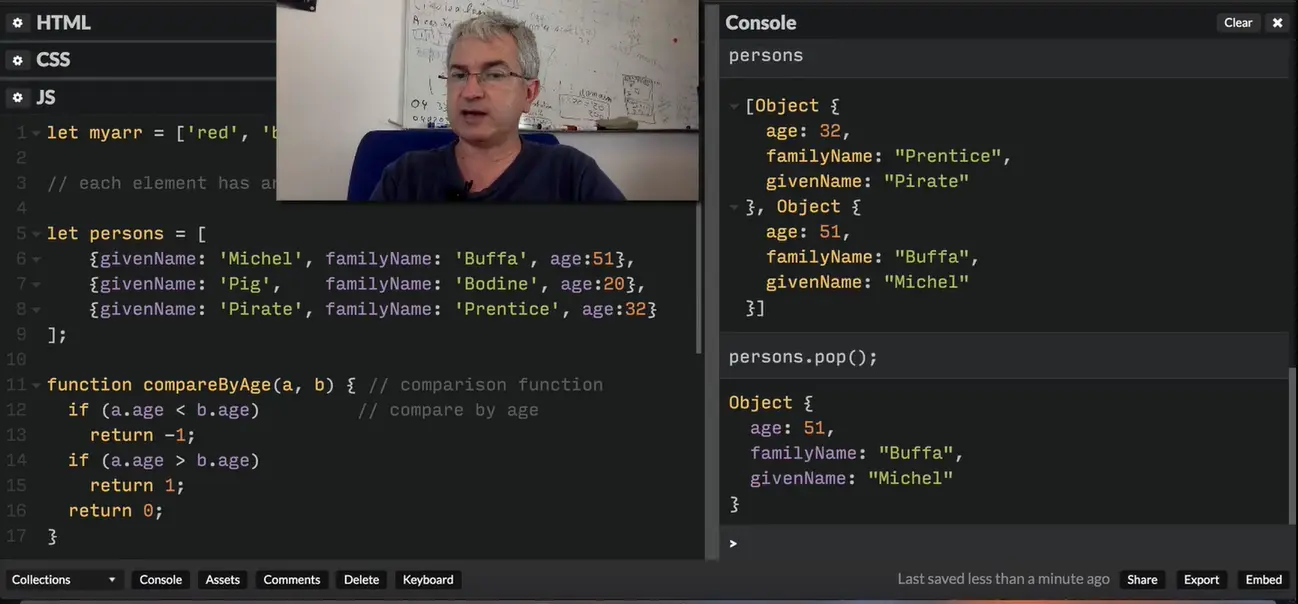
If I want to remove the last element, I can use the "pop" method. You remember that the "push" method adds at the end an element and the "pop" method will just remove the last element. Now, the array contains only the first element, I "popped", i.e., I removed the last element from the array.
Ok that's all for this video, you saw the most common methods: push, pop and sort. You saw that the first element is at index 0, the last element at index length-1 and that you can also use some comparison functions for the sort elements.
In JavaScript, arrays represent a collection of "things", which may be strings, integer values, decimal values, boolean values, or any sort of JavaScript object.
> var myarr = ['red', 'blue', 'yellow', 'purple'];
Undefined
> myarr;
["red", "blue", "yellow", "purple"]
> myarr[0];
"red"
> myarr[3];
"purple"
Each element of an array has a key/index and a value. Here are the keys/indexes and values from the above example:
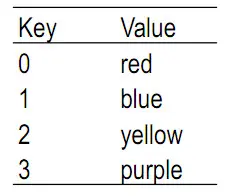
Below is an another example with an array containing three integers. The first element is at index 0, and the last at the index equal to the number of elements.
> var a = [];
> typeof a;
"object"
> var a = [1,2,3];
> a
[1, 2, 3]
> a[0]
1
> a[1]
2
Note that in JavaScript, arrays are "objects" (lines 2-3 in the above example), which means that they have properties and methods. You can access/call them using the "." operator. Here are the most common properties and methods.
> var a = [1, 3, 2, 5, 7];
undefined
> a.length; // number of elements
5
> a.sort(); // sorts element in a
[1, 2, 3, 5, 7]
> a.splice(2, 1); // remove 1 element starting from index=2 (3rd element)
[3]
> a; // the '3' has been removed from the array
[1, 2, 5, 7]
By default, the sort() method sorts elements alphabetically if they are strings, or from lowest to highest if they are numeric. If you want to sort objects like {firstName:'michel', lastName:'Buffa', age:51}, you will need to use another method passed as an argument to the sort method, for example to indicate the property you want to use for sorting (e.g., sort by age);
var persons = [
  {givenName: 'Michel', familyName: 'Buffa', age:51},
  {givenName: 'Pig', familyName: 'Bodine', age:20},
  {givenName: 'Pirate', familyName: 'Prentice', age:32}
];
function compareByAge(a,b) { // comparison function, a and b are persons
if (a.age < b.age)        // compare by age
  return -1;
  if (a.age > b.age)
  return 1;
  return 0;
}
persons.sort(compareByAge); // this will call automatically compareByAge
// passing all persons from the array, compare
// them by age and sort the array.
We will see more methods in the other subsections of this page.
> var a = [1,2,3];
> a[2] = 'three';
"three"
> a
[1, 2, "three"]
We can add new elements using a new index, if you want to add a new element at the end, use the push method!
> var a = [1,2,"three"];
undefined
> a[3] = 'four';
"four"
> a;
[1, 2, "three", "four"]
> a[a.length] = "five"; // adding at the end
[1, 2, "three", "four", "five"]
> a.push("six"); // but usually we prefer using the push method
for adding
[1, 2, 3, "four", "five", "six"]  // a new element at the end
> a[7] = 'height';
"height"
> a;
[1, 2, 3, "four", "five", "six", undefined × 1, "height"]
This array is valid, but having a [6] equal to "undefined" is often prone to errors. Be careful when using absolute indexes for adding elements. We recommend using the push method instead.
The recommended method is to use the splice method:
array.splice(start)
array.splice(start, deleteCount)
> a;
[1, 2, 3, "four", "five", "six", undefined × 1, "height"]
> a.splice(6, 1); // remove element at the seventh index, the undefined one!
[undefined × 1]
> a;
[1, 2, 3, "four", "five", "six", "height"] // it's no more here :-)
> a.splice(0, 3); // remove the three first elements
[1, 2, 3]
> a;
["four", "five", "six", "height"]
> a.splice(a.length-1); // remove the last element
"height"
> a;
["four", "five", "six"]
> a
["four", "five", "six"]
> a.pop(); // remember push/pop = add / remove element at last position!
"six"
> a
["four", "five"]
> delete a[1];
true
> a;
["four", undefined × 1] // the element became undefined,
// but it's still in the array!
It is possible for an array to be an element within an array! This example shows an array made of two arrays of three elements each. It's a 2x3 matrix with two rows and three columns!
> var a = [[1,2,3], [4,5,6]]; // a is a matrix: 2 rows, 3 columns.
Undefined
> a[0]; // first row
[1, 2, 3]
> a[1]; // second row
[4, 5, 6]
> a[0][0]; // top left element
1
> a[0][1]; // second element, first line
2
> a[0][2]; // third element, first line
3
> a[1][0]; // first element, second line
4
> a[1][1]; // second element, second line
5
> a[1][2]; // third element, second line
6
It is possible to have different arrays with different lengths and different types of element in an array:
> var a = [];
undefined
> a[0] = [1, 2, 3, 4, 5];
[1, 2, 3, 4, 5]
> a[1] = ['michel', 'henri', 'francois']
["michel", "henri", "francois"]
> a
[Array(5), Array(3)]
Yes, they do look like arrays!
JavaScript strings are "like" arrays of characters, but they have some limitations, and some dedicated properties and methods:
> var s = 'Michel';
undefined
> s[0];
"M"
> s[1];
"i"
> s.length;
6
Indeed, the string s behaves like an array, it has the length property like an array, and we can access individual characters using indexes that go from 0 to length-1, like arrays...
However... they are not quite the same as arrays!
You cannot add elements to strings using a non-existent index, you cannot use the push/pop methods for adding/removing characters at the end of the string:
s.push(' Buffa');
ERROR: VM5748:1 Uncaught TypeError: s.push is not a function
at <anonymous>:1:3
(anonymous) @ VM5748:1
s[s.length] = 'B'; // add 'B' at the end?
"B"
s[s.length] = 'u'; // add 'u' at the end?
"u"
s[s.length] = 'f'; // add 'f' at the end?
"f"
s; // s remained UNCHANGED!
"Michel"
You can't even modify a character using an index. Strings are "read only" when using brackets to access individual characters!
> var s = 'Michel'; undefined > s[0] = "R"; // Trying to change the 'M' into an 'R' "R" s; // no luck! "Michel"
You also can't remove characters using the array's splice method:
> s.splice(0, 3); ERROR: VM716:1 Uncaught TypeError: s.splice is not a function at <anonymous>:1:3
How do we add characters to a string, how can we modify a string? How can we delete elements in a string?
Strings come with a whole set of methods, which we'll come to in module 4 when we talk about JavaScript objects (in the section titled "JavaScript predefined objects"). Without going into detail just yet, here are some examples:
> var s = 'Michel';
undefined
> s = "Hello " + s;
"Hello Michel"
> s = 'O' + s; // equivalent to push('0') with arrays.
"OHello Michel"
> s = 'Michel'; "Michel" > s += ' Buffa'; "Michel Buffa" > s; "Michel Buffa"
> var s1 = 'Michel'; undefined > var s2 = 'Buffa'; undefined > var s3 = s1 + " " + s2; // + can be used to concat more than 2 strings Undefined > s3; "Michel Buffa" > var s4 = s1.concat(s2); Undefined > s4; "MichelBuffa" > var s5 = s2.concat(s1); Undefined s5; "BuffaMichel"
> var s = 'Michel'; undefined > s = s.substring(0, s.length-1); "Miche"
var s = 'Michel';
function removeChars(s, startIndex, numberOfCharsToRemove) {
return s.substring(0, startIndex) +
s.substring(startIndex + numberOfCharsToRemove);
}
// Remove 3 consecutive chars from s, starting at index = 1.
s = removeChars(s, 1, 3);
console.log(s); // Will display "Mel" in the console
function replaceAt(s, index, character) {
return s.substr(0, index) + character + s.substr(index+character.length);
}
var s2 = "JavaScript";
s2 = replaceAt(s2, 1, "o");
console.log(s2); // Will display "JovaScript"
// It also works with a string instead of a simple char
s2 = replaceAt(s2, 0, "Coca");
console.log(s2); // Will display "CocaScript"
Hello! Let's look at the different methods you can use to iterate on each element of an array. One of the most practical one consists in using the "forEach" iterator we already met during some previous examples, in particular during Module 1.
The syntax is this one, you start with the name of the array, and you type "forEach" with a capital "E". And this method takes a single callback. Usually, we type the callback body between the parenthesis. Declaring an anonymous function, an anonymous callback. And the first example is to use only a single argument that will be the current element while we are iterating. I call it "day" here, and day will be: Monday, Tuesday, Wednesday,... each time, we iterate on the collection of the days, on the array of days.
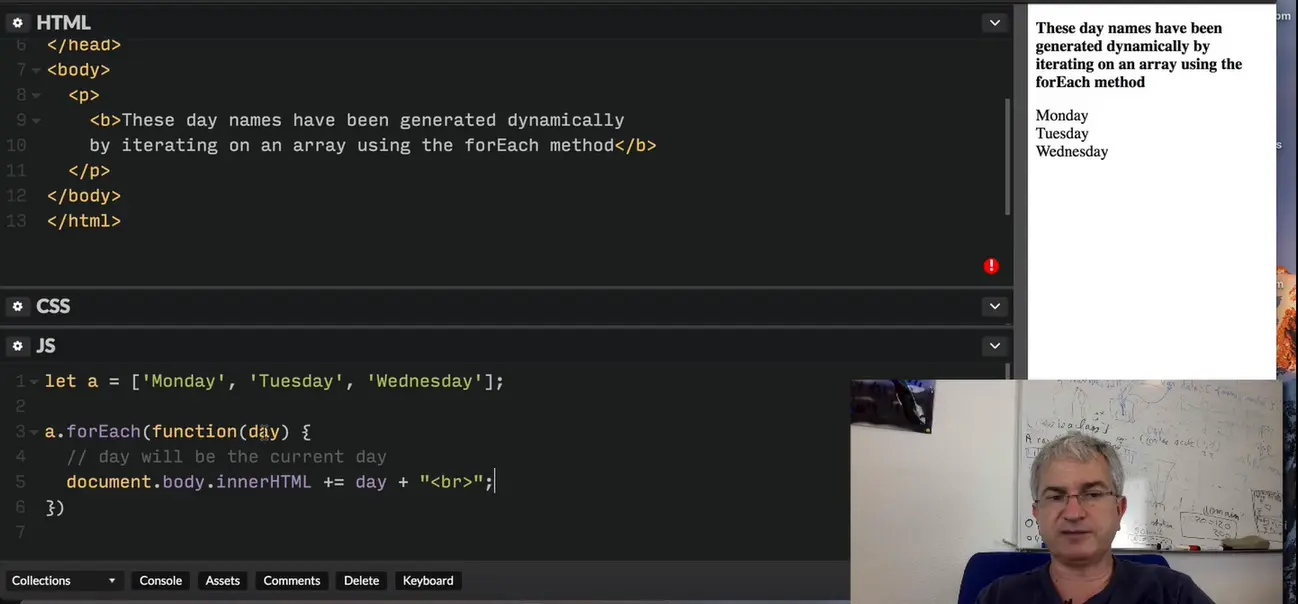
If I do "document.body.innerHTML"...You see that when the code is executed, for each element in the array, the variable "day" here, will be that day, and we use the DOM API to add at the end of the document's body, the name of the day and we go to the next line.
Here is the result. You can see that we can iterate using this "forEach" iterator, it's very simple. The name, here, is not important. You can call it "singleD", you can call it "d" and it works. You choose the name of the variable.
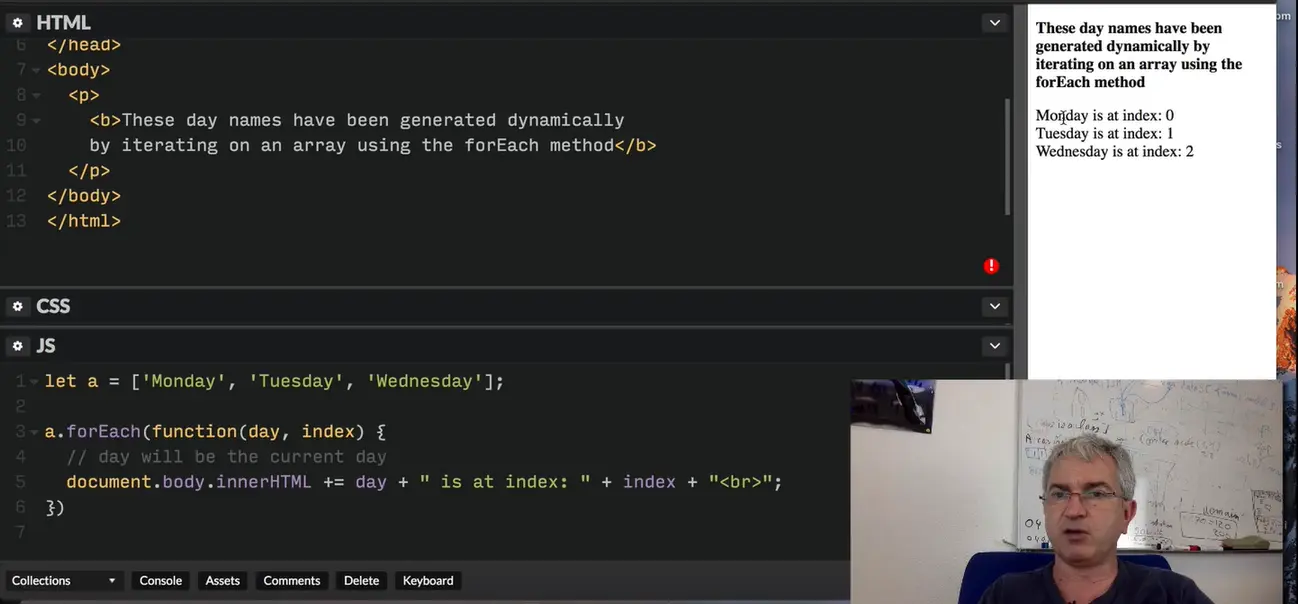
This iterator also takes optionally a second parameter that will be the index of the element. We can use this index to display, to give some numbers to the elements. Here, it will display the name of the day: Monday is at index, followed by the value of the index, 0. Monday is the element in the array at index 0. Tuesday is the element at the index 1.
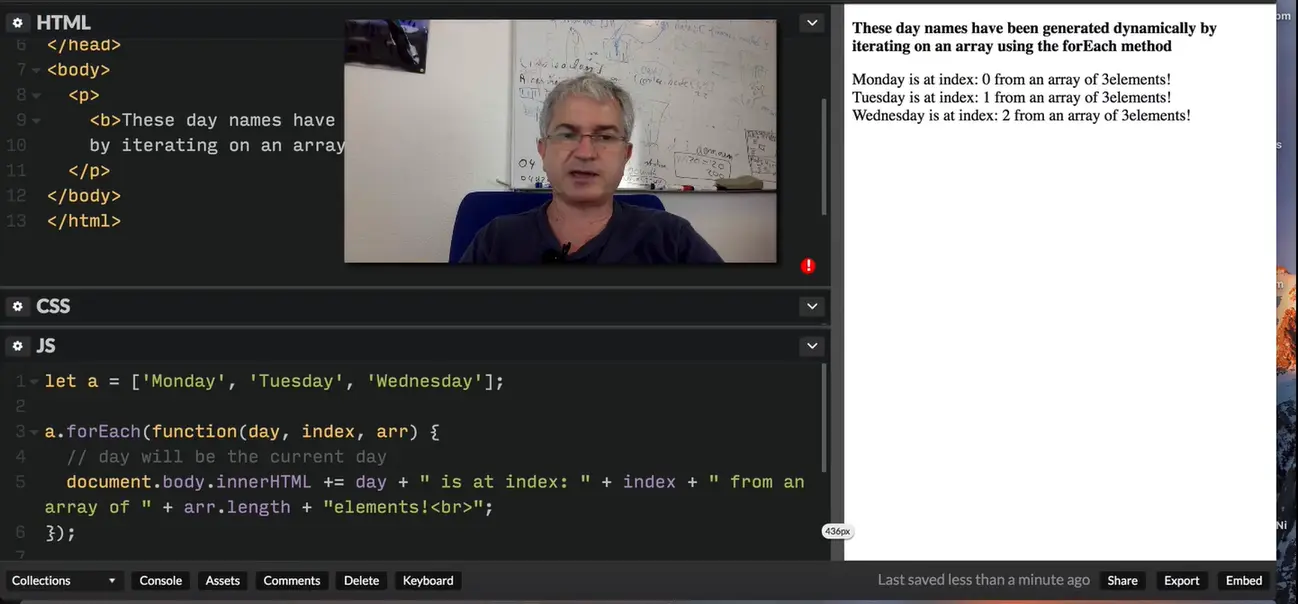
You can also use a third argument, that is the array itself. Let's call it "arr" and usually, we use the array to display the length of the array or maybe do operations on the array: remove the current element or do something like that. "from an array of" And now you can see that it displays: Monday is at index 0 from an array of 3 elements! "3", we took it from the third argument, and we use the length property from it. This is what we can do with the "forEach" iterator, very practical, very simple.
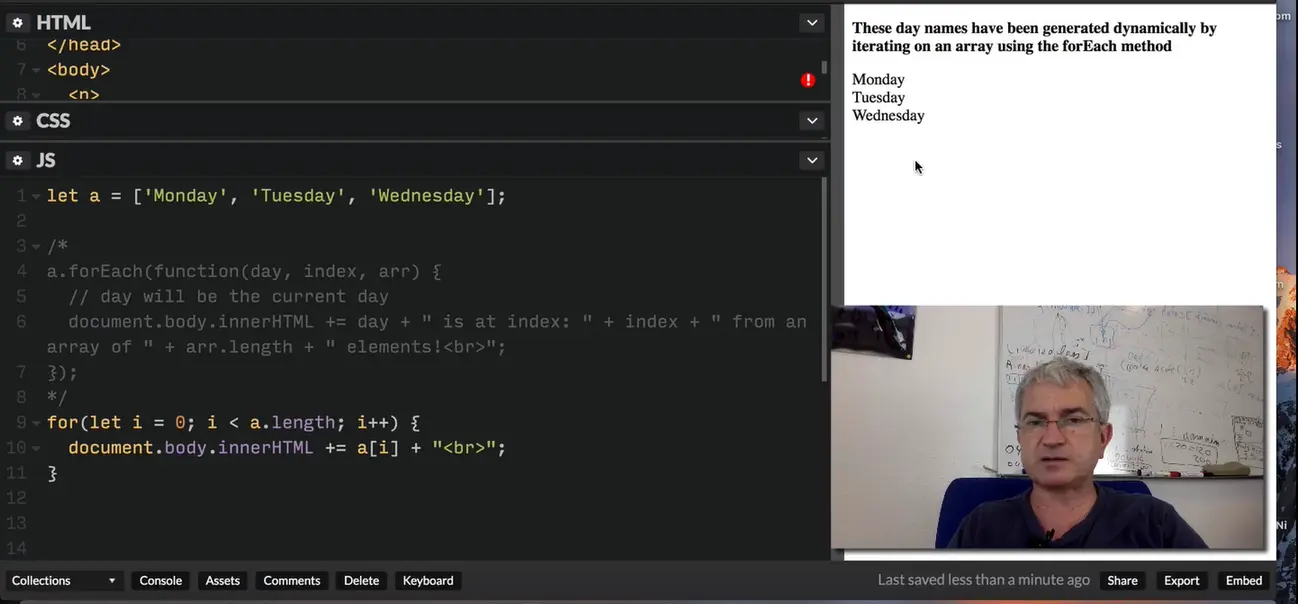
Another thing we can do, let me put this in comments, is use a regular "for" loop. Using a "for" loop... so the very automatic way is do like that. And you see we've got the same results we had with the "forEach". It's a bit more complicated because we must declare a variable, initialize it to 0 and this is the first, the starting index in the array. And this "for" loop, if you remember when we detailed them, if you use a strict < operator and if you increment the loop variable at the end, it will go from 0 to this value - 1.
This loop will go from i = 0 to "a.length -1" and "a.length -1" is the index of the last element of the array. This loop will go to through all elements in the array. And we need to use the "a" brackets with the index between the brackets notation to display the value. Which is best? This one or the with the "forEach" iterator? It depends.
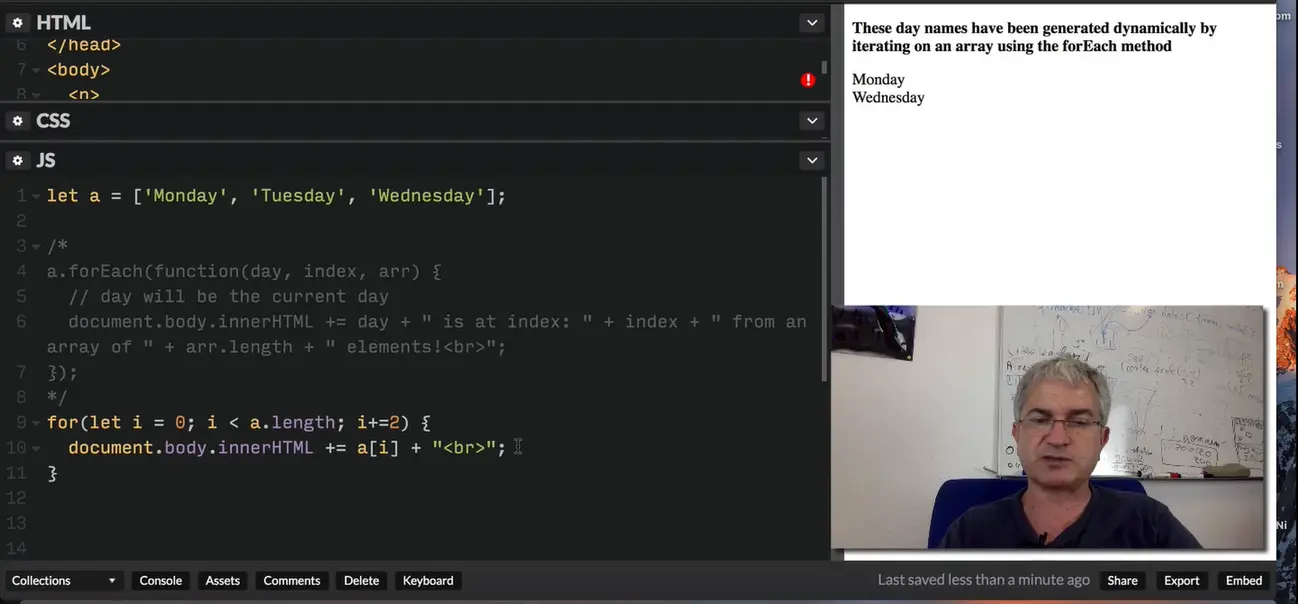
Here you can just go 2 by 2... I can iterate 2 by 2, or I can break the loop in the middle using the "break" keyword and a condition with an "if". All these things I cannot do them easily with the "forEach" operator. If you just need to iterate and do something on each element, use the "forEach" operator. If you need to jump over some elements, do some operations in the middle, stop the iteration, then go for the "for" loop.
Let's study the different methods for iterating on array elements.
The forEach method takes a single argument that is a function/callback that can have one, two or three parameters:
var a = ['Monday', 'Tuesday', 'Wednesday'];
a.forEach(function(day) {
// day is the current element
document.body.innerHTML += day +
"<br>"; // will display Monday, Tuesday, Wednesday
})
This is the most practical way to iterate on each individual element of a collection (array, string);

Now, let's iterate on an array of person, and use two parameters in the callback function in order to get the index of the current element:

var persons = [
{name:'Michel', age:51},
{name:'Henri', age:20},
{name:'Francois', age:29}
];
persons.forEach(function(p, index) {
document.body.innerHTML += p.name + ", age " + p.age +
", at index " + index + " in the array<br>";
});
This can be useful if we need to know the length of the array, or do special things within the array (add/change/move elements during the iteration):

In this example, we used the third parameter (the array) to access its length inside the iteration loop.
You can use any standard loop statement that we saw during in module 2. The most common way to iterate over an array is to use a for loop from 0 to length-1.
Using this method allows elements to be iterated two by two, or the loop to be broken in the middle using the break instruction, etc.

Another example where we iterate two by two (just changed the increment in the for loop):

Please either post your comments/observations/questions or share your creations.
let myPicturesArray = [ {
"albumId": 1,
"id": 1,
"title": "accusamus beatae ad facilis cum similique qui sunt",
"url": "https://placehold.it/600/92c952",
"thumbnailUrl": "https://placehold.it/150/92c952"
},
{
"albumId": 1,
"id": 2,
"title": "reprehenderit est deserunt velit ipsam",
"url": "https://placehold.it/600/771796",
"thumbnailUrl": "https://placehold.it/150/771796"
},
{
"albumId": 2,
"id": 51,
"title": "non sunt voluptatem placeat consequuntur rem
incidunt",
"url": "https://placehold.it/600/8e973b",
"thumbnailUrl": "https://placehold.it/150/8e973b"
},
{
"albumId": 2,
"id": 52,
"title": "eveniet pariatur quia nobis reiciendis laboriosam ea",
"url": "https://placehold.it/600/121fa4",
"thumbnailUrl": "https://placehold.it/150/121fa4"
},
{
"albumId": 3,
"id": 127,
"title": "magnam quia sed aspernatur",
"url": "https://placehold.it/600/74456b",
"thumbnailUrl": "https://placehold.it/150/74456b"
},
{
"albumId": 3,
"id": 128,
"title": "est facere ut nam repellat numquam quia quia eos",
"url": "https://placehold.it/600/b0931d",
"thumbnailUrl": "https://placehold.it/150/b0931d"
}
];
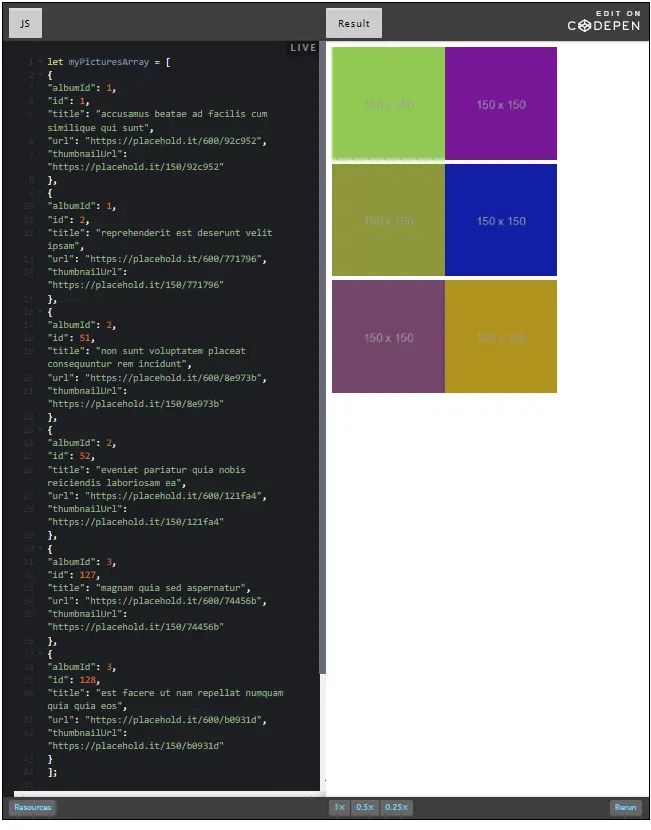
These examples are adapted from the ones in the W3Cx HTML5 Coding Essentials and Best Practices course, which covers multimedia in depth. The HTML5 Advanced Course (HTML5 Apps and Games) also gives further examples covering topics such as making a video player with chapter navigation, clickable transcript, audio EQ, etc.
The <video> element of HTML5 is one of the two "Flash killers" (the other being the <canvas> element). It was designed to replace horrible things like embedded Flash objects that we used to encounter not so long ago.
The new way of doing things is a lot better... (please open this live example at JS Bin).
The source code of this example shows the typical usage of the <video> element:
<video width="320" height="240" controls="controls"> <source src="movie.mp4" type="video/mp4" /> <source src="movie.ogg" type="video/ogg" /> Your browser does not support the <video> element. </video>
You will learn more about the different attributes of the <video> element later on in the course.
Restriction: you cannot embed a YouTube or a Daily Motion video using the <video> element
Help! <video src="my youtube video URL"></video> does not work!

While they use HTML5 to render their videos, these hosting sites (YouTube, etc.) use rather complex techniques in order to prevent you from using them with the <video> element. Instead, you often need to embed an <iframe> that will render the HTML5 videos in your Web site, and of course, the advertising that comes along with them.
Usually you have an "embed" button close to the videos that prompts you with some HTML code that you can copy and paste for embedding.
Here is the HTML code you need to copy and paste in order to embed a video (in this case, a tutorial that tells you how to embed a YouTube video):
<iframe width="560" height="315" src="https://www.youtube.com/embed/ZH1XOsv8Oyo" frameborder="0" allowfullscreen></iframe>
Below is the YouTube video embedded in this page using the above code: it's HTML5 but it's not a <video> element directly inserted in the HTML of this page - it's an <iframe>.
This course focuses on the <audio> element. Please check for the Web Audio API and other advanced parts of HTML5 in W3Cx's HTML5 Apps and Games course.
The attributes, event set and JavaScript API of the <audio> element are just a "reduced" version of the ones from the <video> element, and here we will only address their differences and peculiarities.
The most simple basic example: online example from JSBin
Press play to stream the neigh of a horse:

<!DOCTYPE html>
<html lang="en">
<head>
<meta charset="utf-8">
<title>Using the audio element</title>
</head>
<body>
<audio controls="controls" crossorigin="anonymous">
<source src=<https://mainline.i3s.unice.fr/mooc/week2p1/horse.ogg>
type="audio/ogg" />
<source src=<https://mainline.i3s.unice.fr/mooc/week2p1/horse.mp3>
type="audio/mp3" />
Your browser does not support the audio element.
Download the audio/video in
<a href="https://mainline.i3s.unice.fr/mooc/week2p1/horse.ogg">OGG</a>
or <a href="https://mainline.i3s.unice.fr/mooc/week2p1/horse.mp3">MP3</a>
format.
</audio>
</body>
</html>
In this example, just as for the <video> element, we used the controls attribute in order to render the play/stop, time, volume and progress widgets.
Notice the other similarities: between the <audio>...</audio> tags, we added a text message that is displayed if the Web browser doesn't support the <audio> element, and we used several <source>...</source> elements that link to different audio formats for the same file. The browser will use the first format it recognizes.
Lines 13-17: we suggest downloading the audio files if the browser does not support the <audio> element. This is also a best practice!
Live coding transcript: the video element JavaScript API
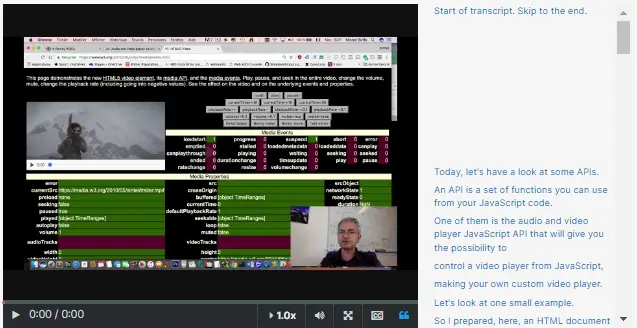
Today, let's have a look at some APIs. An API is a set of functions you can use from your JavaScript code.
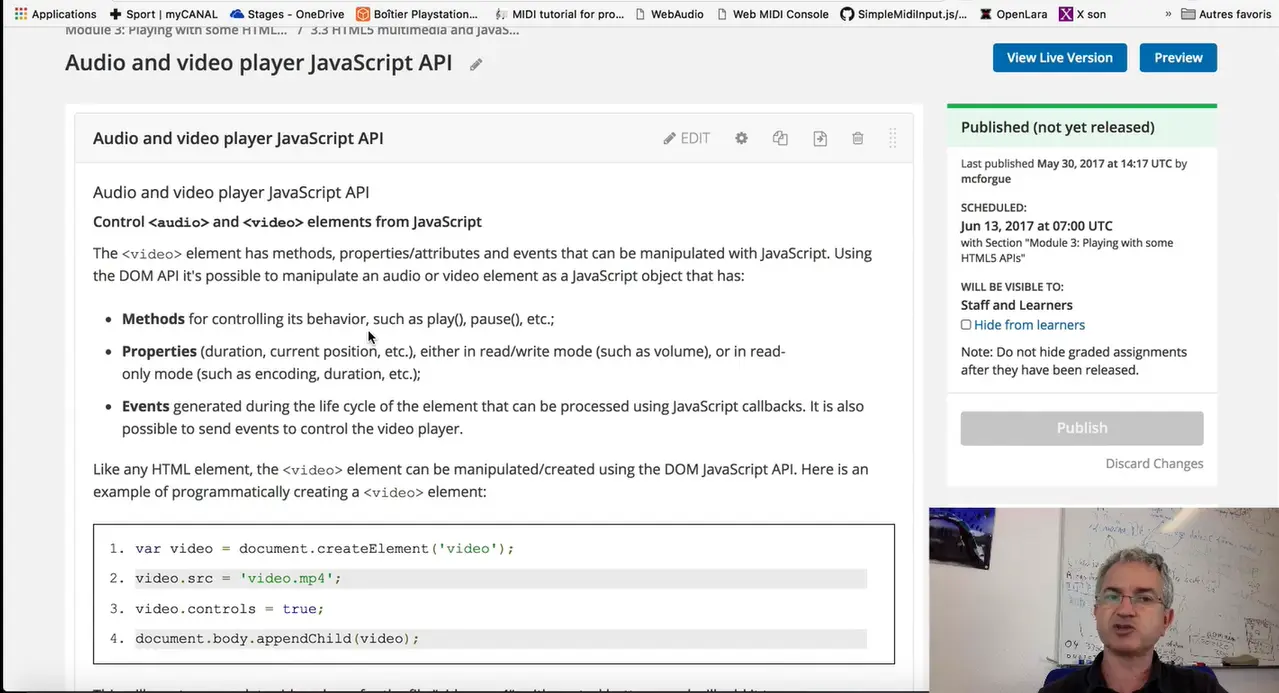
One of them is the audio and video player JavaScript API that will give you the possibility to control a video player from JavaScript, making your own custom video player.
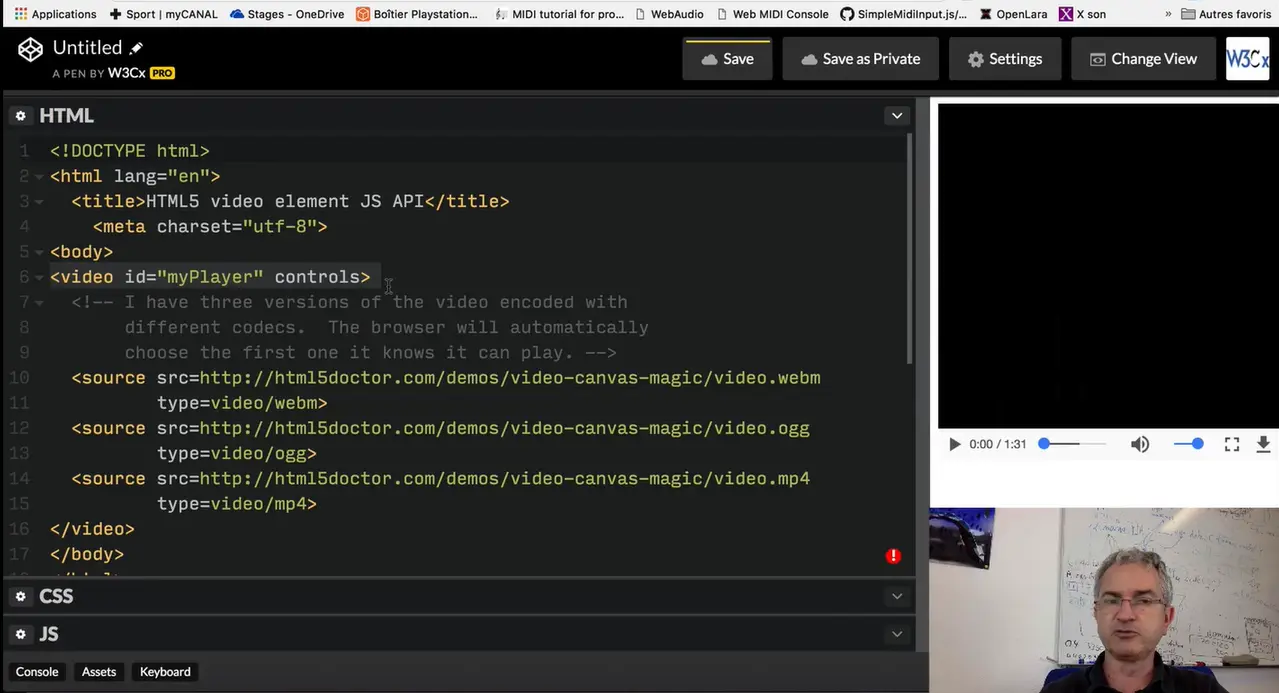
Let's look at one small example. I prepared, here, an HTML document with a video player. In order to include a video player in your document, just use the video HTML5 tag: video... slash video. You indicate with the source tag the URL of the video file that will be streamed into your document. And in order to maximize the compatibility with old browsers, it's recommended to propose the video in different formats. Here, I've got a video file named video.webm, video.ogg, and video.mp4, that is available in different formats.
And when you include a video element with some sources in your HTML document, the browser will ask the remote server and get the video format it prefers. You don't have to wonder which one is the best, your browser will choose.
If I click on the video player, you see that... Ok! By adding a controls attribute it will display a control bar with buttons for play, pause... for adjusting the volume... for going forward and backward video and so on. And if I remove this, you don't have anymore the control, bar so you can make you own control bar for the video player. Let's try it!
I'm going just to add a "play" button. A good way to do this is do use the "onclick" event listener and I will call a function named "playVideo()" that will be located in the JavaScript part of my application. The button will call "playVideo()" and I prepared this function in the JavaScript part: playVideo(). In order to control the video player you must get a reference on it. We used the "querySelector()" method we saw earlier in module 2. We're going to do the same thing. And do you remember that we can access elements from the DOM... you can get references on the HTML elements only when the DOM is ready and when the page have be loaded.
We use "window.onload = init" with an init callback that will executed only when the DOM is ready, and inside this function, we will get a reference to the video player.
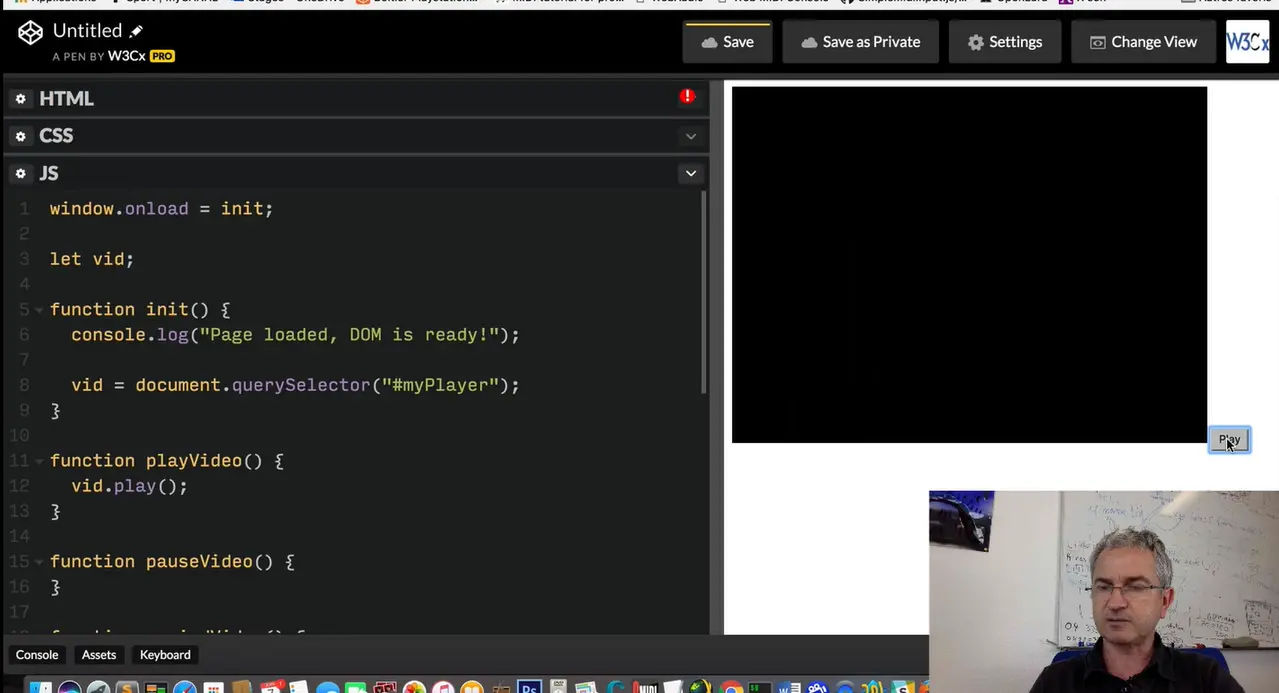
Let's write it. And I will declare this reference as a global variable. Like this. When I click on the button, I will use the JavaScript API of this object -this video player- and I can call "vid.play()". I click on the button and it plays the video. How can you guess the names of the all the methods you can use?
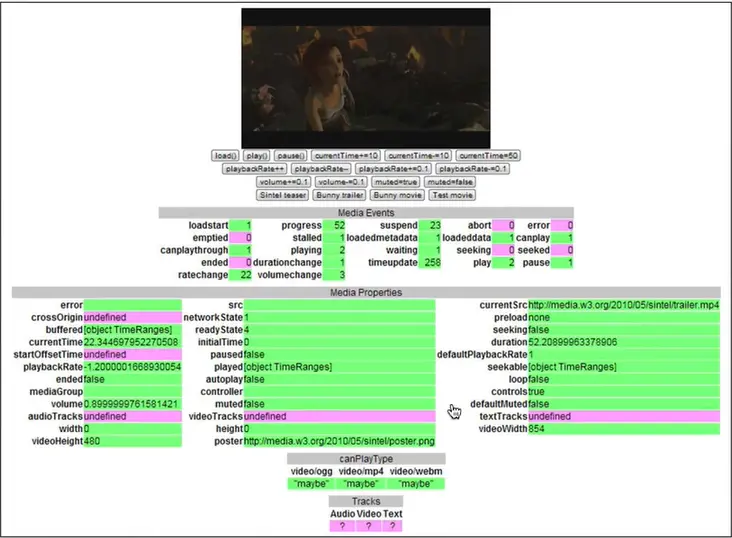
Go to the course, and in the section about the audio and video player JavaScript APIs you got this picture here, that is a link to the W3C specifications. And here you can interactively try the different methods. And the names on the buttons are the names of the different methods you can call when you see parenthesis: play(), pause()...
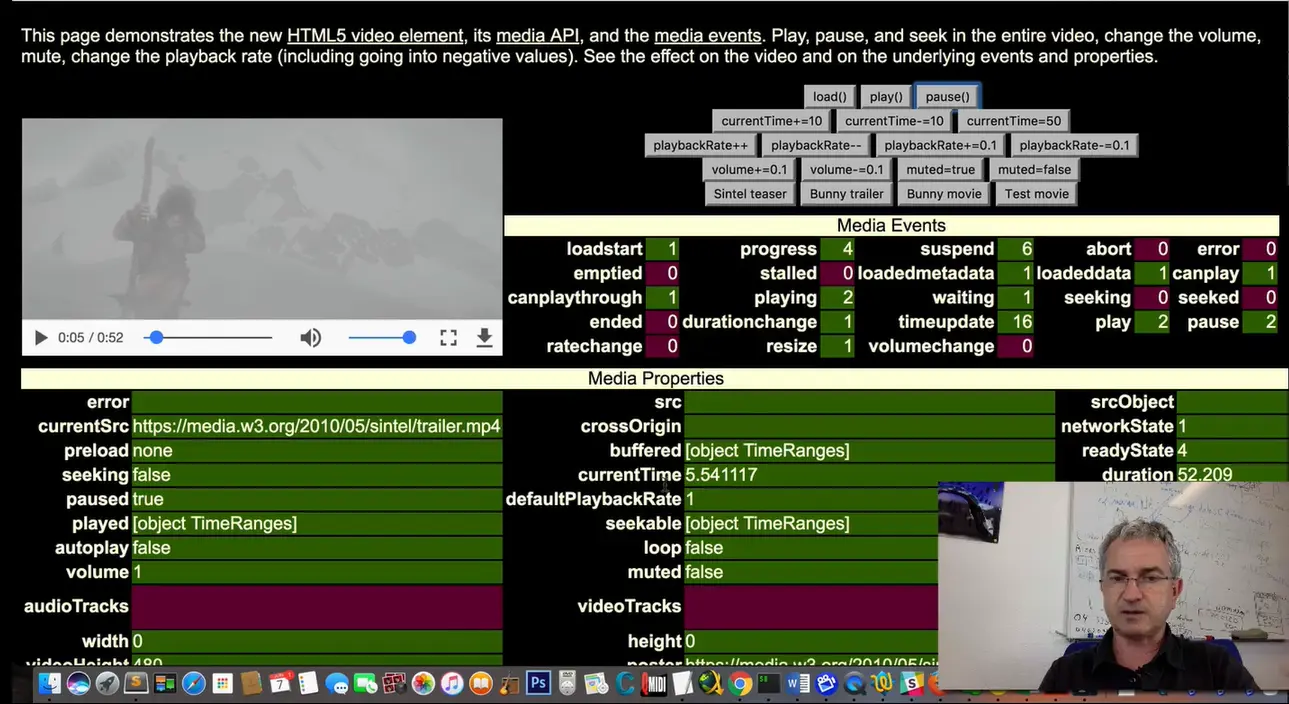
And also you've got properties, these properties you can... you can use them for getting information -what is the current time?- for example. Or you can use them also for setting, changing their values. And for example, going back... if I say current time equals 0, or "currentTime +=10", I'm advancing 10 seconds in the video. Some properties are read only or read and write. You also have events... so you can listen to events while the video is being played. And for example, for synchronizing some contents on the page, for detecting when the video is ended.
The "ended" event here, you can see it and so that you can play another video and do some play lists with the videos that are changed: when one is finished, the other starts and so on.
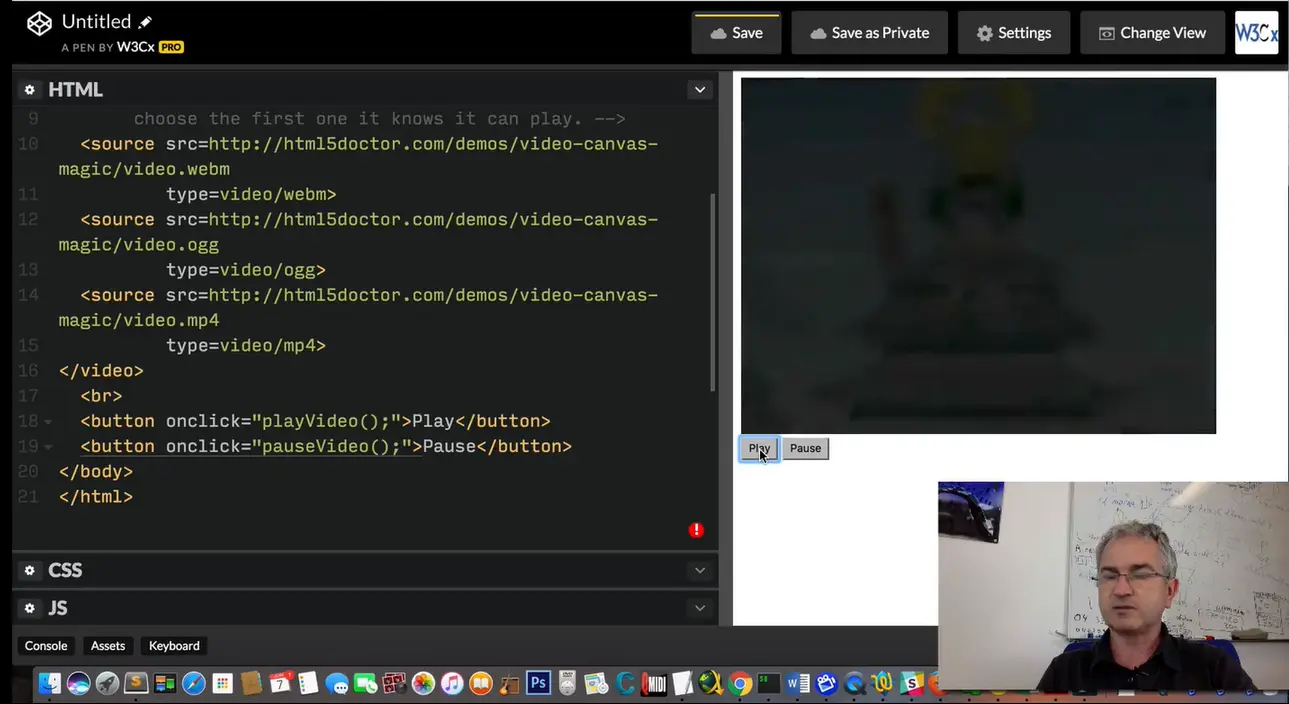
Let's go back our example, and we will just implement the "pause" functionality. And we will add a "pause" button. Now I can play the video and I can pause it.
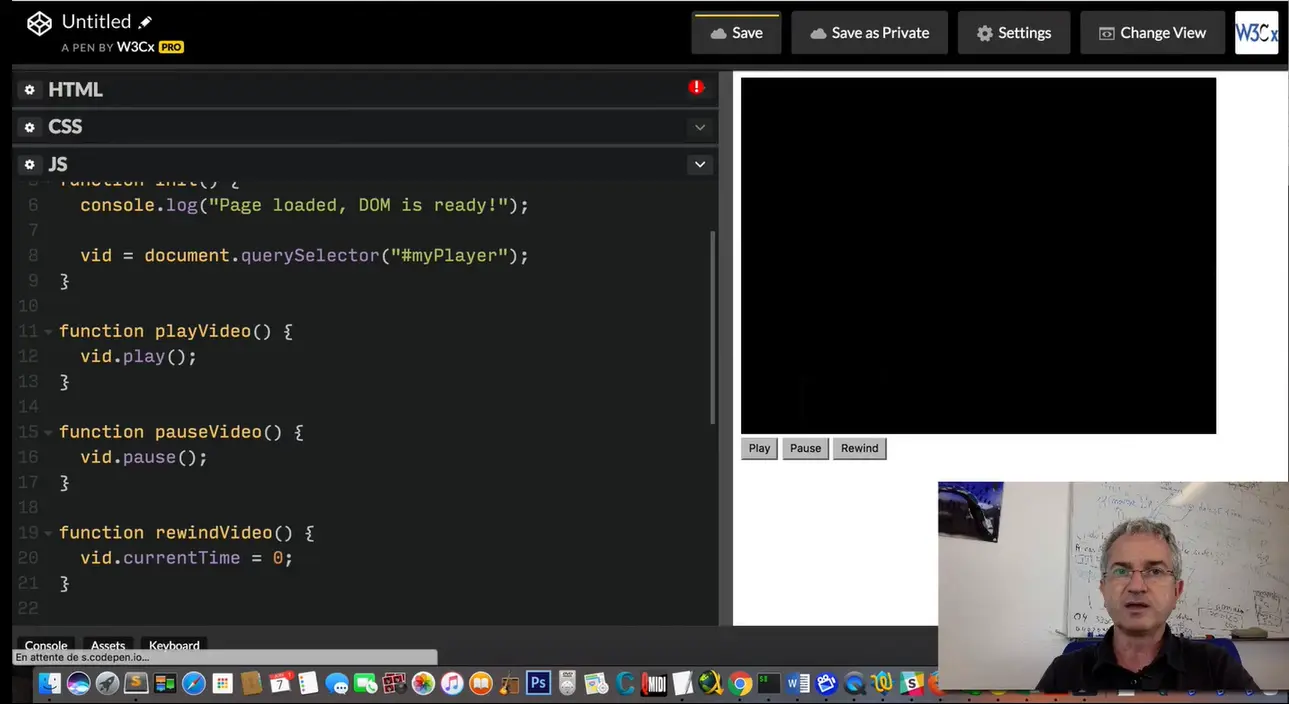
If I want to rewind to the beginning...; let's try again! And in order to do this, instead of calling a method...;we will just use the "currentTime" property and set it to 0. Remember from this document, you see the "currentTime" here, it's a property of the video player object.
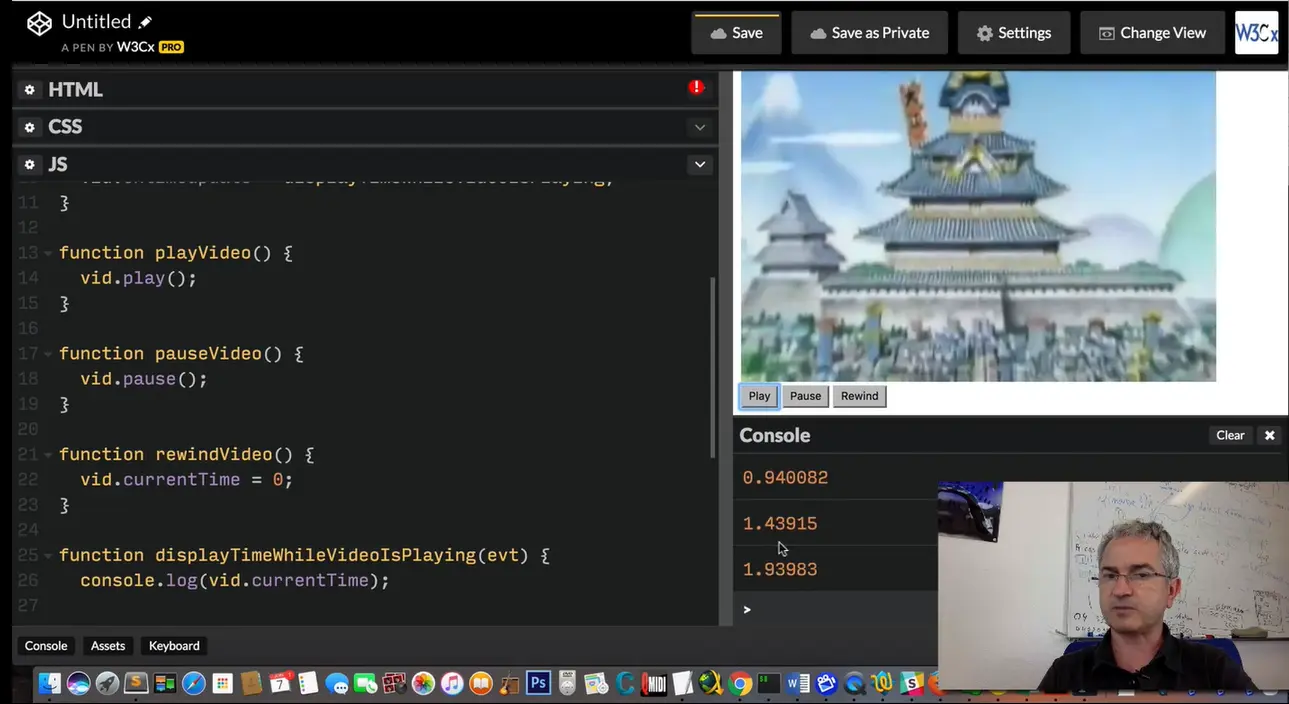
Let's try it, play! Rewind! We start again from zero, and so on. If you want to display the "currentTime" while this video is still played. You can add an event listener on the video element "ontimeupdate = isplayTimeWhileVideoIsPlaying()".
Ok, like this: while the video is being played, this method will be called and we can here, for example, display the currentTime... console.log(). Let's me open the console, play the video and you see the current time. You can make a test: if "vid. currentTime greater than 5 seconds", then we pause the video.
Let's try it. Then for example, you can ask a question, making a quiz related to the video, and so on. Ok, this was just to show you some basics of using the JavaScript API of media elements such as the video audio player.
The <video> element has methods, properties/attributes and events that can be manipulated with JavaScript. Using the DOM API it's possible to manipulate an audio or video element as a JavaScript object that has:
Like any HTML element, the <video> element can be manipulated/created using the DOM JavaScript API. Here is an example of programmatically creating a <video> element:
var video = document.createElement('video');
video.src = 'video.mp4';
video.controls = true;
document.body.appendChild(video);
This will create a complete video player for the file "video.mp4", with control buttons, and will add it to the <body> element of the page.
The JavaScript API gives you powerful tools to manipulate the <video> element, as the video object provides many properties, methods and events.
The complete list of events can be found in the HTML5 living standard specification.
The list of properties can be found at the W3C HTML5 Video Events and API page. This page is interesting for Web developers because it shows an interactive view of the different values and events changing over time while the video is playing within the page.
Try that direct link, play with the different buttons and look at the table of events and properties that will change in real time. The displayed names show the properties, events, and methods from the API.
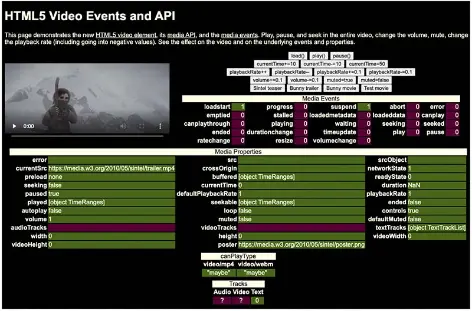
We provide this as a quick reminder - keep in mind that the complete list is much longer!
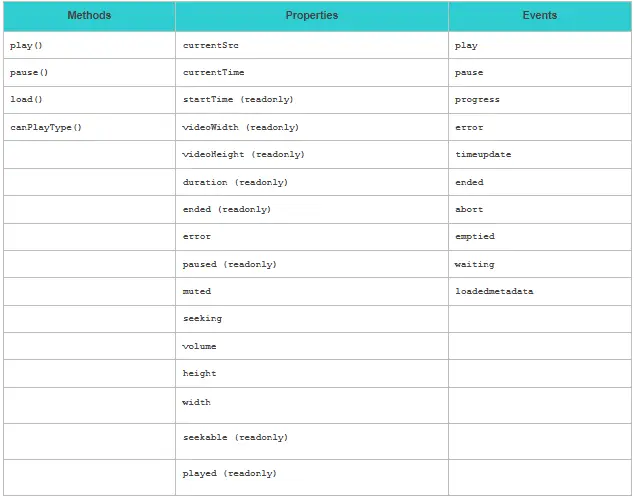
Now let's take a look at a set of examples demonstrating how to use the most important of these properties, methods, and events...;
The JavaScript API is useful for implementing playlists, making custom user interfaces and many other interesting things. The "enhanced HTML5 multimedia players" lesson presented further on in the courses relies heavily on this API.
This example gives the first steps towards writing a custom video player. It shows basic usage of the JavaScript API for adding custom buttons to play/pause the video or to go back to the beginning by setting the currentTime property to zero.


<video id="vid" controls>
<source src=https://mainline.i3s.unice.fr/mooc/samuraiPizzacat.webm
type=video/webm>
...;
</video>
<p>Example of custom controls:</p>
<button onclick="playVideo();" style="cursor: pointer;">Play</button>
<button onclick="pauseVideo();" style="cursor: pointer;">Pause</button>
<button onclick="rewindVideo();" style="cursor: pointer;">
Back to beginning</button>
<script>
vid = document.querySelector("#vid");
function playVideo() {
vid.play();
}
function pauseVideo() {
vid.pause();
}
function rewindVideo() {
vid.currentTime = 0;
}
</script>
This example listens to the ended event, and calls a callback function when the video is ended.

<video src="video.ogv" id="myVideo">
video not supported
</video>
<script type='text/javascript'>
var vid = document.querySelector('#myVideo');
vid.addEventListener('ended', playNextVideo, false);
function playNextVideo(e) {
// Whatever you want to do after the event, change the src attribute
// of the video element, for example, in order to play another video.
}
</script>
This example detects the end of a video, then loads the next video, changes the src attribute of the video element and plays the video.
Check the online example below: use the progress cursor to go near the end of the first video that is being played, and see how it continues with the next video.

<!DOCTYPE html>
<html lang="en">
<head>
<meta charset="utf-8"/>
<title>Sequential Movies</title>
<script>
var myVideo;
var currentVideo = 0;
var sources = [
"https://mainline.i3s.unice.fr/mooc/samuraiPizzacat.mp4",
"https://www.archive.org/download/AnimatedMechanicalArtPiecesAtMit/
P1120973_512kb.mp4"
];
// Set the src of the video to the next URL in the playlist.
// If at the end we start again from beginning (the modulo
// source.length does that).
function loadNextVideo() {
myVideo.src = sources[currentVideo % sources.length]
myVideo.load();
currentVideo++;
}
// listener plays the video.
function loadAndplayNextVideo() {
console.log("playing " + sources[currentVideo % sources.length])
loadNextVideo();
myVideo.play();
}
// Called when the page is loaded.
function init(){
// get the video element using the DOM api
myVideo = document.querySelector("#myVideo");
// Defines a callback function called each time a video ended
myVideo.addEventListener('ended', loadAndplayNextVideo, false);
// Loads the first video when the page is loaded.
loadNextVideo();
}
</script>
</head>
<body onload="init()">
<video id="myVideo"
controls>
</video>
</body>
</html>
It's very easy to use the getUserMedia API for accessing the webcam.
Here is a version that should work on any recent browser except Apple Safari (which still does not support this API). Note that for security reasons you must host your HTML/CSS/JS page on an HTTPS server for getUserMedia to work.
For security reason, these examples cannot run in the course web pages. Click on "Edit on CodePen" to run them.

This is another way of saying, "Please, browser, try to give me access to the webcam, THEN when the webcam is ready, please tell me so that I can display its stream in a <video> element. Otherwise, send me an alert". (note that we've put the alert in a comment in the CodePen below).

In this section, we propose five extended examples that use more JavaScript and more complex CSS manipulation. They might be a little hard to understand if you are a JavaScript beginner, but don't be afraid to try and test them, look at the code, etc.
Some examples are given "as is", such as the custom video player that uses SVG (at the end of the page); if you are interested, you may view the code.
Please see this example online, originally written by Chris Heilmann, and tuned by us ;).

Don't forget to click the JavaScript and CSS tabs of the CodePen in order to display the JavaScript code that creates the buttons on the right of the video, and the CSS that processes the different clicks and applies CSS3 transforms.
This example shows a lot:
This example also shows how to handle failures. See the code and play with this example below:

Below is a piece of code for handling errors during video playback:
...
vid.addEventListener('error', function(evt) {
logEvent(evt,'red');
}, false);
...
function logEvent(evt, color) {
switch (evt.type) {
...;
case 'error':
var error = document.querySelector('video').error;
switch (error.code) {
case error.MEDIA_ERR_ABORTED:
note.innerHTML = "fetching aborted at the user's request";
break;
case error.MEDIA_ERR_NETWORK:
note.innerHTML = "a network error caused the browser to stop
fetching the media";
break;
case error.MEDIA_ERR_DECODE:
note.innerHTML = "an error occurred while decoding the media";
break;
case error.MEDIA_ERR_SRC_NOT_SUPPORTED:
note.innerHTML = "the media indicated by the src
attribute was not suitable";
break;
default:
note.innerHTML = "an error occurred";
break;
}
break;
}
...
}
Check the example below:

Note that on mobile phones, the video does not start until the user presses the play control or clicks on the video picture. Using the "canplaythrough" event is a trick to call a function that starts the video player as soon as the page is loaded on a desktop computer. This event is not supported by mobile devices, so if you try this example on a mobile, the video will not start automatically.
As explained by the Apple Developer Web site: "The buffered property is a TimeRanges object: an array of start and stop times, not a single value. Consider what happens if the person watching the media uses the time scrubber to jump forward to a point in the movie that hasn't loaded yet---the movie stops loading and jumps forward to the new point in time, then starts buffering again from there. The buffered property can contain an array of discontinuous ranges. The example simply seeks the end of the array and reads the last value, so it actually shows the percentage into the movie duration for which there is data. "
<!DOCTYPE html>
<html lang="en">
<head>
<title>JavaScript Progress Monitor</title>
<meta charset="utf-8"/>
<script>
function getPercentProg() {
var myVideo = document.getElementsByTagName('video')[0];
var endBuf = myVideo.buffered.end(0);
var soFar = parseInt(((endBuf / myVideo.duration) ) 100));
document.getElementById("loadStatus").innerHTML = soFar + '%';
}
// Will be called as soon as the page is ready on desktop computer,
// only when a user clicks on play control or image on mobile.
function myAutoPlay() {
var myVideo = document.getElementsByTagName('video')[0];
myVideo.play();
}
function addMyListeners(){
var myVideo = document.getElementsByTagName('video')[0];
myVideo.addEventListener('progress', getPercentProg, false);
// Calls autoplay only if the device is adapted.
myVideo.addEventListener('canplaythrough', myAutoPlay, false);
}
</script>
</head>
<body onload="addMyListeners()">
<h1>Check progression of buffering before playing a movie. Useful
with
slow connections (3G, etc.)</h1>
<div>
<video controls>
<source src=https://html5doctor.com/demos/video-canvas-magic/video.webm
type=video/webm>
<source src=https://html5doctor.com/demos/video-canvas-magic/video.ogg
type=video/ogg>
<source src=https://html5doctor.com/demos/video-canvas-magic/video.mp4
type=video/mp4>
</video>
<p id="loadStatus">Buffering)</p>
</div>
</body>
</html>
This is the ultimate way of doing a real custom player: redesign your own controls using SVG shapes! This example (try it online) is given "as is" for those of you who may be curious.
This is more an example than a tutorial. Maurice, a student who followed the precursor version of this MOOC, had the assignment to write a custom video player with playlist, video thumbnails, custom play/pause/next/previous/volume controls, and present it in a Web page that used a nice layout based on the HTML5 structuring elements studied previously.
Here is the online example. We recommend that you look at the source code:
Please either post your comments/observations/questions or share your creations.
Here are a few ideas to play with the material learned in this section. Your classmates and the team who prepared the course will be happy to look at them and give feedback. Please post URLs of your work in this discussion forum. These projects are optional, meaning that they won't be graded.
Try to write a video player with a few custom buttons for play/stop/etc. When your custom player is done, please add a way to play several videos one after another (what we call a playlist), etc.
See this example created by a student in one of an earlier earlier version of this MOOC: custom player with nice CSS and buttons

Create a quiz based on videos - here is a proposed story telling:
As always, do not forget to post the URL of your work in the forum so that we can enjoy your creation. Michel will inevitably give you his advice(s), and also tell you that you are the best ;))
This chapter presents the new Geolocation API and illustrates its use with several examples.

The Geolocation HTML5 JavaScript API is implemented by most modern Web browsers, and uses different means to get the current location: GPS, GSM/3G triangulation, Wifi, IP address, etc.
It is possible to prompt the user to activate the GPS (this is what most GPS navigation software does on mobile phones), or ask for a particular mean among those available. It is also possible to track the current position when it changes. This is useful for writing a navigation application or for tracking in real time the position of different participants in the case of an application that involves several persons at the same time (using WebSockets, for example).
Browser support for the Geolocation API is excellent, both on mobile and on desktop devices.
This section presents an example of how to get an interactive map, using the Leaflet API for OpenStreetMap, and gives links to more resources. Did you know that you can even get an estimation of a physical address from the longitude and latitude, using online Web services?
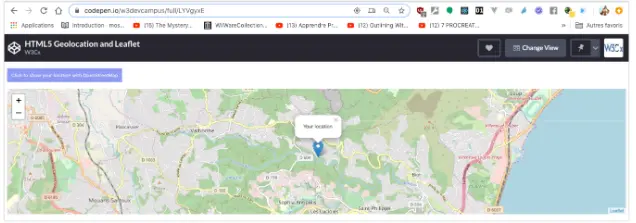
This example is just given "as is", as there are so many possibilities for rendering a map with the Leaflet API for OpenStreetMaps. Leafletjs.com). However, we think having such a basic example might be useful.

<html>
<head>
<meta charset="utf-8">
<title>OpenStreetMap Example</title>
<link rel="stylesheet" href="https://unpkg.com/[email protected]/dist/leaflet.css">
<script src="https://unpkg.com/[email protected]/dist/leaflet.js"></script>
</head>
<body>
<button class="btn" onclick="getLocation(event)">Click to show
your location with OpenStreetMap</button>
<div id="map" class="map"></div>
</body>
</html>
function getLocation(e) {
e.preventDefault();
if (!navigator.geolocation) {
alert("Browser doesn't support geolocation");
} else {
navigator.geolocation.getCurrentPosition(success, error);
}
}
// Get current position successfully.
function success(position) {
var map, marker,
latitude = position.coords.latitude,
longitude = position.coords.longitude;
// Instance map using leaflet.
map = L.map('map').setView([latitude, longitude], 13);
// Tile layer using key api at cloudmade.com.
L.tileLayer('https://{s}.tile.openstreetmap.org/{z}/{x}/{y}.png', {
key: '760506895e284217a7442ce2efe97797',
styleId: 103288,
maxZoom: 16
}).addTo(map);
// Marker using leaflet.
marker = L.marker([latitude, longitude]).addTo(map);
// Popup in leaflet.
marker.bindPopup('<p>Your location</p>').openPopup();
}
// Get current position fail.
function error() {
alert('Get current position fail. Please access codepen to get geolocation.');
}
cDifferent Web services can be used to get an address from longitude and latitude. Most are free of charge, but they will ask you to register an API key and enter your credit card number. If you send too many requests, you will be charged.Such a service is the [Google Reverse Geocoding JavaScript API](https://developers.google.com/maps/documentation/javascript/examples/geocoding-reverse). For those of you who are really interested to know how this API works, please read the Google documentation and tutorials.
There is also an interesting Leaflet plugin (an extension to Leaflet) based on the [Gisgraphy](https://www.gisgraphy.com/) (free open source framework) service, that comes with a [nice demo of reverse geocoding](https://services.gisgraphy.com/static/leaflet/index.html). Let's see some examples of use.Google reverse geocoding example (screenshot only):
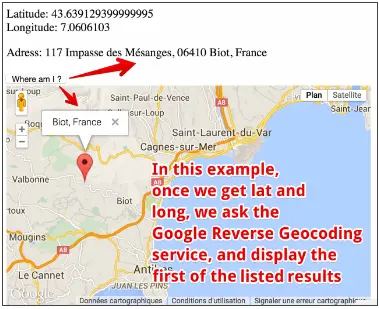
Source code of this example (in order to run it, you need a Google API key, used at line 6).
<!DOCTYPE html>
<html lang="en">
<head>
<meta charset="utf-8">
<title>Js bin </title>
<script src="https://maps.googleapis.com/maps/api/js?key=PUT_HERE_YOUR_API_KEY&v=3.exp&sensor=false"></script>
<script>
// p elements for displaying lat / long and address
var displayCoords, myAddress;
// used with the google apis
var geocoder;
var map;
var infowindow = new google.maps.InfoWindow();
var marker;
// Called when the page is loaded
function init() {
displayCoords=document.getElementById("msg");
myAddress = document.getElementById("address");
geocoder = new google.maps.Geocoder();
// In order to show something even before a user clicks on the button
var latlng = new google.maps.LatLng(34.0144, -6.83);
var mapOptions = {
zoom: 8,
center: latlng,
mapTypeId: 'roadmap'
}
map = new google.maps.Map(document.getElementById('map_canvas'), mapOptions);
} // end of init()
// Called when the button is clicked
function getLocation() {
if (navigator.geolocation) {
navigator.geolocation.getCurrentPosition(showPosition);
} else {
displayCoords.innerHTML="Geolocation API not supported by your browser.";
}
}
// Called when a position is available
function showPosition(position) {
displayCoords.innerHTML="Latitude: " + position.coords.latitude +
"<br />Longitude: " + position.coords.longitude;
// Display the map
showOnGoogleMap(new google.maps.LatLng(position.coords.latitude,
position.coords.longitude));
}
function showOnGoogleMap(latlng) {
// Ask google geocoder for an address once we get a longitude and
// a latitude. In fact, the reverse geocoder sends back an array of "guesses"
// i.e. not just one address object, but several. Each entry in this array
// has several properties such as street, city, etc. We use the "formatted_address"
// one here, but it might be interesting to get the detailed properties in other
// applications like a form with street, city, zip code etc.
geocoder.geocode({'latLng': latlng},reverseGeocoderSuccess);
function reverseGeocoderSuccess(results, status) {
if (status == google.maps.GeocoderStatus.OK) {
if (results[1]) {
map.setZoom(11);
marker = new google.maps.Marker({
position: latlng,
map: map
});
infowindow.setContent(results[1].formatted_address);
infowindow.open(map, marker);
// Display address as text in the page
myAddress.innerHTML="Adress: " + results[0].formatted_address;
} else {
alert('No surface address found');
}
} else {
alert('Geocoder failed due to: ' + status);
}
} // end of reverseGeocoderSuccess
} // end of showOnGoogleMap
</script>
</head>
<body onload="init()">
<title>HTML5 + Geolocalisation + Google Maps API Reverse Geocoding</title>
<p id="msg">Click the button to get your coordinates:</p>
<p id="address"></p>
<button onclick="getLocation()">Where am I ?</button>
<div id="map_canvas" style="width: 500px; height: 300px"></div>
</body>
</html>
Gisgraphy (free service) reverse geocoding example (screenshot only, click on it to see the demo on the Gisgraphy website):
Important note: these examples below rely on an external GitHub resource. No related questions are asked in this module's exercises or final exam.
Please, pan and zoom on the map and click. The longitude and latitude are computed from your click and a free reverse geocoding service is used to convert to a physical address.

Click on the Codepen logo on the top right to open the example in Codepen. Due to security reasons, it cannot run embedded in this page.

This is just a variation of the previous examples. We embedded the interactive map in a form, and we display the results of the reverse geocoder in a form field. This example might be useful if you want to pre-fill the address of a registration form, depending on the current location of the person who is registering.
Click on the Codepen logo (on the top right) to run the online example (for security reasons the embedded version cannot run in this page):

Here is the discussion forum for this part of the course. Please either post your comments/observations/questions or share your creations.
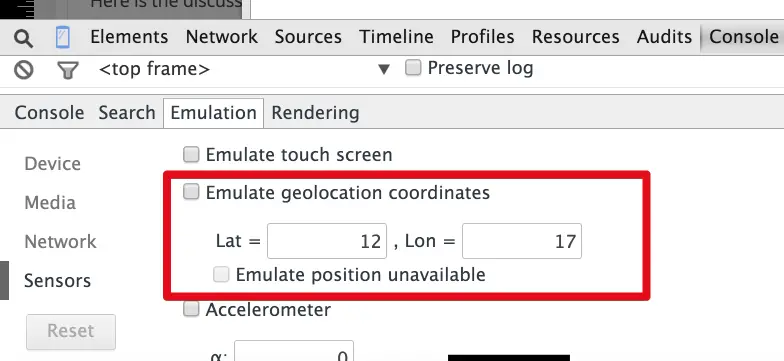
Warning about the autoplay policy
Since 2018, most browsers have adopted the Autoplay Policy that prevents any Web page to start making music or playing sounds without a user interaction.
For a user, it means that most examples from this course won't make sounds until you interact with the application (i.e. clicking on the canvas for the game example). For a developer, if you use libraries such as Howler.js, there are good chances that you won't have to change your code. If you are programming with the WebAudio API, then you'll need to resume the AudioContext after the first user interaction.
In a previous section, we saw how we can add music to our Web page, using the <audio></audio> element. We can even hide its GUI and control the play/pause of the music from JavaScript. Streaming music is perfect for providing a background atmosphere in a video game.

The same way we made the small custom video player, you can also use the audio HTML element that is similar in its use to the video HTML element, for adding to your page an audio player.
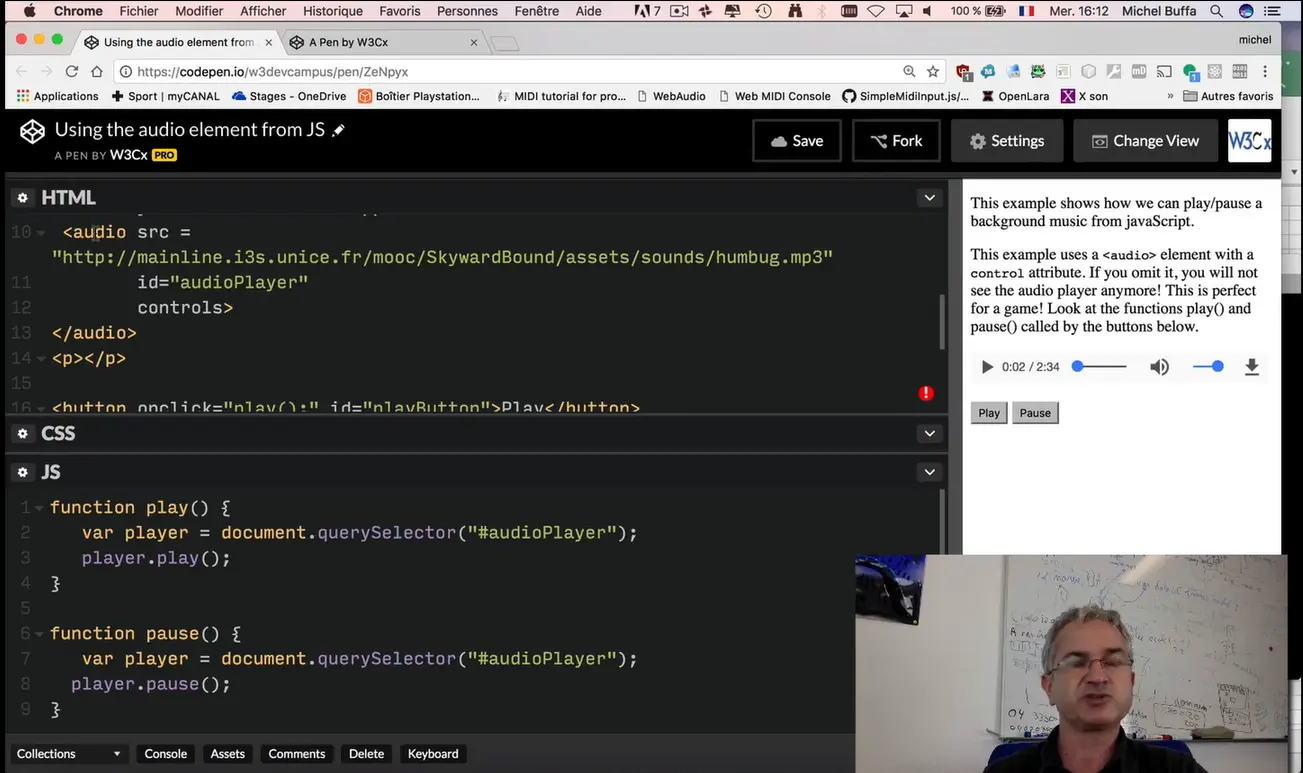
Here, the audio is streamed from a remote server, the same way with the video element, a video movie is streamed from a remote server.
If you want to add background music to your game, you can use the audio player, but of course you will want to hide completely the buttons. If I remove the controls attribute. Then, I can completely hide the player.
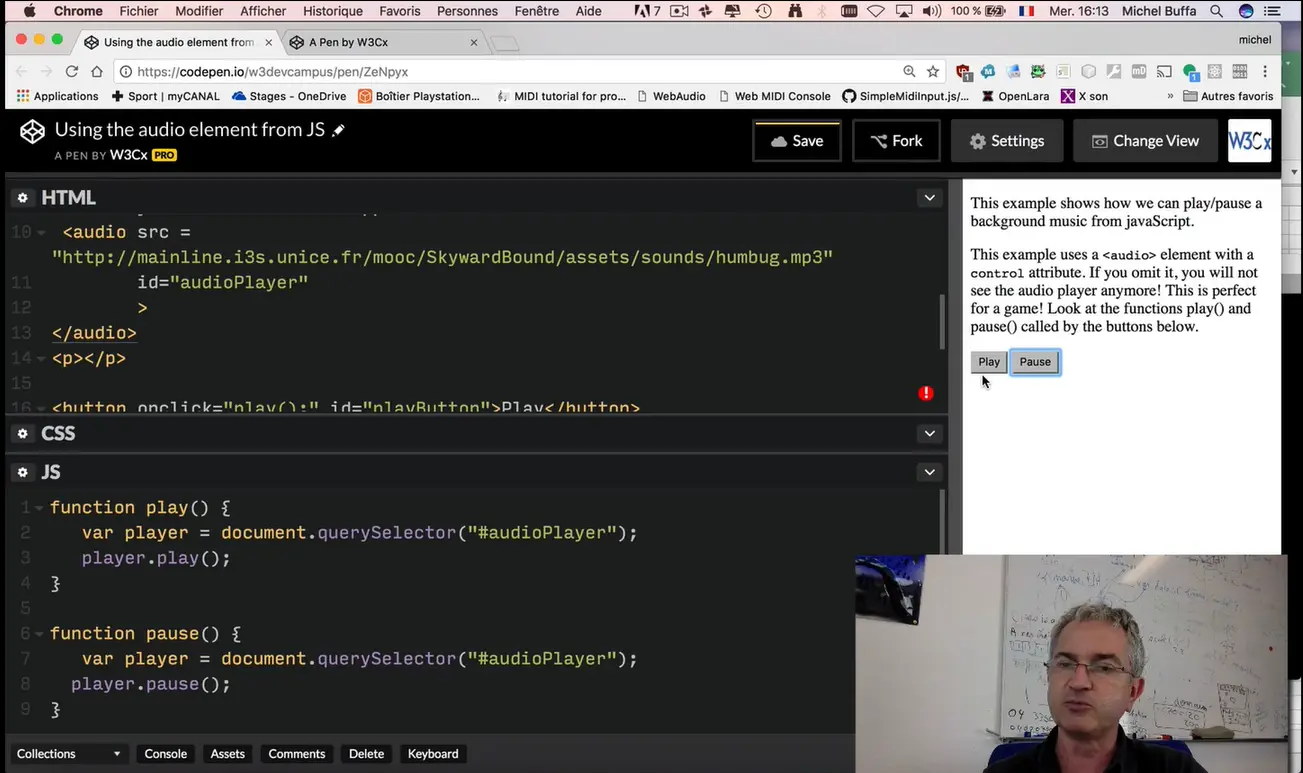
Here, I kept some buttons for playing music or pausing it. But you saw that you can start playing the music from JavaScript. You can also) directly start the music when the page is loaded. The same way I use the video player, I declare an audio player, here.
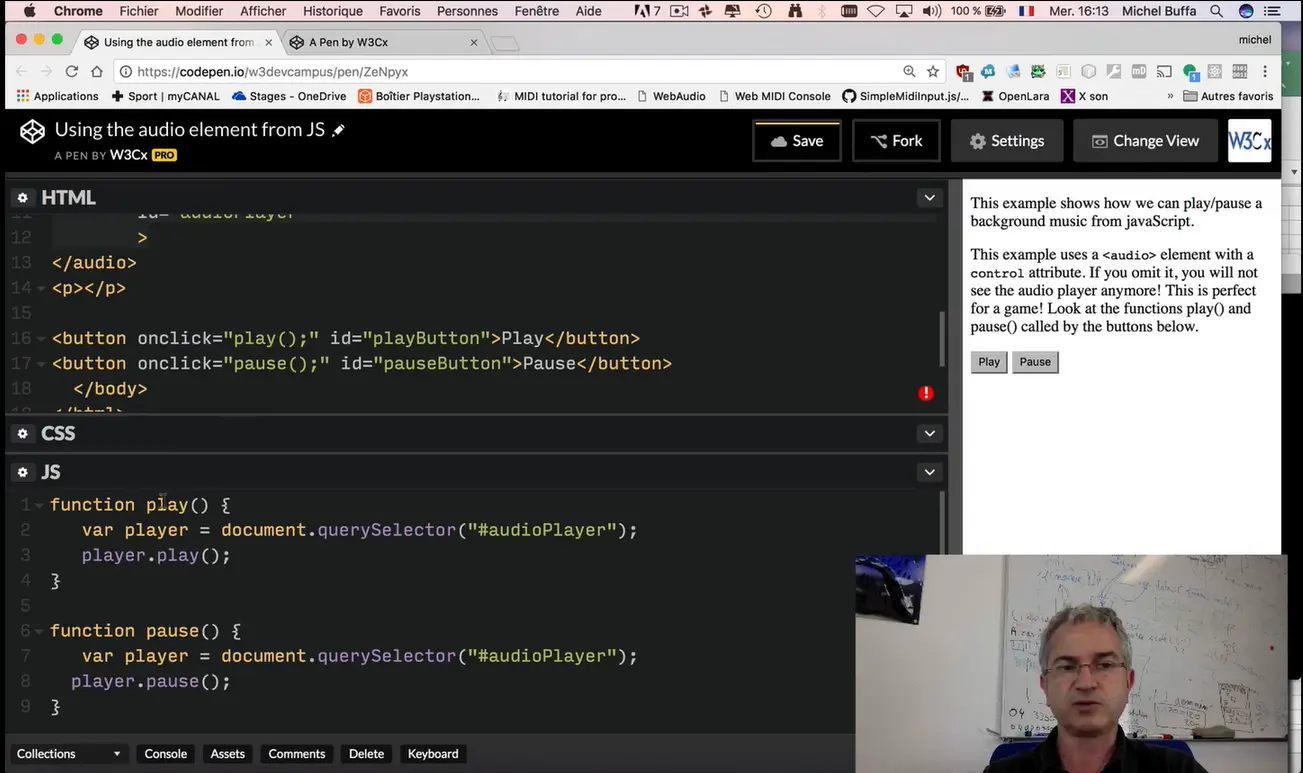
And in JavaScript, I've got my button onclick="play()" that will call a play function, that will get a reference on the player.
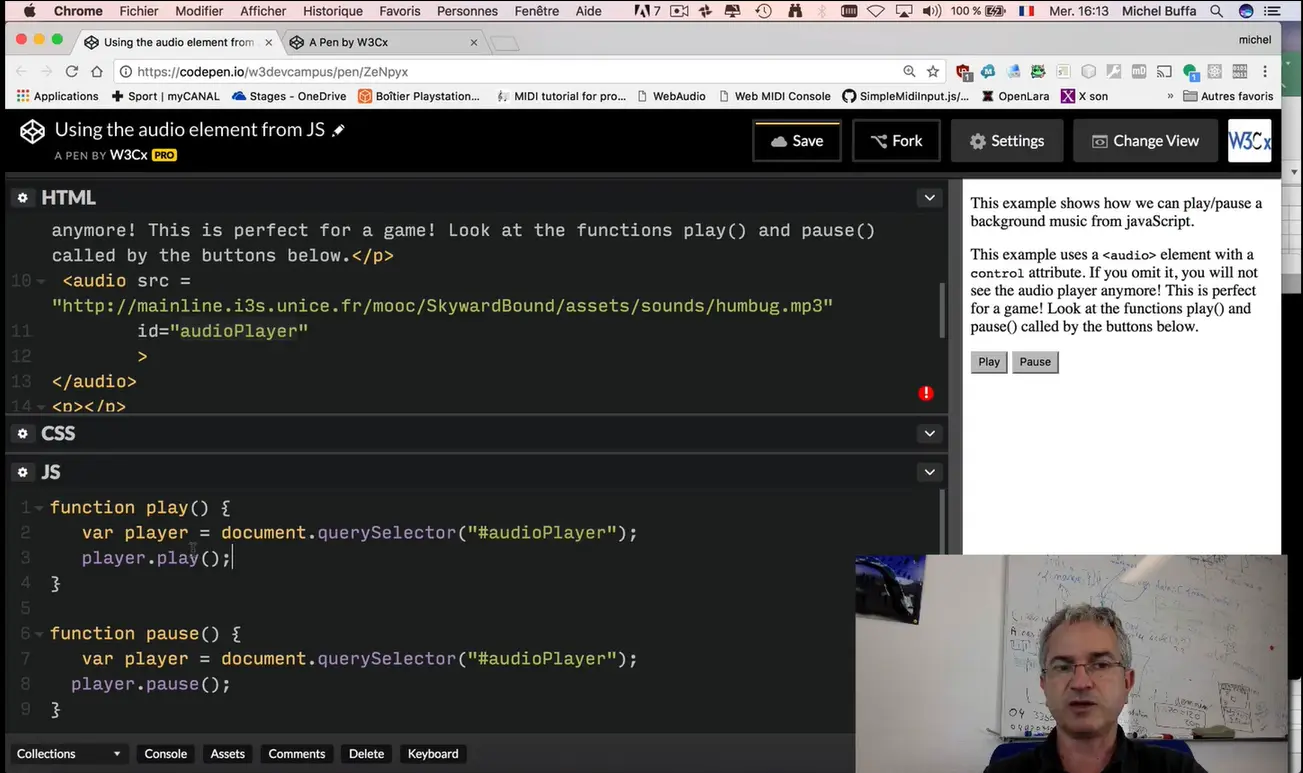
This is the id of the player. You can see it here. And I'm calling the play and pause methods to play and pause the music.
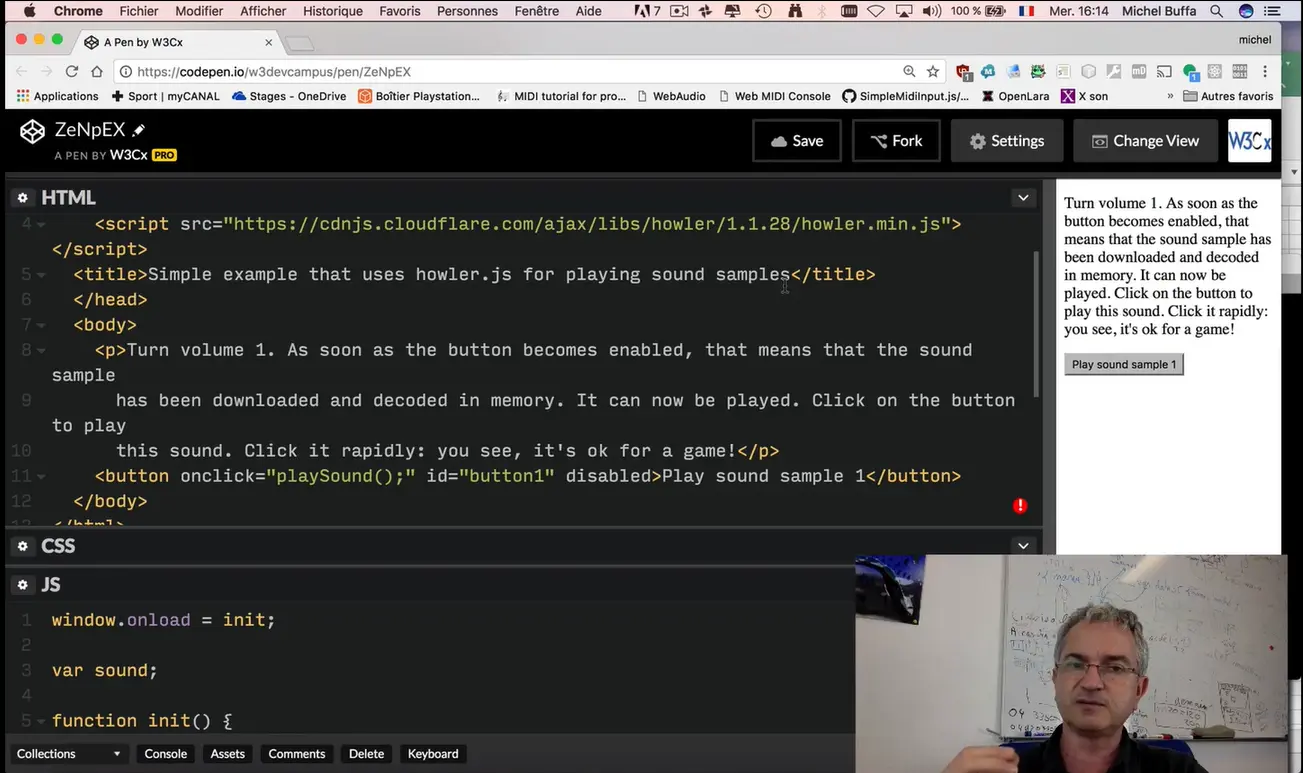
For sound effects, that will have to be played very fast,) that last a very short time. It's better to load the sounds in memory and then play them. There are small sounds samples that are loaded and decoded and kept in memory for a very fast use within video games. It's a bit complicated to use the low level WebAudio API. Some developers made some high level libraries for making this task easier. One of them is called howler.js.
This is the Web site --- howler.js "Make working with audio in JavaScript easy". You can read the documentations and look at samples here. The way we used it, is that we've just including it using a script tag.
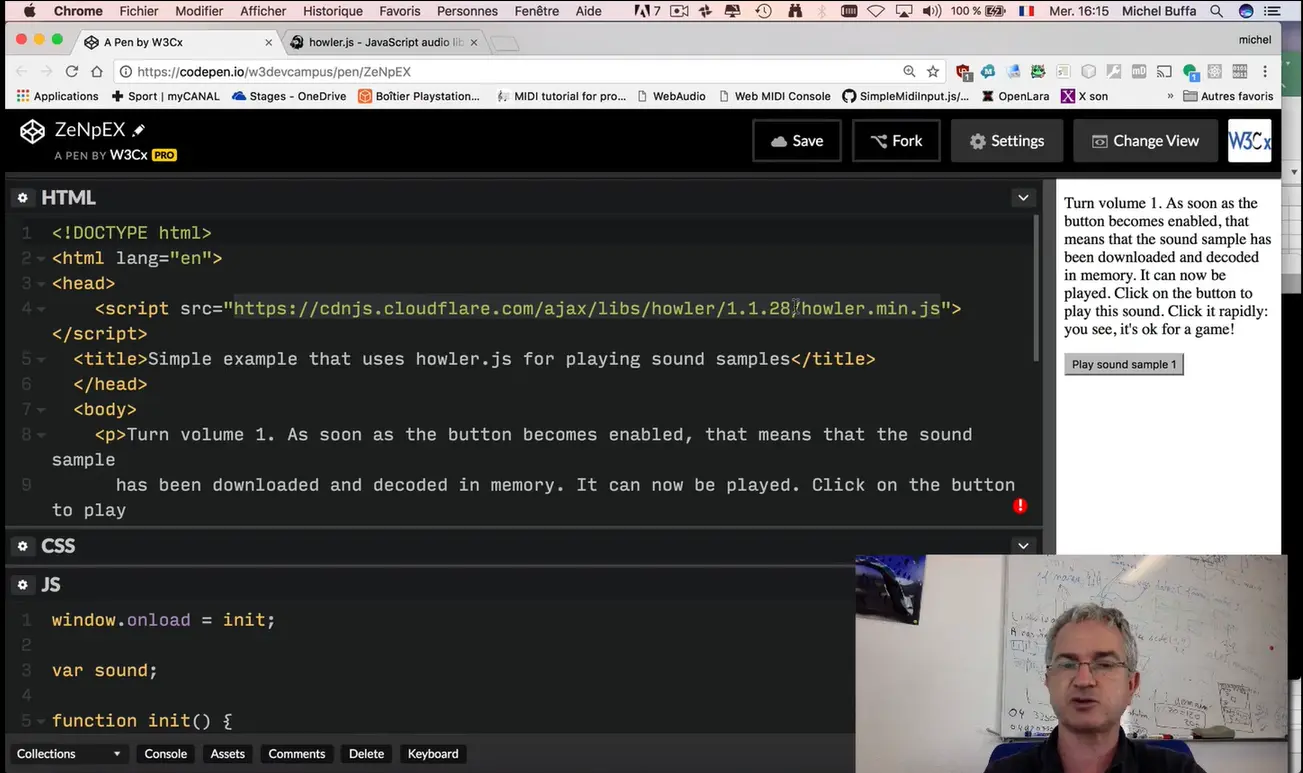
This is the inclusion of a minified, a very short version of this library. And then from JavaScript, you can use it.
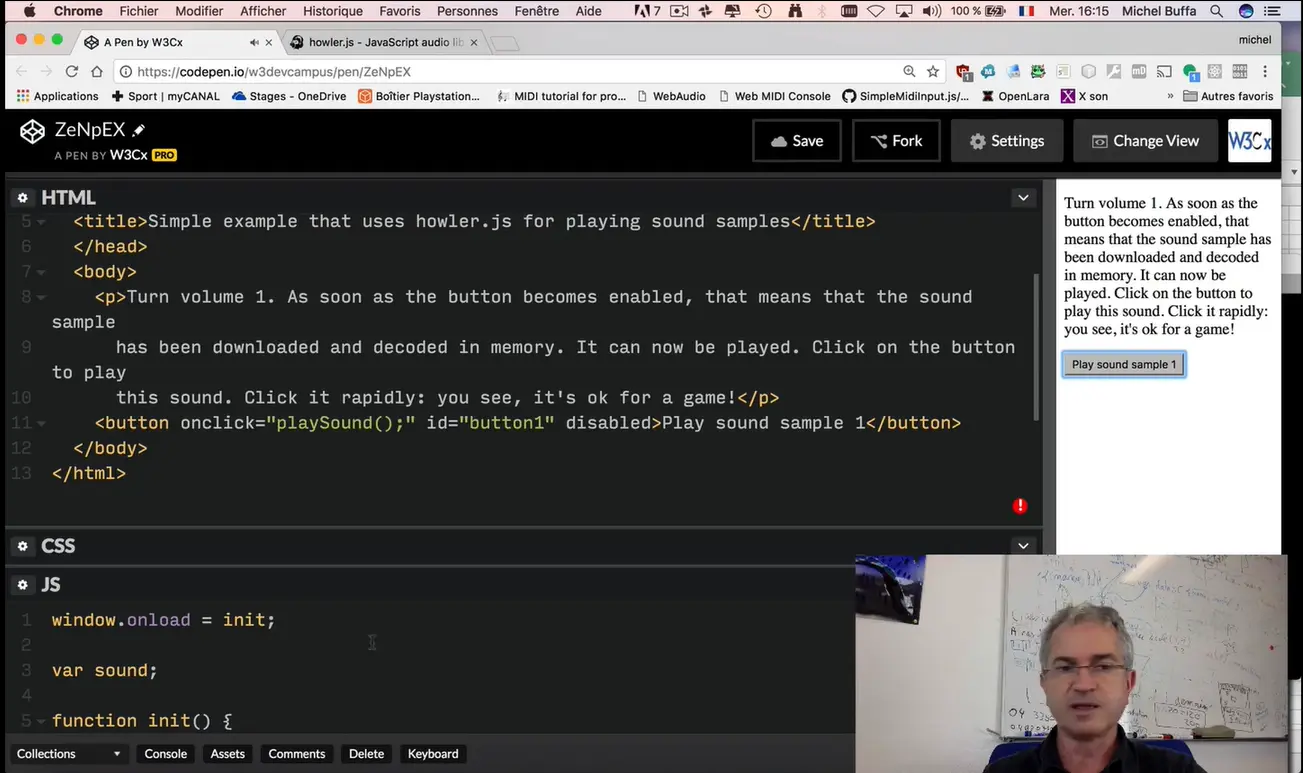
Here we've got a button that will play a very short sound... you see. Let's look at the way the play sound is implemented.
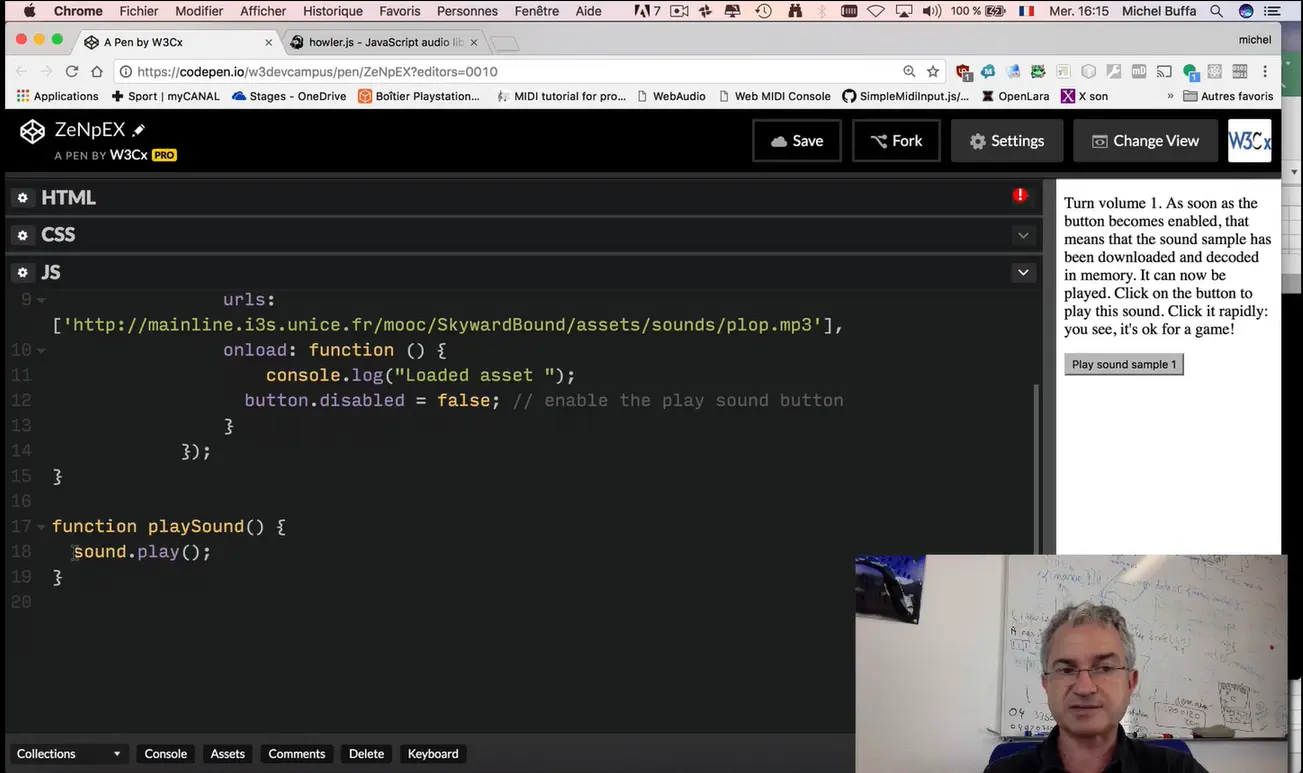
The play sound function just does "sound.play();", but the sound we are referring to, here, has been loaded when the page was ready.
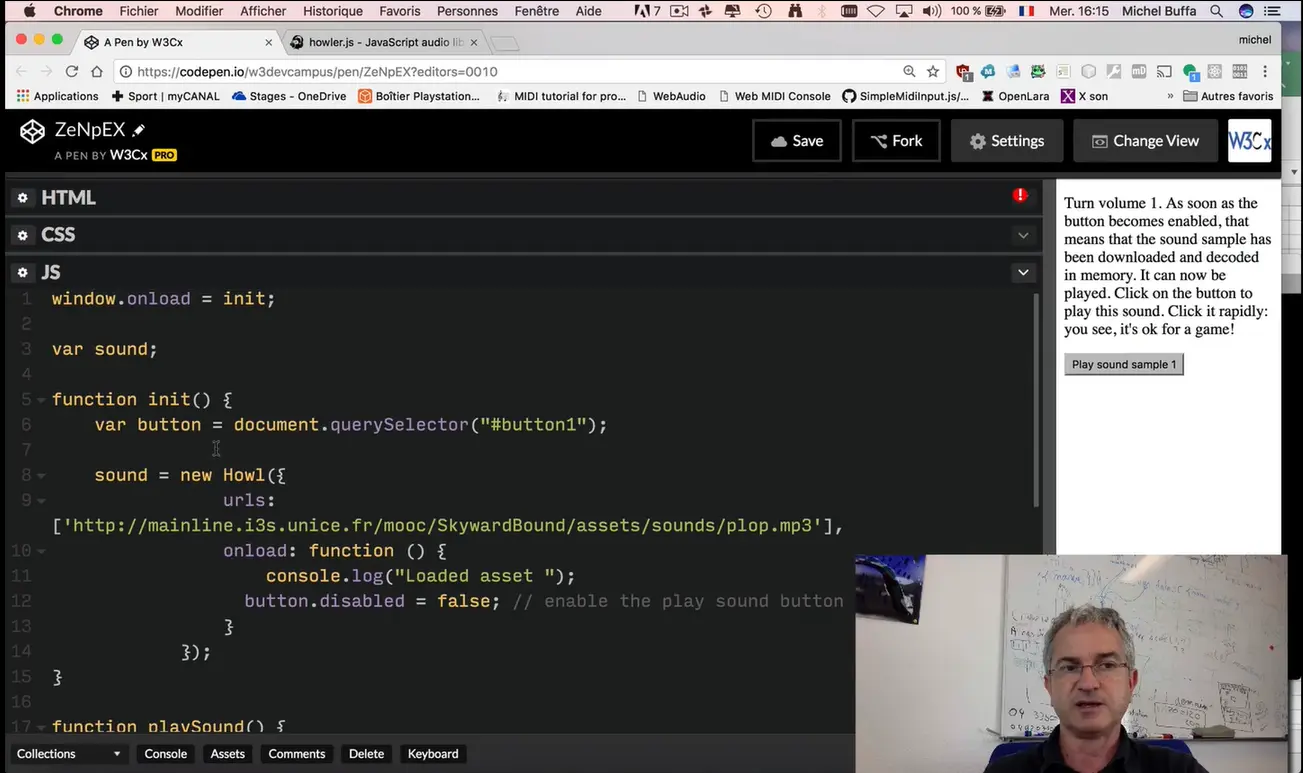
So "window.onload = init;"... You saw that many times now. From then, we use the Howl library like this. "new Howl": you indicate the URL of your audio file and you've got a callback. A callback is a function that will be executed when the sound has been loaded and decoded. What we do here, is that, by declaring "sound=new Howl", we ask the Howl library to load and decode the sound.
Then, it tells us when the sound is ready to be used and in that case, we enable the button that is greyed and not clickable by default.
If you want to play short sounds that can occur very rapidly, streamed sound/music is not a good solution. This is where the WebAudio API, made by W3C and implemented by your browser, comes in handy. This API allows you to download and decode sound samples in memory, and play them on demand, using nearly zero CPU and with no delay when you play the sound (no buffering etc.).
However, this API is a bit complicated to use for beginners. Fortunately there are several JavaScript libraries that simplify the use of the WebAudio API. HowlerJS is one of these.

<!DOCTYPE html>
<html lang="en">
<head>
<script src="https://cdnjs.cloudflare.com/ajax/libs/howler/1.1.28/howler.min.js"></script>
<title>Simple example that uses howler.js for playing sound
samples</title>
<meta charset="utf-8">
</head>
<body>
<p>Turn volume 1. As soon as the button becomes enabled, that
means that the sound sample
has been downloaded and decoded in memory. It can now be played.
Click on the button to play
this sound. Click it rapidly: you see, it's ok for a game!</p>
<button onclick="playSound();" id="button1" disabled>Play
sound sample 1</button>
</body>
</html>
window.onload = init;
var sound;
function init() {
var button = document.querySelector("#button1");
sound = new Howl({
urls: [ 'https://)/assets/sounds/plop.mp3'],
onload: function () {
console.log("Loaded asset ");
button.disabled = false; // enable the play sound button
}
});
}
function playSound() {
sound.play();
}
The important part is located in lines 5-9: the Howler library is to be used like this: sound = new Howl({...}); The part between the { and } is an object. The url's property is an array with at least one element: the URL of the sound we want to use, located on remote servers. The call to new Howl({...}); will start downloading the sound in background, then, once it has loaded, it will "decode it" (i.e., an mp3 file will use some cpu to be decoded on the fly and played, whereas a decoded sound will use nearly zero cpu, which makes it good for games!).
Finally, once the sound is decoded, the onload callback is executed. In other words, the function after onload: will be executed (at lines 7-9). In this callback, we enable the button because the sound is ready to be played.
The playSound function can only be called when the button is enabled (when the sound sample has been loaded and decoded). In order to play a sound loaded by Howler.JS, we just call the play() method (line14).
Here is the last version of the game from Module 2 with music and sound effects (when the player eats a ball):
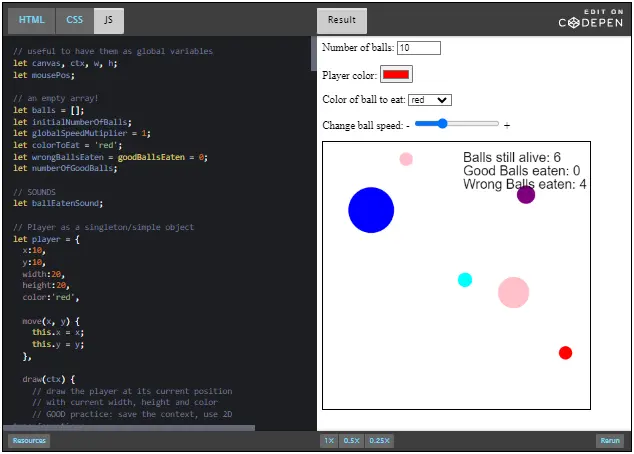
Look at the HTML part: we included the Howler.js library and we also added an <audio> player (invisible; we removed the controls attribute) for background music.
In the JavaScript code, we start the background music as soon as the page is loaded.
We then used HowlerJS to load a sound sample in background. Only once this sample has been loaded and decoded do we start the animation.
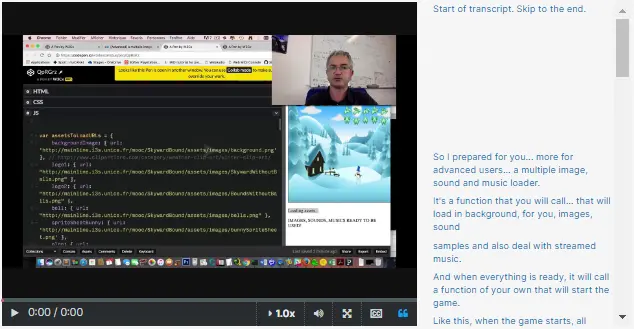
I prepared for you) more for advanced users) a multiple image, sound and music loader.
It's a function that you will call) that will load in background, for you, images, sound samples and also deal with streamed music. And when everything is ready, it will call a function of your own that will start the game.
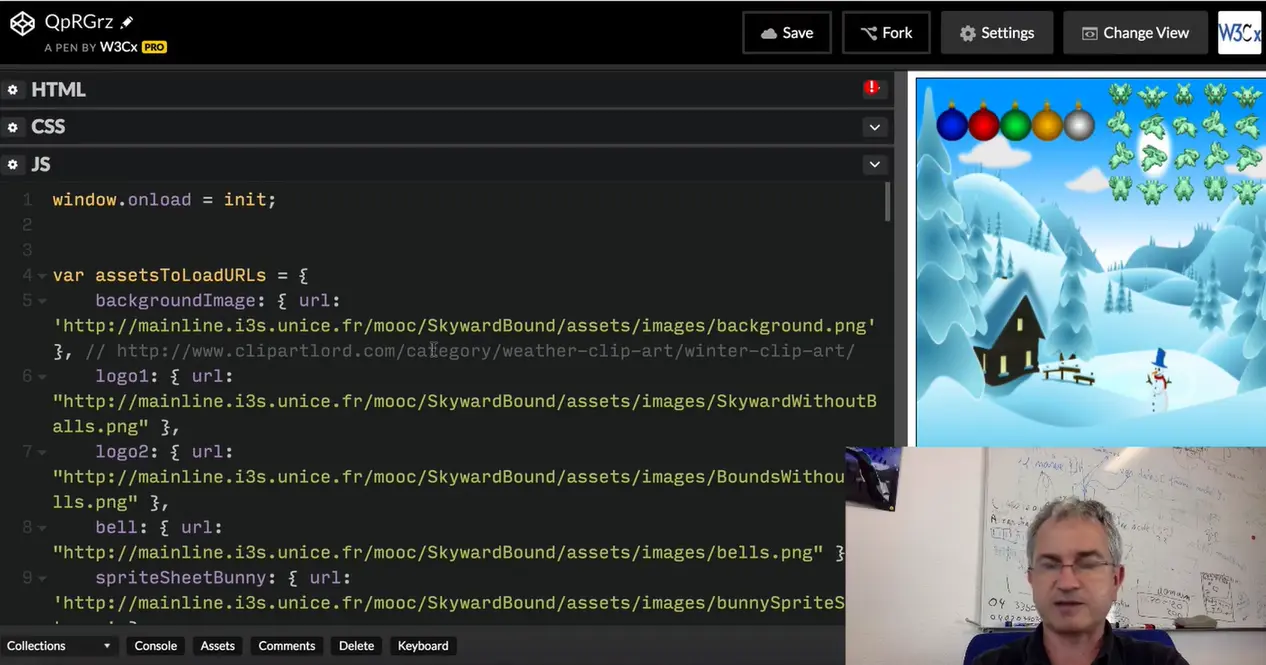
Like this, when the game starts, all images, musics and sounds are ready to go. Let's have a look at it. Here is how it looks like. You define an object called "assetsToLoadURLs" and you indicate the names of the musics, of the sound samples or of the images you want to load, and you indicate their URLs. So "backgroundImage" it's a PNG, logo it's a PNG, "plop" it's a MP3.
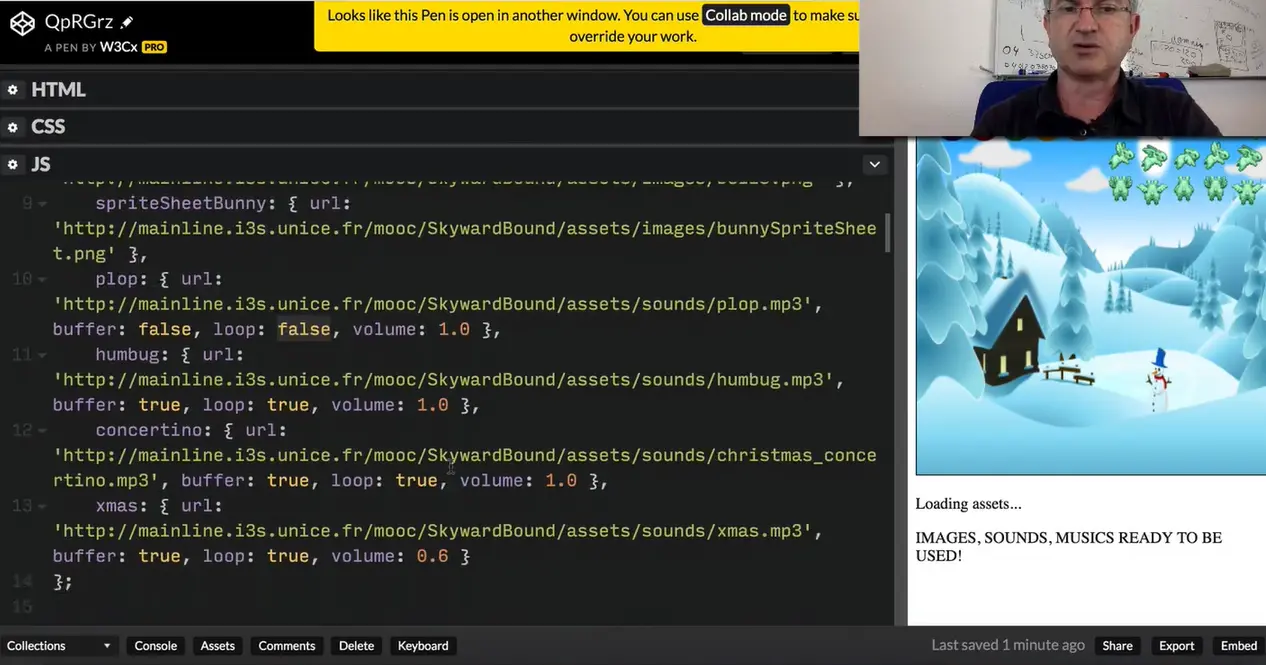
And you can also indicate if it's going to be streamed or loaded and decoded in memory for fast access. You can indicate if it's gonna loop, start again at the end. You can indicate the volume) and it will do everything for you. You can indicate background music with "buffer: true", "loop: true". This is a background music will be looped in the background. How do you load all these assets?
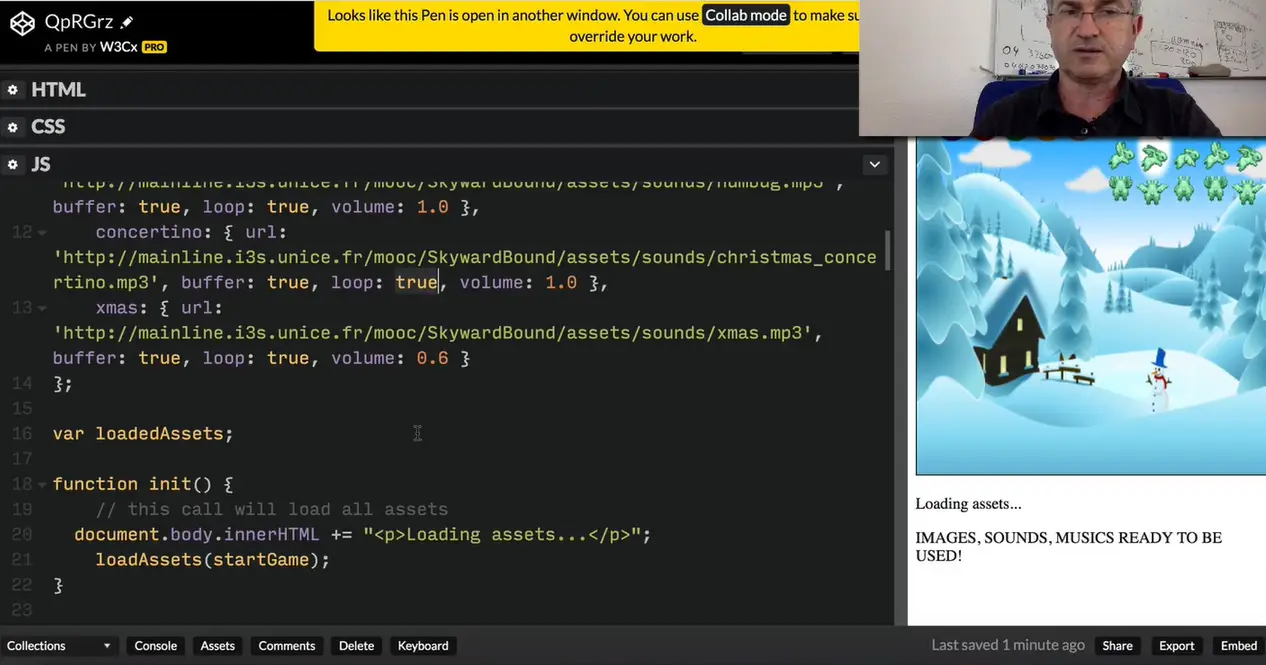
You use the "loadAssets()" function that is provided at this end of this source file but you don't have to look at the details. You don't have to understand in details how it works. Here, in the init() function called when the page is loaded, we display the "Loading assets" ) "Loading assets" message. Then we call "loadAssets()" and we pass the name of the function that will really start the game.
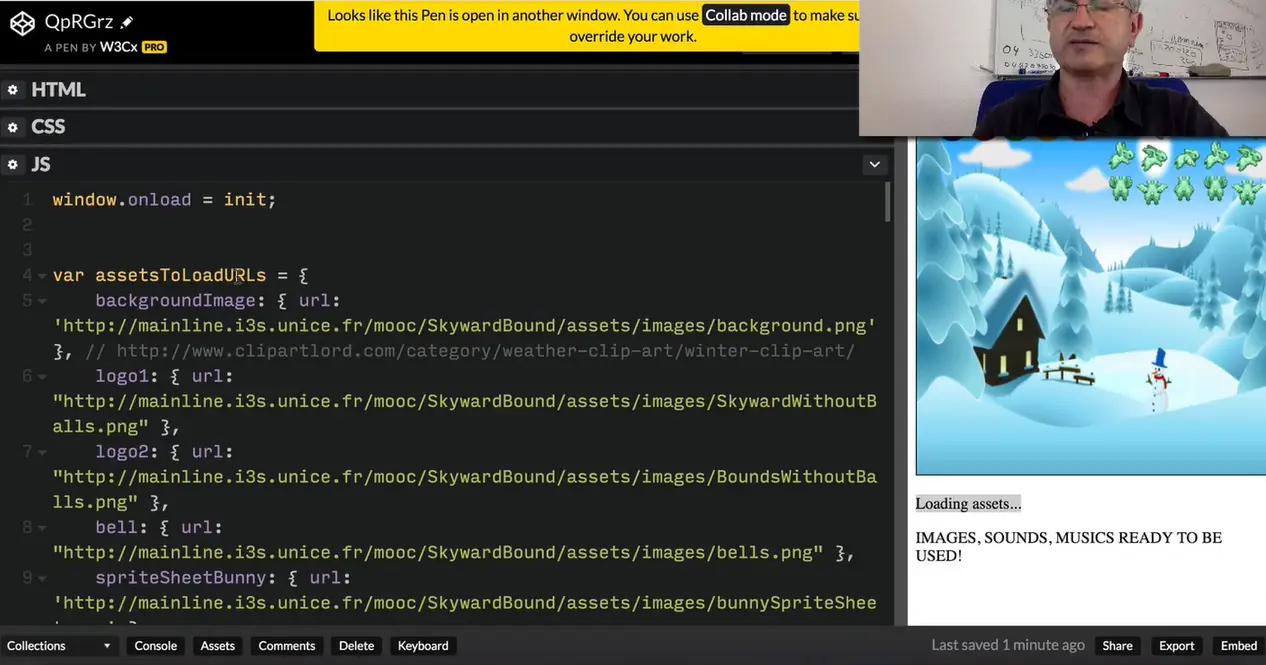
This is where you will start animation, drawing, playing music and so on. And this "loadAssets()" function will use this "assetsToLoadURLs" object we talked earlier.
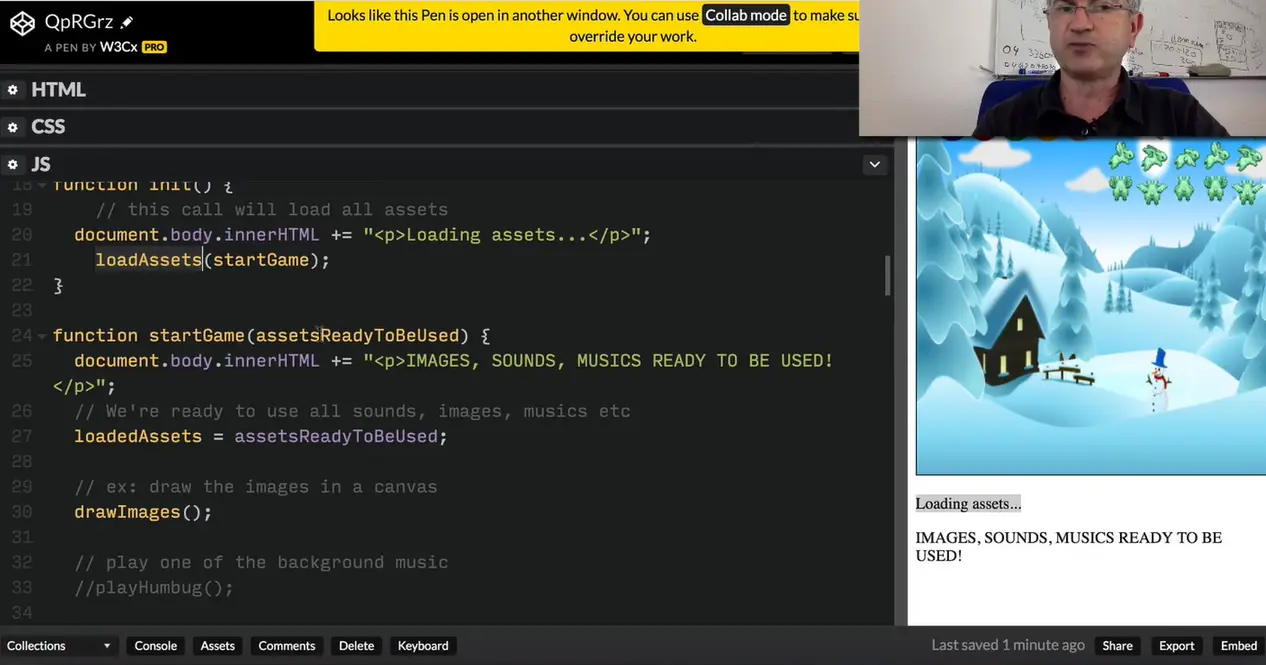
Look in the "startGame()" function we're going to use this now. And how are we going to use this for playing music for example?
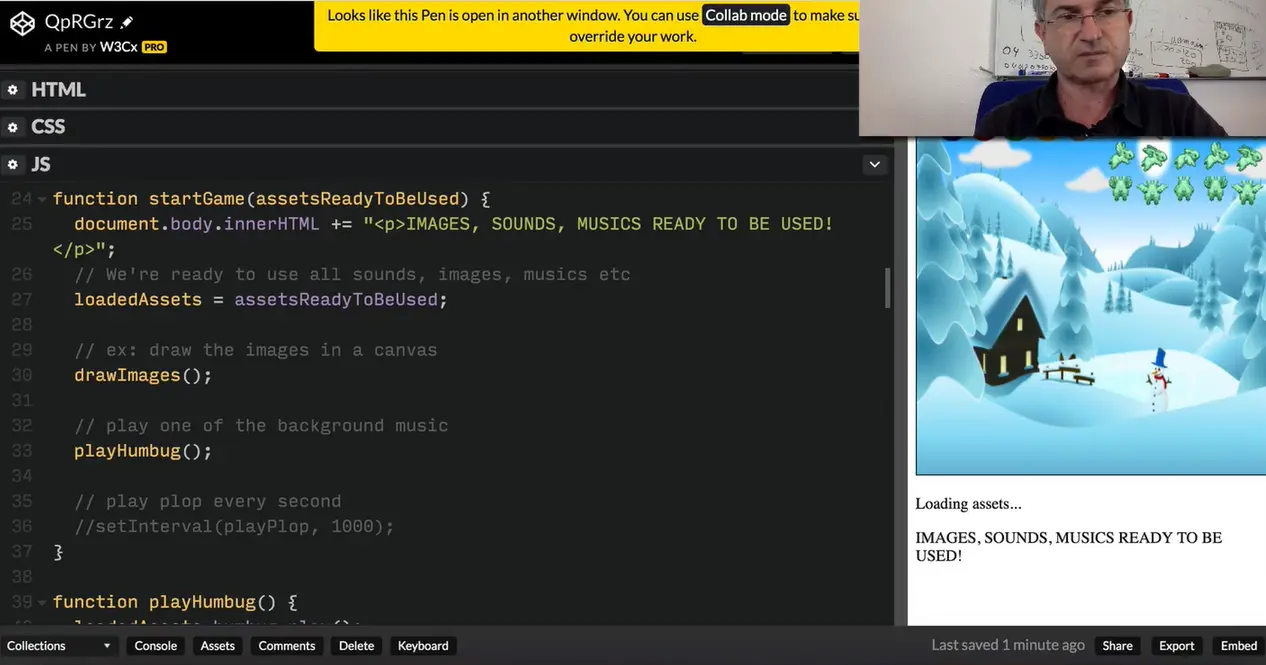
"playHumbug()". You see. The music is just called by its name. "LoadedAssets" the object of the top of the file ".humbug" the name of the music ".play()".
For playing some sound samples, here we are going to play a "plop" sound sample every 1000 milliseconds) every second.
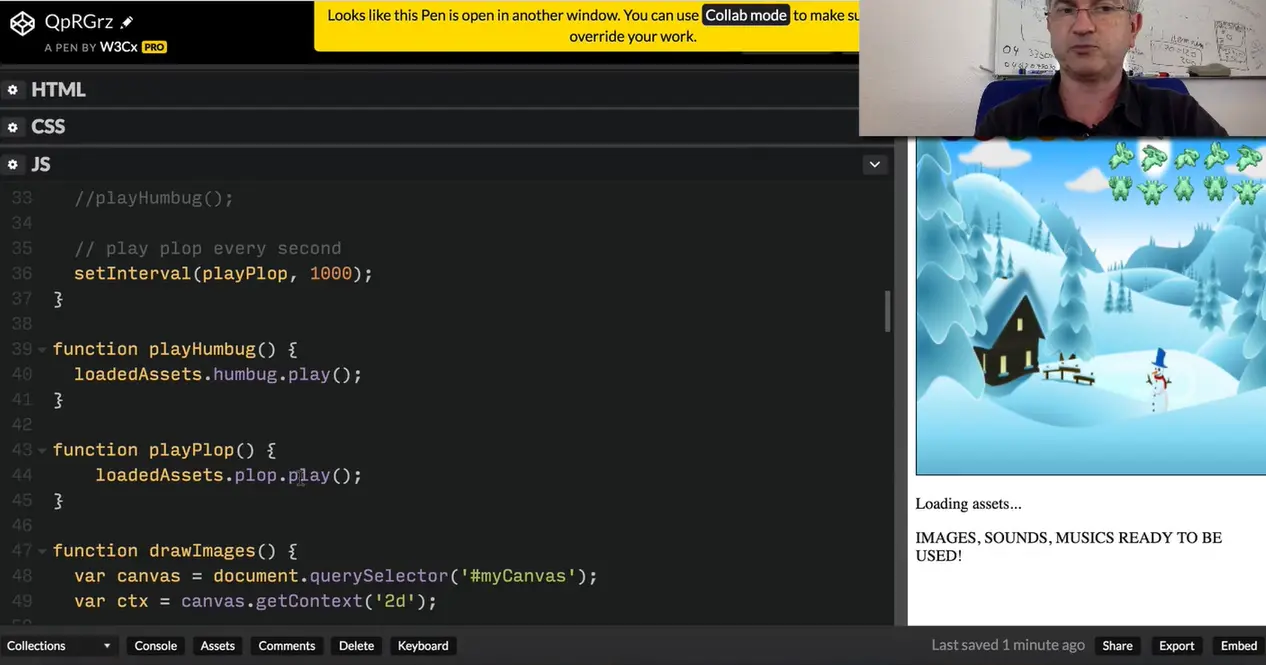
We just do "LoadedAssets.plop.play()" you see the name "plop" comes from here. Instead of using "assetsToLoadURLs" now we are using "LoadedAssets".plop because the "LoadedAssets" will initialize this object here, this variable with the decoded sound samples, with the loaded images and so on.
I hope you will find this useful if you are planning to write a small HTML5 game with lots of JavaScript.
This comes from the module 2 of the W3Cx HTML5 Apps and Games course.
In video games, you very often need to load assets before starting the game:
We wrote a multiple "asset loader" to make all these tasks easy.
Here is a small example that you may use if you like, which takes an array of "assets to be loaded", that can be either an image, a sound sample or streamed background music. You call the loadAssets(callback) function, passing as a parameter a single callback function of yours. When all assets are loaded, your callback will be executed, and will get a single parameter: the assets ready to be used!
Example (to hear the music and sound sample, there are two lines to uncomment in the startGame(...) function):
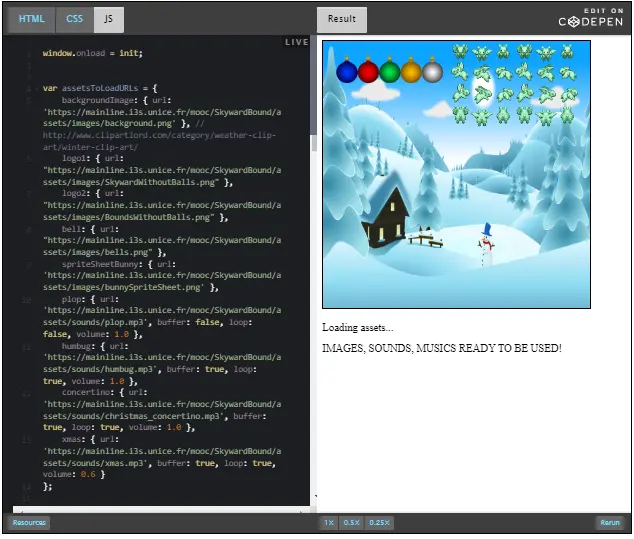
window.onload = init;
var assetsToLoadURLs = {
backgroundImage: { url: 'https://)/assets/images/background.png' },
logo1: { url: "https://)/assets/images/SkywardWithoutBalls.png" },
logo2: { url: "https://)/assets/images/BoundsWithoutBalls.png" },
bell: { url: "https://)/assets/images/bells.png" },
spriteSheetBunny: { url: 'https://)/assets/images/bunnySpriteSheet.png' },
plop: { url: 'https://)/assets/sounds/plop.mp3',
buffer: false, loop: false, volume: 1.0 },
humbug: { url: 'https://)/assets/sounds/humbug.mp3',
buffer: true, loop: true, volume: 1.0 },
concertino: { url: 'https://)/assets/sounds/christmas_concertino.mp3',
buffer: true, loop: true, volume: 1.0 },
xmas: { url: 'https://)/assets/sounds/xmas.mp3',
buffer: true, loop: true, volume: 0.6 }
};
var loadedAssets; // above assets, ready to be used
function init() {
// Once the page is loaded, we load all assets. We pass the function
// that will be called when assets are ready. In our case "startGame"
// this call will load all assets
loadAssets(startGame);
}
function startGame(assetsReadyToBeUsed) {
// This function is executed once all assets are ready.
// It is called by the asset loader, and receives as a unique
// parameter, the assets (sounds, images etc.) ready to be used
// we store them in the loadedAssets variable
loadedAssets = assetsReadyToBeUsed;
// Now we can use them! e.g., draw the images in a canvas
drawImages();
// or play one of the pieces of background music
playHumbug();
// Or use sound samples, for example let's play a plop every second
setInterval(playPlop, 1000);
}
function playHumbug() {
loadedAssets.humbug.play();
}
function playPlop() {
loadedAssets.plop.play();
}
function drawImages() {
var canvas = document.querySelector('#myCanvas');
var ctx = canvas.getContext('2d');
// background image drawImage can have different syntaxes :
// drawImage(img, x, y); or
// drawImage(x, y, width, height),
// for other syntaxes see HTML5 fundamentals course
ctx.drawImage(loadedAssets.backgroundImage,
0, 0,
canvas.width, canvas.height);
ctx.drawImage(loadedAssets.bell, 20, 20);
ctx.drawImage(loadedAssets.spriteSheetBunny, 190, 0);
}
These games are not for JavaScript beginners, but it's time to spend some time having fun :-) You can look at the source code: it's been written by students like you who followed the HTML5 advanced course.

Michel Buffa helped them actively in the forum, and one student rapidly took the lead in developing the game, while another composed the music, another helped with the graphics, etc.
The game runs on phones, tablets (using touch events), can be resized, rotated, etc. It also uses the multiple asset loader presented.
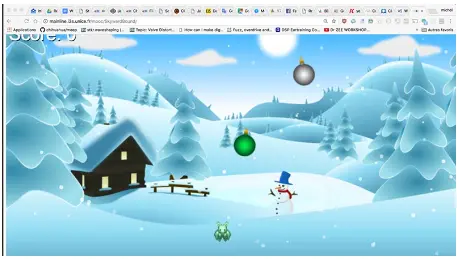
Here is the discussion forum for this part of the course. Please either post your comments/observations/questions or share your creations.

This module is about JavaScript objects.
So far, we've only scratched the surface! And it's time to get into detail. As with many other programming languages, JavaScript objects can be compared to real-life objects. A JavaScript object is an entity with a type and properties that define its characteristics. It also comes with special functions associated to it called methods.
Let's take the example of these bottles and this candle. They are different kind of objects, different type of objects. But they also have a color, they also have a weight and they have a material. This candle is made of wax and this bottle is made of glass. The properties define the objects' characteristics, they are the DNA. But they also have a behavior: a bottle can be filled with water or can be emptied. A candle can be lighted on or lighted off. These behaviors are usually implemented, using some particular functions that are tied to the object definition, and we call them "methods".
You'll learn how to create your own classes and how to create to multiples objects from the same class. Furthermore, JavaScript comes with a set of predefined objects, standard objects such as Math, Array, Date, and so on. And it is important for you to know how to use them.
Finally, as usual, we will provide many examples and some optional projects at the end of module.
Finally, you will use these new concepts for improving the small game we started to develop in Module 2!
You're already familiar with the concept of objects, but so far we've only seen one simple form, called "objects literals" or "singleton objects". I think we've referred to them as "simple objects" in the course. Here is an example:
var js1 = {
courseName: 'JavaScript intro',
weeks: 5,
madeBy: 'W3Cx',
author: 'Michel Buffa' // no "," after the last property!, even
if ES5/6 accept it
}
js1.author "Michel Buffa" js1.weeks 5
However, we haven't explained 90% of what is going on, and what we can do with "objects". Our objective in this module, is to explain the most important features of objects, while keeping it simple (more advanced topics will be taught in a future "JavaScript Advanced" course, such as prototypes, context binding, etc.).
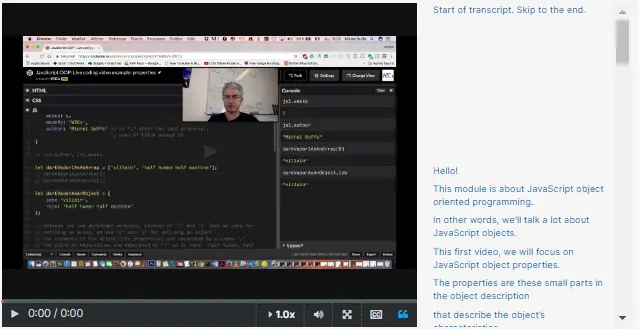
This module is about JavaScript object oriented programming. In other words, we'll talk a lot about JavaScript objects.
This first video, we will focus on JavaScript object properties. The properties are these small parts in the object description that describe the object's characteristics. So far, we mainly saw what we call "object literals" or "singleton objects".
They're objects that use this syntax: you use the "let" or the "var" keyword followed by the name of the object, by braces, and between braces you've got some pairs: property name, columns and property value.
In order to access the properties, you use the name of object: js1. You use the '.' operator followed by the name of the properties. js1.weeks will display the value of the week's properties for the object js1: "the JavaScript 1 course lasts 5 weeks". You can also access other properties like author: "Michel Buffa".
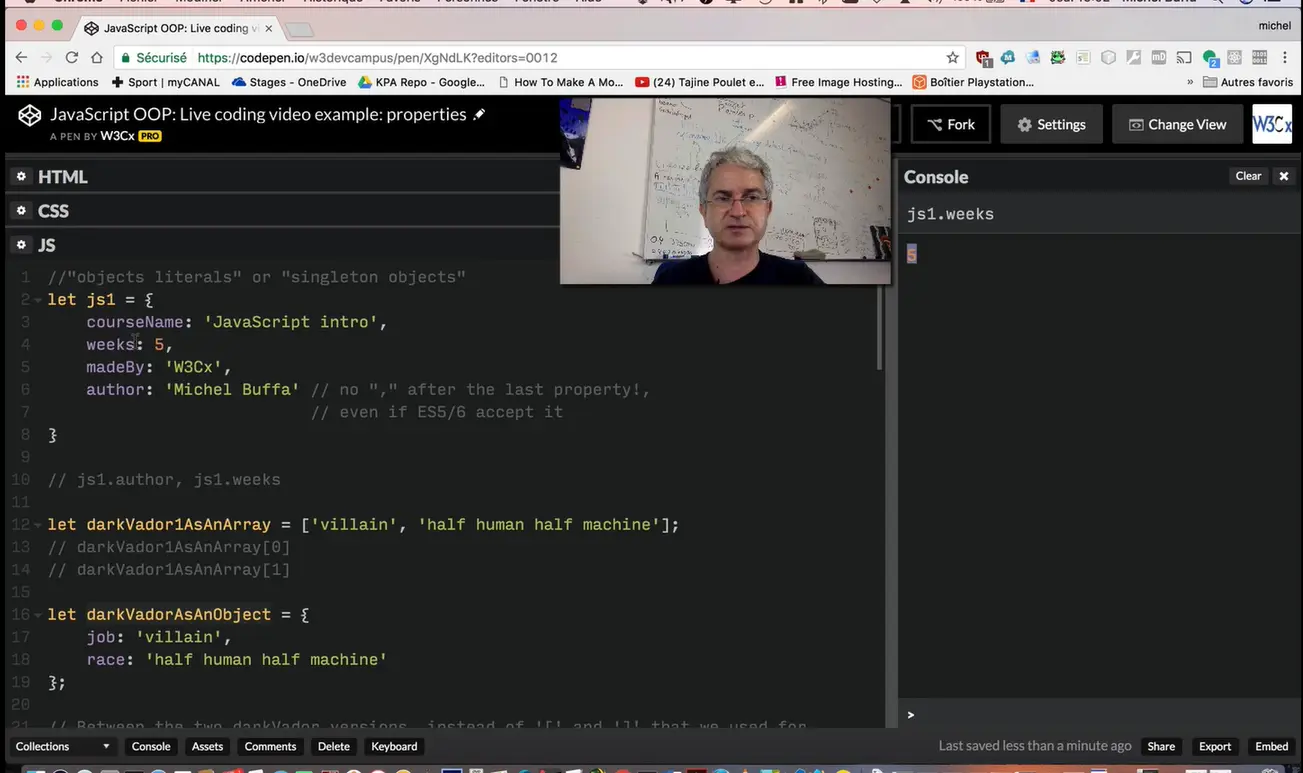
Then let's have a look at some arrays. Here, we've got an array named "darkVador1asAnArray" and you can access the different elements of an array, using brackets followed by the index, "0" being the first element.
So "darkVador1asAnArray[0]" will display "villain". That is the value of the first element. If you look at "darkVadorAsAnObject", in that case we use the '.' operator and the name of the property: job.
If you look at the two notations, the one with the array and the one with a property name and the '.' operator, they look rather similar. And if you look at the type of the "darkVador1asAnArray" variable, it's an object. In fact, objects declared with braces and pairs of property and name are very very similar to arrays because arrays are objects too.
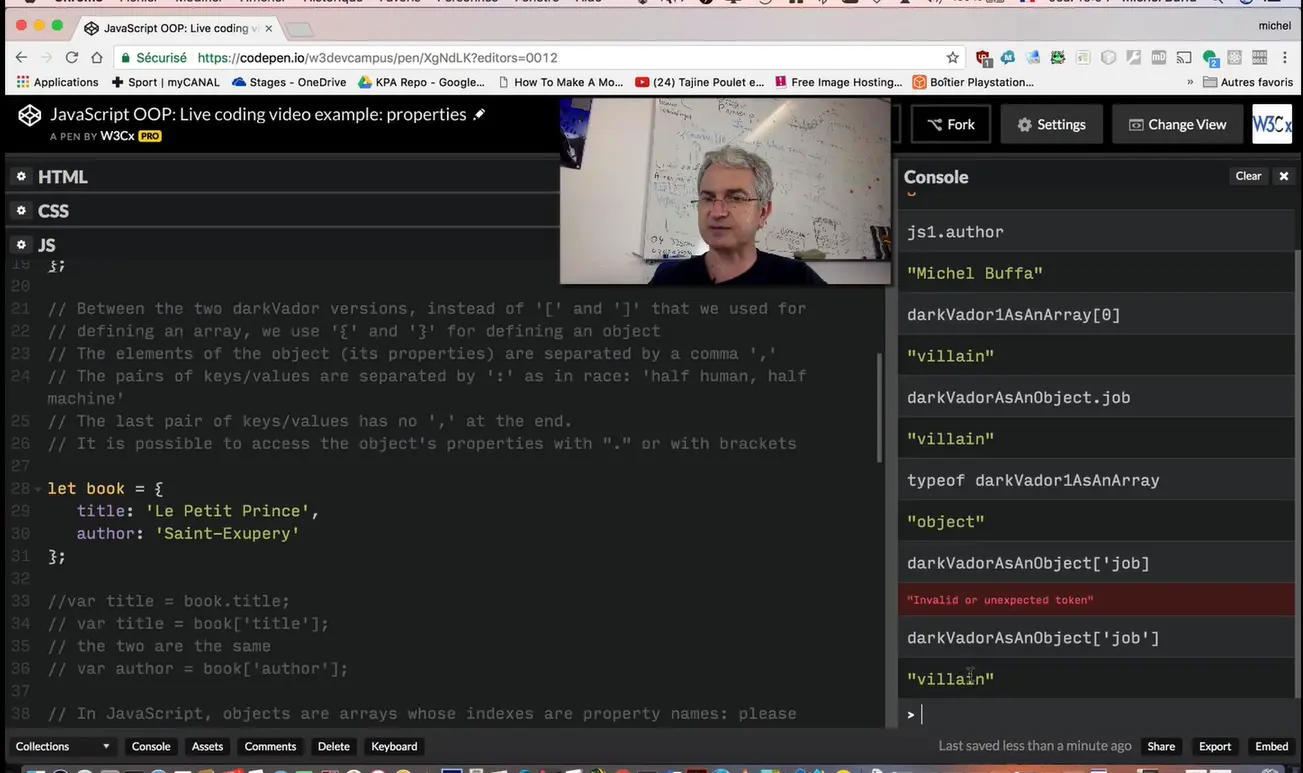
If I use the name of the property with the brackets notation, look at that: darkVadorAsAnObject[], the name of the property (job) then...you've got the exact same result as if you're using the '.' operator. In JavaScript objects are arrays whose indexes are the property names. They are very similar.
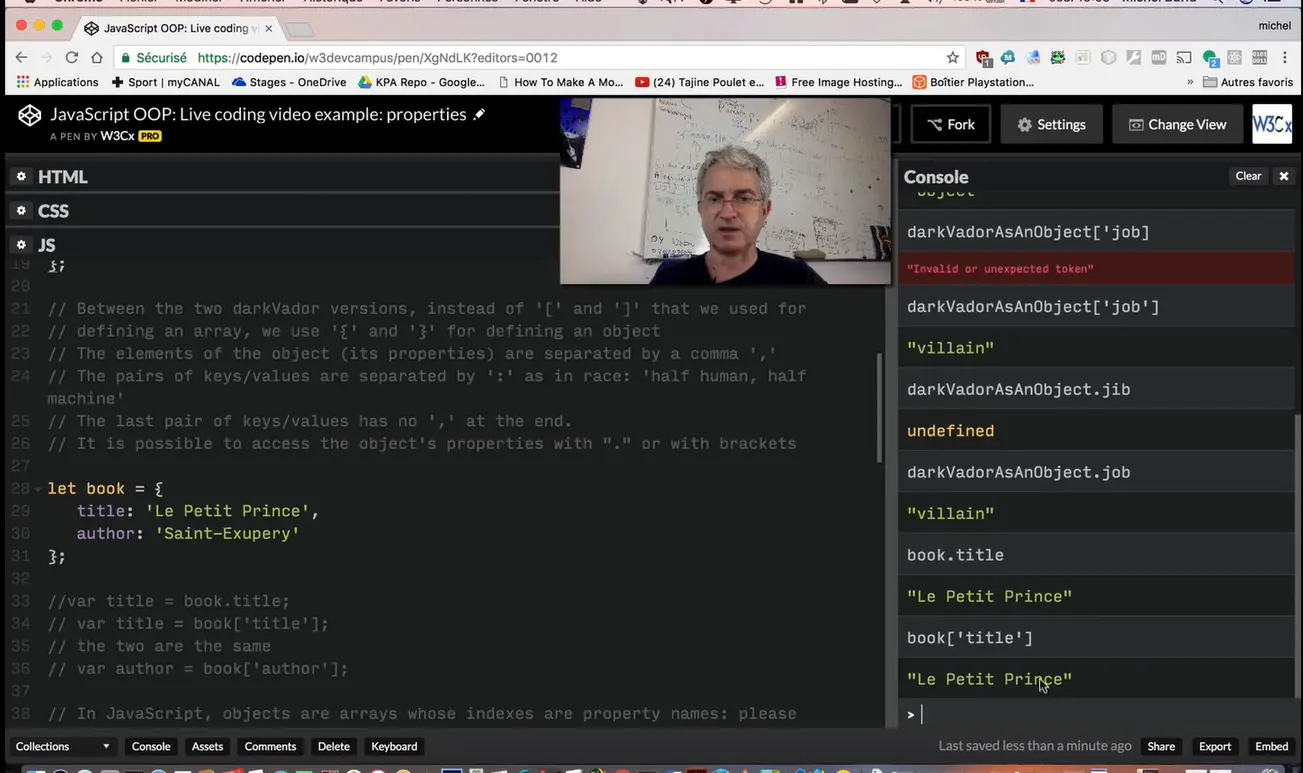
Look at this object named "book": book.title ... Le Petit Prince and book['title'] will give exactly the same result. Why would you use this notation for accessing properties?
It's because in some cases you can have property names that include spaces or that start with a number.
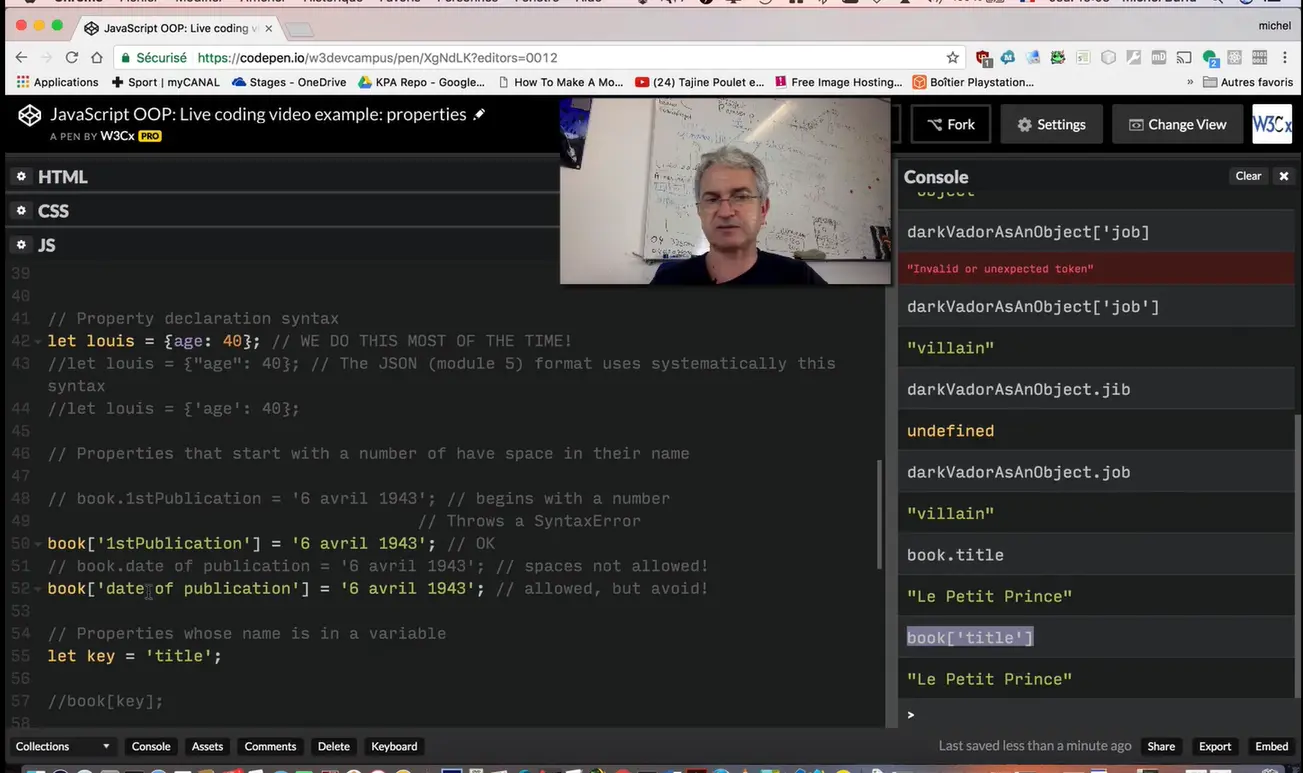
For example, if I write this: book['1stPublication'] as an index, it works. And if I type the object book, I can see that I defined the property that is named "1stPublication.
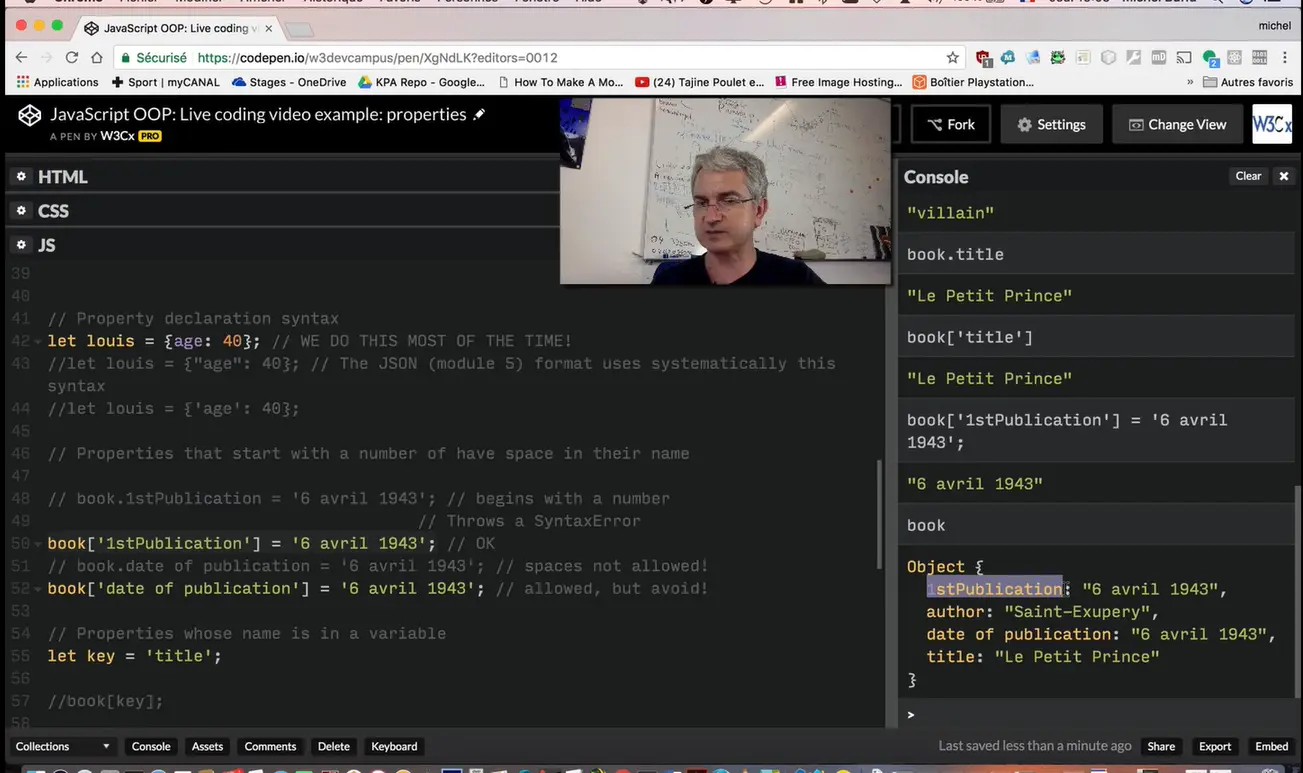
But if I use the '.' notation, and if I try to set this property, it's invalid because the property name when used with the '.' notation cannot start with a number. It's the same if we've got property names that contain spaces like 'date of publication'. I can define a property that has spaces in its name using brackets but not using the '.' notation.
The bracket notation can also be useful when you've got the name of the property in a variable. For example, I've got in the variable named "key", the "title" property name. And I want to access "book.title", except that in that case the name of the property is the value of the "key" variable.
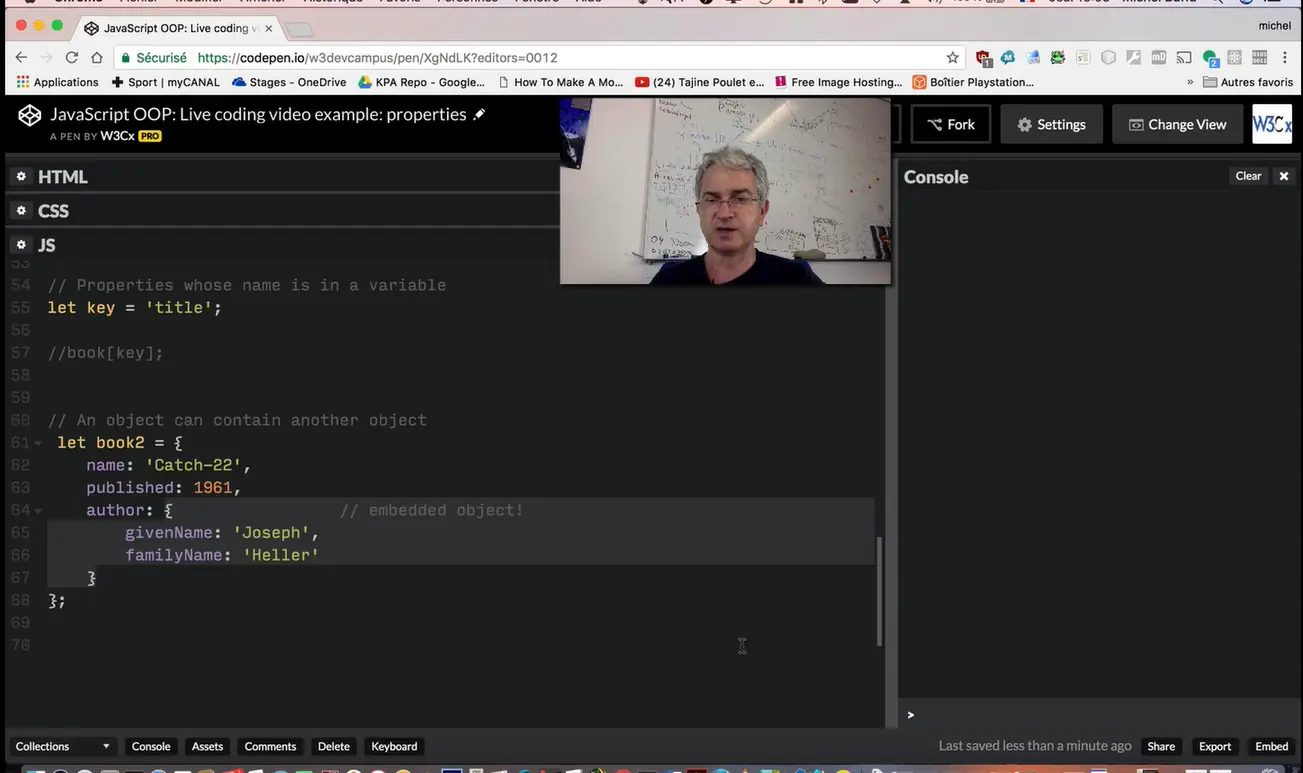
I type key ="name" ... "book2" that is an object with the name. I can type "book2.key3", it's exactly the same as typing "book2.name". You can also have objects that contain objects. The "book2" object, here, has the property name author that in turn is an object. It uses brackets and a pair of property values. In that case, you can chain the '.' operator to access the sub-properties. "book2.author" is an object, "book2.author.familyName" will access the "familyName" property of the author object that is a property of "book2". And it gives "heller" here.
Source code is available on CodePen.
Important note: Darth Vader is called "Dark Vador" in the French versions of Star Wars, and, as a French tutor, I think it's cool to give to one of the heroes an international name. :-)
> var darkVador = ['villain', 'half human half machine']; Undefined > darkVador[0] "villain" > darkVador[1] "half human half machine"
And now, look at this object:
var darkVador = {
job: 'villain',
race: 'half human half machine'
};
They look a bit similar, don't they?
We saw that we can use the "." operator, followed by the property name. It's also possible to use the bracket notation, and manipulate the object as an array whose indexes, instead of being 0, 1, 2 etc., are the property names!
> var book = {
title: 'Le Petit Prince',
author: 'Saint-Exupery'
};
Undefined
> var title = book.title;
undefined
> title;
"Le Petit Prince"
> var title = book['title'];
undefined
> title
"Le Petit Prince";
> var author = book['author'];
undefined
> author;
"Saint-Exupery"
As you can see, if you look at lines 7-10 and 13-16, writing book.title or book['title'] is equivalent!
In JavaScript, objects are arrays whose indexes are property names: please remember this!
Property names: different possibilities
We can put single or double quotes around the name of the property, or nothing at all:
var louis = {age: 40}; // WE DO THIS MOST OF THE TIME!
var louis = {"age": 40};
var louis = {'age': 40};
book.1stPublication = '6 April 1943'; // begins with a number
// Throws a SyntaxError
book['1stPublication'] = '6 April 1943'; // OK
book.date of publication = '6 April 1943'; // spaces not allowed!
book['date of publication'] = '6 April 1943';
// allowed, but avoid!
In this case it is necessary to use the syntax with '[' and ']' ...
var key = 'title'; undefined book[key]; "Le Petit Prince"
> var book = {
name: 'Catch-22',
published: 1961,
author: { // embedded object!
givenName: 'Joseph',
familyName: 'Heller'
}
};
Undefined
> book.author.givenName;
"Joseph"
> book.author.familyName;
"Heller"

Accessing the embedded object author is done by chaining property accesses using the "." operator, like in book.author.givenName (here we access the givenName property of the object author, which is also a property of the book object).
Live coding transcript: object methods
In this lesson, we will talk about objects' methods and about the "this" keyword that is very useful when using methods that will access properties inside an object, or methods that will call other methods.
For arrays, we speak of elements but for objects, we talk about properties. But we can also have some functions that will be assigned to properties and a property that is equal to a function is called: a method.
With objects, properties correspond to characteristics of objects, to their DNA, while methods will correspond to the behavior of the objects. If you've got a dog, we can call a method named "bark". It will mean: hey Medor (the dog's name), please bark!
If you've got a person -an object person- with a method named describeYourself, it's like if you are talking to the person: person.describeYourself(), you are calling the method describeYourself on the object person, you are talking to the person and you expect a behavior. It will describe itself.
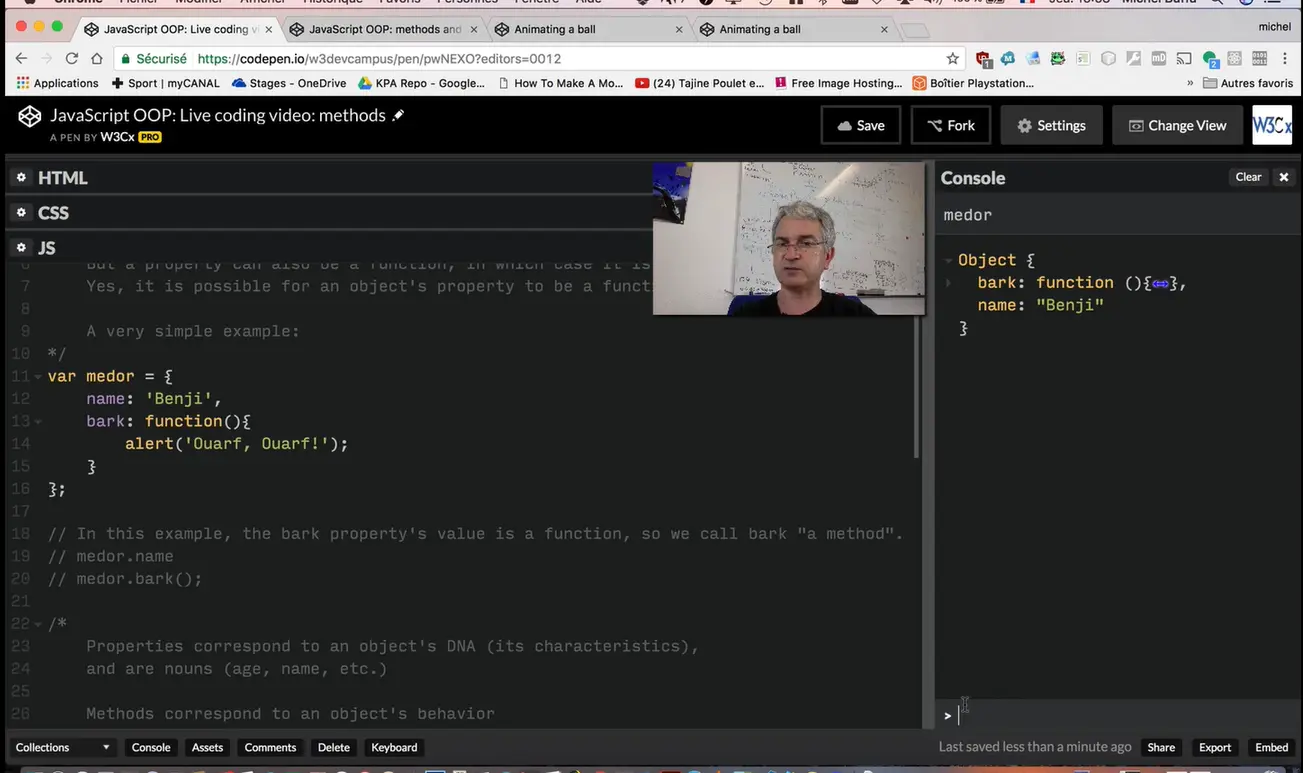
Let's have a look at some examples. so here we've got an object named "medor" with the property "name" and the method "bark". If I open the console, I can type the name of the object. And, we see that it's got a name and a method.
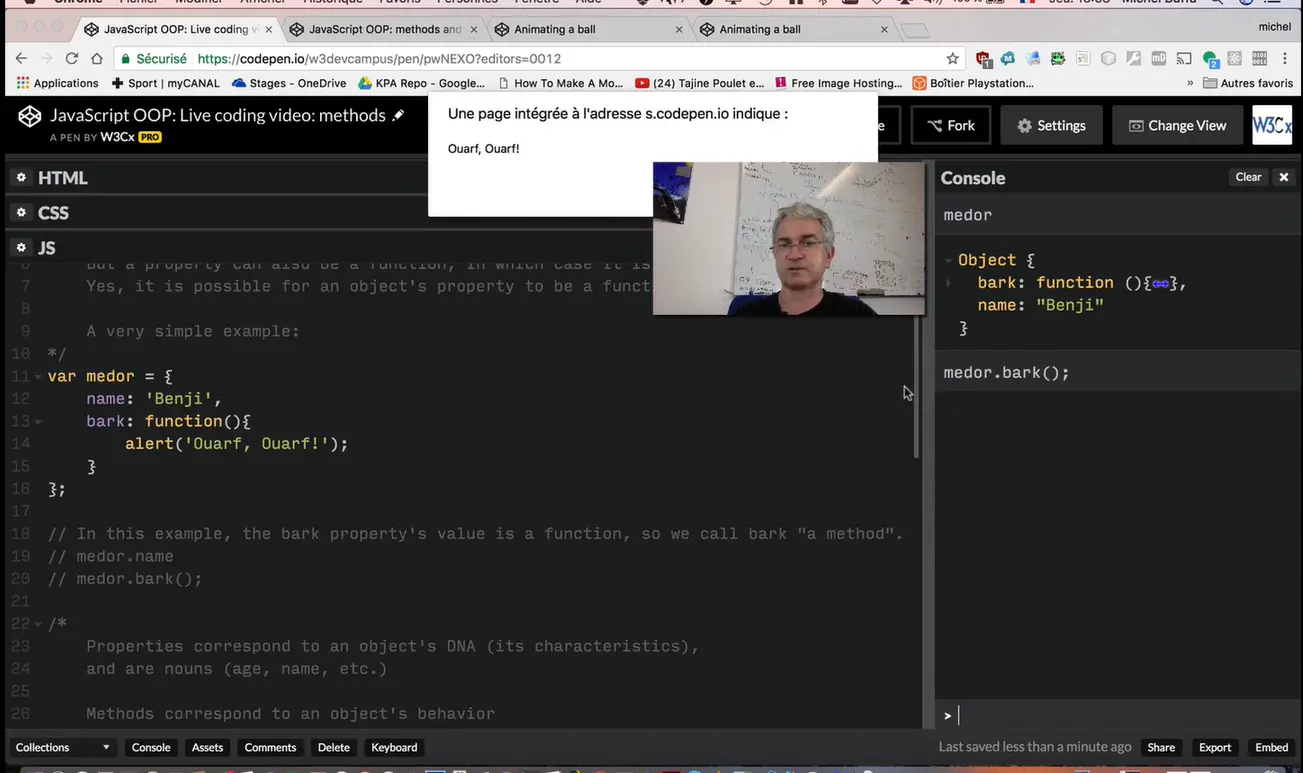
And to call a method, it's the same as with accessing properties, you use the '.' operator, method . the name of the function followed by parenthesis and if the method take arguments, you would add arguments between parenthesis. It's just displayed an alert saying "Ouaf, Ouaf!" because the dog does "Ouaf, Ouaf!".
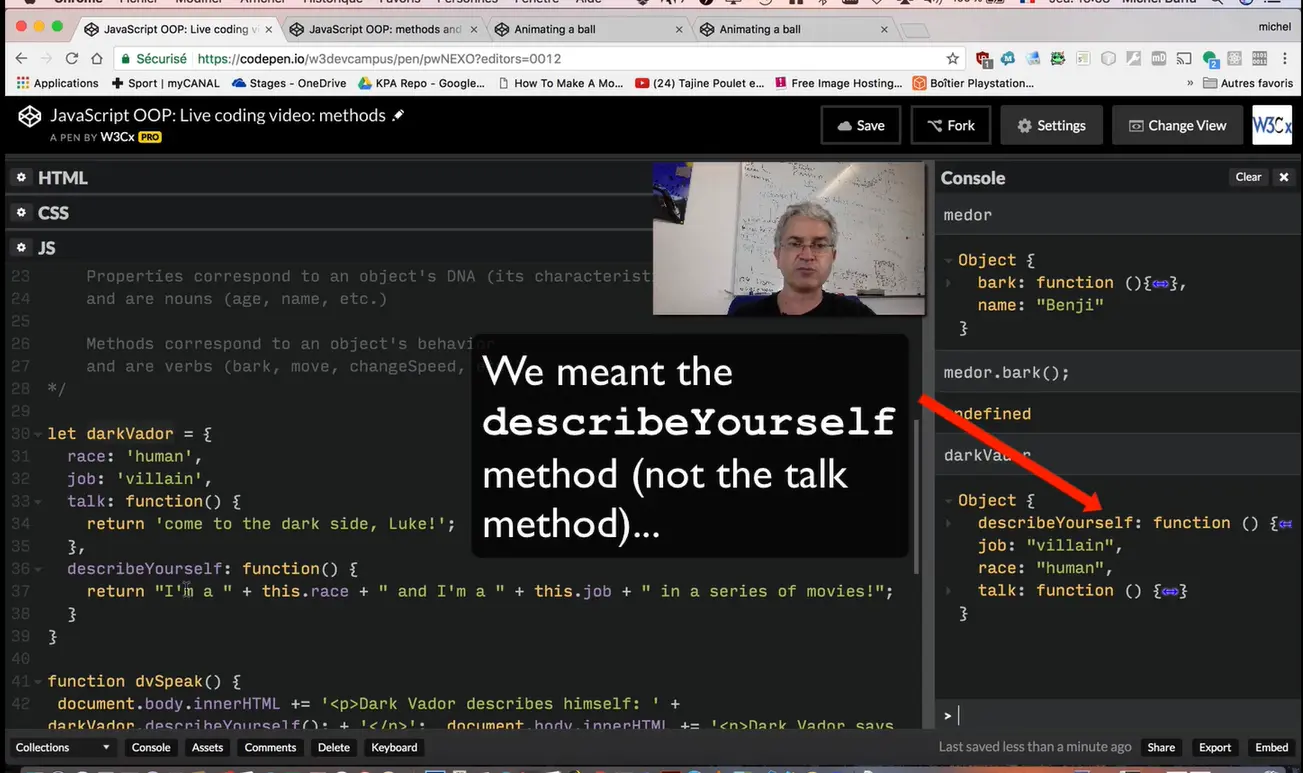
Let's have a look at another example. Here, we've got an object named darkVador with properties and a method. Here we've got the describeYourself method that will make darkVador say: "I'm a human and I'm a villain in a series of movies". You can see that from inside the method describeYourself, we need to access the value of properties.
For this, we used the "this" keyword... "this.race" means the race property of the object darkVador, "this.job" means the job property of the object darkVador. If we omit "this." before the name of the properties, we are referring to a variable, a global variable for example. If there was a variable named "job", in that case it will display the name of variable. But if I've had "this." before, it means the "job" of this object, the "job" property of this object. Let's try it.
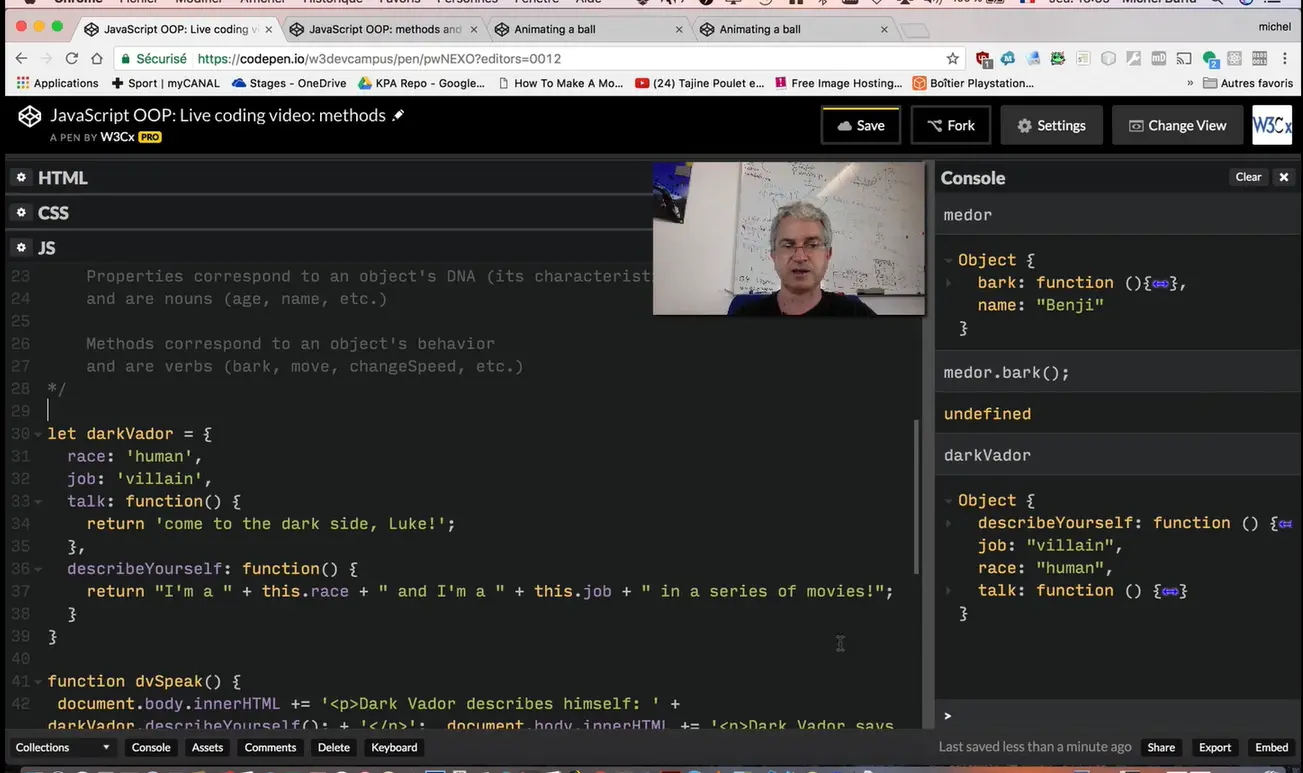 nbsp;nbsp;nbsp;nbsp;nbsp;
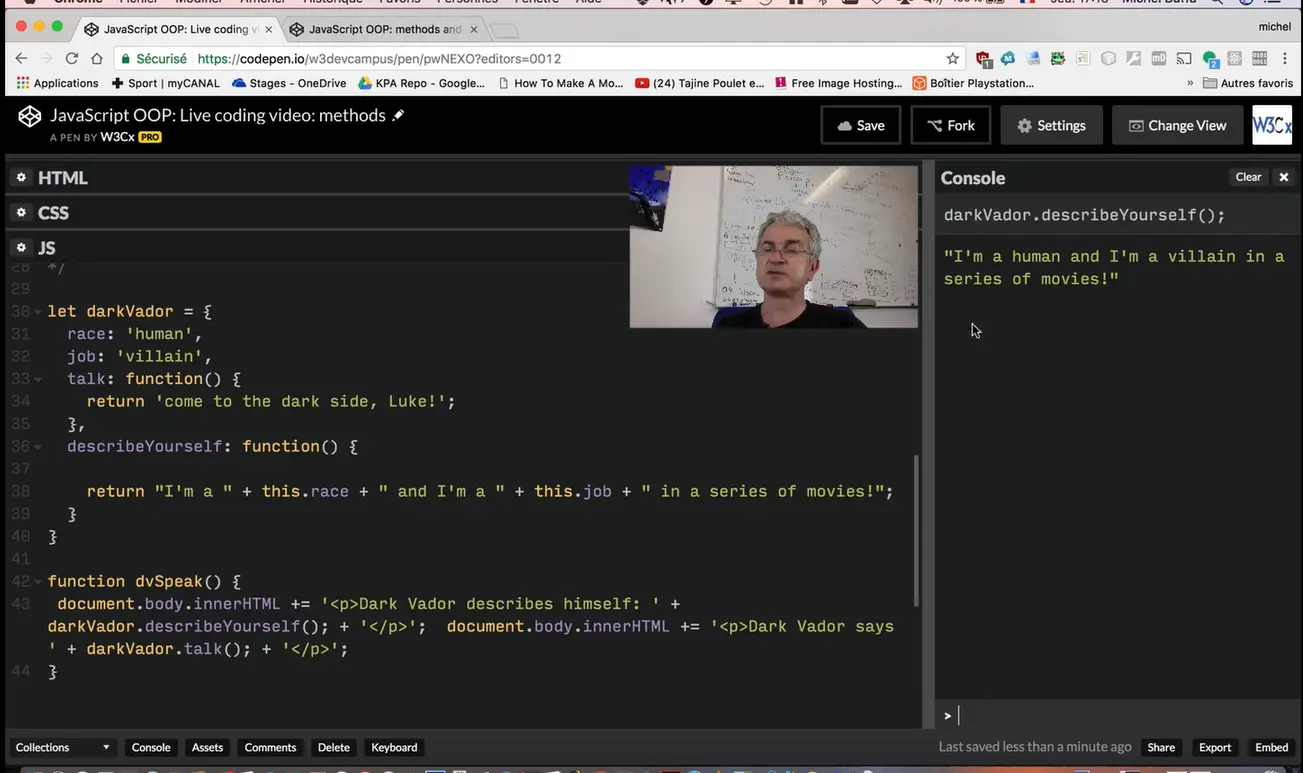
You see that it displays "I'm a human and I'm a villain " blah blah blah...And "human" and "villain" are the values of the "race" and the "job" properties inside the object. "this.race" was used for displaying this value. You can also use the "this" keyword for calling a method from another method.
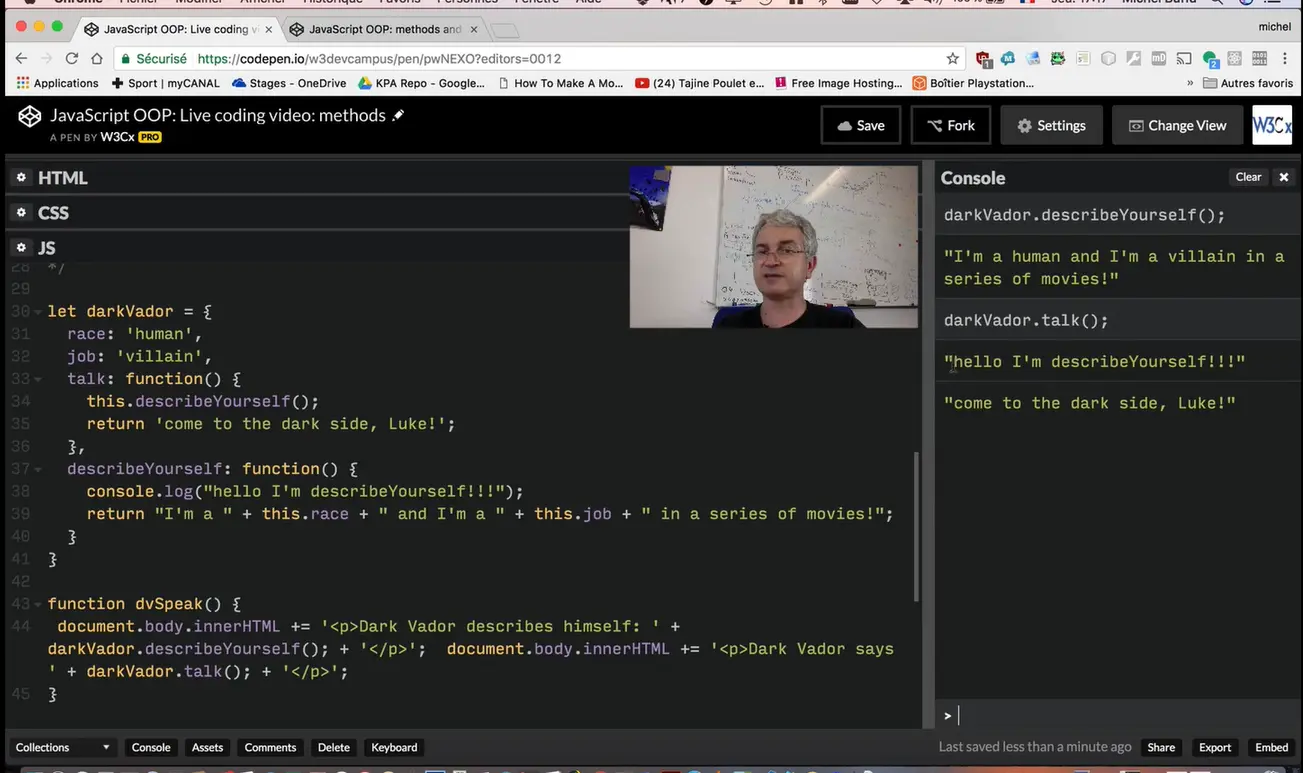
Let's add a "console.log("hello I'm describeYourself!!!")", and let's call this describeYourself from the talk that is just above. For calling a method from another one, I use "this.", followed by the name of the method. And I save and if you call the talk method, you see that it says "hello I'm describeYourself!!!" before displaying "come to the dark side", that is in the talk method, because this.describeYourself() executed describeYourself from the talk method.
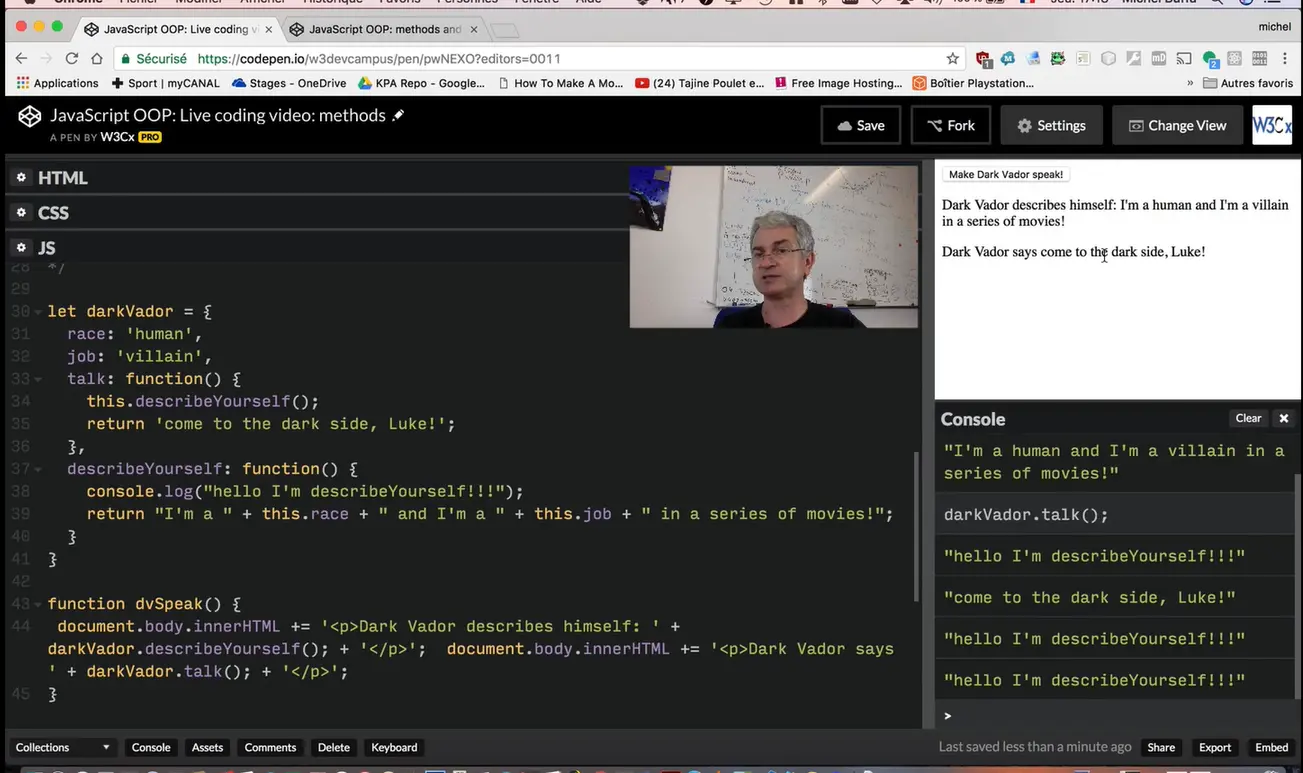
In the example, I have also a click event listener that you can try that will display a message in the HTML5 page itself. It just shows that we can call method by using the name of this object followed by the name of the method with parentheses.
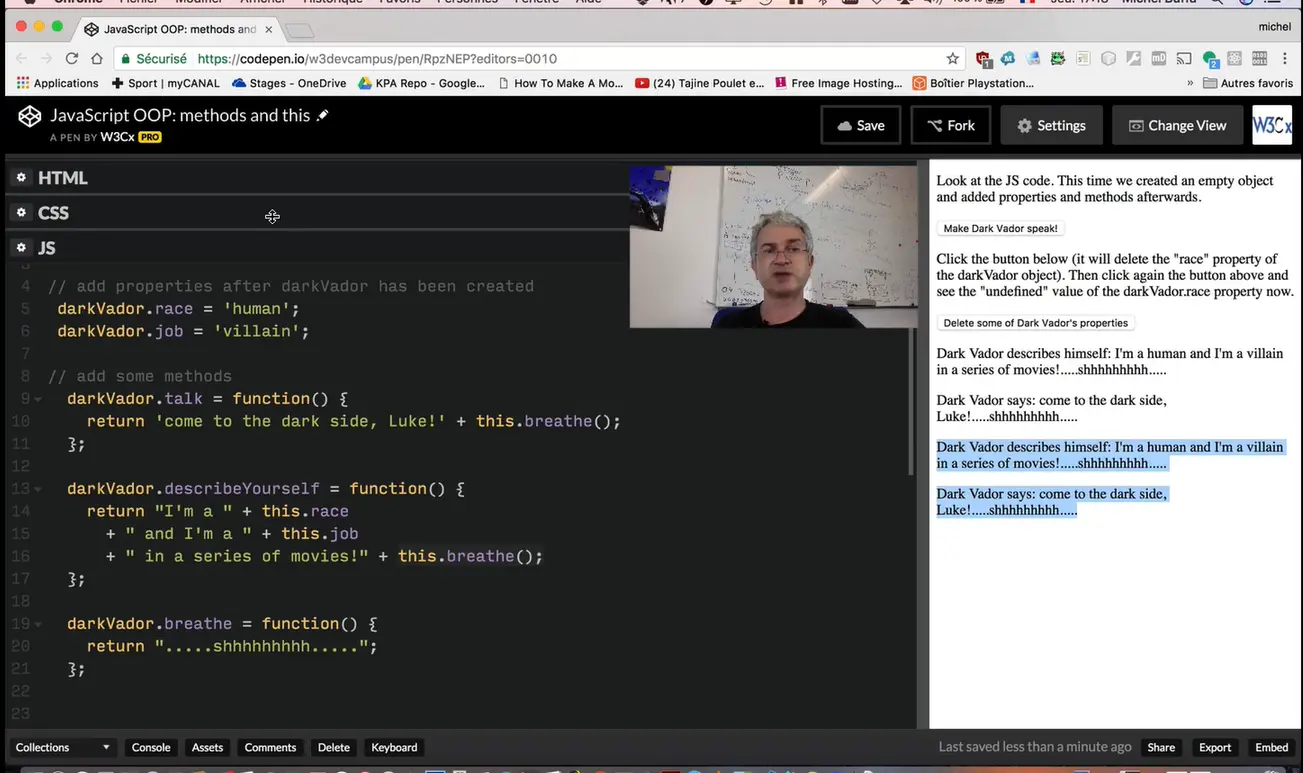
Ok, there is another interesting way to define objects and to add and remove properties and methods. You can describe an object with 0 property or method, or just few of them. And you can complete it, you can add properties and methods after its creation. We created an empty object named darkVador, and we defined properties (race and job), methods (talk and describeYourself) after the creation of the object. You can try this example, it will work the same.
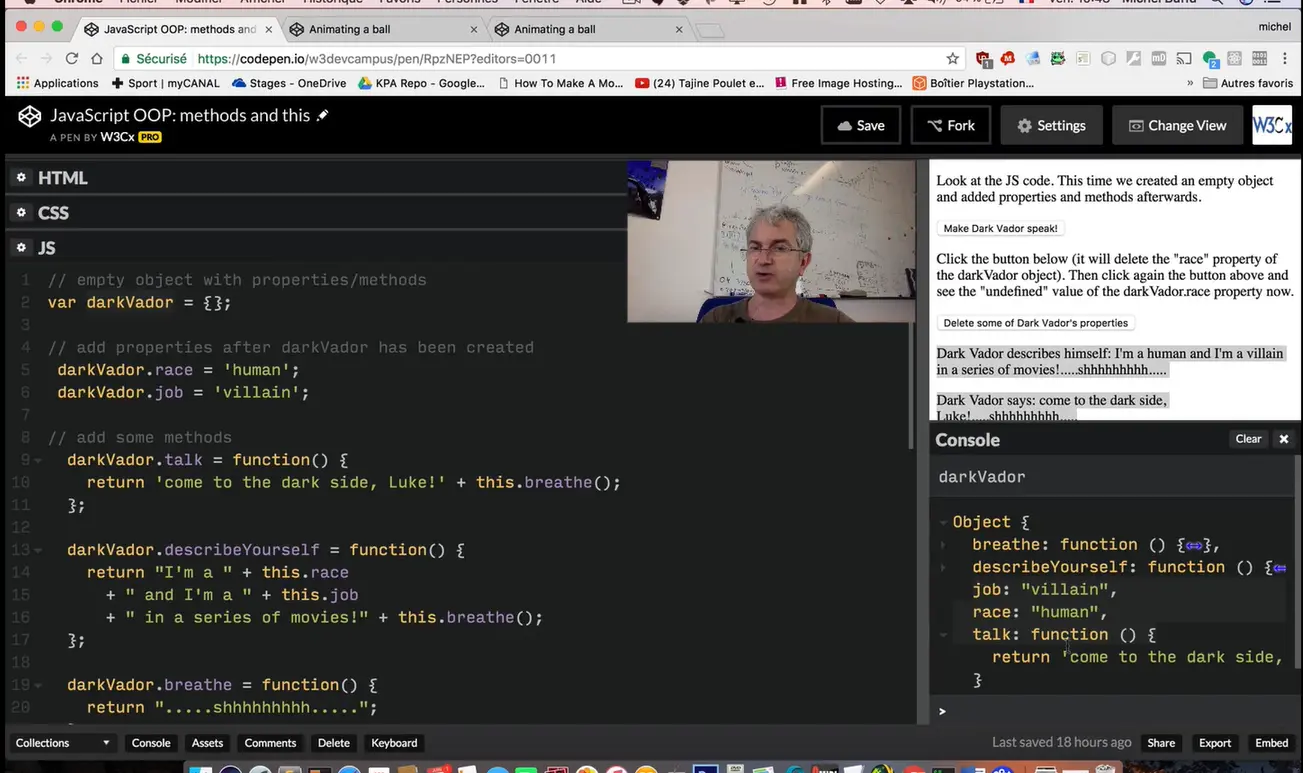
And if we look at the value of the darkVador object in the devtool console (on the right), you see that it's a complete object that contains the properties and the methods we define after creating the object.
A very simple example:
var medor = {
name: 'Benji',
bark: function(){
alert('Ouarf, Ouarf!');
}
};
In this example, the bark property's value is a function, so we call bark "a method".
A method is a special property that corresponds to the object's behavior.
Properties correspond to an object's DNA (its characteristics), and are nouns (age, name, etc.)
Methods correspond to an object's behavior and are verbs (bark, move, changeSpeed, etc.)
Since a method is a property we can use the '.' operator (or brackets with the method's name as a string index).

var darkVador = {
race: 'human',
job: 'villain',
talk: function() {
return 'come to the dark side, Luke!';
}
}
function dvSpeak() {
document.body.innerHTML += '<p>Dark Vador says
' + darkVador.talk(); + '</p>';
}
In line 1, we created a simple object named darkVador, that has two properties (race and job) and a method (talk).
In the dvSpeak function, at line 10, we call darkVador's talk method. The syntax is a mix between the one for accessing a property (with the '.' operator), and the one for calling a function (with parentheses and ';' at the end).
When we write darkVador.talk(), we are executing the talk method of the object darkVador, but in plain English, we're just asking Dark Vador to talk. We invoke its behavior!
Another example with the player we saw briefly in Module 2
Here is the last version of the player object we saw in our small game:

var player = {
x:10,
y:10,
width:20,
height:20,
color:'red'
}
// and we also used two other functions for moving the player with
the mouse
// and for drawing it as a filled rectangle
function movePlayerWithMouse() {
if(mousePos !== undefined) {
player.x = mousePos.x;
player.y = mousePos.y;
}
}
function drawFilledRectangle(r) {
// BEST practice: save the context, use 2D transformations
ctx.save();
// translate the coordinate system, draw relative to it
ctx.translate(r.x, r.y);
ctx.fillStyle = r.color;
// (0, 0) is the top left corner of the monster
ctx.fillRect(0, 0, r.width, r.height);
// BEST practice: restore the context
ctx.restore();
}
var player = {
x:10,
y:10,
width:20,
height:20,
color:'red',
move(x, y) {
// change x and y coordinates of the player
// TODO!
},
draw() {
// draw the player at its current position
// with current width, height and color
// TODO!
}
}
Assuming that the move and draw methods are fully implemented, we will now be able to call:
Readability is better, it is like asking the player to move, or asking it to draw itself. And we do not need to pass the x, y, width, height, color to the draw method: it is inside the player object, and it can access all its internal property values!
In the next section we will look at how we can access other object's properties from a method or call other methods.
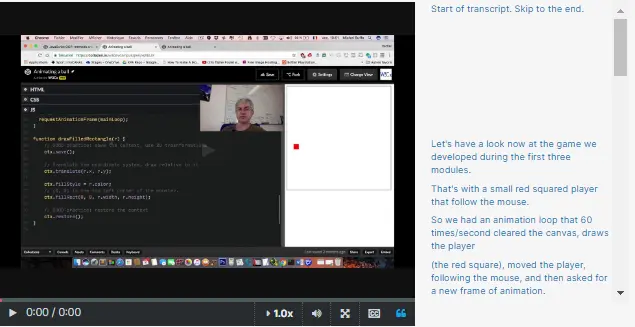
Let's have a look now at the game we developed during the first three modules.
That's with a small red squared player that follow the mouse.
We had an animation loop that 60 times/second cleared the canvas, draws the player (the red square), moved the player, following the mouse, and then asked for a new frame of animation.
This is how it works. For drawing the player we called "drawFilledRectangle()" passing, as a parameter, a player object with just properties in it.
For drawing the player, we call "drawFilledRectangle()" with the player as parameter, and we use the x and y and color and width and height properties of the player's object.
The same for moving the player with the mouse: we've got a method that will use "player.x" and "player.y" giving to them the position of the mouse. We can go further in object-oriented programming by moving these functions inside the object, here, as methods. Of course, we'll have to do some small modifications because "player.x" and "player.y", will become the properties of the object itself.
Let's have a look at the modified version. So here we've got the "move" function that will take the "x" and the "y" position of the mouse, and we just set them to the "this.x" and "this.y" properties of the object.
Let's look at how we call this move method from the animation loop: just "player.move(mousePos.x, mousePos.y)".
The same for drawing the player: we copy and paste the content of the previous "drawFilledRectangle()" method except, that when we add to access x, y, color, width and height properties, we use "this.x", "this.y", etc. And we also pass the context that is the object used for drawing in the canvas as a parameter.
Like this, we can use the object in another project and don't rely on a global variable...like we did before in the previous example, the context was a global variable, here. By passing it as a parameter, if the global variable has a different name, we just have to pass it as a parameter. Look at the code of this "draw()" method: "player.draw()" context.
Like this we've got a more compact object that contains its characteristics and the methods that correspond to its behaviors to what it can do and, of course, the methods will modify the properties for changing the position of the object on the screen.
When one wants to access an object property or wants to call another method from an object method, we must use the this keyword. In the code of the player object, this means "from this object".
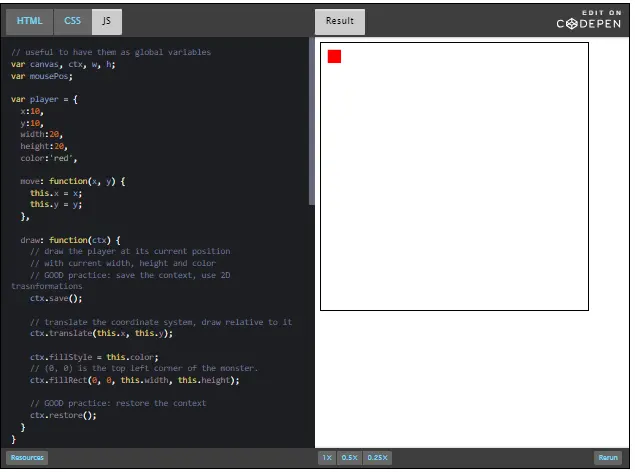
var player = {
x:10,
y:10,
width:20,
height:20,
color:'red',
move: function(x, y) {
this.x = x; // this.x is the property of "this object"
this.y = y;
},
draw: function(ctx) {
// draw the player at its current position
// with current width, height and color
// it's nearly the same code as the old drawFilledRect function
ctx.save();
// translate the coordinate system, draw relative to it
ctx.translate(this.x, this.y);
ctx.fillStyle = this.color;
// (0, 0) is the top left corner of the monster
ctx.fillRect(0, 0, this.width, this.height);
// BEST practice: restore the context
ctx.restore();
}
}
Notice that we've used this followed by the '.' operator every time we've had to access the current value of an object's property (lines 9, 10, 20, 22 and 24).
We passed the canvas' graphic context as a parameter to the draw method (it's always good not to create dependencies when making objects). Passing the context as a parameter avoids using it as a global variable. If in another project we've got a context named "context" instead of "ctx", then we will just change the parameter when we call player.draw, otherwise we would have had to rename all occurrences of ctx in the code).
Same with the mouse coordinates we passed to the move method.

var darkVador = {
race: 'human',
job: 'villain',
talk: function() {
return 'come to the dark side, Luke!' + this.breathe();
},
describeYourself: function() {
return "I'm a " + this.race + " and I'm a " + this.job +
" in a series of movies!" + this.breathe();
},
breathe() {
return ".....shhhhhhhhh.....";
}
}
function dvSpeak() {
document.body.innerHTML += '<p>Dark Vador describes himself:
' +
darkVador.describeYourself(); +
'</p>';
document.body.innerHTML += '<p>Dark Vador says: ' +
darkVador.talk(); +
'</p>';
}
In this example, notice that the describeYourself method from the darkVador object uses the two properties name and job using the this keyword. We also call the breathe method from the two methods describeYourself and talk, using this.breathe();
Properties and methods can be added/deleted after an object has been defined.

// empty object with properties/methods
var darkVador = {};
// add properties after darkVador has been created
darkVador.race = 'human';
darkVador.job = 'villain';
// add some methods
darkVador.talk = function() {
return 'come to the dark side, Luke!' + this.breathe();
};
Lines 5, 6 and 9: we can add properties and methods after the object has been created empty at line 2.
You can use the JavaScript keyword "delete" to delete an object's property (it will become undefined).
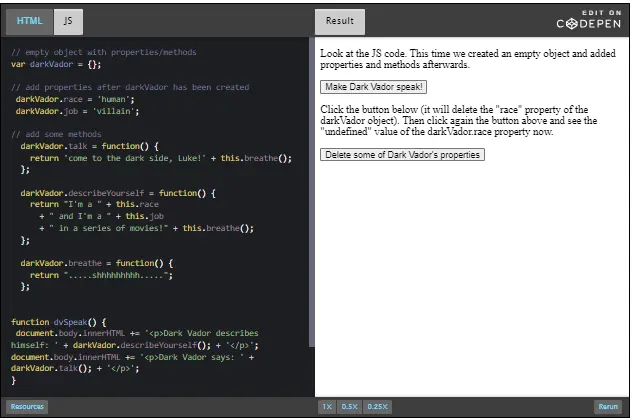
function deleteSomeProperties() {
delete darkVador.race;
delete darkVador.job;
}
We simplified the explanations for "this" in this introductory course. Normally, "this" is the current object when you use it inside an "object literal" (like in this CodePen example from the course).
But... we also met "this" in event listeners (see in this example from the course). Look at the onchange = "changePageBackgroundColor(this.value);" ...
In fact, the "this" keyword can be confusing in JavaScript. The key thing to remember is that it is bound to the calling object when the function is called, not when the function is created.
And in the case of event listeners, the callbacks are called by the browser... You can conclude that it's a good habit not to have event listeners in your objects: just use methods in which there is no confusion about "this".
Let's study what is the concept of "class" in object oriented programming languages.

So far in this course, we've only used singleton objects: objects that only occur once: player, darkVador, etc. Ok, this is not quite true, I'd forgotten that we created many balls in the module 2 game. We'll come back to this example further down the page!
But even with the balls from module 2, we did not use a template to tell us how to easily create multiple objects that share the same properties and the same methods, but whose properties' values may differ.
For example, imagine Luke Skywalker, Ian Solo and Dark Vador. What do they have in common? They all are Star Wars heroes, they all have a name, they all belong to one side (the good/bad people, or rebels vs empire), etc. Imagine that we have a way of programming that describes not the objects themselves, but a "model", a "template" for these objects. We could call it StarWarsHero and use it for creating our heroes' objects.
Imagine the balls from module 2: they all had the same shape (circle), the same x, y, radius and color properties, but they were all different. They all belonged to the same class of object (ball), but they were all different in terms of their properties' values.
In many programming languages, these templates are called "classes".
Let's introduce these two ways of defining "pseudo classes" with ES5's function constructors, and with modern JavaScript's classes!
Live coding lesson: the "new" keyword
So far, in this course, we've only used singleton objects: objects that only occur once. We've got one player in the game, we've got one Dark Vador in the examples with the Star Wars heroes. But imagine Luke Skywalker, Ian Solo and Dark Vador... what do they have in common?
They're all Star Wars heroes, they all have a name, they all belong to one side, the good or the bad people, the rebels or the empire, etc. Imagine that we have a way of programming that will describe not the objects themselves, but a model, a template, for these objects.
We could call it StarWarsHeroes for example, and use it for creating our heroes' objects, each being of the same kind, but with different names, different sizes, different descriptions.
Imagine the balls from the Module 2, in the game, the balls that were bouncing against the walls. They all have the same shape (a circle), the same properties x and y, and color, but they all differ, they all have x and y coordinates that are different, and different colors.
In many programming languages, these templates are called classes. You've got a class Person, and you create objects that are instances of Persons. From a model, you create Michel Buffa. From a Hero class you will create Luke Skywalker. From a Ball class, you will create many balls with different shapes, radius and coordinates. In JavaScript 5, we did not have such a concept.
Instead, we have "constructor functions". I will show you how they work. With JavaScript 6, we've got the concept of "classes", and it will be the topic of a next video. But as "constructor functions" from JavaScript 5 are in many, many examples on the Web, I will show you that to you first.
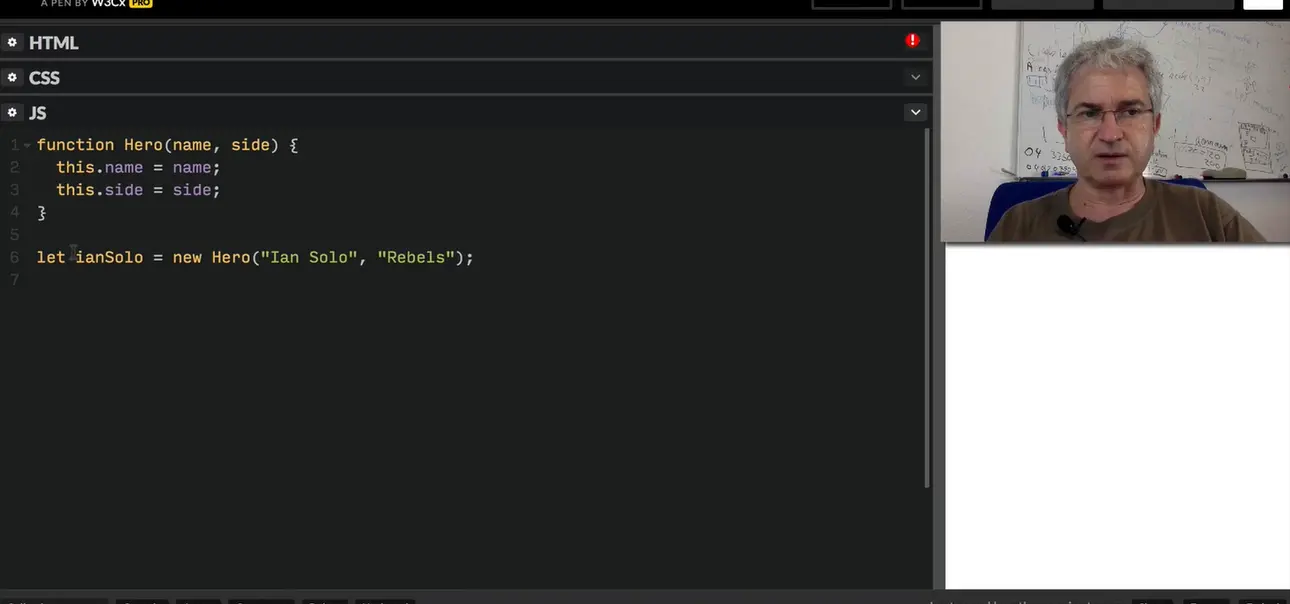
You start by writing a simple function, but by convention, you start with a capital letter: "Hero". And then, you can indicate the parameters that your heroes will have. You will indicate the name and the side of a Star Wars heroes for example. Then you will initialize the properties of each hero. What I write here is very common: "this" followed by the name of the property equal the name of the parameter passed for building an object.
If I use just this syntax, I can start building heroes. And for this I use the keyword "new". I just typed the name of the constructor function, preceded by the keyword "new".
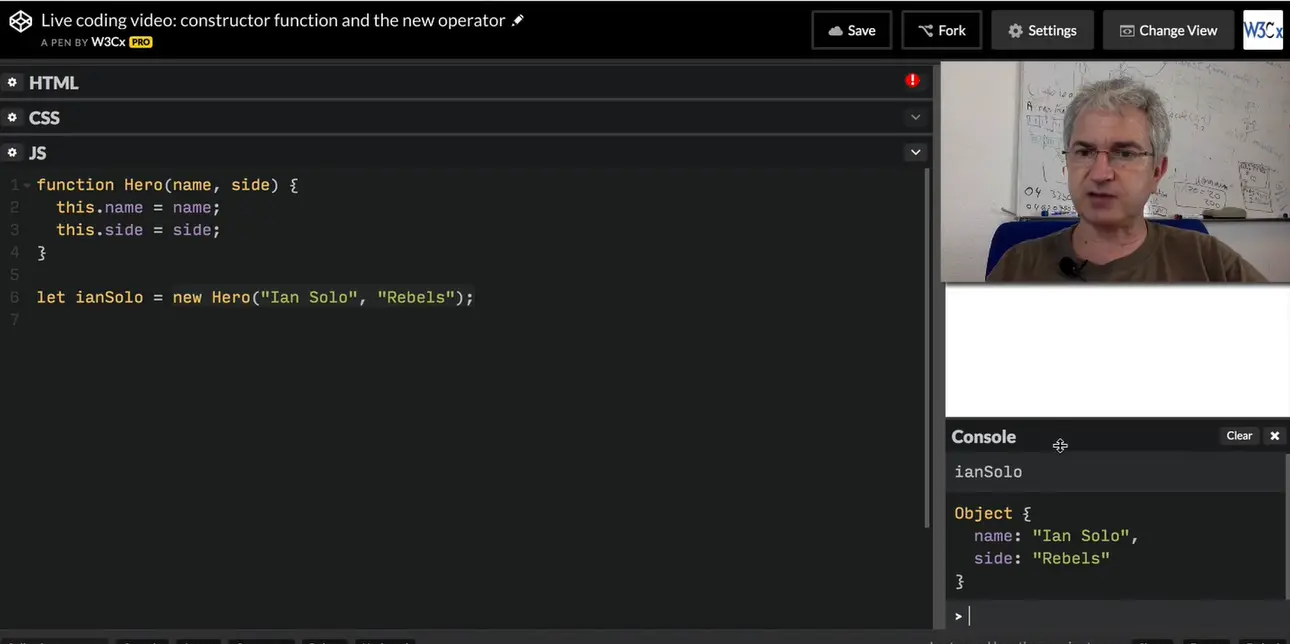
If we open the console and look at this object... you see that we built an object. And where it's interesting? It's when you create multiple objects.
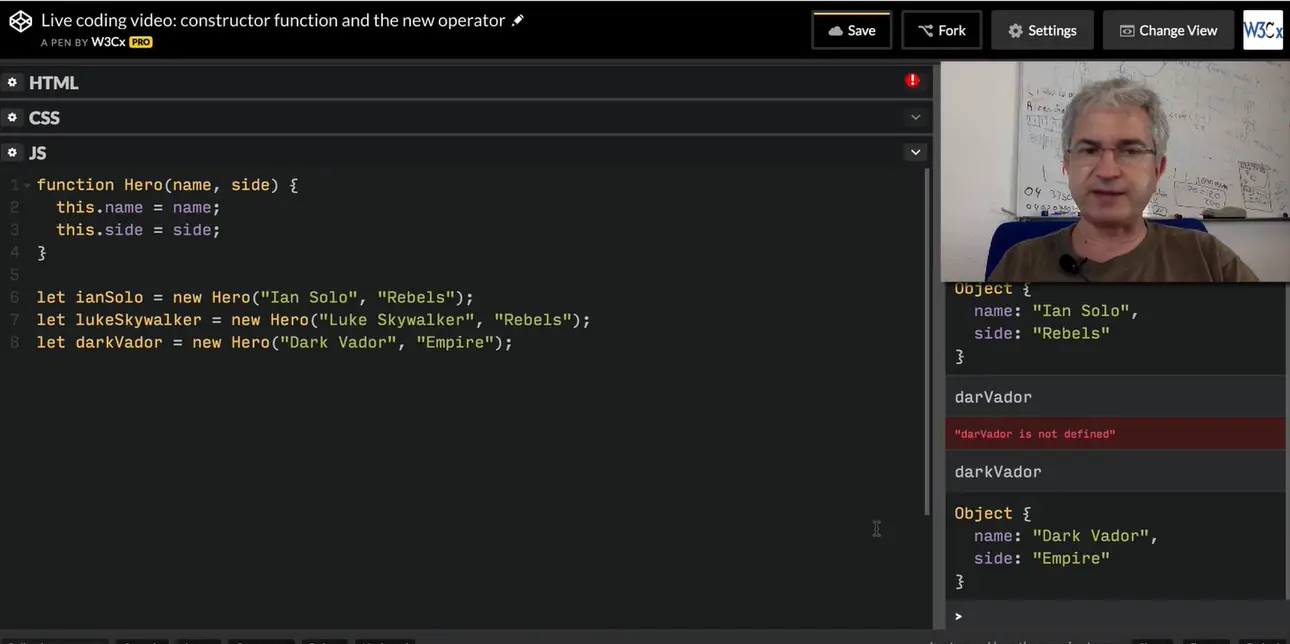
If you look at these objects, ... dark ..., we created multiple objects from the same template. Of course, we can also add methods in this object.
And the syntax is also to declare the name of the method preceded by "this": this.describeYourself =... and then the body of the function. This is a property defined in the class Hero. First, we can check that the method has been added to each object...so, Ian Solo... you can see the method here: "describeYourself"... you can see the body of the method. Luke Skywalker has the same method because it's "an instance of the same class".
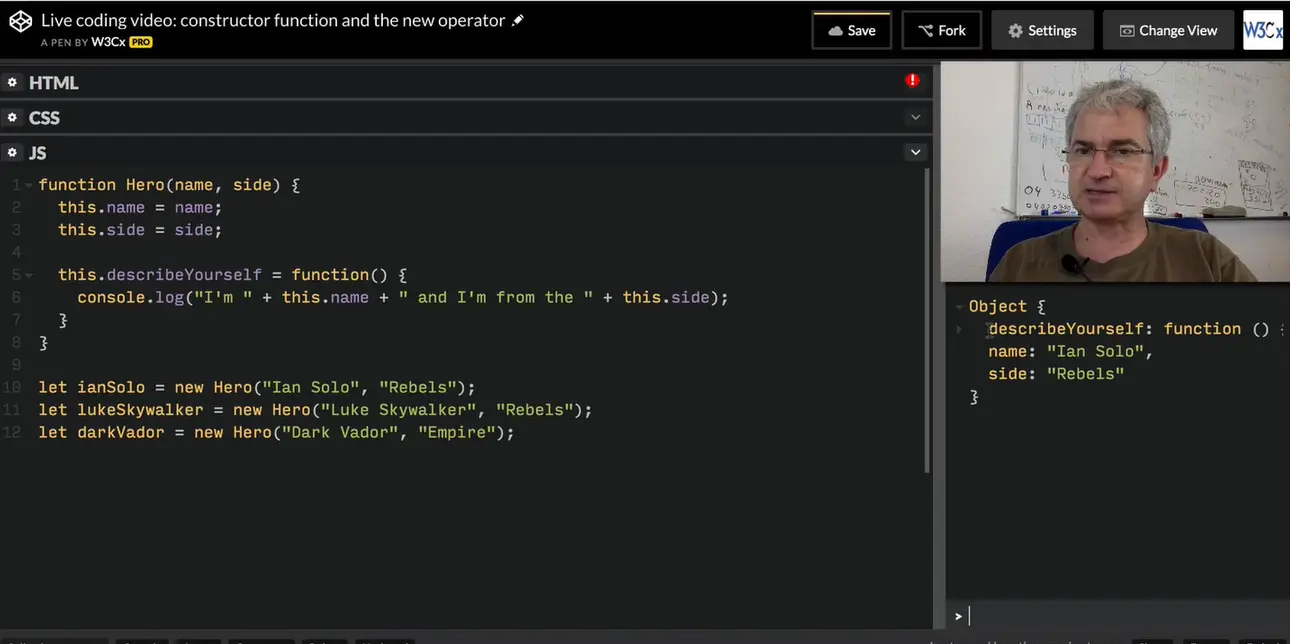
We can call ianSolo.describeYourself(); and it will say "I'm Ian Solo and I'm from the Rebels". If we do the same with darkVador, it will say "I'm Dark Vador and I'm from the Empire".
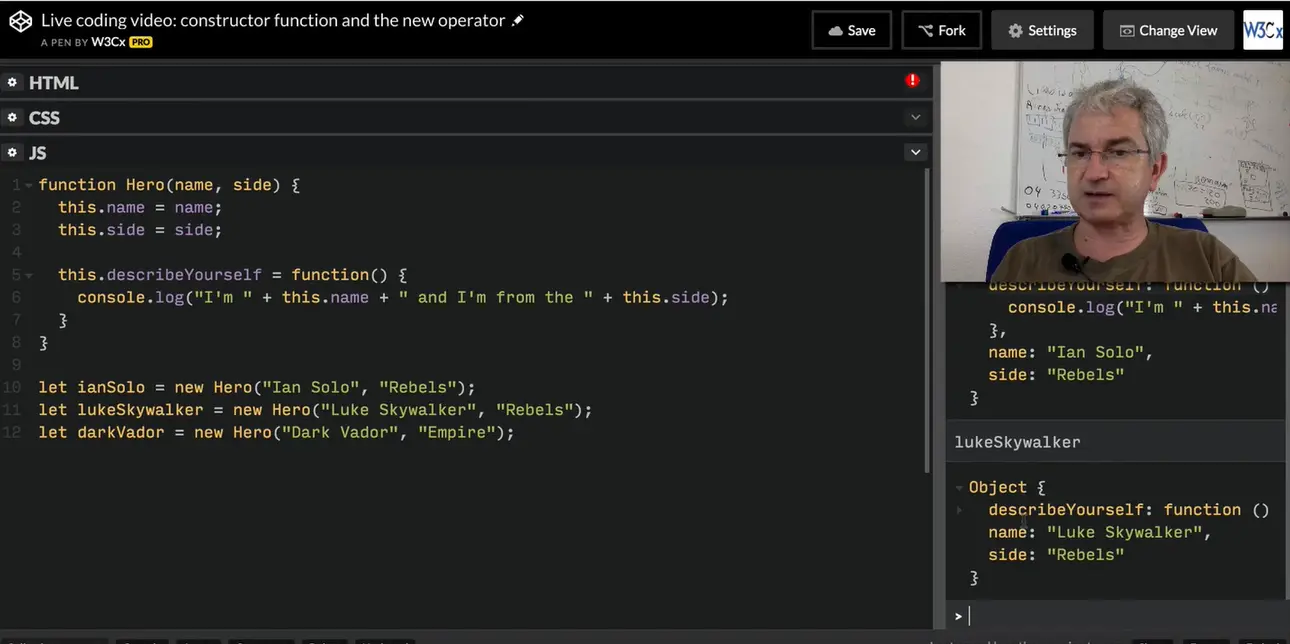
Just using these lines here, we'll create different objects that will all share a name, a side and a describeYourself properties and methods, but with different values that have been passed at construction time. The 'new' operator here is for constructing, for building objects.
Up to 2015, with JavaScript version 5 (and previous versions), you can define a pseudo-class template called "a constructor function". The syntax is the same as for creating a function, except that:
Examples (Car, Hero, Ball, Product are constructor function names):
var car = new Car('Ferrari', 'red');
var luke = new Hero('Luke Skywalker', 'rebels");
var ball1 = new Ball(10, 10, 20, 'blue'); // x=10, y=10,
radius = 20, color = 'blue'
var p1 = new Product('Epson printer P1232', '183', 'Mr Buffa');
// ref, price, customer etc.
function Hero(name, side) {
this.name = name;
this.side = side;
this.speak = function() {
console.log("My name is " + this.name + " and I'm with
the " + this.side);
}
}
In a constructor function named "Hero", you will find properties declared like this: this.name this.side; and methods declared like this: this.speak = function() {...}
function Hero(name) {
this.name = name;
...
}
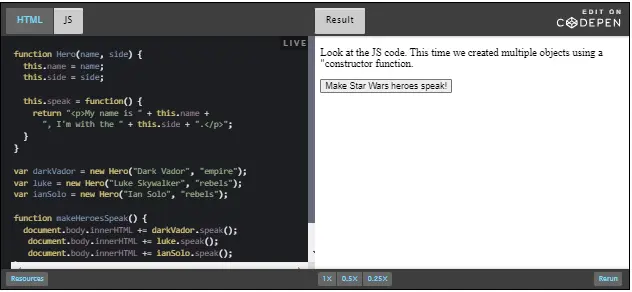
function Hero(name, side) {
this.name = name; // code outside of methods is usually for initializing
this.side = side; // the properties. Very often, they match the parameters
this.speak = function() {
return "<p>My name is " + this.name +
", I'm with the " + this.side + ".</p>";
}
}
var darkVador = new Hero("Dark Vador", "empire");
var luke = new Hero("Luke Skywalker", "rebels");
var ianSolo = new Hero("Ian Solo", "rebels");
function makeHeroesSpeak() {
document.body.innerHTML += darkVador.speak();
document.body.innerHTML += luke.speak();
document.body.innerHTML += ianSolo.speak();
}
Lines 1-9: see how the constructor function is declared: the function name starts with an uppercase letter 'Hero'. The parameters have the same name as the properties they correspond to (name, side). And in the first source code lines after the function declaration, we initialize some properties using these parameters (lines 2 and 3). We use the this keyword to distinguish the property and the parameter. You will often see things like: this.name = name; this.age = age; etc.
Lines 11-13: creation of three heroes. We use the same constructor function (Hero) along with the new keyword. Luke, darkVador and ianSolo ARE each a Hero, and share the same properties (name, side, lines 2 and 3) and the same behavior (they can speak, they all have a speak method, declared at line 5).
Live coding lesson: modern JavaScript's classes
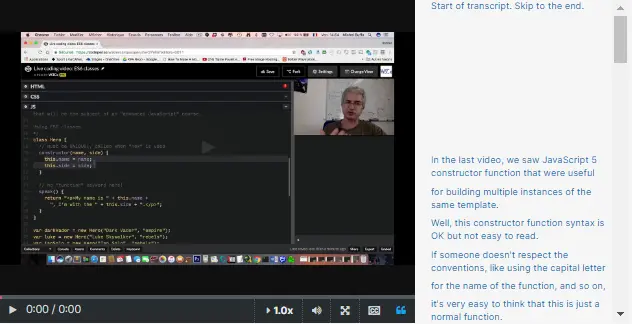
In the last lesson, we saw JavaScript 5 constructor function that were useful for building multiple instances of the same template.
Well, this constructor function syntax is OK but not easy to read. If someone doesn't respect the conventions, like using the capital letter for the name of the function, and so on, it's very easy to think that this is just a normal function.
If I read a source code with a constructor function written in lowercase, I might not understand that it's meant for building objects. JavaScript 6 introduced the concept of classes that we're going to see. But just before looking at the class version of the hero we saw earlier, let's have a look at it again.
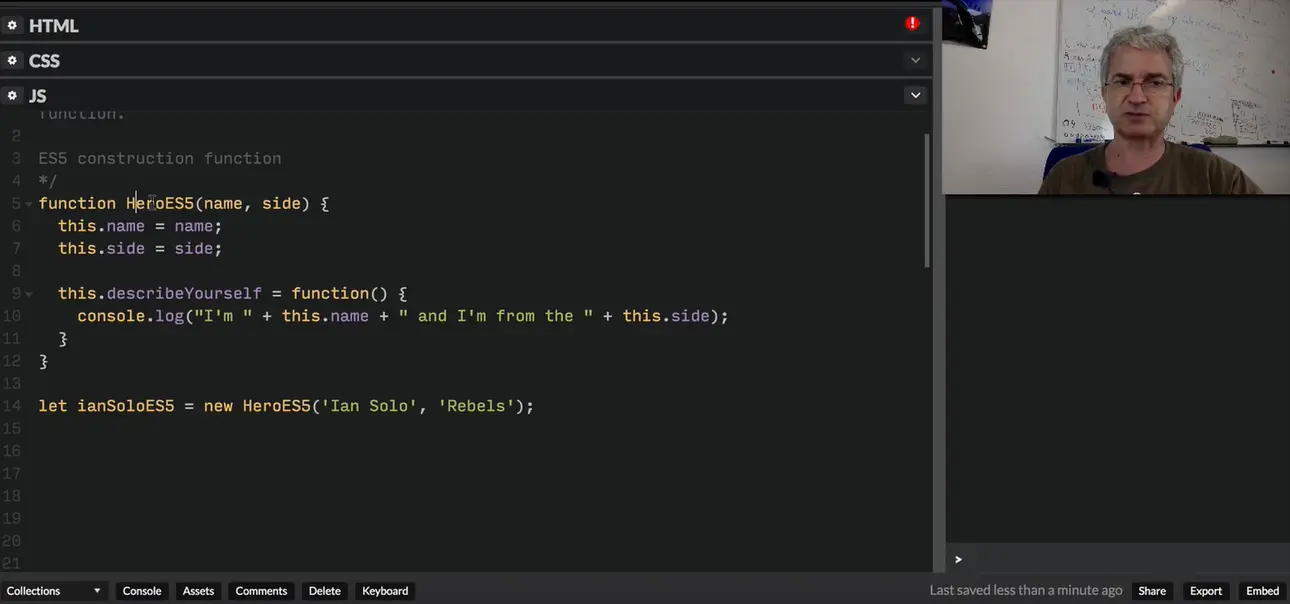
Previously, we had a function with the name that starts with a capital letter, we passed the parameters for building the object, and we used this to set the different properties. We used the equal sign for setting values to the properties at building time, and we also used the equal syntax for defining methods. And inside methods, we used these for accessing the properties.
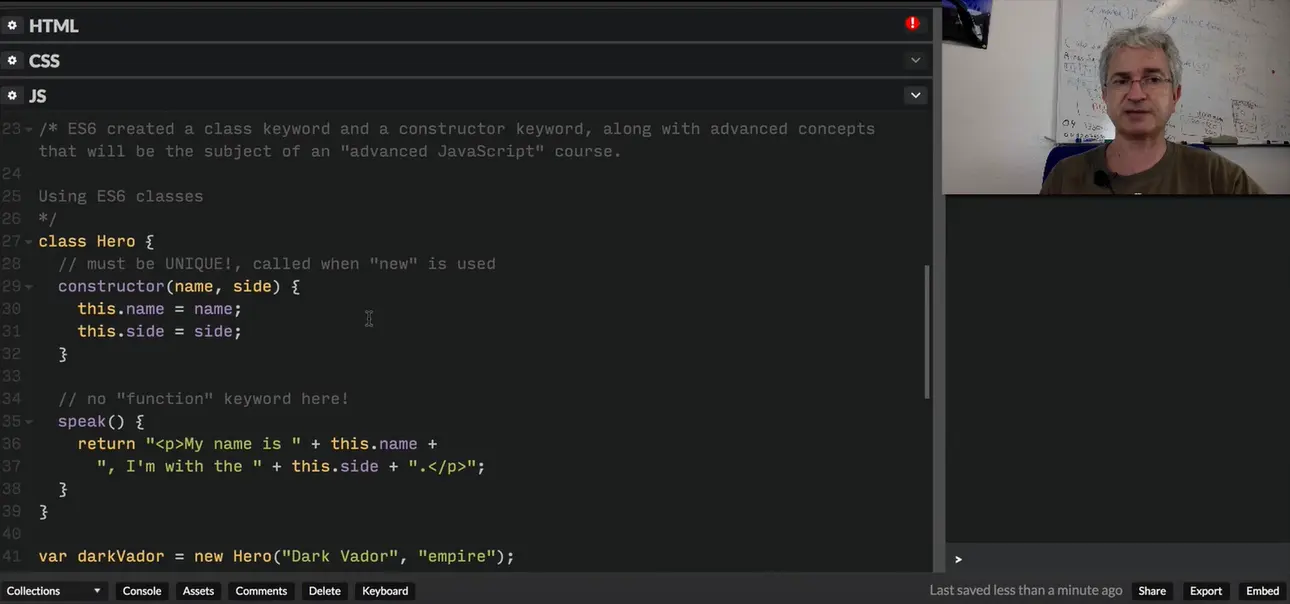
With the new JavaScript 6 syntax, it's much simpler. We use the "class" keyword followed by the name of the class for defining a class. JavaScript 6 also introduces the concept of constructor.
Constructor is a special method that will be called at construction time, when "new" is used. When we will build darkVador using "new" followed by the name of the class, it will call this method. So "new Hero( "Dark Vador", "empire")" will call the constructor in the class, passing "Dark Vador" and "empire" as values for the "name" and "side" arguments.
Inside the constructor, we usually set the different properties, and for this we use the same syntax as in constructor function. We use "this" followed by the name of the property and we use the equal sign for setting values to the properties.
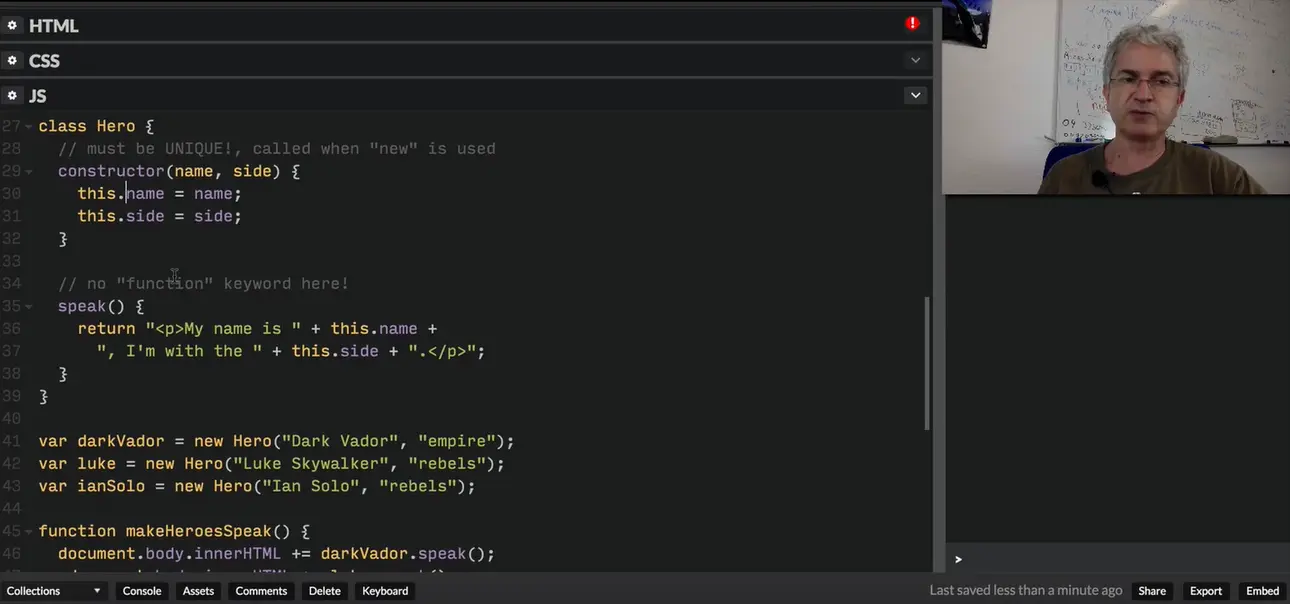
Then we can define methods, and here, the syntax again is much simpler. No more use of the "function" keyword.
Look at this, you just type the name of the method followed by parentheses, and eventually, you can add arguments between parentheses. Compare the way we declare the method in JavaScript 5, inside the constructor function, with the way we declare method with JavaScript 6 classes. Here, we will able to call "darkVador.speak()" to call this method.
And inside the method, you will still use "this" keyword for accessing internal properties of the object of for calling internal methods. If I had a method, "anotherMethod" here. Blah blah blah ... something. I would call it using "this.anotherMethod". In this aspect, it's very similar to what we saw with constructor functions and JavaScript objects with the JavaScript 5 syntax. Okay, so we can try this example.
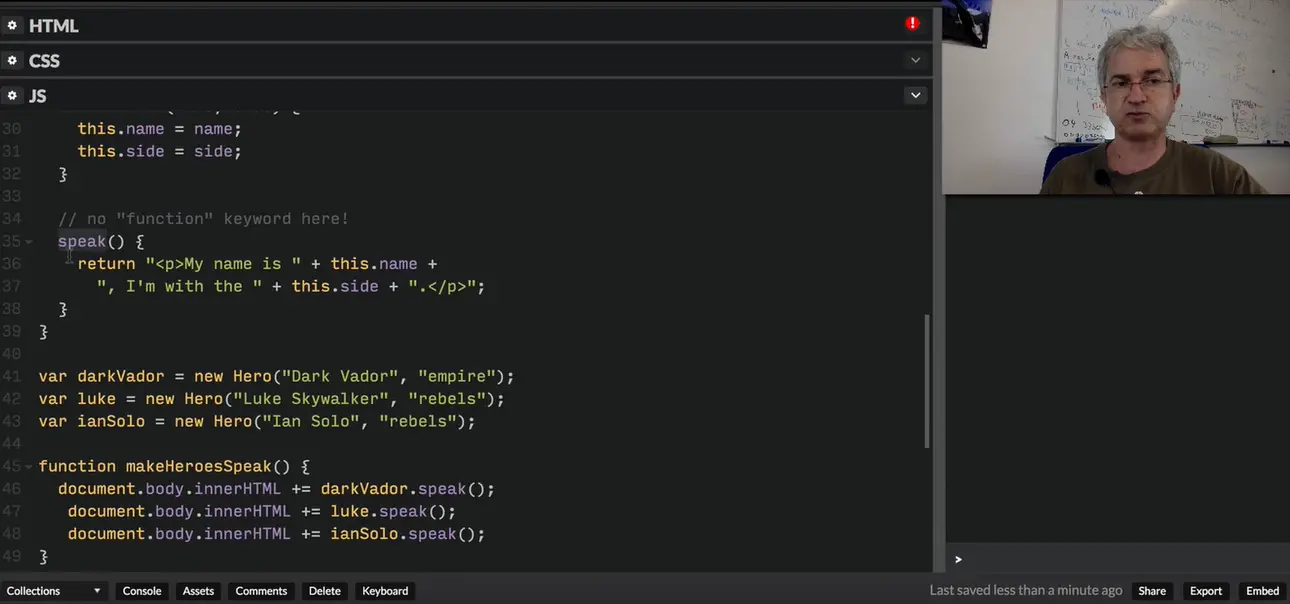
Here we build, in a similar way as previously with constructor function, we build object using the "new" keyword followed by the name of the class and we pass the parameter for building the object, that will be passed to the constructor.
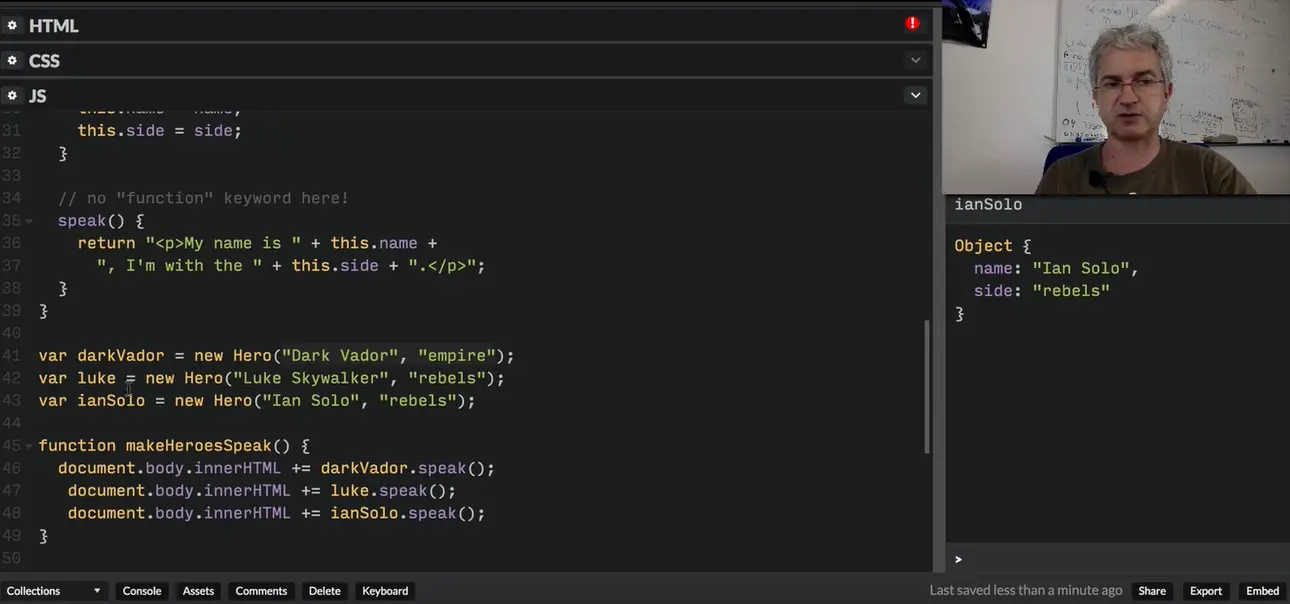
We can type "ianSolo": see that it's been built correctly.
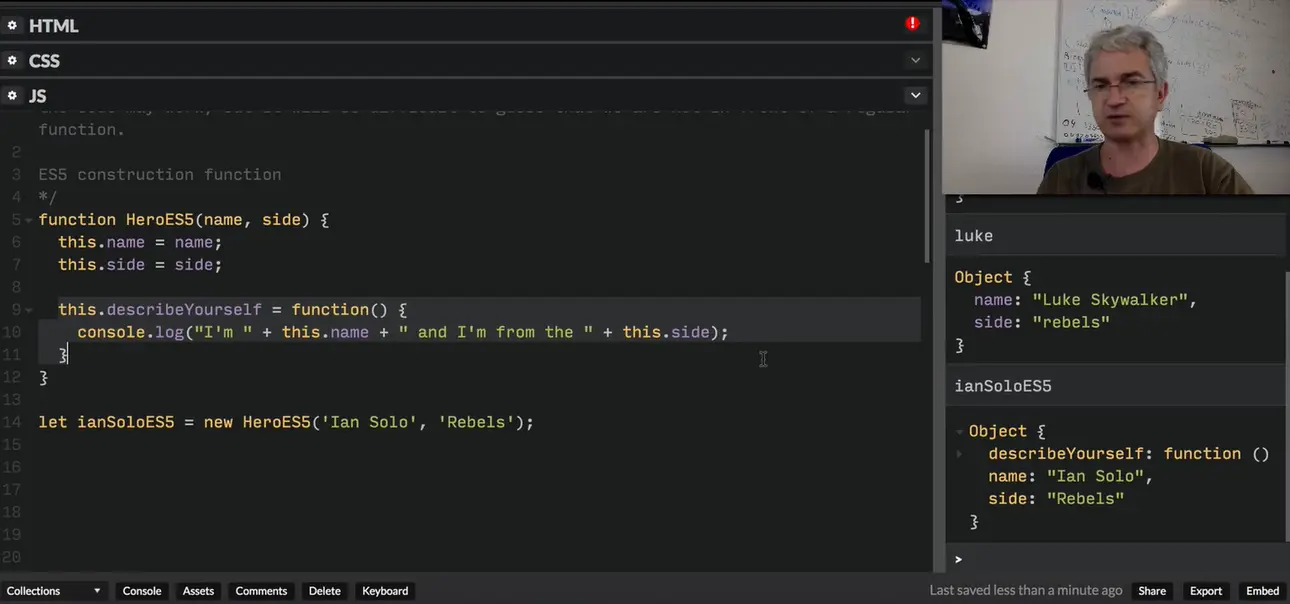
And if we compare to the JavaScript 5 version, the "IanSolo JavaScript 5", you see it's completely similar. Well, in this example, we had a method describe yourself, but it's really the same thing behind the scene, just a syntactic sugar for making... defining templates for building object much more easier than before. I recommend to use the class syntax from ES6, it's supported by all modern browsers.
ES5's constructor function syntax is not easy to read. If someone does not respect the "conventions" that we've just discussed (start the class with an uppercase, etc.), then the code may work, but it will be difficult to guess that we are not in front of a regular function.
Modern JavaScript now provides a class keyword and a constructor keyword, along with advanced concepts that will be the subject of a future " JavaScript advanced" course.
Example: let h1 = new Hero('Ian Solo', 'rebels');
This will call constructor(name, side) in the example below.
Here is the new version of the Hero "template", this time with the ES6 class syntax:
class Hero {
constructor(name, side) {
this.name = name; // property
this.side = side; // property
}
speak() { // method, no more "function"
return "<p>My name is " + this.name +
", I'm with the " + this.side + ".</p>";
}
}
var darkVador = new Hero("Dark Vador", "empire");
The instructions in the body of the constructor are executed when an object is created using the keyword new followed by the name of the class, with arguments between parentheses. These arguments will be passed to the constructor.
See below an interactive example that uses an ES6 class to create Star Wars' heroes.
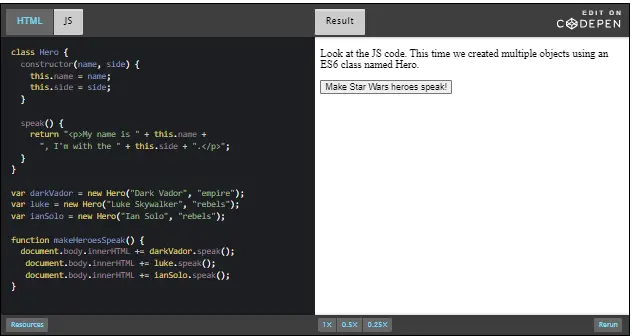
Unlike functions, classes must be declared BEFORE using them.
An important difference between function declarations and class declarations is that function declarations are "hoisted" and class declarations are not. This means that you can call a function BEFORE it has been declared in your source code. This is not the case with ES6 classes!
You first need to declare your class and then access it, otherwise code like the following will throw a ReferenceError:
Incorrect version => you try to create an instance of a class before it has been declared:
var p = new Rectangle(); // ReferenceError
class Rectangle {...}
Correct version =>
class Rectangle {...}
var p = new Rectangle(); // WORKS !
We have already seen three different ways to create objects (literals, constructor functions and ES6 classes).
Objects can be created as "literals":

var darkVador = { firstName:'Dark', lastName:'Vador'};
Objects can be created with the keyword new and a constructor function or an ES6 class:
var darkVador = new Hero('Dark Vador', 'empire');
function getMousePos(event, canvas) {
var rect = canvas.getBoundingClientRect();
var mxx = event.clientX - rect.left;
var my = event.clientY - rect.top;
return { // the getMousePos function returns an object. It's a factory
x: mx,
y: my
}
}
var mousePos = getMousePos(evt, canvas);
console.log("Mouse position x = " + mousePos.x + " y =
" + mousePos.y);
The call to getMousePos returns an object that has an x and a y property.
Live coding lesson: static properties and methods
Hi, let's talk again about classes, properties and methods. So far, we saw classes that are templates for building objects. And in the class, we define properties and methods. Properties are for describing the characteristics of each object that will be built.
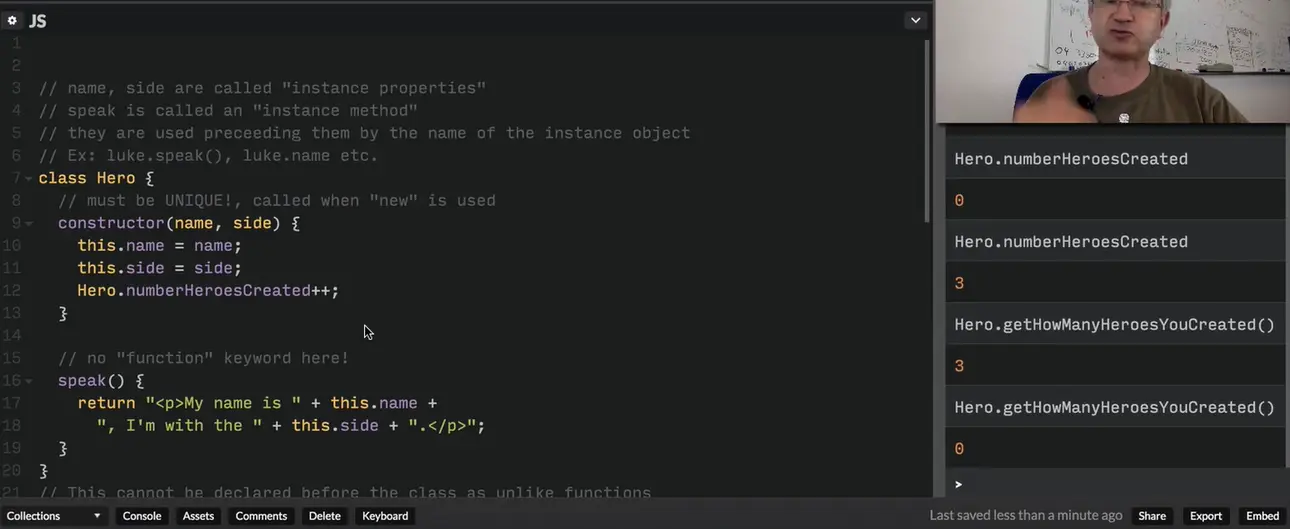
The name property, the side property, for the Star War heroes, correspond to Luke Skywalker and the rebels, to Dark Vador and the empire. And these properties and methods are called 'instance properties' and 'instance methods' because they are tied to the objects that have been created. And we use them by preceding them by the name of the object: luke.speak(), darkVador.name(), and so on.
Sometimes you will want to have some properties for characterizing the class itself, and some methods for characterizing the behavior of a class. For example, you would like to know how many heroes have been built. And you'd like for that to ask the hero class.
We can define what we call 'static properties' and 'static methods'. But I prefer to use another name for them that is also very common: we call them class properties and class methods.
Class properties define the characteristic of the class itself: how many heroes have you built? And the class methods will correspond to the behavior of the class Hero: "Hey! Please give me how many heroes from the rebels you've built".
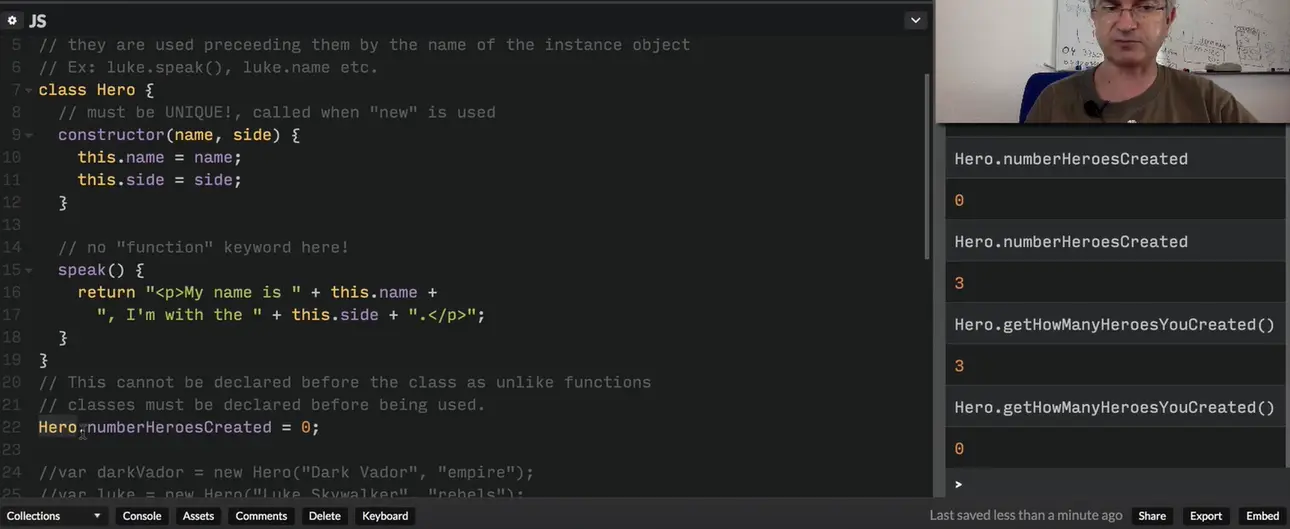
Let's see an example. I will declare a property for the class Hero. We use the name of the class followed by '.' followed by the name of the property.
Here, I declare that after the Hero class, because we explained this in another page of the course, but unlike functions, you can use only class name after it has been declared. The class Hero is declared here, I can only use "Hero.something" 24
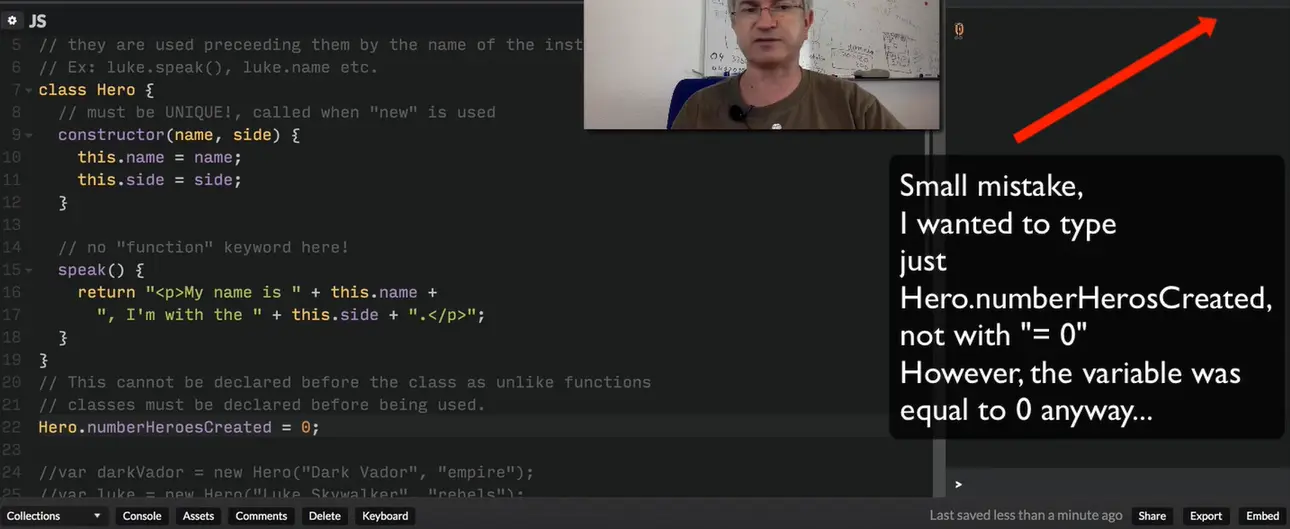
Here, I declared a variable named "numberHeroesCreated". I can type this in the console and see that it returns 0. But why it's interesting, is that I can use this class property inside a class itself. If in the constructor, I increment the "numberofHeroesCreated", the property of the class Hero. And if I build 0 instance, ...
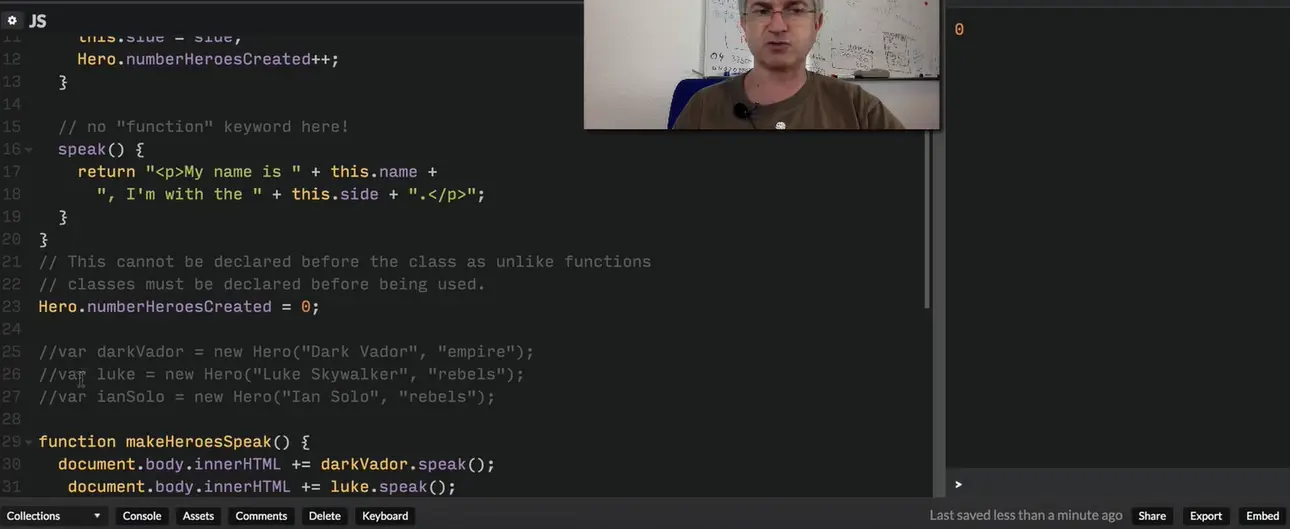
I can look at the value of this property: it says 0. But if I built 2 objects, in that case the "new" keyword will call twice the constructor method. And the property of the class Hero will say I've built 2 heroes. If I'm just uncommenting another one, here. The return value is 3.
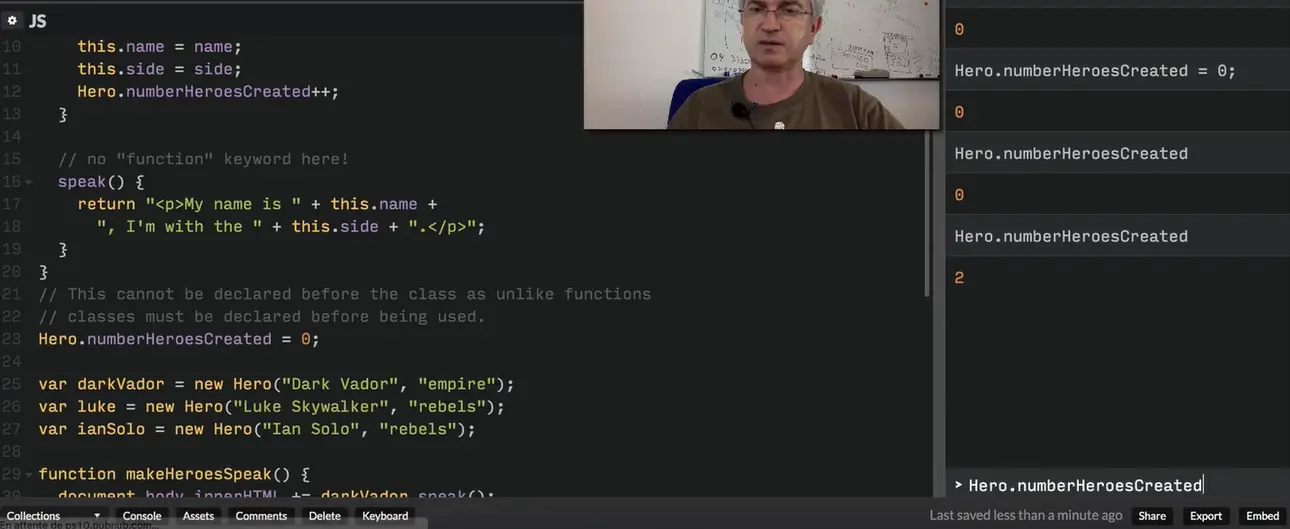
It's important to use this method, using the name of the class because it corresponds to a property of this class, to characteristics... "class Hero. How many heroes have you created?"
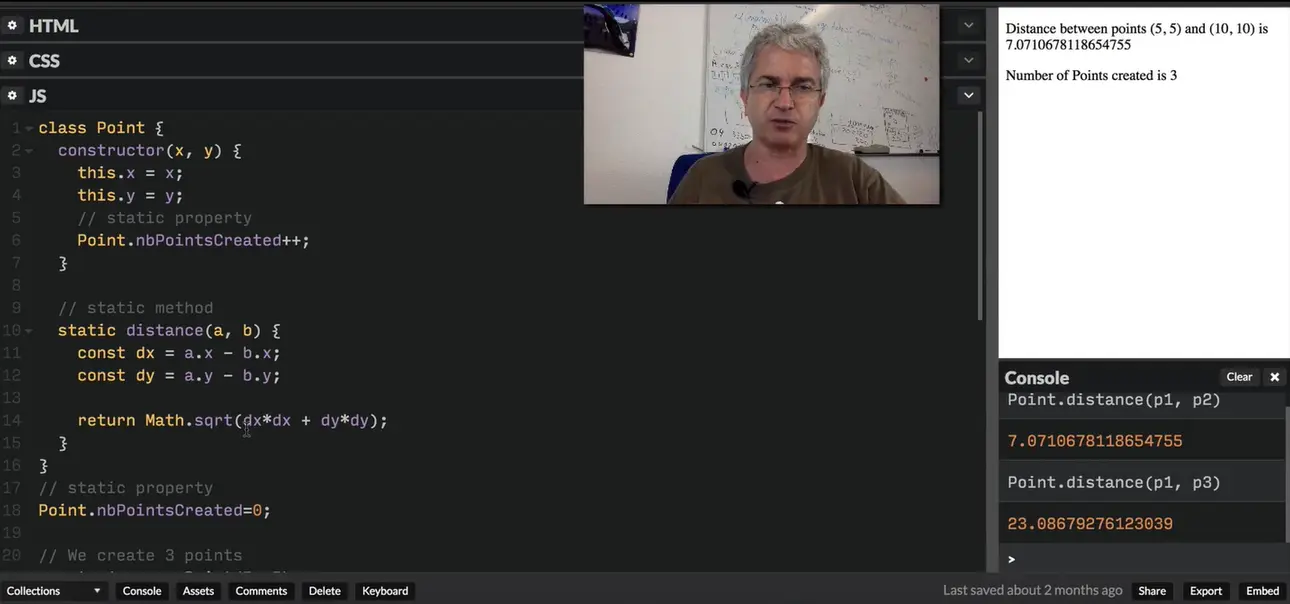
Now, we can also have static methods. A static method can be some sort of utility method, some behavior method of the class itself. Here we've got a class that defines a point, defined by its "x" and "y" properties. We can have a "distance" method for computing the distance between two points. We could have this located outside of the class and it will just use the coordinates of two points for computing the distance. But if it's meant to work only on points, it's a good idea to put it as a class method inside the point class.
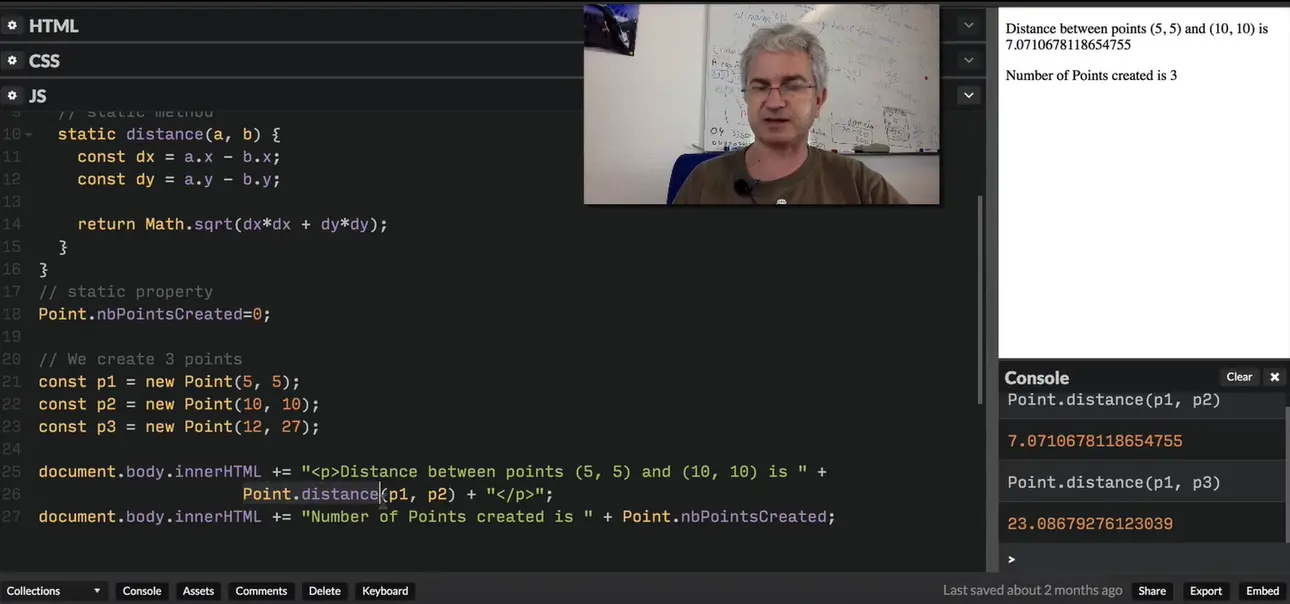
Like this, when you will compute the distance between 2 points, we'll just call: Point.distance(), passing the 2 points as parameter. In plain text, it means: "class point, please compute the distance between these 2 points that are instanced of your class". When you've got methods that are only related to instances of the class itself, it's a good idea to put it inside. And you precede them by the "static" keyword.
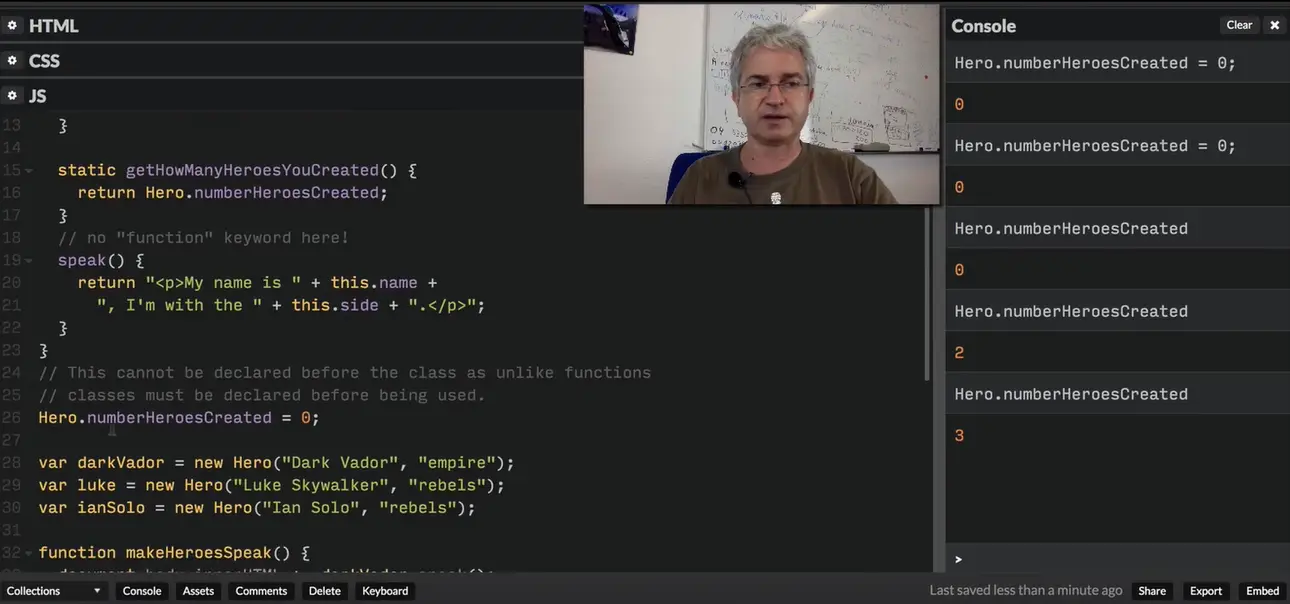
Because sometimes, you can call such methods without using any instance. For example, if I want a method that will work on the "numberHeroesCreated": static getHowManyHeroesYouCreated()... HowManyHeroesYouCreated. And here, it makes sense that it should be a special method because, instead of using an instance name, I will use the name of the class.
getHowManyHeroesYouCreated()... 0!
Sometimes, there are methods "attached" to a class, not to an instance of a class.
For example, imagine the Hero class we've already seen, and we would like to know how many Star Wars's heroes have been created. If zero hero has been created, it's obvious that we could not use this property with an instance of the class such as Dark Vador: darkVador.getNbHeroes(); this would make no sense.
Instead, object oriented programming languages have the concept of "class properties" and "class methods" that complete the "instance properties" and "instance methods" that we've seen up to this point. Hero.getNbHeroes() means "Hey, class Hero, can you tell me how many heroes have been created using your class?". Class methods define the "class behavior", and instance methods define the instances' behavior. darVador.speak(); means "Hey, Dark Vador, please, tell us something!". I speak to Dark Vador and I'm expecting something creative from him, such as "I'm your father, Luke!".
It's the same for properties. If there is a property named nbHerosCreated in the class Hero, it represents the DNA of the class, not of the instances. You can say "the Hero class has the number of heroes it created", and you can say "Dark Vador has a name and belongs to the empire side", but not "Dark Vador has a number of heroes he created". We have class properties and instance properties.
How do we distinguish them? By using the static keyword. When you see a method preceded by the static keyword, it means that you see a class property or a class method.
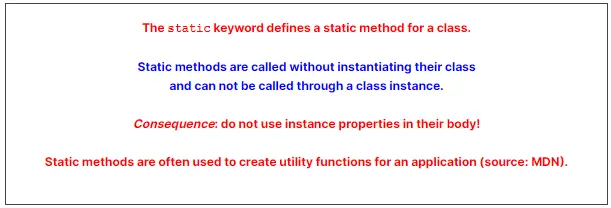
Class properties should be defined after the class definition, and declared using the name of the class followed by the . operator and the name of the property. Example: Point.nbPointsCreated in the example below. A best practice is to ALWAYS use them this way.
There is another way to declare Class properties (using static getters and setters -- see next section, for advanced users), but we recommend using this one for beginners.
class Point {
constructor(x, y) {
this.x = x;
this.y = y;
// static property
Point.nbPointsCreated++;
}
// static method
static distance(a, b) {
const dx = a.x - b.x;
const dy = a.y - b.y;
return Math.sqrt(dx...dx + dy...dy);
}
}
// static property definition is necessarily outside of the class with ES6
Point.nbPointsCreated=0;
// We create 3 points
const p1 = new Point(5, 5);
const p2 = new Point(10, 10);
const p3 = new Point(12, 27);
document.body.innerHTML += "<p>Distance between points (5, 5) and
(10, 10) is " +
Point.distance(p1, p2) + "</p>";
document.body.innerHTML += "Number of Points created is
" + Point.nbPointsCreated;
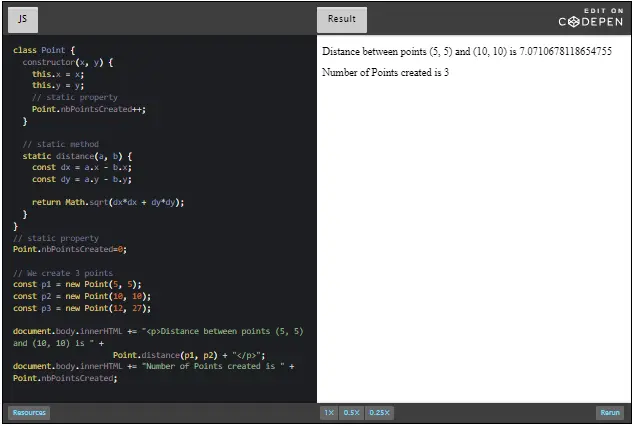
It is possible to use special methods that are called getters and setters. They allow to make some checks when one is trying to set a value to a property, or to do some processing when accessing it (for example for displaying it in uppercase, even if its value is in lowercase).
These special functions are called "getters" and "setters", and are declared using the keywords get and set followed by the name of the property they define.
class Person {
constructor(givenName, familyName) {
this.givenName = givenName; // "normal name"
this._familyName = familyName; // starts with "_"
}
get familyName() {
return this._familyName.toUpperCase();
}
set familyName(newName) {
// validation could be checked here such as
// only allowing non numerical values
this._familyName = newName;
}
walk() {
return (this.givenName + ' ' + this._familyName + ' is
walking.');
}
}
let p1 = new Person('Michel', 'Buffa');
console.log(p1.familyName); // will display BUFFA in the devtool console
// this will call implicitly get familyName();
p1.familyName = 'Smith'; // this will call implicitly set
familyName('Smith');
Notice that when you declare get familyName() {...} for example, you define implicitly a property whose name is "familyName" and that will be accessible using object.familyName, where object is an instance of the class. See lines 22-25 in the example above. Displaying the value of p1.familyName will call implicitly get familyName(), while p1.familyName = 'Smith'; will call set familyName('Smith');
As get familyName() defines an implicit property named familyName, the convention is to use this._familyName for storing its value (the same name preceded by an underscore).
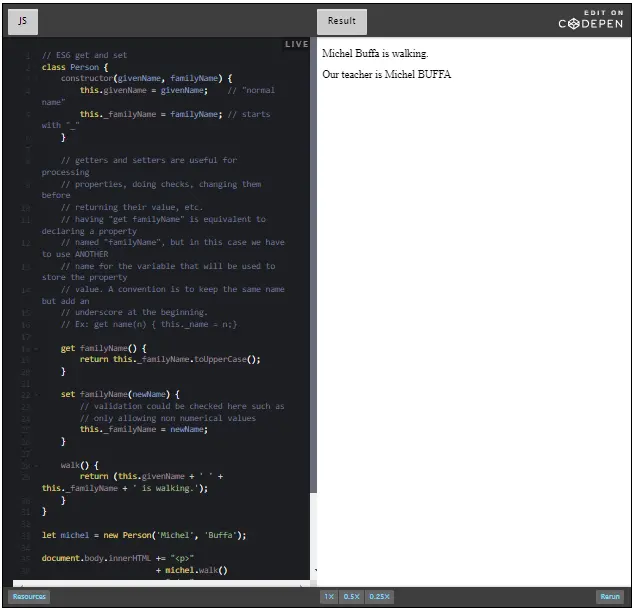
Here is the discussion forum for this part of the course. Please either post your comments/observations/questions or share your creations.
First, let's look how we were handling balls previously in our game!
We have built balls in order to fill the array of balls.
function createBalls(n) {
// empty array
let ballArray = [];
// create n balls
for(let i=0; i < n; i++) { // let's build multiple times a singleton object
let b = {
x:w/2,
y:h/2,
radius: 5 + 30 ... Math.random(), // between 5 and 35
speedX: -5 + 10 ... Math.random(), // between -5 and + 5
speedY: -5 + 10 ... Math.random(), // between -5 and + 5
color:getARandomColor(),
}
// add ball b to the array
ballArray.push(b);
} // end of for loop
// returns the array full of randomly created balls
return ballArray;
}
In the code above, in order to build n balls, we created a singleton ball object multiple times. This worked, but if we have misspelled a property name within the code, or forgot one of the properties that had to be initialized, we would have received no warnings. We will replace these lines with something like let b = new Ball(...);
function createBalls2(n) {
// empty array
let ballArray = [];
// create n balls
for(let i=0; i < n; i++) {
// Create some random values...
let x = w/2;
let y = h/2;
let radius = 5 + 30 ... Math.random(); // between 5 and 35
let speedX = -5 + 10 ... Math.random(); // between -5 and + 5
let speedY = -5 + 10 ... Math.random(); // between -5 and + 5
let color = getARandomColor();
// Create the new ball b
let b = new Ball(x, y, radius, color, speedX, speedY);
// add ball b to the array
ballArray.push(b);
}
// returns the array full of randomly created balls
return ballArray;
}
Ok, not a very big change here, except that we are no longer manipulating the property names one by one, and we use the new keyword.
And here is the (so far, incomplete) ES6 class for Ball (continued in the next page of this course):
class Ball {
constructor(x, y, radius, color, speedX, speedY) {
this.x = x; // properties
this.y = y;
this.radius = radius;
this.color = color;
this.speedX = speedX;
this.speedY = speedY;
}
... // code to come for methods
}
Ok, we've seen how to define the Ball class: properties and constructor. Properties are the DNA for balls: they all have an x and y position, a radius, a color, a horizontal and a vertical speed.
It is time to add some behaviors: a draw and a move method. Indeed, all balls will be able to draw and move themselves.
Here's how we were drawing a ball in the previous version of the game:
function drawFilledCircle(c) {
// GOOD practice: save the context, use 2D trasnformations
ctx.save();
// translate the coordinate system, draw relative to it
ctx.translate(c.x, c.y);
ctx.fillStyle = c.color;
// (0, 0) is the top left corner of the monster.
ctx.beginPath();
ctx.arc(0, 0, c.radius, 0, 2...Math.PI);
ctx.fill();
// GOOD practice: restore the context
ctx.restore();
}
And this how we were drawing and moving all the balls:
function drawAllBalls(ballArray) {
ballArray.forEach(function(b) {
drawFilledCircle(b);
});
}
function moveAllBalls(ballArray) {
// iterate on all balls in array
balls.forEach(function(b, index) {
// b is the current ball in the array
b.x += (b.speedX ... globalSpeedMutiplier);
b.y += (b.speedY ... globalSpeedMutiplier);
testCollisionBallWithWalls(b);
testCollisionWithPlayer(b, index);
});
}
Instead of having these behaviors as separate functions that take a ball reference as a parameter, it is always better to put this as a method inside the class. Indeed, each ball can move, can draw itself, and the content of these methods does not bring any external dependencies.
For example, if we decide to put a method named testCollisionWithWalls inside the Ball class, it would be bad, in terms of reusability, for its content to rely on external, global variables, such as the canvas size. You could have passed the canvas as a parameter, but then you create more specialization: you have a Ball class for balls that can move inside a rectangular area that is a canvas. It's better to just pass the width and the height of the zone.
Anyway, if you plan to use your balls in another game, it is recommended that you keep the class as simple as possible. It will be more reusable in other projects.
class Ball {
constructor(x, y, radius, color, speedX, speedY) {
// see previous section for the code
}
draw(ctx) { // Nearly the same as the old drawFilledCircle function
// BEST practice: save the context, use 2D transformations
ctx.save();
// translate the coordinate system, draw relative to it
ctx.translate(this.x, this.y);
ctx.fillStyle = this.color;
// (0, 0) is the top left corner of the monster.
ctx.beginPath();
ctx.arc(0, 0, this.radius, 0, 2...Math.PI);
ctx.fill();
// BEST practice: restore the context
ctx.restore();
}
move() {
this.x += this.speedX;
this.y += this.speedY;
}
}
Notice that we did not take into account the globalSpeedMultiplier we had in the old moveAllBalls function, as this is not something that is individually relevant to each ball: it is more something that affect ALL balls. This should raise an alert: use an ES6 class property for that!
In other words, even if zero ball has been created, this globalSpeedMultiplier is set and can be modified using a slider in the graphic user interface. Consequently, it is not a ball property, more a property of the Ball class itself.
This setting could be created using a class property, as seen in a previous section of this course.
function drawAllBalls2(ballArray) {
ballArray.forEach(function(b) {
b.draw(ctx);
});
}
function moveAllBalls2(ballArray) {
// iterate on all balls in array
balls.forEach(function(b, index) {
// b is the current ball in the array
b.move();
testCollisionBallWithWalls(b);
testCollisionWithPlayer(b, index);
});
}
And here is the CodePen version of the game that includes these improvements:
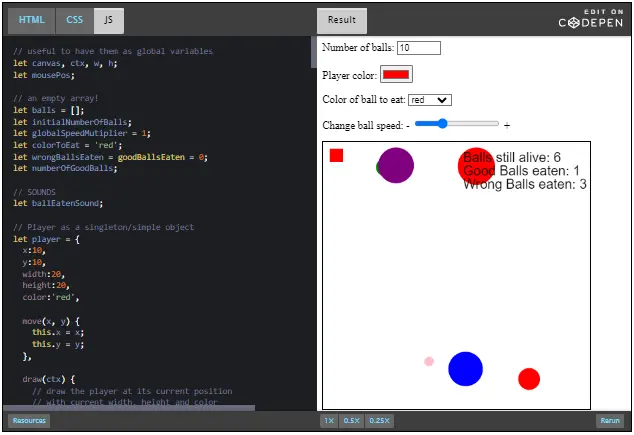
Transcript: Introduction - Adding interactivity
Adding interactivity to your Web documents often involves the use of different input fields.
The HTML5 specification came with a lot of new form elements such as sliders, color chooser, and so on. In this module, you will learn what can be done using JavaScript and form inputs. For example, how can we ask the user to enter new data, how can we manipulate input fields' content and validate on the fly, what is been typed? How can we update an HTML table by adding a new row with this new data? Other interactions may involve sliders to adjust the volume of a video, custom button for controlling a play list, color chooser for controlling color style and so on. You will learn the main events related to HTML5 forms and will play with many examples.
We'll also come back to projects seen during the previous modules and enhance their interactivity by adding forms. This is the last module of this course, congratulations!! The HTML5 series is a natural continuation of this course since you will be able to put into practice your new JavaScript skills! And I hope to see you again as I'm the author of some of these courses! Byebye!
What you will learn in Module 5:
This module ends with the final exam which regroups questions specific to the current module but also a potpourri of questions related to the 4 previous modules.
Live coding transcript: references and objects
When you define a variable, this is what happens: if its value is a primitive value, a number, a string or a boolean for example, the variable contains this value directly. On the opposite, if its value is an object with braces or created with the "new" keyword we saw during module 4, the variable contains the memory address of the object. We say that "this variable points to an object" or "references this object". And accessing the variable will automatically resolve the reference, meaning that the value of the variable is the referenced object.
And... let's see what happens when we copy a variable and modify the value of the variable that contains the copy. You will see that there are differences between variables that have a primitive value and variables that reference an object.
Let's start with primitive type...With primitive type if we take variable a and put the value "2" in it, then, if we copy this value of this variable into another one, ...here I've got the variable "x=2" and I set "x2" , "x2". So I've got "x2" that is a copy of "x", then if I modify the copied value, if I say "x2=3", you can notice that "x", the original variable, has not been modified. We just made a copy of it, a complete copy, and we modified the copy without changing the original. Now with objects, it's completely different.
Let's take the "y" variable from the example. That is an object with the property "a", that has the value of 2. If you look at the type of "y", it will say "y" is an object. Then, we copy "y" into "y2" and into "y3". "var y2=y" "y3=y". And then we modify one of the copy, "y2.a=3". We modify the property "a" of the object "y2".
It says "y2" as the value equal to 3. But if we display also the value of the property "a" for "y" and "y3", you will see that their value is the same. If we display here, "y.a" and "y3.a", the value is exactly the same. It's because "y", "y2" and "y3" point to the same location into memory. They just hold the memory address of the location that contains the value. If we modify this value using the "y2" reference, we also modify the value of the property of "y3" and "y".
You must understand this, take it slowly, look at the code, look at the video again until you are fine with that. However, if we say "y2" equals another object, in that case, if we modify "y2": "y2.a = 20" here. Then if we display the value of "y2.a", it will say "20". But if we just try to display the value of "y" and "y3", they have not changed. "y.a" "y3.a" - you see in the console, they've got their original value. It's because we assigned to "y2" another location in memory. And you can check if 2 different variables point to the same object using the "===" operator. So if we compare "y" and "y2", ...and I made just the test..., it will say "y and y2 ARE NOT the same object in memory".
You remember "y2" points to another location. And if you compare "y" and "y3", in that case they are the same objects. "y", "y3": they are the same objects, if I modify the property "a" of "y", and if I look to the "y3" it's modified too. To sum up, variables that are objects are in fact references to locations in memory. If we copy this variable that contains an object, we will get many variables that point to the same location in memory. With predefined types like Number, String and so on, it's a real copy that is done when we do "x=x2" for example. And in that case, only the copy is modified, not the original.
First of all, we have to define "reference". Unlike a pointer variable, which contains the actual address of an object within the memory, a reference variable is an alias to a variable. This means that when you modify a reference variable, the original variable is modified too. This is because the two variables reference (i.e. point to) the same object.
When you define a variable (such as var x = 10; or let name = "Michel"; or let courseAuthor = {firstName:'Michel', lastName:'Buffa'), this is what happens:
// Defining two variables
var x = 2; // the variable x contains the primitive datum 2
var y = { a: 2 } // The variable y references the object {a: 2}
// "Copying" two variables
var x2 = x;
var y2 = y;
var y3 = y;
// Modifying copied variables
x2 = 3;
y2 = { a: 3 };
// Check
x; // 2 <- x is not modified because it contains a primitive value
y; // { a: 2 } <- y is not modified because y2 does not point to same object
y3.a = 4;
y; // { a: 4 } <- The object referenced by "y" and "y3" is modified
var driver = {
name: 'Jean'
};
var car = {
color: 'red',
driver: driver
};
driver.name = 'Albert';
car.driver.name; // 'Albert'
JavaScript is a "pass by value" language, unlike some other languages, which are "pass by reference" languages. This means that when you pass a variable to a function as argument, the value of the variable is copied into the argument.
var x = 2;
function sum(a, b) {
a = a + b;
return a;
}
sum(x, 3); // returns 5
x; // 2 <- but x equals 2
When working with objects, the reference of the object is copied into the argument. That means you can modify the referenced object. But if you change the reference (for example by assigning a new object), the original variable (which now points to another object) will not be modified.
var obj = { x: 2 }
function add(a, b) {
a.x += b;
}
add(obj, 3);
obj.x; // 5 <- The referenced object is modified
var obj = { x: 2 };
function addAndSet(a, b) {
var addition = a.x + b;
a = { x: addition };
};
addAndSet(obj, 3);
obj.x; /... 2 <- The referenced object is not modified
because at the end of the function the variable "obj"
and the variable "a" are not referencing the same object..../
> var originalObject = {name:'Michel'};
undefined
> var copy = originalObject;
undefined
> copy.name;
"Michel"
> copy.name = 'Dark Vador';
"Dark Vador"
> originalObject.name
"Dark Vador"
// They are the same. originalObject and copy are two "references"
of the same object in memory
// If we change the name, we change the value in memory, but copy
and originalObject "point to" the
// same place, to the same object. They are just "pointers" or
"reference" to the same object
Comparing two objects will only return true if they point to the same object (i.e., if they have the same reference).

Two objects of the same type, with the same property value, that look identical, will not be equal one to another if they don't have the same reference (if they point to different places in memory).
> var originalObject = {name:'Michel'};
undefined
> var copy = originalObject;
undefined
> copy === originalObject
true
> var anotherObject = {name:'Michel'};
undefined
> copy === anotherObject
false
It is time to tell you the truth: the JavaScript code is executed by an "environment" (usually a Web browser, but there are some HTTP Web servers that use JavaScript for coding the server side of Web sites of applications, such as the NodeJS HTTP server).
This environment defines a "global object". When this environment is a Web browser (and this is the case for all examples we have seen in this course), this global object is named window. The "global variables" defined with the keyword var are properties of this window object, and we can say the same of predefined functions like prompt, alert, etc. However, at the top level of programs and functions, let, unlike var, does not create a property on the global window object.
TIP: if you have global variables/objects declared with let, just declare them with var instead, and you will be able to inspect them easily from the devtool console. You can switch back to using let, later.
> var a = 1; undefined > a; 1 > window.a; 1 > window['a']; 1 > let z = 1; // LET DOES NOT DEFINE properties of the window object undefined > window.z undefined
> document === window.document true > navigator === window.navigator true
Predefined functions are methods from the global object window:
> parseInt('10 little children');
10
> window.parseInt('10 little children');
10
> alert === window.alert
true
> prompt === window.prompt
true
> window.addEventListener === addEventListener
true
JavaScript comes with a set of predefined objects or built-in objects such as Math, String, Date and so on. For developers that already know the Java language... or C#, you can imagine this more like a class from the developer's kit, a class that is provided by the language itself. The consequence of this is that on all the objects you manipulate in JavaScript, you will be able to use a predefined set of methods and properties that will be inherited from this predefined object.
On all the objects you manipulate, you will be able to use a method called "toString()" that is very similar to what we've got in the Java language. Another method is called "valueOf()" that will just return the value of the object. Let's take an example with first an array.
Here, we've got the array "t", that contains: 1, 2 and 3. If I type the name of the array in the devtool console, it calls behind the scene "valueOf()". It's the same thing as if I typed: "t.valueOf()". If I try to print the value of "t" using "console.log()" for example: if I do: "console.log(t.toString())", in that case, it will return the value of "t" as a string and not as an array.
Writing "t.toString()" will convert to string the object. But, if you just write "console.log" using just "t", in that case we are implicitly trying to convert it to a string. The call to "toString()" will be implicit. If I type "console.log("t = " + t)", it works, because it's the same as writing "t.toString()". We've got the same behavior with the Java language and the C# language. You see the same result.
We can also try with an object. Here, we've got a "p" object that has 2 properties: name and age. If I type "p", it will display the value, it's the same as "p.valueOf()". If I type "p.toString()", in that case, it gives me the value of "p" as a string, and as a string its the value is this message.
The source code of the example shown in the video is available on CodePen.
The father of all objects: Object. All objects will inherit the properties and methods from the special class named Object.
> var o = {}; // creation of an empty object
undefined
> var o = new Object(); // same thing as in line 1
undefined
> o.toString(); "[object Object]" > o.name = 'Michel'; "Michel" > o.toString(); "[object Object]" > var t = [1, 2, 3]; undefined > t.toString(); "1,2,3"
toString() in JavaScript is rather similar to the Object.toString() method we find in the Java programming language: when we try to "display" an object, it is transformed into a string by calling toString() implicitly.
> alert(t); > alert(t.toString()); // same as previous line of code > "An object into a string : " + t // same as t.toString() "The object as a String : 1, 2, 3"
Line 5: using the + operator with a string as the left argument will force the other arguments to convert to string by implicitly calling their toString() method.
The ValueOf method returns the value of an object:
> var t = [1, 2, 3]; undefined > t.valueOf() [1, 2, 3] > t.toString(); "1,2,3"
Live coding transcript: predefined object - Array
This time, we look at the Array predefined JavaScript object. When you create an array, using the brackets notation, it's equivalent to using the "new" keyword with the name of the predefined class (or object) named, from JavaScript, "Array", with a big "A".
You can create an empty array using "new Array()" or you can create an array with elements inside, using "new Array()" followed by the list of elements. And if you only give one argument, you create an empty array full of undefined elements. "new Array(10)" will create an array with 10 undefined elements inside.
To tell you the truth, I nearly never use this notation. I prefer using directly the bracket notation. But this was just to show you that arrays are objects.
Now, let's look at some of the predefined properties and methods inherited from this "Array" predefined object. We already met the "length" property that corresponds to the number of elements in an array. If we look at the array named "a2", that contains "1" and "2", 2 numeric elements, 2 numbers, "a2.length" will display "2" ... 2 elements... value "2".
As arrays are objects, you can imagine that you can also set some properties to them. You can do "a2.name="Michel"". This not so good because your are mixing numbers with a property that is a name, and so on... I don't recommend at all doing that: avoid! But just to show you something: it's that the length of an array works only on elements that have a numeric index. If we display the length after adding the name (property), we will still have a length of "2"..."only elements with a numeric indexes are taken into account".
We can also change the "length" value. If we set the "length" to an arbitrary number, and if this number is bigger than the current number of elements, it will make the array grow and will fill it with undefined elements. After doing "a2.length=5", we can look at the length after that: it will be "5" and if we display the content of the array, it will display undefined, undefined, undefined. The notation, here, means undefined.
If you set the length to a value less than the current number of elements, in that case, it will shorten the array. It will remove the unwanted elements from the array. Now let's have a look at the most useful methods on arrays. One is called "sort()" and it's useful for sorting an array. I've got an array named "a" in the example.
Ok, let's set it again, here. I've got an array named "a", if I type "a.sort()", it will both return a sorted array but it will also sort the array itself. And by default, it sorts the array using just the numerical or alphabetical order. You can also add and remove elements to "a". We already saw the "push()" and the "pop()" methods. If I do "a.push()" with new elements, and if we look again at the array, I added twice an element named "new" and each time it returns the new length of the array. "a.length" is "7".
I can use "pop()": a.pop(), that will remove the last inserted element, the element at the end. It will return the value that has been removed, and you can see that "a" losts its last element. I can do it again: "a" lost 2 new elements I added earlier. Ok, let's have a look at another method called "join()".
"join()" will add a string between each elements of the array. "a.join()", and if I want to add some minus signs, will return the array with the minus sign in the middle. But it did not change the original array. If I want to use it, I can do: var b... b with minus... = a.join("---") And in that case, it's the returned array that will get the new modified value.
You can also use "slice()". "slice()" is a method that returns a sub-array without modifying the original array. If I want to remove the "3" and the "5" here, I need to remove elements from index 1 until index 2, ...3.
"a.slice(1,3)"... that means it will return "3" and "5" because this is the index of the last element before which I must stop cutting. And this does not modify the original array. If I want to remove elements and maybe insert elements at the location of the slice I remove, there is another method called "splice()". The "splice()" method modifies the array, it removes the slice and also adds new elements.
Let's start with the array "a". And I want to remove "3" and "5", and insert new elements instead. I can use the same syntax as before except that I will add a "p" for changing the name of the method, and I will add 3 new elements. If I look at what happened, it returned the slice that has been removed and now, in the array, we inserted instead the new elements. In that case, "splice()"... the last..., the second parameter, is included in the slice, It's a bit different and the previous method we saw. This means "remove elements 1 with index 1, 2 and 3" and put these elements instead.
It removed these 3 elements: 3, 5, 7 and inserted these elements instead. If you just use 2 parameters, the begin and the end indexes, it will just remove elements. In that case, we'll remove the 2 elements I've inserted here. And if I look at the array, it has been modified. These methods are quite powerful for manipulating elements inside an array: remove, insert, insert at the end, remove at the end, and so on...
The Array class can be used for creating arrays (however, we recommend that you use the other methods presented instead):
> var a = new Array(); // same as a = []; use this instead! undefined > var b = new Array(1, 2, 3); undefined > b; [1, 2, 3]
Attention: if only one element, this corresponds to the initial size of the array.
> var myArray = new Array(3); undefined > myArray; [undefined × 3]
> var a = [], o = {};
undefined
> a.length; // a is an array
0
> o.length; // o is a simple literal object
undefined
Some horrible things we can do with arrays (TO AVOID!):
> var a = [1, 2]; undefined > typeof a "object" > a.push(3); 3 > a [1, 2, 3] > a.length 3 // Now let's add a name property to the array. Yes, we can do that! > a.name = "I'm an array named a!"; "I'm an array named a!" > a.length; 3 > a; [1, 2, 3, name: "I'm an array named a!"]

The length property can be modified: reducing or increasing the size of an array. If you give to the length property a value bigger than the number of elements in an array, it adds undefined elements to it:
> var a = [1, 2]; undefined > a.length = 5; 5 > a; [1, 2, undefined × 3]
If you give to the length property a value less than the array's number of elements, it reduces the size of the array:
> var a = [1, 2, 3]; undefined > a.length = 2; 2 > a; [1, 2]
The most useful methods you can use on arrays are: sort(), join(), slice(), splice(), push()and pop()
> var a = [3, 5, 1, 7, 'test'];
undefined
> a.push('new') // appends at the end and returns the new length
6
> a;
[3, 5, 1, 7, "test", "new"]
> a.pop(); // removes the last element and returns it
"new"
> a;
[3, 5, 1, 7, "test"]
> var b = a.sort();
undefined
> b;
[1, 3, 5, 7, "test"]
> a;
[1, 3, 5, 7, "test"]
// a is also sorted. The sort method sorts the array + returns it
undefined
> a.join(' and ');
"1 and 3 and 5 and 7 and test"
The slice() method returns a shallow copy of a portion of an array into a new array object selected from begin to end (end not included). The original array will not be modified.
> a; [1, 3, 5, 7, "test"] > b = a.slice(1, 3); // elements of indexes = 1 and 2 [3, 5] > b = a.slice(0, 1); // element of index = 0 [1] > b = a.slice(0, 2); // elements o indexes = 0 and 1 [1, 3] > a; [1, 3, 5, 7, "test"] // a is unchanged by calls to a.slice(...)
The first two parameters are start and the number of elements to delete, the other parameters are the elements to add to the array to replace the slice that will be removed.
start: index at which to start changing the array (with origin 0)
deleteCount: An integer indicating the number of old array elements to remove.
item1, item2, ...: these are optional. They are the elements to add to the array, beginning at the start index. If you don't specify any elements, splice() will only remove elements from the array.
> a; [1, 3, 5, 7, "test"] > b = a.splice(1, 2, 100, 101, 102); [3, 5] > a; [1, 100, 101, 102, 7, "test"] > a.splice(1, 3); [100, 101, 102] > a; [1, 7, "test"]
The Number class can be used to transform strings into numbers, but it is recommended that you use parseInt or parseFloat instead.
> var n = Number('3.1416');
undefined
> n;
3.1416
> typeof n;
"number"
> var n = parseInt('3.1416'); // convert a string to an integer number
undefined
> n;
3
> var n = parseFloat('3.1416'); // convert a string to a float number
undefined
> n;
3.1416

Number has useful non-modifiable properties (constants): MAX_VALUE and MIN_VALUE:
> Number.MAX_VALUE; 1.7976931348623157e+308 > Number.MIN_VALUE; 5e-324
> var n = 123.456;
123.456
> n.toFixed(1); // sets the number of digits for the decimal part of the number
"123.5"
> n = new Number(123.456); // same as n = 123.456
Number {[[PrimitiveValue]]: 123.456} // well, not exactly, but
when you use n, it is equivalent
> n.toFixed(1);
"123.5"
> n.toExponential();
"1.23456e+2"
> var n = 255;
undefined
> n.toString();
"255"
> n.toString(10);
"255"
> n.toString(16);
"ff"
> (3).toString(2);
"11"
> (3).toString(10);
"3"
Live coding video: predefined class - String
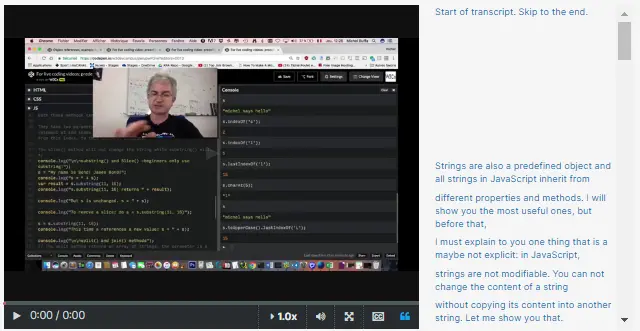
Strings are also a predefined object and all strings in JavaScript inherit from different properties and methods. I will show you the most useful ones, but before that, I must explain to you one thing that is a maybe not explicit: in JavaScript, strings are not modifiable. You cannot change the content of a string without copying its content into another string. Let me show you that.
If I declare a string with the value "Michel" in it: string "s" - and I try to modify its content like this: "s." character at position 0 equals something else. It returns the character that I modified but if I type the value of "s", it's unchanged. When you want to add or remove characters, you cannot use the bracket notation. The most common thing we do is: "s = s +" something.
You see like that. I'm creating a new string that has the old value of "s" plus the "say hello" string. This is stored somewhere in memory and then "s" will get a new reference: instead of referencing "Michel", it now references another string located somewhere else in memory that has the value "Michel says hello". This is how we can concatenate elements to a string.
Let's look at some of the most useful methods. One is a "toUpperCase()". It returns the string "s" in upper case, but without modifying the string itself. If you want to modify "s", you will do: "s = s.toUpperCase()". In that case, "s" has been modified. The same, if you want to put it in lower case, so you've got "toLowerCase()". That works too and using "s = s.toLowerCase()" modifies the string.
Some other interesting methods are "indexOf()" to locate, to get the index of a particular character. "s.indexOf()" and...if I say... the character "c", it will return 2. 0 for the "m", 1 for the "i" and 2 for the "c". "indexOf()" returns the first occurrence.
If I try it with an "l", it will be 5 for the first occurrence of the chain. You've got also the "lastIndexOf()" method that is useful for getting the last position: 15 will be this "l", the last "l" from the "hello" word located at the end of the string. You've got also "charAt()" that is useful for getting a character at a given position: "s.charAt(5)" will return the character at number 5, it's "l".
We can also chain methods. We've got "s" that has the value of "Michel says hello". You can say: "s.toUpperCase()" and this will return the same value but in upper case. And now I can do for example: "lastIndexOf()" with the big "L" and it will give me the answer, because "s.toUpperCase()" will return a value in upper case and on this return value, we will try to get the index of the last "l", big "L" in it. Then, you can also get parts of a string without modifying it.
You've got 2 different methods that are very similar. For the most common use, it's "slice()" and "substring()". Let's me show you "substring()". Let's type again the value of "s": s.substring()"... beginning index and end index...
For example, 0 to 3 will get the characters at index 0, 1 and 2. It stops before the end parameter. It will get character at position 0, 1 and 2 not 3. If I try again with 3 to 5, it will get only 2 characters: 3 and 4. You see that.
"slice()" does the same thing, so in my opinion just choose one. "slice()" will do exactly the same thing. To tell you the thrust, I mainly use only "substring()" with 2 arguments begin and end that are positive and begin less that end. Follow this advice and will not have any problem. Other interesting methods are "split()" and "join()". If you use "split()", you can indicate the separator character. In the current string, you've got spaces between the words.
If I do this, it returns an array composed of tokens that are just the different slices of the strings separated by a space. If I want to split "s" using another separator, for example, I can enter the character "l", then in that case you will have slices separated by the "l" keyword.
Ok let's try again with this one.
And "join()" will rebuild, again from an array of tokens, it will rebuild a string. And you can indicate what set of characters should be inserted in the middle between each token.
If I do this, it will... ok...I need to do this on the array so: "s.split(' ').join('----')" will first return the array of tokens separated by space and will in turn build again a string with '----' between different tokens.
The String class can be used to build new strings, but it's preferable to use the standard syntax:
> var name = 'Michel'; // use this rather than using new String(...)
undefined
>typeof name;
"string"
> var name = new String('Michel');
undefined
> typeof name;
"string"
> var name = 'Michel'; Undefined . name.length; 6 name[0]; "M" name[0] = 'Z'; "Z" name; // we cannot modify a string using s[index] = value; "Michel" 'Michel'.length; 6 'Michel'[0]; "M"
These methods are all inherited from the String class:
> var s = "I'm the Walrus";
Undefined
var s1 = s.toUpperCase();
undefined
s1;
"I'M THE WALRUS"
var s2 = s1.toLowerCase();
undefined
s2;
"i'm the walrus"
s; // s is unchanged
"I'm the Walrus"
s.indexOf('w'); // no 'w' in s
-1
s2.indexOf('w');
8
s2[8]; // char at index 8
"w"
s2.charAt(8); // same as s2[8]
"w"
> s = 'wow wow wow!';
"wow wow wow!"
> s.lastIndexOf('w');
10
> s.indexOf('w', 1); // start looking at s at index=1, s[0] is ignored
2
> var s1 = s.toUpperCase();
undefined
> s1;
"WOW WOW WOW!"
> s1.toLowerCase().lastIndexOf('w'); // we can chain method calls using '.'
10
The most useful methods of the String are: slice, substring, split, join.
Both these methods can be used to extract a substring from a string. They take two parameters: the start and end index of the slice (element at end index will NOT be included in the slice): "please cut from this index, to this one, not included!".
These two methods are very similar.
> var s = "My name is Bond! James Bond!"; undefined > s; "My name is Bond! James Bond!" > s.slice(11, 16); "Bond!" > s; // s is unchanged "My name is Bond! James Bond!" s.substring(11, 16); "Bond!" > s; // s is still unchanged "My name is Bond! James Bond!" > s = s.substring(11, 16); "Bond!" > s; // this time s has changed, because we did s = s.substring(...), the same // could have been done with s = s .slice(...) "Bond!"
If you are a beginner, we recommend that you use substring for most common cases (as it will behave the same as slice) and that you stay away from negative parameters, where slice and substring show small differences.
Beginners: do not read what follows about slice and substring! There will be no related graded questions at the end of this chapter!
> var s = "My name is Bond! James Bond!"; undefined > s.slice(11, -1); // start from index = 11 to length-1, extract the end of the string from 11th element "Bond! James Bond" > s.substring(11, -1); // the reverse, extract from 0 until 11-1, get the first 10 chars "My name is " > s.substring(1, -1); // extract from 0 to 1-1 = 0, get the first char "M"
Actually, here is a summary of the common behaviors and the differences between slice and substring.
The split method returns an array of strings, the parameter is a separator. The join method builds a string from an array of strings.
> var s = "My name is Bond! James Bond!";
undefined
> s.split(" ");
["My", "name", "is", "Bond!", "James", "Bond!"]
> s;
"My name is Bond! James Bond!"
> s.split(' ').join('-#-');
"My-#-name-#-is-#-Bond!-#-James-#-Bond!"
> s.split(' ').join('.......');
"My.......name.......is.......Bond!.......James.......Bond!"
> s.split('Bond!').join('.......');
"My name is ....... James ......."
> s.split('Bond!').join(' ');
"My name is James "
> s; // s is unchanged
"My name is Bond! James Bond!"
> s.concat("And I've made a lot of movies!");
"My name is Bond! James Bond! And I've made a lot of movies!"
> s; // s is also unchanged by concat
"My name is Bond! James Bond!"
> s = s + "and I've made a lot of movies!"; // this changes s
"My name is Bond! James Bond! And I've made a lot of movies!"
> s += " Action films!" // this too, most common syntax for
concatenating strings
"My name is Bond! James Bond! And I've made a lot of movies!
Action films!"
> s; // s changed too
"My name is Bond! James Bond! And I've made a lot of movies!
Action films!"
It's not possible to do var m = new Math();
> var m = new Math(); VM5777:1 Uncaught TypeError: Math is not a constructor at <anonymous>:1:9 (anonymous) @ VM5777:1
But the Math class has a lot of properties and methods that are useful for arithmetic expressions. They are all class methods and properties, so you will need to use the name of the class followed by the dot operator to access them.
Math.PI; 3.141592653589793 Math.SQRT2; 1.4142135623730951 Math.E; // Euler constant 2.718281828459045 Math.LN2; // Neperian log of 2 0.6931471805599453 Math.LN10; // Neperian log of 10 2.302585092994046
Math.random(); 0.6033316111663034 100 ... Math.random(); // between 0 and 100 11.780563288516422
function getRandomValue(min, max) {
return ((max - min) * Math.random()) + min;
}
getRandomValue(5, 10);
5.064160540161435
Indeed, if Math.random() returns a value above 0.5, Math.round of this value will return 1, if the value is below 0.5, Math.round will return 0:
> Math.round(Math.random()); 1 > Math.round(Math.random()); 0 > Math.round(Math.random()); 1 > Math.round(Math.random()); 1
Get the min and the max of two values with Math.min(a, b) and Math.max(a, b)
Math.min(12, 4); 4 Math.max(12, 4); 12
A useful function that restricts a value between min and max bounds:
function restrictValue(value, min, max) {
return Math.min(Math.max(1, value), max);
}
restrictValue(40, 1, 20);
20
restrictValue(-10, 1, 20);
1
restrictValue(10, 1, 20);
10
Math.pow(2, 8); //2^8 256 Math.sqrt(9); 3 Math.sin(Math.PI/2); 1 Math.cos(Math.PI/2); 6.123233995736766e-17
Here is a typical example of the use of Math.atan2 in a video game, in order to make an object follow the mouse cursor by moving towards it. Look at the code in the mainloop function.
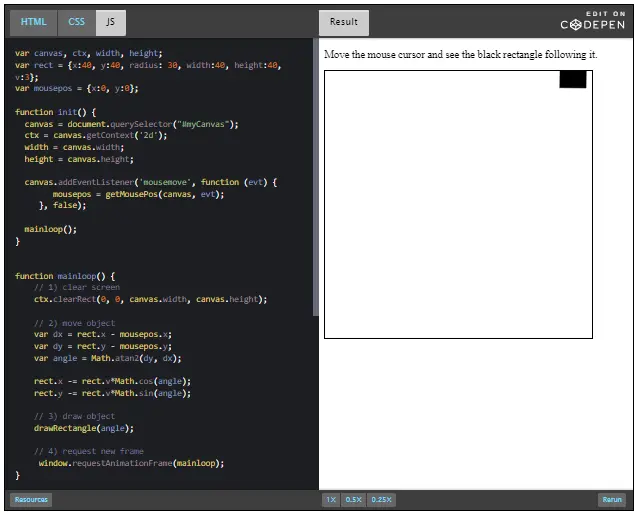
Let's see how to get a date by calling the Date constructor.
Without any argument, a call to new Date() returns the current date.
Note: The return value is actually a Date object, which is displayed by calling toString() on this object.
var date = new Date(); undefined date; Wed Apr 12 2017 11:10:28 GMT+0200 (CEST) date.toString(); // same thing! Wed Apr 12 2017 11:10:28 GMT+0200 (CEST)
We can also pass it an argument that can be:
... in this case it returns a date object that corresponds to the encoded date passed as argument.
> new Date('2017 04 28');
Fri Apr 28 2017 00:00:00 GMT+0200 (CEST)
> new Date('2017 1 2');
Mon Jan 02 2017 00:00:00 GMT+0100 (CET)
> new Date('2017 1 2 8:30');
Mon Jan 02 2017 08:30:00 GMT+0100 (CET)
Numerical parameters can also be passed in this order: year, month (0-11), day (1-31), time (0-23), minutes (0-59), seconds , milliseconds (0-999). We do not have to pass everything but it should always be in this order.
> new Date(2017, 3, 16, 14, 43, 10, 120); Sun Apr 16 2017 14:43:10 GMT+0200 (CEST) > new Date(2017, 0, 10, 14); Tue Jan 10 2017 14:00:00 GMT+0100 (CET) > new Date(2017, 1, 28) // 1 is February! Month indexes start at 0! Tue Feb 28 2017 00:00:00 GMT+0100 (CET) > new Date(2008, 1, 29); Fri Feb 29 2008 00:00:00 GMT+0100 (CET) > new Date(2017, 1, 29); // No February 29th in 2017! Gives 1st of March Wed Mar 01 2017 00:00:00 GMT+0100 (CET) > new Date(2017, 11, 31); // Happy new year! Sun Dec 31 2017 00:00:00 GMT+0100 (CET) > new Date(2017, 11, 32) // 32 Dec -> 1st of January! Mon Jan 01 2018 00:00:00 GMT+0100 (CET)
One can build the date with a Unix timestamp (number of milliseconds since 1970):
new Date(1199885822900); Wed Jan 09 2008 14:37:02 GMT+0100 (CET)
Calling Date() without "new" returns the current date as a string. It does not matter if we pass parameters:
Date(); "Sun Apr 16 2017 14:51:47 GMT+0200 (CEST)"
var d = new Date(); undefined d.toString(); "Sun Apr 16 2017 14:52:52 GMT+0200 (CEST)" d.setMonth(2); // Change for month with index=2 1489672372092 d.toString(); "Thu Mar 16 2017 14:52:52 GMT+0100 (CET)" d.getMonth(); // get current month index 2
var d = new Date(1965, 3, 16); // Michel Buffa's birthday undefined d.getDay(); // Sunday is 0 5 d; // let's verify Fri Apr 16 1965 00:00:00 GMT+0200 (CEST) Great, it was a Friday :-)
Let's write a small piece of code that will guess which days of the week Michel Buffa's birthday will occur, between 2017 and 2047:
var dayOfTheWeek = [0,0,0,0,0,0,0];
for (var year = 2017; year <= 2047; year++) {
dayOfTheWeek[new Date(year, 4, 16).getDay()]++;
}
daysOfTheWeek
[4, 4, 5, 5, 4, 4] // 4 times on a Sunday, Monday, Friday and Saturday,
[4, 4, 5, 5, 5, 4, 4] // 5 times on Tuesday, Wednesday and Thursday
And here is a full version with input fields and results displayed in an HTML table:
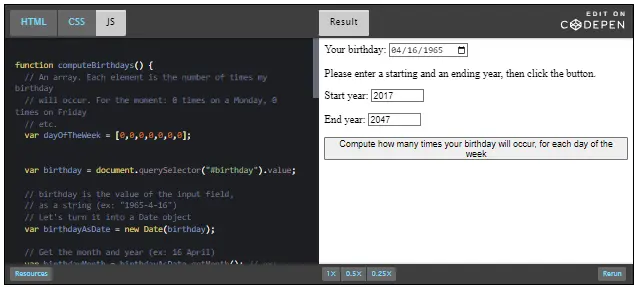
The <table> element helps with rendering tables in an HTML document.
Each table row is defined with the <tr> tag (Table Row). A table header is defined with the <th> tag (Table Header). By default, table headings are bold and centered. A table data/cell is defined with the <td> tag (Table Data). In each cell, you can have other HTML elements/tags. You can have only "column table headers" (the first row of the table will be in bold), or you can also have "row headers" (first cell of each row).
Best practice for making the table accessible: always add a <caption> tag inside the <table> tag. Data tables very often have brief descriptive text before or after the table that indicates the content of that table. This text should be associated to its respective table using the <caption> element. The <caption> element must be the first thing after the opening <table> tag.
Second best practice for accessibility: use a scope attribute with all <th scope = "row or column"> for identifying whether a table header is a column header or a row header. We invite you to read these guidelines for making accessible tables.
<table>
<caption>A typical HTML table</caption>
<tr>
<th scope="col">Given Name</th>
<th scope="col">Family Name</th>
<th scope="col">Age</th>
</tr>
<tr>
<td>Michel</td>
<td>Buffa</td>
<td>52</td>
</tr>
<tr>
<td>Dark</td>
<td>Vador</td>
<td>Unknown</td>
</tr>
<tr>
<td>Luke</td>
<td>Skywalker</td>
<td>Unknown</td>
</tr>
</table>
Most of the time, we add some CSS rules for rendering cell/row/table borders and for adjusting spacing between the text in the cells and the cell borders. Let's look at some examples.
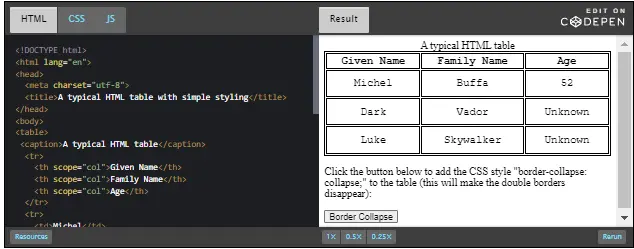
table {
width:100%;
border:1px solid;
}
tr, th, td {
border:1px solid;
font-family:courier;
}
td {
text-align:center;
padding:10px;
}
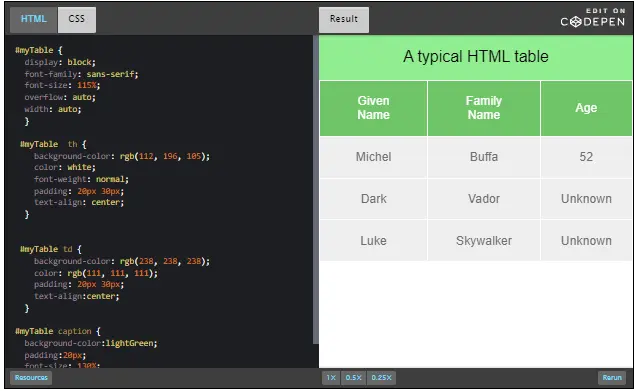
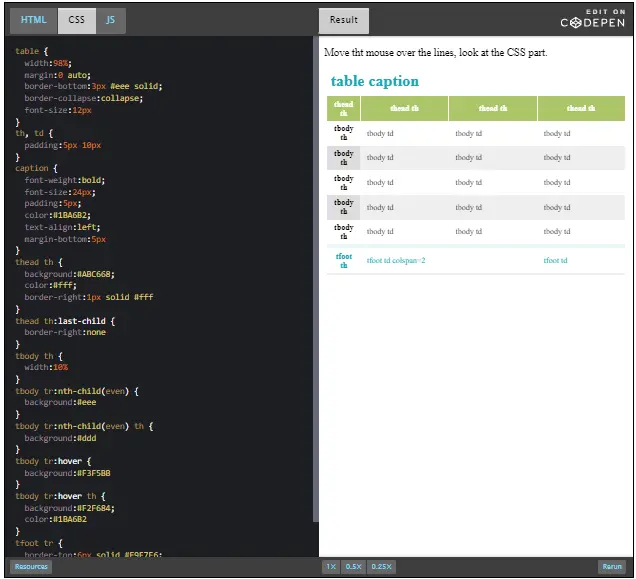
Live coding transcript: HTML table JavaScript API
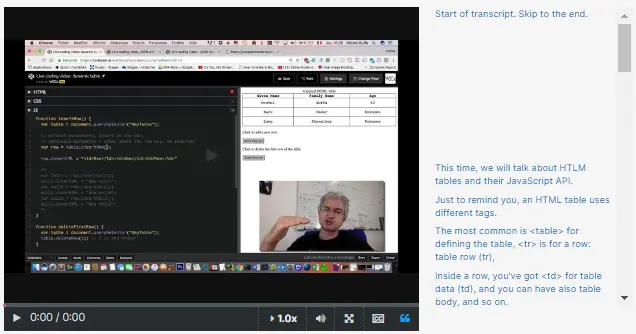
This time, we will talk about HTLM tables and their JavaScript API. Just to remind you, an HTML table uses different tags. The most common is <table> for defining the table, <tr> is for a row: table row (tr), inside a row, you've got <td> for table data (td), and you can have also table body, and so on. We recommend you to go to the HTML5&CSS Fundamentals course for having a full survey of HTML tables.
Here, I defined a table with a header, and 3 rows. And we'll see how we can use some functions from the API for inserting a row or deleting a row. It's very easy. First, you need to get a reference on the table, so put an id on your table. Here, I've set the table as for id "myTable". We use query selector "#myTable" to get a reference on the table.
Then, using the table object, you can use different methods that are described in the course, but the must common one is "insertRow()" without any argument. Without any argument: that means insert at the end of the table. If you pass an index here, it will be the position, the location, where you want to insert the new row. And once you created the row, you can use "innerHTML" to put some HTML code inside the row.
Here, I use some <td> elements to create 3 different table data, table cells in the row. If I click "Add a new row", it will call this callback "insertRow()", that will insert a row at the end of the table with "new", "new", "new" inside. I just made the same structure as I had in the static elements. I mean a <tr> with 3 <td> inside. I could have used as well, instead of " innerHTML", I could have built the cell one by one using "row.insertCell()".
From the table I inserted the row, from the row I insert a cell and then I use the innerHTML" to add some HTML in a new row. For example, I can put the first cell in bold using this "Add a new row". I've just inserted the new row made of 3 cells. Row that is inserted creates the cells inside: New cell1, New cell2, New cell3. You see this API is quite simple.
For deleting a row when I click on this button, I will call with a click event listener the "deleteFirstRow()" function. It's very similar to inserting a row. I first get a reference on the table using a "querySelector". I get a table object and I call "deleteRow()", 0 being the first line, the header. So "deleteRow(1)" will delete the first row from the body of the table. Each time I click, it deletes a the first row and when I click on "add a new row", it adds a new row.
We could have created the whole table itself dynamically. This will be shown in a next video where we consume remote data from Web services, get the data and create on the fly, create dynamically a table with rows and cells that will be used for displaying the data we just collected.
The source code shown in the above video is available on this CodePen.
There is a JavaScript API associated with the HTML table elements that makes dynamic table management possible, enabling you to add or delete a row, add or delete a cell, modify the content of the cells, etc.
We've already seen some examples in the course, but we have not completely covered the table JavaScript API.
When you look for a table using the DOM API or the selector API, or when you create a table using the DOM API, you get a Table object:
var table = document.getElementById("myTable");
var table = document.querySelector("#myTable");
var table = document.createElement("table"); // creates a new table
Like all objects, an instance of Table will have properties and methods:

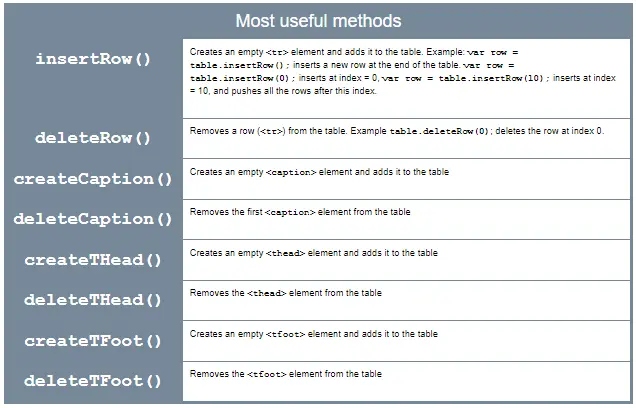
Example that adds a new row or removes a row to/from a table using the insertRow()/deleteRow() methods:
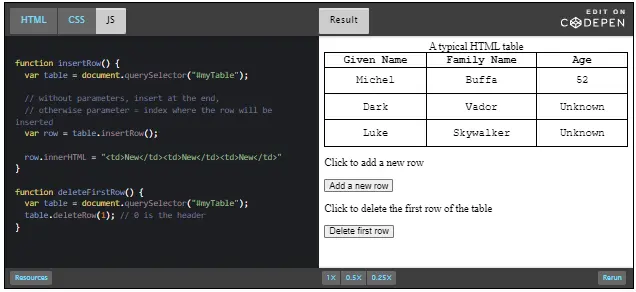
Notice the use of row.innerHTML= here to add some cells to the row. We will soon see another method for doing this.
When you look for a row using the DOM API or the selector API, or when you create a row using the DOM API, you get a Row object:
var row1 = document.getElementById("row1");
var row1 = document.querySelector("#row1");
var newRow = document.createElement("row"); // creates a new row
You can also access a row from the rows property of a table:
var t = document.createElement("table");
undefined
var r1 = t.insertRow(0);
undefined
r1.innerHTML="<td>Hello</td>";
"<td>Hello</td>"
var r2 = t.insertRow();
undefined
r2.innerHTML="<td>Hello 2</td>";
"<td>Hello 2</td>"
var row1 = t.rows[0];
undefined
row1;
<tr><td>Hello</td></tr>
Like all objects, a tableRow object has properties and methods. Here are the most useful ones:


Below are new versions of the previous examples, but instead of using the innerHTML of the TableRow object, we use the insertCell() method.
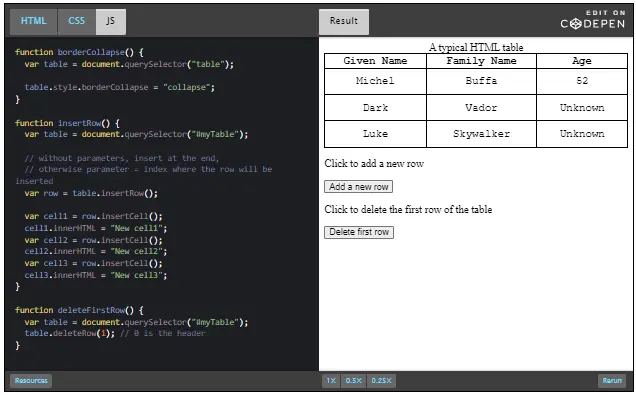
function insertRow() {
var table = document.querySelector("#myTable");
// without parameters, insert at the end,
// otherwise parameter = index where the row will be inserted
var row = table.insertRow();
var cell1 = row.insertCell();
cell1.innerHTML = "New cell1";
var cell2 = row.insertCell();
cell2.innerHTML = "New cell2";
var cell3 = row.insertCell();
cell3.innerHTML = "New cell3";
}
Should we use insertCell() or just row.innerHTML= "<td> ... </td>" ? It's up to you: depending on the HTML that you plan to insert into each cell, one version may be more readable than the other.
Forms are commonly used to enable user interaction within Web sites and Web applications, for example, for login, registering, commenting, and purchasing.
Since HTML5 provides functionalities to assist with accessibility, developers should make a concerted effort to mark up Web based forms. The following two guidelines are to give you a good start to make your forms accessible:
The WAI Web site hosts a Forms tutorial where you will find more guidelines to help make your forms truly accessible: Form Instructions, Validating Input, User Notifications, Multi-Page Forms, and Custom Controls.
Forms can be visually and cognitively complex and difficult to use. Accessible forms are easier to use for everyone, including people with disabilities.
Form fields and other form controls usually have visible labels, such as "E-mail Address:" as the label for a text field (see figure below).

When these labels are marked up correctly, people can interact with them using only the keyboard, using voice input, and using screen readers. Also, the label itself becomes clickable, which enables a person who has difficulty clicking on small radio buttons or checkboxes to click anywhere on the label text.
Whenever possible, use the label element to explicitly associate text with form elements. The for attribute of the label must exactly match the id of the form control.

Bottom of Form <label for="first_name">Your First Name</label> <input id="first_name" type="text" name="fname"/>
Note that you can also include the <input> element inside the <label>...</label> element, and also add a <span lang="en"> for example, to indicate the language used in the label. Sometimes, nesting labels and inputs can also make CSS styling easier and produce better results with screen readers.
<label for="first_name"><span lang=en">Your First Name</span> <input id="first_name" type="text" name="fname"/> </label>

Bottom of Form <label for="firstname">First name:</label> <input type="text" name="firstname" id="firstname"><br> <label for="subscribe">Subscribe to newsletter</label> <input type="checkbox" name="subscribe" id="subscribe">
The label of a <button> element is set inside the element and can include markup. This
allows advanced accessibility hints to be included, such as marking up language change.
Example: <button>Mon <span lang="fr">bouton</span></button>,
for a button with a label in French.
When using the <input> element to create buttons, the label is set in the value attribute
of the element.
Example: <input type="submit" value="Please submit">, will be rendered as
a button.
<button type="submit">Submit</button> <button type="button">Cancel</button> <input type="submit" value="Submit"> <input type="button" value="Cancel">


<label for="address">Enter your address:</label> <br> <textarea id="address" name="addresstext"></textarea>
Groupings of form controls, typically groups of related checkboxes and radio buttons, sometimes require a higher level description. Grouping related form controls makes forms more understandable for all users, as related controls are easier to identify.
Grouping needs to be carried out visually and in the code, for example, by using the <fieldset> and <legend> elements to associate related form controls. The <fieldset> identifies the entire grouping and <legend> identifies the grouping's descriptive text.
In the example below, there are three radio buttons that allow the user to choose an output format. Radio button groups should always be grouped using <fieldset>.
<fieldset>
<legend>Output format</legend>
<div>
<input type="radio" name="format" id="txt" value="txt" checked>
<label for="txt">Text file</label>
</div>
<div>
<input type="radio" name="format" id="csv" value="csv">
<label for="csv">CSV file</label>
</div>
[...]
</fieldset>
In the example below, there are three checkboxes that are all part of an opt-in function for receiving different types of information.

<fieldset>
<legend>I want to receive</legend>
<div>
<input type="checkbox" name="newsletter" id="check_1">
<label for="check_1">The weekly newsletter</label>
</div>
[...]
</fieldset>
WAI-ARIA provides a grouping role that functions in a similar way to fieldset and legend. For example, a div element can have role=group to indicate that the contained elements are members of a group.
WAI-ARIA roles are very important in the accessibility world, and we invite you to see an example provided in the associated WAI tutorial. Find also another WAI-ARIA documentation on MDN.
Live coding video: HTML Forms Best Practices

Hi everybody. For this first video, we will talk about traditional form design. When you design a form, using the form element, usually you add two attributes to it:
1) first attribute called action that has for value the URL of the server side component that will process the data entered and sent when you submit the form. And,
2) an attribute called method that will indicates the way the browser will send the data from the form to the server. As this course is really focused on HTML5, that is a 100% client-side technology, we're not going to explain how we can process form data in PHP, in Java or in asp.NET or whatever. We will focus on the client-side on the new input field, the new attributes and a new validation system that is included in the browser that implements the new HTML5 features.
One good practice, this is not new with HTML5, is to group different input elements into a fieldset. You can see some details about this practice in the accessible form part of the course. Here, we use the fieldset that generated this small bar here. That is a visual rendering of the group and we use the legend element inside that render as a title in the fieldset border. Inside, for the sake this example, we just used two input fields of type="text".We associated a label with the 'for' attribute that matches the ID attributes.
This is a good practice for accessibility, and if you click on the label, it gives the focus to the input field thanks to the 'for' and the ID attributes that match. What we can just add is some CSS to make this a little bit nicer. Usually for the fieldset I add some padding. Padding if for the internal space; you can see that I added some space here. And for separating the different lines here, I usually add some margin-bottom to the labels. with a value, 10px for example.
And in order to make this work, I use display 'inline-block' for the labels. OK, I made a small mistake here, about the margin-bottom. And you can see that if I change the value or the length of the levels, the input fields are no more aligned. In order to align the input fields, the common technique is input, float them to the right and give them a right margin. Let's say maybe 7px for the margin-right, and give them a width...
You see if I change the length of the labels the input fields are aligned. This is not new with HTML5. What is new is that, okay let me just add a border-radius to the fieldset. This makes nice rounded corners here. Okay what is new is that some attributes like this one 'required' that will make the input field invalid if it's empty.
And I can visualize this automatically, because the new input fields with HTML5 inherit a CSS pseudo class called 'invalid'. I use the column followed by the keyword 'invalid' to visualize that. Or background-color:pink;. Like this you can see that the fields are invalid because they're pink and become valid as soon as I type something inside. If I try to submit a form with an 'invalid', field it pops up some bubbles with an error message.
And the message is in the language is the one of my operating system, so here it's in French. This is new. It's called the built invalidation system and some new input fields like, for example, the email: the input type="email". Just change that... This time it will become valid not when I type something but also when I type something that looks like a valid email address. If I remove this character The @ character here, it becomes invalid.
We've got some defaults rules for validating new type of input fields. If I want to enter an age, I can use the new age... type="number" for example. Like this, it's an input field for entering numbers and this one has some min values like 1 year old, max value is 120 years old, and if I type something that is not valid, you can see that it's with the pink background, meaning it is 'invalid'.
If I type a real number, it becomes valid. Or if I choose a real number. Also, particularities with this input field, is that you can use the step attribute...step=5 means <I made a mistake> okay like this it will jump from 1 to 6. If the value is not a multiple of 5, it's 'invalid'. Starting from 0. Okay if I enter 20, it's valid but 21 is not.
If I add 5 you can see it jumps from one multiple of 5 to another one. I'm going just to show you the last example but there are more input fields on that brought by HTML5, all the details will be in the course. For example, if you want to select a birth date, there is a new input field of type="date. You can also indicate some constraints with attributes, but you will see that in the dedicated part of the course.
Here, you got directly without writing any JavaScript a calendar that is popping up to select your birth date... Let's say something that is random. And here you've got a birth date, and you can enter using the keyboard but if you type something that is invalid..This is the really basics of HTML5 forms. There are 13 new input elements, lot of new attributes and others elements that can be used to constraint the values. For example, instead of having a calendar, we can have only a small set of dates to choose from. All these things are explained in the course, take some time to read and look at all these examples.
This is the end of this video good luck ... good work !
Source code from the example shown in the above video:
We highly recommend that you follow the W3Cx HTML5 Coding essentials and Best Practices course that has an entire module dedicated to HTML5 forms.
Forms are a way to get user input which is either sent to a remote server, or processed locally, or both.
This section of the course only covers local processing and the client-side part, with a focus on JavaScript processing.
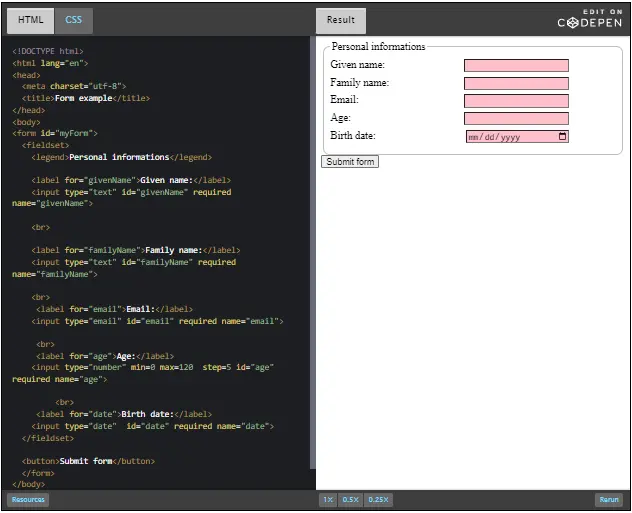
If a form's content is sent to a remote server, on the server side, you may have PHP, Java, C#, Ruby, Python, etc. components. There are several ways to collect server-side data from a form in a Web page: REST Web services, servlets, Microsoft ASP pages, etc.
On the client side, the forms indicate to which server and how the data should be sent, using the action and method attributes respectively. A <button type="submit"> or an <input type=submit> field is used to submit the form content.
For example: <form action="myServerCode.php" method="POST">...</form>. Here, we set the URL of the server side code (myServerCode.php), and the HTTP method that will be used by the browser for sending the form content (POST).
Example of HTML5 form that will not be sent if invalid input fields are present. Notice that the JavaScript part is only used for giving feedback while entering the password. No JavaScript is used for sending the form data, or for complex, global validation:
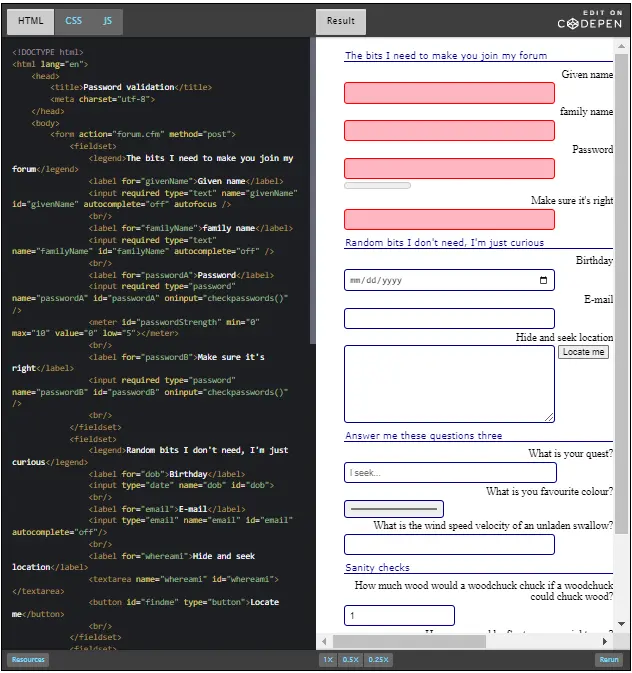
Another approach is to use JavaScript for sending the form content with Ajax.
While one is typing or selecting a color, or moving a slider, JavaScript event listeners can be used to track the user's interactions in real time, and perform some validation steps along with giving visual feedback.
We've already seen how we can track the keys typed in an input field in real time:

Example: checking that a password entered twice is identical in two different input fields, that some values are coherent (e.g. a birthday cannot be in the future), etc.
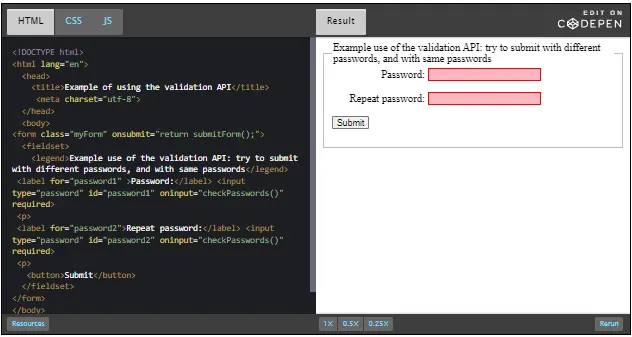
JavaScript can be used to make a WebApp that uses form data locally, perhaps with some client-side persistence API.
For example, a contact manager that will work offline, saving data locally, in a database inside the browser. Data will be displayed in a dynamic HTML table, without the need for a remote database.
This is the small project we will build together at the end of the course. :-)
Here is the discussion forum for this part of the course. Please either post your comments/observations/questions or share your creations.


Live coding video: JSON notation, working with LocalStorage and remote data
Hi! I would like to present you the JSON format that is string-based format for exchanging, on the Web, JavaScript objects. Also, for storing JavaScript objects in databases. It's very popular and used by many Web services. A Web service is a remote server that uses a URL to send you some formatted JavaScript data.
Here you've got an example from the jsonplaceholder.typicode.com Web site that provides some examples of JSON data set. If you want some photos, some pictures, you click on it and you've got a string-based notation, a JSON version of an array. An array that contains pictures with albums, thumbnails)
It's the same data format we used in a previous module for an optional project about pictures and albums. How do you work with such a format? There are 2 different utility methods from the JSON predefined object.
One is called "stringify()" and will be useful for converting a JavaScript object into JSON. And the other one will be "JSON.parse()" that will take a JSON object, a JSON string, and give back a JavaScript object.
Let's see some examples. I just took an array... if you try to stringify the array...you obtain an object that contains the array with quotes around. This is the JSON notation of an array. If you've got more complex objects, for example, this one: it's an object with different properties and one of the properties is an array that contains in turn objects. It's just an example of the albums made by Metallica.
If I try this, "JSON.stringify()" with this object, I get a JSON version of this object, and this can be sent through HTTP or can be downloaded from a remote server. HTTP is hypertext transfer protocol. Only text can be exchanged using HTTP and JSON is pure text. However, if I've got to know a JSON string, I cannot access any property because this is no more a JavaScript object. If I want to get back the original object from the string, I will need to use "JSON.parse()". And this is a real JavaScript object. I can access its properties and call its methods. This is all we need to know about JSON.
"JSON.parse()" turns a JSON string to a JavaScript object you can use, and "JSON.stringify()" takes a JavaScript object and turns it into a JSON string.
In the next lesson, we will see how we can use JSON objects, for example, downloading them from a remote data source and displaying their values in an HTML table.
JSON stands for JavaScript Object Notation. It's a standard for transforming nearly any object into a string representation that is human readable. It became a standard for exchanging data to/from a remote HTTP server, and is available for many other languages in addition to JavaScript.
A JavaScript object o in JSON looks a lot like what o.toString() returns.
There are two main methods to know:
var jsonStr = JSON.stringify(obj);
var jsObj = JSON.parse(jsonStr);
var x = 3;
undefined
JSON.stringify(x);
"3"
var simpleObject = {x:12, y:30};
undefined
JSON.stringify(simpleObject);
"{"x":12,"y":30}"
var anArray = ['Monday', 'Tuesday', 'Wednesday'];
undefined
JSON.stringify(anArray);
"["Monday","Tuesday","Wednesday"]"
var complexObject = {name:'Metallica',
albums:[
{name:"Master of Puppets", year:1986},
{name:"Black Album", year:1991}
]
};
Undefined
JSON.stringify(complexObject);
"{"name":"Metallica","albums":[{"name":"Master of Puppets","year":1986},{"name":"Black Album","year":1991}]}"
In the above examples, you can see JSON representations of a simple variable of a predefined type, of an array, of a simple object, of an object that contains an array of objects (Metallica example).
And indeed, it looks like the code you typed to create the objects, with quotes around it and around the property names. This is why it is called JavaScript Object Notation ;-)
The JSON representation of JavaScript objects is a string. JSON has been developed mainly for replacing XML as a format for exchanging data between a client and a remote HTTP server. It has become very popular as the format for exchanging data when a Web Application uses Ajax for its communications with the HTTP server.
Ajax is a way to send / receive data in the background, without the need to reload the Web page. Along with the DOM API, the appearance of this technology in 2005 with Internet Explorer, made it possible to make Web pages more dynamic. Google Maps was one of the first popular Ajax-powered Web application: as you moved the map, new parts arrived (downloaded in the background from the Gmap HTTP server), and the page updated to display these new parts.
JSON is also very practical for storing objects where strings are expected. There is a data store in your browser called LocalStorage that can be used as a small database for Web applications, but it stores only pairs of key/values in the string format. If you want to save a JavaScript object, you will have to turn it into JSON, then save it. When you read it from the data store, you will need to turn it back from JSON to JavaScript.
Here is a first example that turns an object into JSON and back into a JavaScript object:
> var metallica = {name:'Metallica', albums:[{name:"Master of
Puppets", year:1986}, {name:"Black Album", year:1991}]};
Undefined
var metallicaJSON = JSON.stringify(metallica);
undefined
metallicaJSON;
"{"name":"Metallica","albums":[{"name":"Master of Puppets","year":1986},
{"name":"Black Album","year":1991}]}"
metallicaJSON.name; // metallicaJSON is not a JavaScript object
undefined
metallica.name; // metallica is an object
"Metallica"
var obj = JSON.parse(metallicaJSON); // JSON -> object
undefined
obj.name; // this is an object
"Metallica"
With the JSON representation of an object you cannot access the original object's properties using the "." operator, nor call its methods. The JSON format only stores the list of the object properties (name and value) as a string. Look at line 10: we cannot access the name property of the JSON representation of the metallica object defined at line 1.
When we parse a JSON string using JSON.parse(), we get a real JavaScript object, and we can access its properties (lines 16 and 19).
Live coding Video: Xhr2, remote JSON data, dynamic table
This time we will look at how we can send an AJAX request to a remote server, get the data in JSON, parse this data and build dynamically an HTML table that will display the results.
I prepared a small template, a small HTML template with a button that will call a "search()" function that is located in the JavaScript code and we will write it together. And we also prepared the div location that is not visible here, below the button, that will contain the table that we will create dynamically.
First, let's have a look at the URL of the data source. I'm still using the "jsonplaceholder.typicode.com" Web site. And if we click on "/user", you got here the URL that returns the list of users, actually an array of objects, each object being a user with properties and values. To send a request, we will use 2 different methods, one that is called "XhR2" or XML Http Request level 2.
And one that uses a brand-new API that is implemented only in recent browsers that is called "fetch". Let's start with "XhR2". I declare a URL, and "queryURL". I'm just following the same syntax as in the example. And we need to create an XML Http Request: "xhr = new XMLHttpRequest ()".
That's it: "XMLHttpRequest()". And then you indicate what is the parameter of the request: "xhr.open()". We're going to do a "GET". "GET" is an http order that means 'go on the Web and get me the data from there'. And you indicate also the URL. And the last parameter will be set to true. Then, you will send the request. When you do this, your request is sent but it can take some time. And for getting the data and processing it, we must indicate a callback that will call by the browser only when the response arrives.
This is how it works: "xhr.onload =" and you indicate the callback function, and usually, you also use the event as the only parameter. And here, we can just start trying to see if it works. I open the console, here, click on the button and see ... "xrh" is not defined. It's "xhr". Ok, I clear the console! Yes, the response arrived. I can even use the devtool debugger. If I click on "Network", "XHR", clear. Click on the button, I will see the request here and if I click on it, I can see the response.
I see that I've got the JSON object from the remote server. Now that the response arrived, I can directly display it: "xhr.response". It's a string, I save and run it again. Ok, sorry this was too long, but I can open the real devtool console, and I can see that I got the object here.
This has been printed by the "console.log()". In order to work with this object, I will need to convert it to a real JavaScript object: "users = (xhr.response)". But in order to turn it into JavaScript object, we use "JSON.parse()", you remember from the previous video? And here, just to debug I can try to write: 'first user' ...Because this object is an array, you see it's an array.
Displaying the first of them should work. It says 'first user' is an object. I can also directly turn it into a string. Ok, parentheses is missing...And I can see this time, the first user, the 'first user' that has been displayed. Now we will use this! That will check that it works: we can call displayUsersAsATable(...) passing the users. In order to insert a table here, first we need to create the table.
Let me copy and paste some code. We start by getting a reference on the HTML div in the page that was called users, "id = "users". Then we create a table: document.createElement("table");, and then we can try to insert rows for each user. So "users.forEach()" takes a callback with the first parameter being the current element of the user's array. "console.log(currentUser.name)"...let's try this to see if it works... Clear ... save...Click on the button... and I see the names of the users.
Now, I'm going to add a row to a table. "table.insertRow();" put this in variable called "row", and then I can do: "row.innerHTML= ", for example, just the name.
Here, I inserted rows whose content is the name of the user. And in the end, what we do is that we will add the table to the div. So, "usersDiv.appendChild()", or "append" works too on modern browsers, append(). And we put the table in it. Let's try...Clear. "usersDiv" with a "s" and it works! Now, in order to have a nice table, I could also add some CSS to make it better, or I can define some <td> (table data) to make a nicer table. And I can display for example another property that will be the email of the person. That's it!
Most "big sites" provide what we call a REST API. This means "they propose to send/receive data to/from programs over HTTP", and most of the time the JSON format is one of the possible transport formats for the data. Google APIs, Facebook and Amazon APIs are like this.
JSONPlaceholder is a free online REST service that you can use whenever you need some fake data in JSON. Faking a server is great for tutorials, and this is exactly what the next example does. Please open this URL - you will see some JSON data coming from the server and being displayed in your browser as shown below:
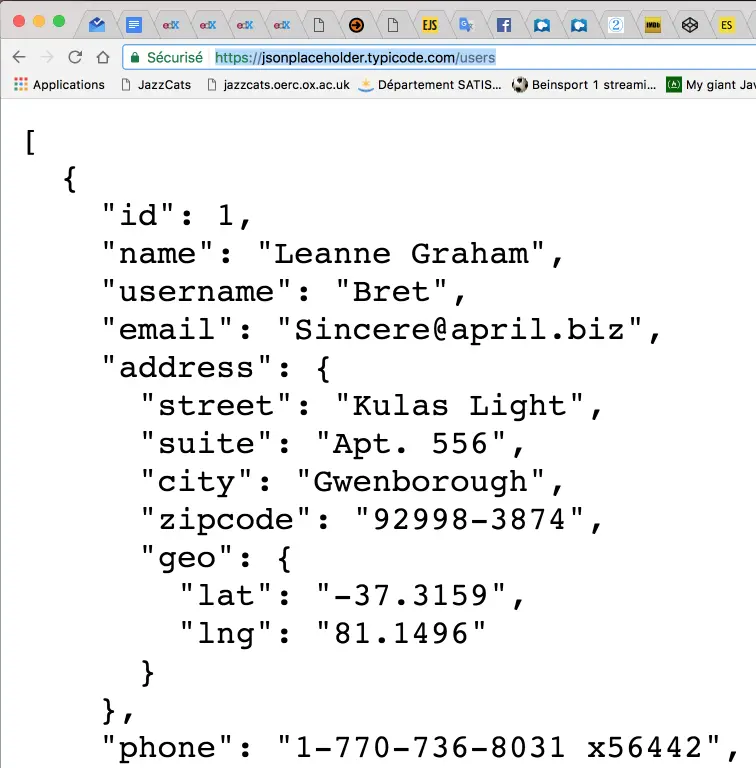
And we would like to use these data in our code, manipulating them as a JavaScript object.
This course does not cover Ajax and what we call "asynchronous JavaScript". However, we can show you two simple examples that use the Xhr2 API for Ajax requests and the new fetch API that is simplest to use.
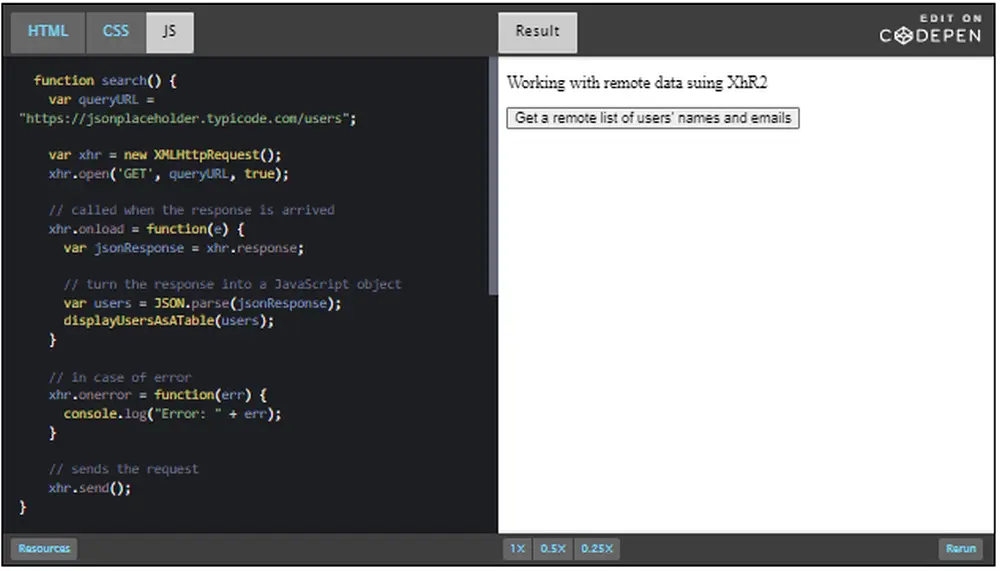
function search() {
var queryURL = "https://jsonplaceholder.typicode.com/users";
var xhr = new XMLHttpRequest();
xhr.open('GET', queryURL, true);
// called when the response has arrived
xhr.onload = function(e) {
var jsonResponse = this.response;
// turn the response into a JavaScript object
var users = JSON.parse(jsonResponse);
displayUsersAsATable(users);
}
// in case of error
xhr.onerror = function(err) {
console.log("Error: " + err);
}
// sends the request
xhr.send();
}
The Fetch API provides a JavaScript interface for accessing and manipulating parts of the HTTP pipeline, such as requests and responses. It also provides a global fetch() method that provides an easy, logical way to fetch resources asynchronously across the network. You fetch data from a URL, then, you do something with the response, then you do something else. If there is an error you can catch this error and display, for example, an error message.
See this blog post for a detailed tutorial. Asynchronous JavaScript and JavaScript promises (the fetch...then...then... is based on the concept of "promises") is not detailed in this course.
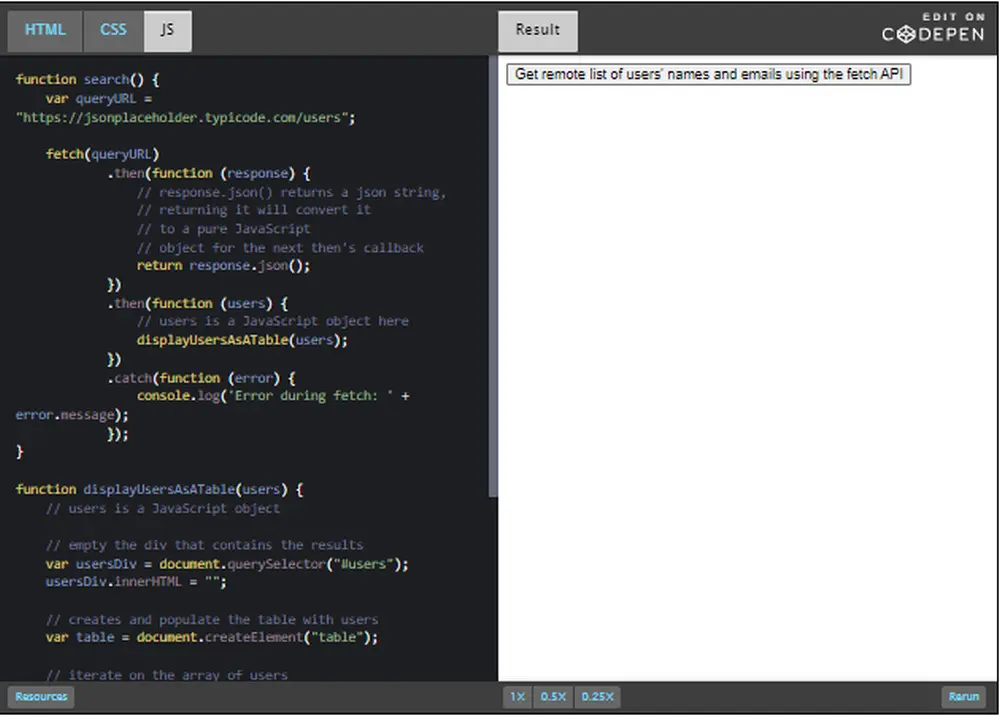
function search() {
var queryURL = "https://jsonplaceholder.typicode.com/users";
fetch(queryURL)
.then(function(response) {
// response is a json string,
// convert it to a pure JavaScript object.
return response.json();
})
.then(function(users) {
// users is a JavaScript object here.
displayUsersAsATable(users)
})
.catch(function(error) {
console.log('Error during fetch: ' + error.message);
});
}
In contrast to XhR2, fetch is based on a concept called "JavaScript promises". You recognize promises when you see ".then..." ".then...".
Let's look at an example of use: the LocalStorage API as a client-side database for JavaScript objects.

The Web storage API (see the related W3C specification) introduces "two related mechanisms, similar to HTTP session cookies, for storing structured data on the client side".
Indeed, Web Storage provides two interfaces - sessionStorage and localStorage - whose main difference is data longevity. This specification defines an API for persistent data storage of key-value pair data in Web clients.
With localStorage the data will remain until it is deleted, whereas with sessionStorage the data is erased when the tab/browser is closed.
For convenience, we will mainly illustrate the localStorage object. Just change "local" to "session" and it should work (this time with a session lifetime)
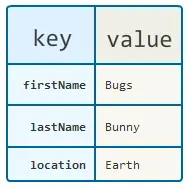
Simple key-value stores, one per domain (following the same origin policy)!
localStorage is a simple key-value store, in which the keys and values are strings. There is only one store per domain. This functionality is exposed through the globally available localStorage object. The same applies to sessionStorage.
// Using localStorage. // Store data. localStorage.lastName = "Bunny"; localStorage.firstName = "Bugs"; localStorage.location = "Earth"; // Retrieve data. var lastName = localStorage.lastName; var firstName = localStorage.firstName; var location = localStorage.location;
This data is located in a store attached to the origin of the page. We've created a JsBin example in which we've included the above code.
Once opened in your browser, the JavaScript code is executed. With the browser dev. tools, we can check what has been stored in the localStorage for this domain:
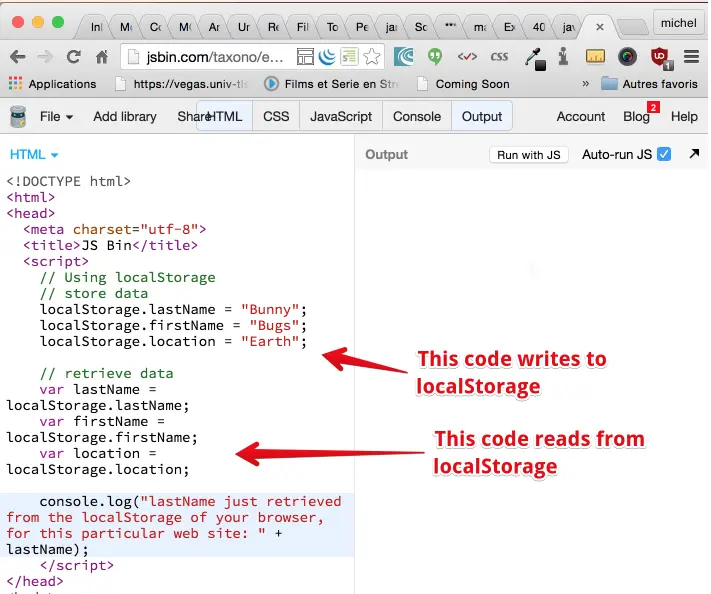
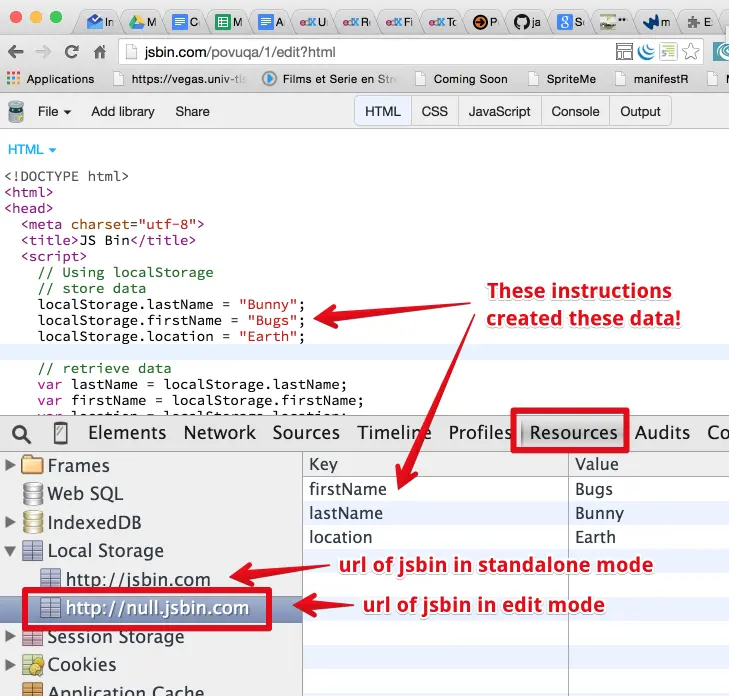
Differences with cookies?
Cookies are also a popular way to store key-value pairs. Web Storage, however, is a more powerful technique than cookies. The main difference is in size limits: cookies are limited to a few KBytes whereas Web Storage may extend to several MBytes. Also, cookies generate additional HTTP request traffic (whether to request a Web page, an image, a stylesheet, a JavaScript file, etc.).
Objects managed by Web Storage are no longer carried on the network and HTTP, and are easily accessible (read, change and delete) from JavaScript, using the Web Storage API.
External resources
Here is the discussion forum for this part of the course.
Suggested topic
Optional projects
In this final part of the course, let's build together a minimal contact manager that shows how to use ES6 classes, local storage, forms and the HTML table JavaScript API.
This is a play project that you can easily improve:
Let's start with a simple skeleton (no GUI), beginning with the Contact class.
class Contact {
constructor(name, email) {
this.name = name;
this.email = email;
}
}
As you can see, a contact is just a name and an email. We will use the above class like this:
var c1 = new Contact("Jimi Hendrix", "[email protected]");
var c2 = new Contact("Robert
Fripp", "[email protected]");
Then you can print the properties of contact c1 or c2 using for example console.log(c1.name), console.log(c2.email), etc.
A minimal ContactManager class:
class ContactManager {
constructor() {
// When we build the contact manager, it
// has an empty list of contacts.
this.listOfContacts = [];
}
add(contact) {
this.listOfContacts.push(contact);
}
remove(contact) {
// We iterate on the list of contacts until we find the contact
// passed as a parameter (we say that they are equal if emails match)
for(let i = 0; i < this.listOfContacts.length; i++) {
var c = this.listOfContacts[i];
if(c.email === contact.email) {
// Remove the contact at index i.
this.listOfContacts.splice(i, 1);
// stop/exit the loop.
break;
}
};
}
printContactsToConsole() {
this.listOfContacts.forEach(function(c) {
console.log(c.name);
});
};
}
We can use the contact manager like this:
var cm = new ContactManager();
var c1 = new Contact("Jimi Hendrix", "[email protected]");
var c2 = new Contact("Robert
Fripp", "[email protected]");
var c3 = new Contact("Angus Young", "[email protected]");
var c4 = new Contact("Arnold
Schwarzenneger", "[email protected]");
console.log("--- Adding 4 contacts ---")
cm.add(c1);
cm.add(c2);
cm.add(c3);
cm.add(c4);
cm.printContactsToConsole();
As you can see, this is a very minimal version. It's always a good idea to start with very simple structures/classes, and a few methods. Then type the code on CodePen or JSBin and use the devtool console. Check that there are no syntax errors, that everything runs smoothly.
Here is the CodePen of this minimal version. Click on the CodePen label on the top right, and once in CodePen, open the console:
Do you remember the sort() method you can use on arrays? We saw it in modules 2 or 3. Since our array contains objects, we must provide a callback for comparing two elements by name. Here is the code for the new sort() method we added to the ContactManager class:
sort() {
// As our array contains objects, we need to pass as argument
// a method that can compare two contacts.
// We use a class method, which is similar to the distance(p1, p2)
// method we saw in the ES6 Point class in module 4.
// We always call such methods using the name of the class followed
// by the dot operator.
this.listOfContacts.sort(ContactManager.compareByName);
}
// class method for comparing two contacts by name
static compareByName(c1, c2) {
// JavaScript has built in capabilities for comparing strings
// in alphabetical order
if (c1.name < c2.name)
return -1;
if (c1.name > c2.name)
return 1;
return 0; // c1.name = c2.name
}
The important thing here is to notice that we declared the compareByName method as a class method (using the static keyword). This is similar to what we did in the Point class example from module 4, when we explained the "class properties and methods". This method compareByName does not depend on any instance of the contact manager, consequently: it's a class method.
CodePen that uses this new method:
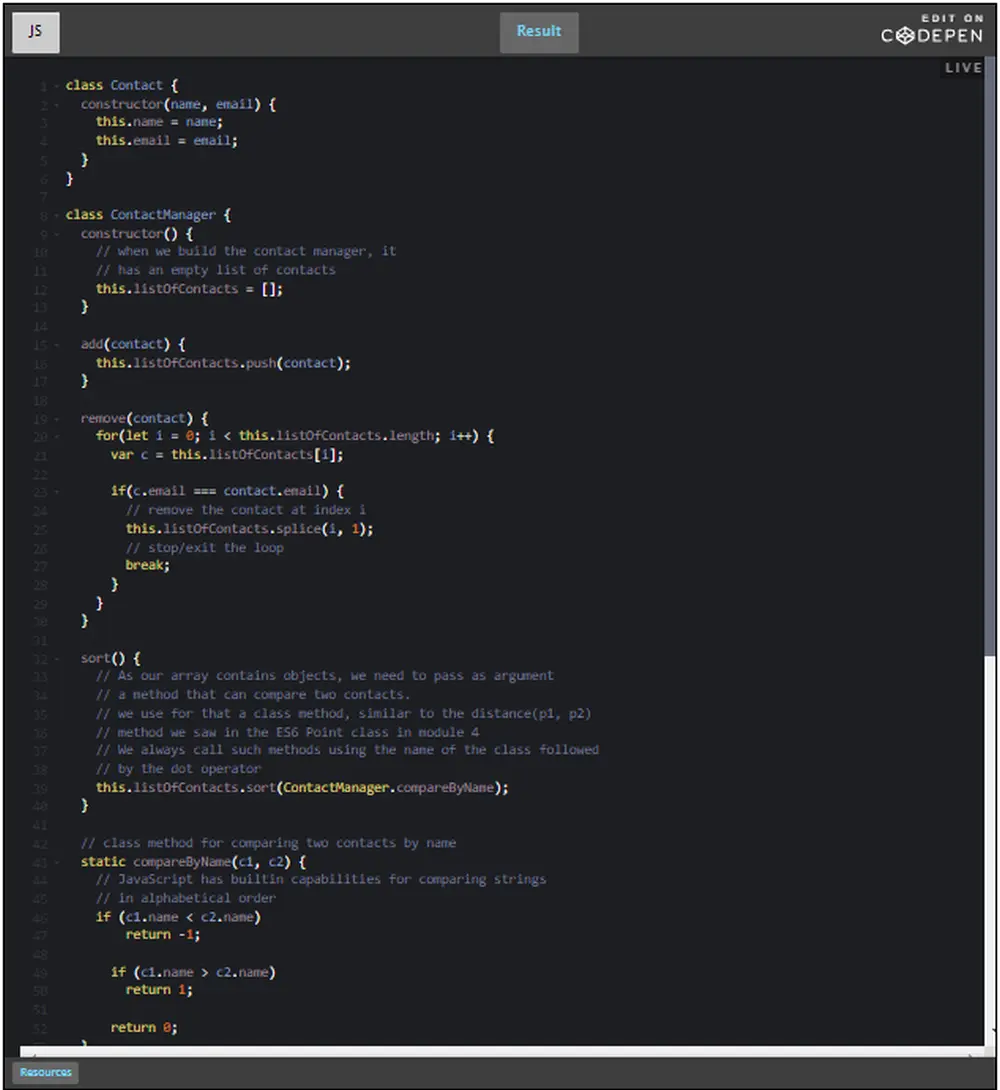
Let's use load/save methods is for loading and saving the list of contacts in Local Storage.
This time, we add to the ContactManager class a load() and a save() method for loading/saving from disk (from a key/value pair database located on your hard disk, and associated to the domain of your Web application).
class ContactManager {
constructor() {
// when we build the contact manager, it
// has an empty list of contacts
this.listOfContacts = [];
}
...
save() {
// We can only save strings in local storage. So, let's convert
// our array of contacts to JSON
localStorage.contacts = JSON.stringify(this.listOfContacts);
}
}
You write data identified by a key in localStorage like this:
In our case, line 11 saves the list of contacts with a key named "contacts" in the local storage. In order to save the list of contacts as a string, we convert it to the JSON format using the JSON.stringify(...) method (JSON = string based)
Try an example on CodePen, save some contacts...
... then we can check in the devtools that the list has been saved.
In Google Chrome, click the Application tab, then LocalStorage:
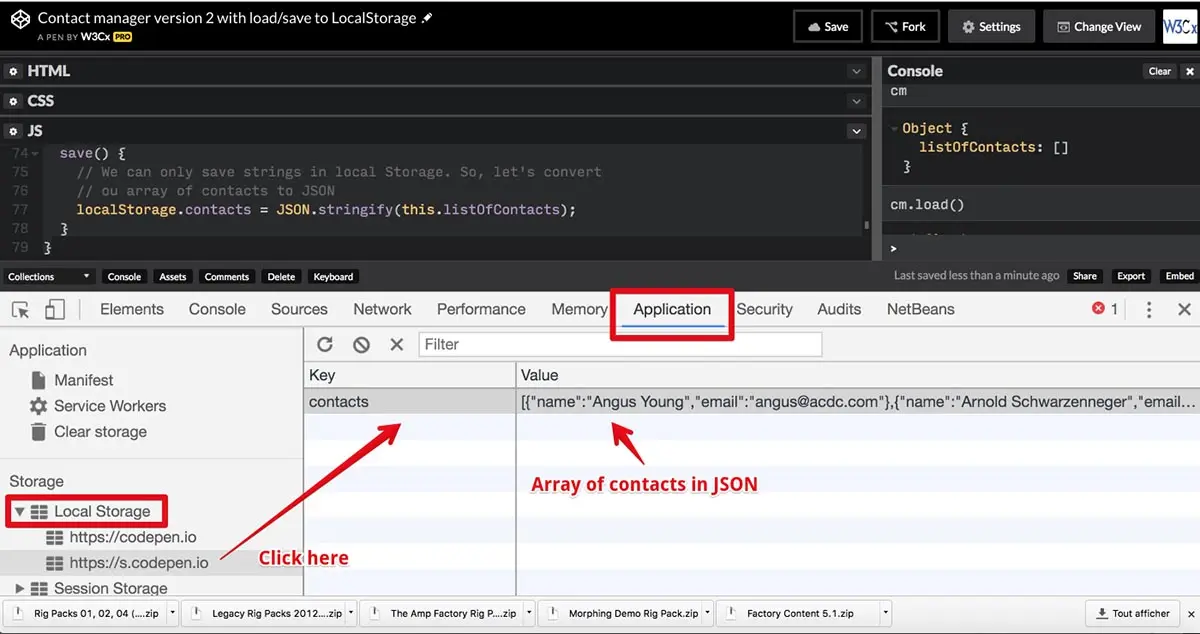
In Firefox, you first need to activate the storage view like this:
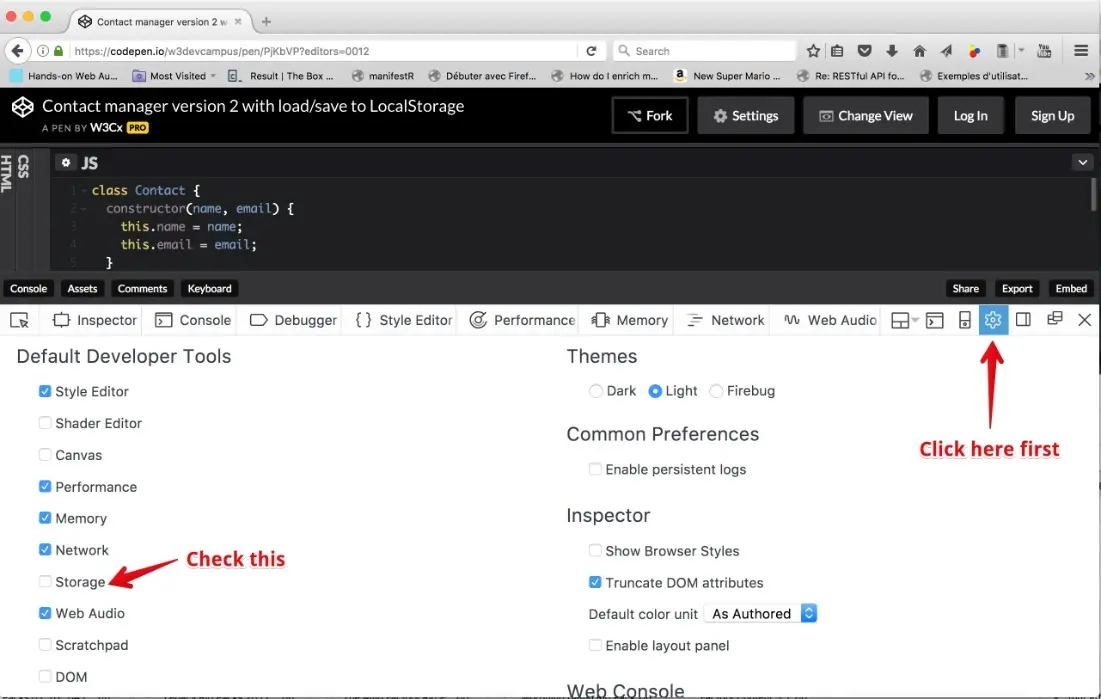
You will see the list of contacts when you click on the newly appeared "Storage" tab:
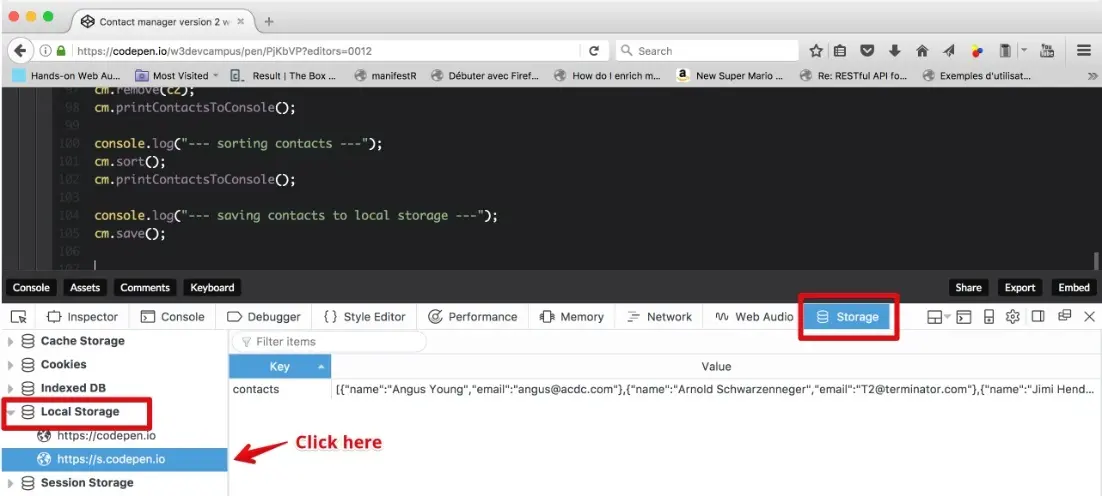
This time, we've added a load() method that will check if a list of contacts has been saved. If this is the case, it will read it from LocalStorage, convert it back from JSON into a JavaScript object.
In order to test this, in the following CodePen, we first save the list, then we empty the list in memory (setting the array to an empty array), print the list of contacts (that displays a message "LIST EMPTY!"), then we load the contacts from LocalStorage and print the list again: it has been restored to its previous value.
class ContactManager {
constructor() {
// When we build the contact manager, it
// has an empty list of contacts.
this.listOfContacts = [];
}
// Will erase all contacts
empty() {
this.listOfContacts = [];
}
...
load() {
if(localStorage.contacts !== undefined) {
// The array of contacts is saved in JSON, let's convert
// it back to a real JavaScript object.
this.listOfContacts = JSON.parse(localStorage.contacts);
}
}
}
...
console.log("--- Saving contacts to local storage ---");
cm.save();
console.log("--- Emptying the list of contacts ---");
cm.empty();
cm.printContactsToConsole();
console.log("--- Loading contacts from local storage ---");
cm.load();
cm.printContactsToConsole();
console.log("Do you notice: contacts have all been restored!");
We're going to reuse the code from this CodePen (example taken from a previous section of the course, the one about working with remote data), and adapt it to our needs:
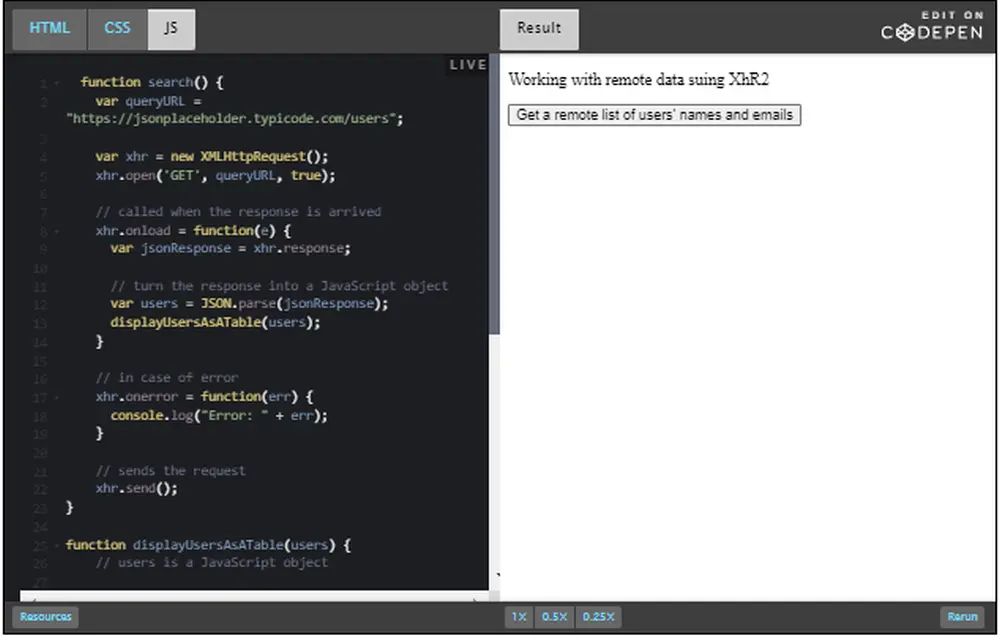
This time, we will first add some HTML to the contact manager example (same as in the previous CodePen except that we've renamed "users" as "contacts"):
<!DOCTYPE html> <html lang="en"> <head> <title>A contact manager, v3</title> <meta charset="utf-8"/> </head> <body> <p>List of contacts</p> <div id="contacts"></div> </body> </html>
The div at line 9 is where we're going to dynamically insert an HTML table with one row for each contact. We will keep the same minimal CSS for displaying table, row and cell borders (we encourage you to improve this):
table {
margin-top: 20px;
}
table, tr, td {
border: 1px solid;
}
And here is the method we add in our ContactManager class; an adaptation of the function displayUsersAsATable(users) from the previous CodePen:
class ContactManager {
...
displayContactsAsATable(idOfContainer) {
// to empty the container that contains the results
let container = document.querySelector("#" + idOfContainer);
container.innerHTML = "";
if(this.listOfContacts.length === 0) {
container.innerHTML = "<p>No contacts to display!</p>";
// stops the execution of this method
return;
}
// creates and populates the table with users
let table = document.createElement("table");
// iterates on the array of users
this.listOfContacts.forEach(function(currentContact) {
// creates a row
let row = table.insertRow();
row.innerHTML = "<td>" + currentContact.name + "</td>"
+ "<td>" + currentContact.email + "</td>"
});
// adds the table to the div
container.appendChild(table);
}
}
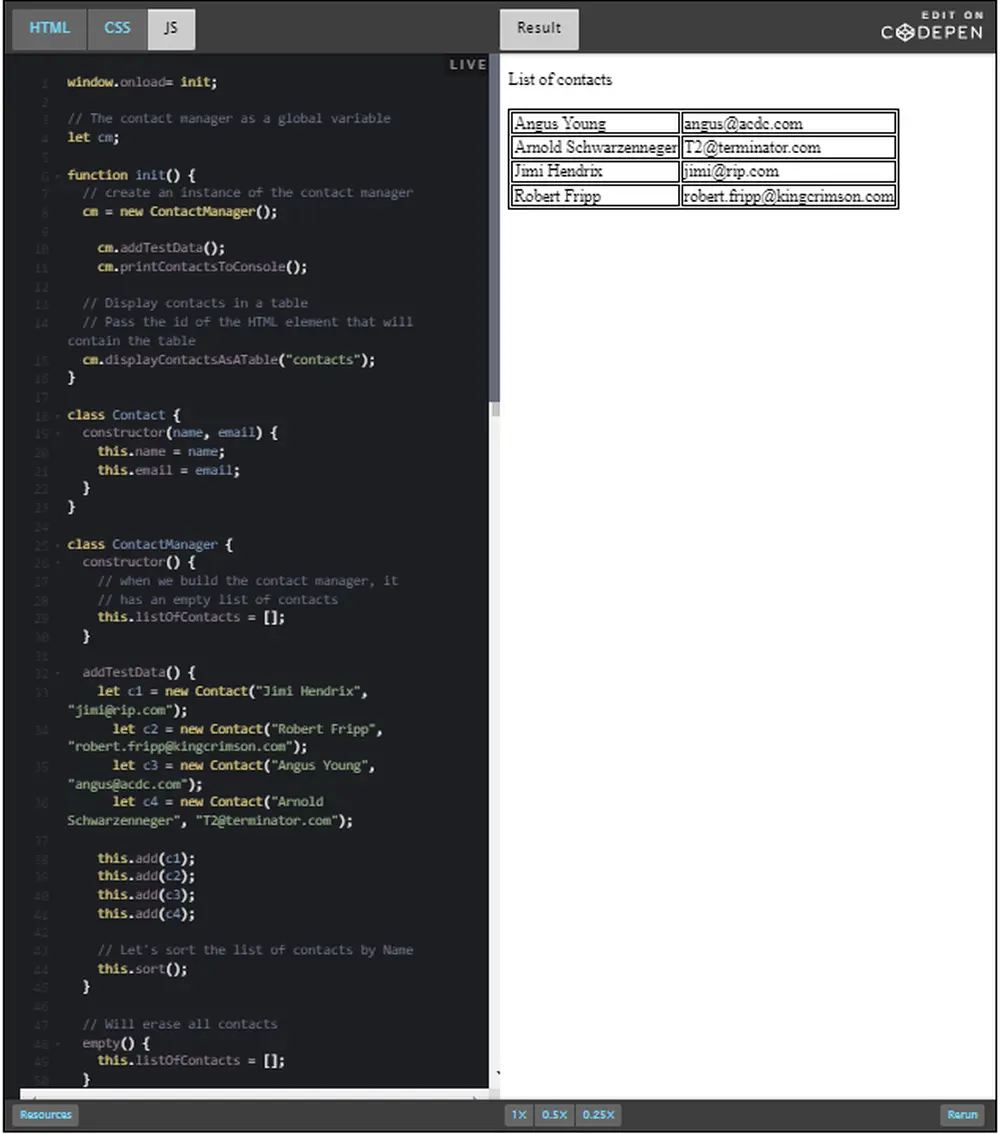
Note that we also added a method called addTestData() to the ContactManager class, as this is a way to make testing the class easier. The code in this method is similar to all the code we used in previous examples for testing the class by adding four contacts to it and displaying messages in the devtool console.
In the previous example, we added a form for entering a new contact, and an "add" button.
<form onsubmit="return formSubmitted();">
<fieldset>
<legend>Personal informations</legend>
<label>
Name :
<input type="text" id="name" required>
</label>
<label>
Email :
<input type="email" id="email" required>
</label>
<br>
<button>Add new Contact</button>
</fieldset>
</form>
The button at line 13 will submit the form by default (it's equivalent to an <input type="submit">).
The event listener at line 1:
<form onsubmit="return formSubmitted();">
... will call the formSubmitted function when the form is submitted. It is interesting that we use onclick="return formSubmitted();":
function formSubmitted() {
// Get the values from input fields
let name = document.querySelector("#name");
let email = document.querySelector("#email");
let newContact = new Contact(name.value, email.value);
cm.add(newContact);
// Empty the input fields
name.value = "";
email.value = "";
// refresh the table
cm.displayContactsAsATable("contacts");
// do not let your browser submit the form using HTTP
return false;
}
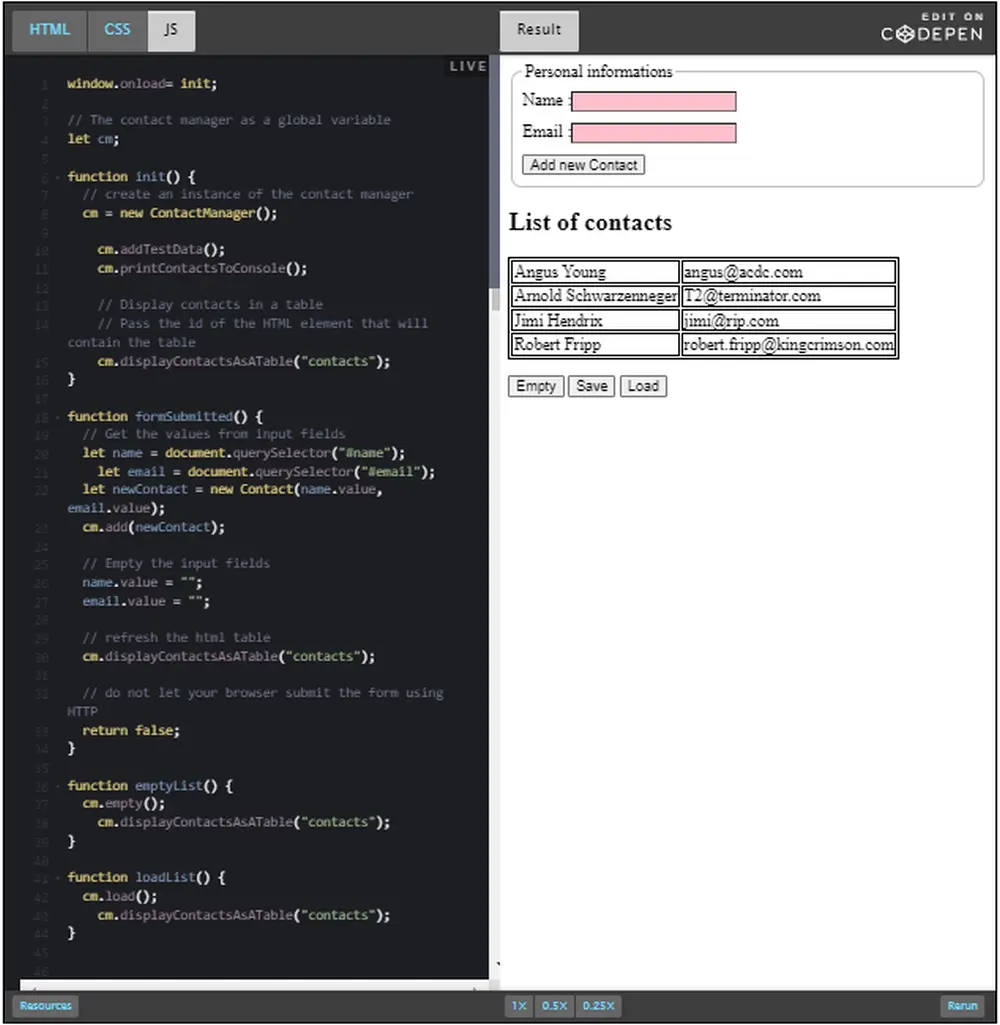
Note that we've also added some buttons for playing with the load/save features we implemented in the previous page:
Here is the discussion forum for this part of the course.
 , do right
click and "save link as"). When you click on this icon, delete the contact.
, do right
click and "save link as"). When you click on this icon, delete the contact.Hint: find a way to get the index of the current row in the click event listener, so that you can easily delete the contact from the array. You can add a "HTML data attribute" using trashbin.dataset.contactId = 3; for example, when you create the img element of the trash bin, do something like this:
let trashbin = document.createElement("img");
trashbin.src = "http://i.imgur.com/yHyDPio.png";
trashbin.dataset.contactId = 3; // 3 is the current row index and
// corresponds to contact at
// index = 3 in the array of contacts.
It's like adding a data-contactId attribute to the HTML of the img element.
Then in the event listener, use evt.target.dataset.contactId to get it back.